
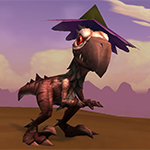
Strategy added by Aranesh
36
36
|
Average rating: |
4.4 |
|
Ratings: |
37 |
|
Your vote: |
|
Creator |
|||||||||
|---|---|---|---|---|---|---|---|---|---|
|
Tags
Filter strategies:
|
|||||||||

Any Level 15+ Pet

|
Level 15+ Script |
2 | 4.4 |
N/A | 36 |
220
3:40
|
32+ | ||

Any Level 15+ Pet
|

Compatible with Shadowlands
Original strategy by Rikade Script thanks to Lumaris |
Level 15+ Script |
2 | 4.2 |
N/A | 38 |
130
2:10
|
15-16 | |
Any Level 1+ Pet
|
Breed Level 1+ Script Unobtainable |
2 | 5.0 |
N/A | 13 |
126
2:06
|
20-21 | ||

Any Level 1+ Pet
|
Level 1 pet is protected whole fight.
|
Breed Level 1+ Script |
2 | 4.4 |
N/A | 8 |
155
2:35
|
23 | |

Any Level 8+ Pet
|
Breed RNG Level 8+ Script |
2 | 4.4 |
N/A | 10 |
87
1:27
|
11 | ||

Any Level 10+ Pet
|
Script thanks to Vaelstra
|
Level 10+ Script |
2 | 3.9 |
N/A | 9 |
235
3:55
|
32+ | |

Any Level 2+ Pet
|
Damage is from Aquatic and you can check the "magic/mechanical" box in rematch
|
Breed Level 2+ Script |
2 | 4.1 |
N/A | 5 |
95
1:35
|
13 | |
Any Level 1+ Pet
|
46 rounds.
|
Level 1+ Script |
2 | 5.0 |
N/A | 2 |
330
5:30
|
40+ | |
Any Level 1+ Pet
|
Level 1+ Script Unobtainable |
2 | 5.0 |
N/A | 2 |
106
1:46
|
18 | ||
|
2 | 5.0 |
N/A | 0 |
112
1:52
|
15-17 | |||

|
RNG |
2 | 4.5 |
N/A | 2 |
110
1:50
|
15+ | ||
Any Level 3+ Pet
|
Wins in 13 or 14 rounds. Leveling pet takes 273 damage, or 409 damage if it's an elemental pet or if Carpnado crits.
|
Breed Level 3+ Script |
2 | 3.3 |
N/A | 4 |
95
1:35
|
13-14 | |

|
Breed Script |
2 | 4.4 |
N/A | 4 |
96
1:36
|
13 | ||
|
Any Level 1+ Pet
|
*** 9.0.2 approved ***
Someone was looking for Sissix strategies that can carry Level 1 pets and I realized I never published my old Slithershock Eel + Dust Bunny carry (~30 turns), so I went back and did optimize my team based on the Hermit Crab idea and replaced Dust Bunny with Sneaky Marmot that looked more promising and so I could shorten the fight to ~23 rounds. I'll do the level pet swap when Living Pool dies, this way Pinch damage will be reset and has to stack up again. If you feel more comfortable with Fish Slap... both attacks are supported by the script. |
Breed RNG Level 1+ Script |
2 | 3.3 |
N/A | 3 |
170
2:50
|
25+ | |
|
2 | 0.0 |
N/A | 0 |
110
1:50
|
14-16 |
Incl. steps:


Any Level 15+ Pet


Substitutes:
1 / 8
1 / 17
| Before | After | Experience Gain | |
|---|---|---|---|
| 1 | ➜ | 13 | 5981 |
| 2 | ➜ | 13 | 6353 |
| 3 | ➜ | 14 | 6683 |
| 4 | ➜ | 14 | 6971 |
| 5 | ➜ | 14 | 7219 |
| 6 | ➜ | 15 | 7425 |
| 7 | ➜ | 15 | 7590 |
| 8 | ➜ | 16 | 7714 |
| 9 | ➜ | 16 | 7796 |
| 10 | ➜ | 17 | 7838 |
| 11 | ➜ | 17 | 7838 |
| 12 | ➜ | 18 | 7796 |
| 13 | ➜ | 19 | 7714 |
| 14 | ➜ | 19 | 7590 |
| 15 | ➜ | 20 | 7425 |
| 16 | ➜ | 20 | 7219 |
| 17 | ➜ | 21 | 6971 |
| 18 | ➜ | 22 | 6683 |
| 19 | ➜ | 22 | 6353 |
| 20 | ➜ | 23 | 5981 |
| 21 | ➜ | 23 | 5569 |
| 22 | ➜ | 24 | 5115 |
| 23 | ➜ | 25 | 3900 |
| 24 | ➜ | 25 | 1980 |
|
Safari Hat |
|
|
Lesser Pet Treat |
|
|
Pet Treat |
|
|
Darkmoon Hat |
|
|
Pet Battle Week |
|
= |
Pet levels to 25 with minimal XP lost |
|
|
= |
Additional XP above level 25 is lost |
|
For the best display of your strategy, please follow these guidelines:


For the best display of your strategy, please follow these guidelines:
For the best display of your strategy, please follow these guidelines:
For the best display of your strategy, please follow these guidelines:
For the best display of your strategy, please follow these guidelines:
For the best display of your strategy, please follow these guidelines:
For the best display of your strategy, please follow these guidelines:
For the best display of your strategy, please follow these guidelines:
For the best display of your strategy, please follow these guidelines:
For the best display of your strategy, please follow these guidelines:
For the best display of your strategy, please follow these guidelines:
For the best display of your strategy, please follow these guidelines:
For the best display of your strategy, please follow these guidelines:
For the best display of your strategy, please follow these guidelines:
For the best display of your strategy, please follow these guidelines:
For the best display of your strategy, please follow these guidelines:
For the best display of your strategy, please follow these guidelines:
For the best display of your strategy, please follow these guidelines:
For the best display of your strategy, please follow these guidelines:
For the best display of your strategy, please follow these guidelines:
For the best display of your strategy, please follow these guidelines:
For the best display of your strategy, please follow these guidelines:
For the best display of your strategy, please follow these guidelines:
For the best display of your strategy, please follow these guidelines:

Hissssss!


1
Poetic
wrote on 2023-07-23 17:28:42
-1
Anonymous wrote on 2017-07-25 12:19:46
swap(#2) [enemy(#2).active & !self(#2).played]
swap(#3) [self(#2).active]
swap(#1) [self(#3).dead]
if [enemy(#2)active]
ability(#2) [self.aura(Whirlpool).duration=1]
ability(#3) [self.aura(Whirlpool).duration=1]
ability(#1)
endif
ability(#1) [!self.aura(Shell Shield).exists]
ability(#2) [!self.aura(Renewing Mists).exists]
ability(#1)
0
Anonymous wrote on 2017-07-25 12:28:03
ability(#1) [!self.aura(Shell Shield).exists & self(#1).active]
ability(#2) [!self.aura(Renewing Mists).exists & self(#1).active]
ability(#1)
0
Kjarrval wrote on 2017-07-26 06:11:55
-1
Zalid wrote on 2017-08-23 17:57:50
ability(#3) [!self.aura(Shell Shield).exists & self(#1).active]
Also swap is not the correct command, it's change. Maybe it was swap in the past ?
So the script should look like this :
change(#2) [enemy(#2).active & !self(#2).played]
change(#3) [self(#2).active]
change(#1) [self(#3).dead]
if [enemy(#2).active]
ability(#2) [self.aura(Whirlpool).duration=1]
ability(#3) [self.aura(Whirlpool).duration=1]
ability(#1)
endif
ability(#3) [!self.aura(Shell Shield).exists & self(#1).active]
ability(#2) [!self.aura(Renewing Mists).exists & self(#1).active]
ability(#1)
0
Kjarrval wrote on 2017-09-30 05:52:01
0
fr0z3night
wrote on 2017-11-12 03:49:00
Added
- quit line for the rare occasions when the leveling pet dies
- if for enemy 3 for when the rabbit survives (all it did was scratch & dies to a whirlpool)
- when the rabbit survives to enemy 3, it doesn't need the duration, just order 3/2/1
- everything else works the same
quit [self(#2).dead]
change(#2) [enemy(#2).active & !self(#2).played]
change(#3) [self(#2).active]
change(#1) [self(#3).dead]
if [enemy(#2).active]
ability(#3) [self.aura(Whirlpool).duration=1]
ability(#2) [self.aura(Whirlpool).duration=1]
ability(#1)
endif
if [enemy(#3).active]
ability(Burrow:159)
ability(Dodge:312)
ability(Scratch:119)
endif
ability(Shell Shield:310) [!self.aura(Shell Shield).exists & self(#1).active]
ability(Renewing Mists:511) [!self.aura(Renewing Mists).exists & self(#1).active]
ability(Surge:509)
1
fr0z3night
wrote on 2017-11-12 04:17:53
quit [self(#2).dead]
change(#2) [enemy(#2).active & !self(#2).played]
change(#3) [self(#2).active]
change(#1) [self(#3).dead]
if [enemy(#2).active]
ability(159) [self.aura(Whirlpool).duration=1]
ability(312) [self.aura(Whirlpool).duration=1]
ability(119)
endif
if [enemy(#3).active]
ability(159)
ability(312)
ability(119)
endif
ability(310) [!self.aura(309).exists & self(#1).active]
ability(511) [!self.aura(510).exists & self(#1).active]
ability(509)
2
Invincible#1811
wrote on 2017-11-22 08:13:43
How do I do this?
1
Googles
wrote on 2018-02-01 19:14:00
0
Doug wrote on 2021-01-25 10:25:41
4
Jenstar
wrote on 2020-11-23 15:58:53
2
pengu
wrote on 2020-11-16 10:40:33
3
D3adbolt
wrote on 2020-10-16 18:55:05
2
Luxaetern
wrote on 2020-10-16 23:45:20
0
shardi wrote on 2018-01-14 15:53:02
jademist start with jadeskin> acid rain>steam vent til dancer dies
ikky black claw > savage talon till ikky dies
rocket chicken start with toxic smoke >peck >extra plating>toxic smoke this finished off the lobster for me
0
Knievel wrote on 2017-12-15 22:34:48
0
Kreggy wrote on 2017-05-15 08:12:34
Direbeak 1, 2, 1 Iron starlette 1, 1, 1
Living Pool enters the fight
Round 1 - Ironskin
Round 2 - Falcosaur Swarm
Round 3 - Falcosaur Swarm continues
Round 4 - Predatory Strike
Round 5 - Falcosaur Swarm
Round 6 - Falcosaur Swarm continues - Living Pool dies
Tia Mia and Larry enters the fight
Round 1 - Falcosaur Swarm
Round 2 - Falcosaur Swarm continues
Round 3 - Predatory Strike - Tia Mia and Larry dies
Rock Lobster enters the fight
Round 1 - Falcosaur Swarm - Direbeak Hatchling dies > switch to Level-Pet (or leave til end)
Round 2 - Switch pet - Iron Starlette
Round 3 - Wind-Up
Round 4 - Powerball (with P/P skip this round)
Round 5 - Supercharge
Round 6 - Wind-Up - Rock Lobster triggers Damned
Round 7 - Pass (or swap to lvl pet if not already done so) - Rock Lobster dies
0
Anonymous wrote on 2017-05-15 21:48:03
0
(OP) Aranesh
wrote on 2017-05-18 05:53:01
1
Drakuul
wrote on 2017-11-21 18:17:10
0
Kathleene wrote on 2017-10-12 16:56:26
0
Elimae wrote on 2017-03-29 11:03:14
0
[email protected] wrote on 2017-09-19 06:42:05
replica alhambra necklace van cleef http://www.womenclove.com/
0
[email protected] wrote on 2017-10-07 11:11:05
0
Azrulian wrote on 2017-05-14 06:10:50
Fen Crab (1,2,2) Amber Moth (2,1,2) Chrominius (1,1,2)
Fen Crab against Living Pool:
Shell Shield
Rip
Blood in the Water
Rip until Living Pool Dies
Tia Mia comes in:
Shell Shield
Rip
Blood in the Water
Rip until crab dies, it should die on the round the whirlpool expires.
Bring in Amber Moth.
Moth Dust will kill Tia Mia
Rock Lobster comes in:
Cocoon Strike
Alpha Strike
Alpha Strike
Moth Dust
Alpha Strike until Amber Moth dies.
Bring in Chrominius. Surge of Power to victory.
0
gerana wrote on 2017-08-12 03:39:37
0
Anonymous wrote on 2017-10-06 03:51:45
0
Telrik wrote on 2017-04-20 05:02:33
Emperor Crab P/P breed (2, 1, 1)
Lifelike Toad (1, 2, 1) (however, I never did use this pet)
Open with Broom - Sweep
That pulls Tia Mia and Larry in. Use Wind-up x4, then just Broom it to death (2, maybe 3 hits).
Living Pool comes back, Sweep again to grab Rock Lobster.
Bring in Emperor Crab and Shell Shield. Renewing Mists next, then Surge. Keep Shell Shield and Renewing Mists up on cool down, and Surge to victory.
0
Rainee wrote on 2017-05-03 07:58:21
0
Telrik wrote on 2017-05-25 19:03:08
0
Agu wrote on 2017-06-06 16:32:00
0
Anonymous wrote on 2017-05-28 02:17:21
0
Yeti Uprising wrote on 2017-04-21 15:44:04
Direbeak Hatchling 1/2/1 Iron Starlette (P/P) 1/1/1
Living pool: Ironskin, Falcosaur Swarm!, Predatory Strike, Falcosaur Swarm!
Tia Mia and Larry: Falcosaur Swarm!, Predatory Strike
Rock Lobster: Pass (Direbeak dies), bring in Iron Starlette, Wind-up, Powerball, Supercharge, Wind-up, Pass
0
Whytie wrote on 2017-04-21 19:10:03
0
Evil wrote on 2017-04-21 19:36:13
Unless we want to level pet here, then it looks less reliable :(
After several tests on few chars, 75% of the time Direbeak Hatchling is dead when 3rd enemy pet comes.
Which means u can not level pet with level 2 or 3, u need level 6 or 7 (400+ HP)
Please allow me to tweak it a bit anyway :P (added leveling pet)
Non Elemental pet with 400+ Health (level 6, or 7)
Direbeak Hatchling 1/2/1
Iron Starlette (P/P) 1/1/2
vs 1st enemy pet: Ironskin, Falcosaur Swarm!, Predatory Strike, Falcosaur Swarm!
vs 2nd enemy pet: Falcosaur Swarm!, Predatory Strike
3rd enemy pet comes.
Is your Direbeak Hatchling still alive??
A) YES
Instead of passing use Falcosaur Swarm! (to put 100% damage debuff on enemy)
Iron Starlette: 2x Wind-up --> enemy pet "dies" and resurrects for 1 round
--> use Explode, done.
B) NO
Iron Starlette: Wind-up, 3x Powerball, Wind-up, enemy pet "dies" and resurrects for 1 round
--> use Explode, done.
In both cases your leveling pet gets all the exp, but it is just very RNG.
0
Lilyoptra wrote on 2017-04-22 01:20:32
0
Yeti Uprising wrote on 2017-04-24 13:49:57
0
Firstborn Dragon wrote on 2017-04-25 19:07:28
0
Yeti Uprising wrote on 2017-05-13 12:47:39
0
Anonymous wrote on 2017-05-13 13:01:48
0
(OP) Aranesh
wrote on 2017-05-18 05:53:42
0
Kai wrote on 2017-04-03 05:34:58
This one from Rikade on wowhead seems much more reliable/faster
Direbeak Hatchling 1:2:1
Iron Starlette 1:1:1 (I used a P/P)
Level-Pet at least 185 health points (277 Elemental)
Battle Strategy:
Living Pool enters the fight
Round 01 - Ironskin
Round 02 - Falcosaur Swarm!
Round 03 - Falcosaur Swarm! continues
Round 04 - Predatory Strike
Round 05 - Falcosaur Swarm!
Round 06 - Falcosaur Swarm! continues - Living Pool dies
Tia Mia and Larry enters the fight
Round 01 - Falcosaur Swarm!
Round 02 - Falcosaur Swarm! continues
Round 03 - Predatory Strike - Tia Mia and Larry dies
Rock Lobster enters the fight
Round 01 - Falcosaur Swarm! - Direbeak Hatchling dies > switch to Level-Pet
Round 02 - Switch pet - Iron Starlette
Round 03 - Wind-Up
Round 04 - Powerball
Round 05 - Supercharge
Round 06 - Wind-Up - Rock Lobster triggers Damned
Round 07 - Pass - Rock Lobster dies
0
myahomi wrote on 2017-04-03 13:37:24
0
Anonymous wrote on 2017-04-03 16:37:19
0
Feufou wrote on 2017-04-03 17:38:53
0
Firstborn Dragon wrote on 2017-04-03 23:14:28
0
0XBDB wrote on 2017-04-04 00:19:41
0
Tyrsa wrote on 2017-04-04 10:25:10
0
Xpariah wrote on 2017-05-14 01:31:54
0
(OP) Aranesh
wrote on 2017-05-18 05:53:34
0
Blackless wrote on 2017-05-16 09:27:42
0
Turgo wrote on 2017-05-15 09:49:48
0
Murinae wrote on 2017-05-14 16:51:44
Emperor Crab OR Spirebound Crab (any breed) 2-1-1
Level 15+ leveling pet
Anubisath Idol 1-1-1
Same strat, just replace the Bunny with the Anubisath Idol, just Sandstorm on CD and use Deflection on the Whirlpool end round.
0
Anonymous wrote on 2017-05-13 17:24:32
0
Amalle wrote on 2017-05-13 17:49:57
0
gerana wrote on 2017-05-11 16:47:39
apocalypse, switch to fen crab, shield, rip, blood, rip, rip, living pool dies, switch to raven, call darkness, nocturnal strike, peck, tia mia dies, peck, peck, raven dies, switch to roach, use survival to avoid apocolypse, flank, flank, rock lobster dies, if roach dies your crab should still be alive
0
Kebabül wrote on 2017-05-03 11:42:45
Cerulean Moth (1,1,1) destroys Tia Mia and also Lobster.
Best Easy Setup
0
Kebabül wrote on 2017-05-07 03:29:52
0
Terkan wrote on 2017-05-03 06:32:26
This was in fact the last available Broken Shore WQ, and the last one I needed to complete my 12 for the weekly. I haven't done many battle pet WQ's before, but since I was so close to Revered with the Armies of Legionfall I figured I'd try it out. Went looking for guides and found this one.
It went really smooth thanks to you, and now I just got flying from turning in the weekly :D
0
Evil wrote on 2017-04-10 01:38:51
vs 1st enemy
Pump, Cleansing Rain, Water Jet, Pump
vs 2nd enemy
Pump, Water Jet, Pump (your pet dies)
Hyjal Wisp
Evanescence, AB untill 2nd enemy pet is dead (should be 2xAB)
vs 3rd enemy pet
2x AB, Evanescence, Wish, spam AB, Evanescence when enemy pet triggers his passive
Done!
PS: If u crit with Pump vs 2nd pet (happened once in x fights) rotation changes, you will have to delay Hyjal Wisp's Evanescence for 1 round, which means: AB, Evanescence, AB untill 2nd enemy pet is dead, then adjust abilities vs 3rd pet.
0
Wreathy wrote on 2017-04-10 01:55:16
0
Gegzy wrote on 2017-04-13 08:58:32
0
Schahmaar wrote on 2017-04-13 10:18:10
0
Evil wrote on 2017-04-13 18:31:20
0
Evil wrote on 2017-04-13 18:43:34
0
Sindorein wrote on 2017-04-14 01:22:34
0
Remte
wrote on 2017-05-03 05:33:53
0
Geki wrote on 2017-05-02 02:22:21
0
Anonymous wrote on 2017-04-27 08:33:07
0
Emperor crab wrote on 2017-04-21 22:23:23
0
Evil wrote on 2017-04-19 21:22:33
Slithershock Elver 1/1/1 Breed: S/S (VERY IMPORTANT)
vs 1st enemy pet
2,1,3,1,2,1 untill enemy pet dies (two or three Deep Bites)
vs 2nd enemy pet
1,1,2,1,1
vs 3rd enemy pet
3,2,1,1,1,3 (now undead resurrects) press 2, done.
Where:
1= Deep Bite
2= Dodge
3= Dive
--------------------------------------------------------------------------------------
TACTIC WITH LEVELING PET
Slithershock Elver 1/1/1 Breed: S/S (VERY IMPORTANT)
Darkmoon Zeppelin 1/2/2
Leveling Non Elemental pet with 200+ Health (level 2 or 3+)
vs 1st enemy pet
Dodge, Deep Bite, Dive, Deep Bite, Dodge, 2 or 3x Deep Bite to finish
vs 2nd enemy pet
3x Deep Bite (this way you should have very low HP, important for later) Dodge, Deep Bite
vs 3rd enemy pet
Dive, Deep Bite untill enemy pet has 420 health or less (u must not kill him in order to level pet) and then let your Slithershock Elver die.
Bring Darkmoon Zeppelin
MISSILE (make sure it wont kill enemy pet, your attack deals 246-369 damage)
now DECOY (to save your level 2+ pet from Carpnado- AoE attack)
now SPAM MISSILE untill Enemy pet Dies (and triggers passive)
now EXPLODE- your level 2+ pet (with 200+ Health) gets all the exp :)
Short version vs 1st Two Enemy Pets
2,1,3,1,2,1 untill enemy pet dies (two or three Deep Bites) --> 1,1,1,2,1
0
Evil wrote on 2017-04-19 20:49:27
Slithershock Elver 1/1/1 Breed: S/S (VERY IMPORTANT)
Darkmoon Zeppelin 1/2/2
Leveling Non Elemental pet with 200+ Health (level 2 or 3+)
vs 1st enemy pet
Dodge, Deep Bite, Dive, Deep Bite, Dodge, 2 or 3x Deep Bite to finish
vs 2nd enemy pet
3x Deep Bite (this way you should have very low HP, important for later) Dodge, Deep Bite
vs 3rd enemy pet
Dive, Deep Bite untill enemy pet has 420 health or less (u must not kill him in order to level pet) and then let your Slithershock Elver die.
Bring Darkmoon Zeppelin
MISSILE (make sure it wont kill enemy pet, your attack deals 246-369 damage)
now DECOY (to save your level 2+ pet from Carpnado- AoE attack)
now SPAM MISSILE untill Enemy pet Dies (and triggers passive)
now EXPLODE- your level 2+ pet (with 200+ Health) gets all the exp :)
0
Evil wrote on 2017-04-19 21:11:13
Slithershock Elver 1/1/1 Breed: S/S (VERY IMPORTANT)
vs 1st enemy pet
2,1,3,1,2,1 untill enemy pet dies (two or three Deep Bites)
vs 2nd enemy pet
1,1,2,1,1
vs 3rd enemy pet
3,2,1,1,1,3 (now undead resurrects) press 2, done.
Where:
1= Deep Bite
2= Dodge
3= Dive
-------------------------------------------------------------------------------------
TO MODS: sorry, i have failed, i should do that before, so decided to fix that and make 1 big clean post with both tactics :)
Please delete my post from 04/14/2017 and this one.
Sorry for the mess :P
0
Evil wrote on 2017-04-13 19:54:08
S/B would be better, as u outspeed them anyway + u have more damage (rotation might also change!!) but still.. lol
This strategy is for S/S Slithershock Elver 1/1/1
Where:
1= Deep Bite
2= Dodge
3= Dive
vs 1st enemy pet
2,1,3,1,2,1,1
vs 2nd enemy pet
1,1,2,1,1
vs 3rd enemy pet
3,2,1,1,1,3 (now undead resurrects) press 2, done ^^
Tried it few times so far, and lol :D but.. you may fail if enemies manage to crit you, and could change rotation vs 3rd enemy pet a bit.
Bring backup pet (maybe level 15+ pet + some pet with Explode??)
This way --> Let your Slithershock Elver die when 3rd enemy pet is low, swap to pet with Explode, use it, and your 15+ will get all the exp
0
Anonymous wrote on 2017-04-15 15:35:30
0
Evil wrote on 2017-04-17 18:25:34
0
Anonymous wrote on 2017-04-19 14:48:17
0
MuffinManKen wrote on 2017-04-19 17:50:17
0
Evil wrote on 2017-04-19 19:25:11
he killed all 3 pets alone, with 300 hp left, so yes it does work.
U just basically have to press 2,1,3,1,2,1,1,1,1,2,1,1,3,2,1,1,1,3,2
(pet one 2,1,3,1,2,1,1
pet two 1,1,2,1,1
pet 3 3,2,1,1,1,3,2)
I am going to test out leveling with "explode" pet now.
It s so cool when "Anonymous's" downvote u <3
^^
0
Evil wrote on 2017-04-19 20:57:19
Check my leveling tactic in the post above :D
Took some time, but u can actually level up pet 2 or 3+ here!! (not only 15 level)
0
Elimae wrote on 2017-04-10 10:31:33
Zandalari Anklerender 2,1,2
Zandalari Kneebiter 2,1,2
Sharptalon Hatchling 1,1,1
Start with Anklerender (or Kneebitere - doesn't matter)
1. Black Claw
2-3 Hunting Party - Living Pool dies
Bring in Kneebiter
4. Black Claw
5-6 Hunting Party - Tia Mia dies
7. Black Claw - both Zandalari pets die
Bring in Sharptalon
8. Wild winds
9. Falcasaur swarm
On reserurection round
10. Predatory strikes
0
Ntina wrote on 2017-04-13 08:19:01
0
Anonymous wrote on 2017-04-13 17:02:56
0
Anonymous wrote on 2017-04-13 22:45:02
0
Razerz wrote on 2017-04-15 04:27:34
0
Anonymous wrote on 2017-04-15 15:02:42
0
Anonymous wrote on 2017-04-15 14:12:51
0
Schahmaar wrote on 2017-04-07 10:26:43
0
Schahmaar wrote on 2017-04-09 03:20:09
1. Shell Shield
2. Renewing Mists
3. 5x Water Jet (Pool dies)
4. Shell Shield (Don't aks just do it ;). It's for keeping the DoTs from beeing harmful even in the back row)
5. LvL-Pet
6. Dodge
From now on, keep to the original strat
0
Pattymayo wrote on 2017-04-09 21:19:46
0
Anonymous wrote on 2017-04-09 08:03:50
0
(OP) Aranesh
wrote on 2017-04-03 13:06:29
The last enemy pet, Rock Lobster, only has 280 speed. To my knowledge every rabbit or hare is faster than that.
Any more insight into why this keeps failing for some would be very helpful.
In the meanwhile I will add some more alternatives to this fight. Thanks for trying and sticking around!
0
Pattymayo wrote on 2017-04-03 13:16:13
0
(OP) Aranesh
wrote on 2017-04-03 13:20:00
0
Anonymous wrote on 2017-04-03 13:20:12
0
Anonymous wrote on 2017-04-03 14:15:22
0
Throki wrote on 2017-04-03 14:38:14
0
QC wrote on 2017-04-04 04:16:11
0
Pilfer wrote on 2017-04-04 05:23:36
I dont know why, but fail for me.
0
Anonymous wrote on 2017-04-07 23:25:57
0
Vij wrote on 2017-04-07 04:30:27
0
Isiel wrote on 2017-04-04 06:54:51
0
Anonymous wrote on 2017-04-03 16:28:17
0
Anonymous wrote on 2017-04-03 20:03:11
0
Anonymous wrote on 2017-04-03 21:52:21
0
Anonymous wrote on 2017-04-04 01:23:57
0
Anonymous wrote on 2017-04-04 01:43:46
0
TryChick wrote on 2017-03-29 08:59:17
0
Anonymous wrote on 2017-04-01 14:02:29
0
TryChick wrote on 2017-04-01 17:43:19
0
Rosalyne wrote on 2017-04-03 20:17:10
0
Anonymous wrote on 2017-04-03 06:48:58
0
Anonymous wrote on 2017-04-03 20:04:33
0
Rameartog wrote on 2017-04-03 19:26:19
0
Pilfer wrote on 2017-04-03 08:20:00
http://www.wowhead.com/npc=117934/sissix#comments:id=2480090
Two pet strat: Anubisath idol 1/1/2, Sprite Darter Hatchling/Nether Fairy Dragon s/s 2/2/1, carry pet with > 500hp add a few more if weak to aquatic.
Anub in Sandstorm then pound him into dust till he dies.
spriter darter in, keep moonfire on cool and use your heal accordingly for dps.
Sprite Darter dies and you should only need one round to finish with carry pet.
0
Pattymayo wrote on 2017-04-03 13:20:37
0
(OP) Aranesh
wrote on 2017-04-02 03:25:19
0
Mix wrote on 2017-04-03 07:28:51
0
Rzzr wrote on 2017-04-01 16:26:59
0
Vanro wrote on 2017-04-03 05:07:28
0
Dead wrote on 2017-04-02 03:26:27
0
Anonymous wrote on 2017-04-02 07:59:42
0
Zashule wrote on 2017-04-01 15:32:45
0
Mintari wrote on 2017-04-02 02:25:45
0
Falathiel wrote on 2017-04-02 02:09:55
0
Zarhan wrote on 2017-04-02 00:46:08
0
Emerson wrote on 2017-04-02 02:05:34
0
Marzen wrote on 2017-03-28 18:06:00
0
Murmacil wrote on 2017-03-28 18:45:08
0
Aviana wrote on 2017-03-28 19:45:38
0
Abi wrote on 2017-04-02 01:42:07
Failed miserably the next time Sissix is up.
Methinks RNG is a factor in this one!
0
Sindail wrote on 2017-04-01 18:24:34
0
Abi wrote on 2017-04-02 01:39:19
0
Rabbit wrote on 2017-04-02 00:41:57
0
Kessyra wrote on 2017-04-01 18:12:47
0
Lainya wrote on 2017-04-02 00:11:09
0
Firstborn Dragon wrote on 2017-04-01 22:42:51
0
Zalaan wrote on 2017-04-01 16:12:22
0
Sif wrote on 2017-04-01 17:41:42
0
Star wrote on 2017-04-01 19:35:18
0
Anonymous wrote on 2017-04-01 20:48:33
0
Lilyoptra wrote on 2017-04-01 21:08:10
0
moskwicz wrote on 2017-04-01 18:56:25
0
Anonymous wrote on 2017-04-01 18:30:58
0
LookInMyEyes wrote on 2017-04-01 18:13:18
0
kkm wrote on 2017-04-01 17:15:06
0
kkm wrote on 2017-04-01 16:22:26
0
Samin wrote on 2017-04-01 03:38:56
0
Synn wrote on 2017-04-01 06:39:16
0
Hermy wrote on 2017-04-01 16:18:54
0
Anonymous wrote on 2017-04-01 15:37:45
0
Blossom Anicent wrote on 2017-04-01 12:32:55
0
Rasalom wrote on 2017-04-01 08:03:42
0
Misei wrote on 2017-04-01 06:44:01
0
kwiltre wrote on 2017-03-28 20:58:47
0
Hex wrote on 2017-03-29 03:21:07
0
Anonymous wrote on 2017-03-29 03:20:59
0
Pattymayo wrote on 2017-03-28 23:03:50
0
Bluemoons wrote on 2017-03-28 22:41:23
0
Myecroft wrote on 2017-03-28 20:00:42
0
Darielyia wrote on 2017-03-28 16:49:33
0
Mumphie wrote on 2017-03-28 16:49:21
0
Demonhntr wrote on 2017-03-28 16:38:25
0
Badjoojoo - SOE wrote on 2017-03-28 16:30:58
0
Posh wrote on 2017-03-28 16:21:39
0
Coonga wrote on 2017-03-28 16:13:45
0
Soni wrote on 2017-03-28 15:28:15
0
(OP) Aranesh
wrote on 2017-03-28 16:08:13
0
Anonymous wrote on 2017-03-28 15:48:52
0
Niki wrote on 2017-06-14 14:11:27
0
TDPetBattle-Script wrote on 2017-06-14 09:37:30
ability(310) [self.round=1]
ability(511) [self.round=2]
ability(511) [self.round=6]
ability(310) [self.round=7]
ability(509)
endif
if [enemy(#2).active]
change(#2) [enemy.round=1]
change(#3) [enemy.round=2]
ability(312) [enemy.round=4]
ability(159) [enemy.round=8]
ability(312) [self.aura(512).duration=1]
ability(119)
endif
if [enemy(#3).active]
ability(119)
change(#1)
ability(310) [!self.aura(309).exists]
ability(310) [self.aura(309).duration<=1]
ability(511) [!self.aura(510).exists]
ability(509)
endif
0
Suse wrote on 2017-04-27 08:29:55
0
Vafthrudnir wrote on 2017-04-04 02:50:24
Junge mutierte Kriegsschildkröte (Panzerschild/Pumpen)
Arktishase (Kratzen/Ausweichen/Eingraben)
Level-Pet
Start mit Schildkröte:
Panzerschild
4x Pumpen
Tia, Mia und Larry wird eingewechselt
4xPumpen
Schildkröte ist tot (tml lebt noch), level-pet einwechseln - hase einwechseln
Kratzen
Felshummer wird eingewechselt
Eingraben
Ausweichen
Kratzen bis Felshummer stirbt
Ausweichen in der Untotenrunde
0
Anonymous wrote on 2017-04-07 06:09:59
0
Laira wrote on 2017-04-09 12:17:51
0
(OP) Aranesh
wrote on 2017-04-04 03:12:05
0
Cartman wrote on 2017-04-07 08:32:08
0
Anonymous wrote on 2017-04-03 17:40:26
0
Kiralu wrote on 2017-04-03 16:58:29
Ab Punkt 6 ist schon seltsam und ab Punkt 10+ ist dass ganze total wirr!
Mein einer Kanne und einem Hasen trotzdem geschafft
0
Throki wrote on 2017-04-03 14:31:19
0
Suhl_Madmortem wrote on 2017-04-03 13:56:03
0
Anonymous wrote on 2017-04-03 12:16:28
0
(OP) Aranesh
wrote on 2017-04-02 03:25:50
0
Anonymous wrote on 2017-04-01 20:38:12
0
Tuhraco wrote on 2023-02-27 11:44:17
0
Thélurick wrote on 2017-07-30 04:39:39
0
Cactus Suramar wrote on 2017-05-07 19:25:54
aucune strategie supplemantaire pour ce boss et justement 1 boss de la nouvelle ile je suis triste .
0
Cactus Suramar wrote on 2017-04-25 05:49:54
la mascotte 15 + n'est là que pour dire qu'elle a combattu mais vaz se faire ouvrir façon plancha (elle va up mass puisque le combat va etre gagné à la fin).
le craby estr là pour ses 2 "sorts" qui lui permettent de tanker trankillou les pets adverses. brumes et carapasse.
Je fais toujours ce combat quand le pnj est actif. toujours gain combat facile et upant.
0
Anonymous wrote on 2017-04-25 03:51:09
Ou sont passé les autre alternatives ?
0
Anonymous wrote on 2017-04-19 13:08:59
Merci d avance :)
0
Aby wrote on 2017-04-15 06:22:03
0
Langbardr wrote on 2017-04-09 19:33:40
0
mamkilla wrote on 2017-04-09 04:56:28
Personnellement j'ai mis un crabe 22 avec dechirure et du sang dans l'eau pour bien entamer la premiere mascotte ennemie .
1
Canoptek wrote on 2017-06-18 07:15:44
ability(310) [!self.aura(309).exists]
ability(511) [!self.aura(510).exists]
ability(509)
endif
if [enemy(#2).active]
change(#2) [self(#1).active]
change(#3)
ability(312) [self.aura(512).exists]
ability(159) [enemy.round=8]
ability(119)
endif
if [enemy(#3).active]
ability(119)
change(#1)
ability(310) [!self.aura(309).exists]
ability(511) [!self.aura(510).exists]
ability(509)
endif
0
Anonymous wrote on 2017-09-18 11:01:08
1
EPHNX
wrote on 2017-11-11 20:51:33
0
Эльфгыр wrote on 2017-04-26 02:52:45
0
Влад wrote on 2017-04-15 04:05:59
0
Kpecm wrote on 2017-04-13 17:51:55
0
Anonymous wrote on 2017-03-30 05:00:48
0
Enerylan wrote on 2017-04-13 07:38:58
0
Lea wrote on 2017-04-13 08:42:00
0
Рунхент wrote on 2017-04-01 12:40:23
0
Lea wrote on 2017-04-02 02:07:31
0
Glöinn wrote on 2018-06-19 23:08:25
Round 11 - Bring the crab back (?????)
New Comment: