
Strategy added by Saintgabrial
1
1
|
Average rating: |
2 |
|
Ratings: |
1 |
|
Your vote: |
|
Creator |
|||||||||
|---|---|---|---|---|---|---|---|---|---|
|
Tags
Filter strategies:
|
|||||||||


Any Level 1+ Pet

|
Level 1+ Script Staff Pick |
2 | 4.8 |
N/A | 171 |
141
2:21
|
21+ | ||


Any Level 1+ Pet
|

Strategy from Incandio via Wowhead. I now prefer this strategy over the MPD+Tonk strategy that I used for years. There is one possible stun RNG when swapping to Molten Corgi, but it doesn't make you lose the fight. It's even possible to defeat Fezwick before MPD even dies.
Script thanks to Serenzis |
Level 1+ Script Unobtainable |
2 | 4.7 |
N/A | 126 |
180
3:00
|
25 | |
|
Any Level 1+ Pet
|
Evil
|
Breed Level 1+ Script |
2 | 4.7 |
N/A | 29 |
105
1:45
|
16 | |


Any Level 1+ Pet
|
|
Level 1+ Script |
2 | 4.6 |
N/A | 39 |
90
1:30
|
12 | |

Any Level 5+ Pet
|
Damage is from Mech and is worst case scenario
Sim's show around 98% post 10.2 changes. Script untested |
RNG Level 5+ Script |
2 | 4.6 |
N/A | 19 |
87
1:27
|
11-12 | |
|
Any Level 1+ Pet

|
Approximately 95% WR;
any suggestions welcome. |
Breed RNG Level 1+ Script |
2 | 4.6 |
N/A | 12 |
65
1:05
|
9 | |

|
|
Script |
2 | 5.0 |
N/A | 9 |
125
2:05
|
16 | |

Any Level 1+ Pet
|
Breed Level 1+ Script |
2 | 5.0 |
N/A | 10 |
120
2:00
|
13 | ||


|
This strategy can be used for both Darkmoon Faire pet battles. Credit to KD135 on Wowhead who posted the strategy here: https://www.wowhead.com/npc=67370/jeremy-feasel#comments:id=3125388
Author claims 98% success rate. I've used it a couple dozen times now for both battles and have yet to lose. If your goal is to just get the daily quests done quickly, this is the one for you! |
Script |
2 | 4.9 |
N/A | 6 |
110
1:50
|
15+ | |

Any Level 1+ Pet
|
Strategy by deathxelf on Wowhead
|
RNG Level 1+ Script |
2 | 3.7 |
N/A | 33 |
125
2:05
|
18 | |

Any Level 1+ Pet
|
I've been using Remte's Ashstone Core strategy for the longest time without fail, but recently decided to find something that was faster. Utilising the DOT damage of the Tiny Bog Beast combined with his stun speeds up the fight significantly. Victory should take between 16-18 rounds.
|
Breed Level 1+ Script |
2 | 4.2 |
N/A | 6 |
120
2:00
|
17+ | |


Any Level 1+ Pet
|
10~11 rounds.
|
Breed Shop Level 1+ Script Unobtainable |
2 | 4.4 |
N/A | 6 |
83
1:23
|
10 | |

|
First time making a strategy, not going for leveling, just trying to make the most consistent script for Daily Darkmoon Faire battle. This is 98-99% reliable and hits 9 turns 55-60% of the time.
|
Breed Script |
2 | 0.0 |
N/A | 1 |
65
1:05
|
9+ | |
|
Any Level 1+ Pet
|
RNG Level 1+ Script |
2 | 5.0 |
N/A | 0 |
125
2:05
|
16 | ||
Any Level 1+ Pet
|
|
RNG Level 1+ Script |
2 | 0.0 |
N/A | 1 |
130
2:10
|
18 | |
|
Any Level 1+ Pet
|
17 rounds.
|
Breed Level 1+ Script |
2 | 5.0 |
N/A | 1 |
105
1:45
|
17 | |
Any Level 1+ Pet
|
rounds ~15
|
Script |
2 | 5.0 |
N/A | 3 |
125
2:05
|
15 | |

Any Level 1+ Pet
|
Level 1+ Script Unobtainable |
2 | 5.0 |
N/A | 0 |
120
2:00
|
14 | ||

Any Level 1+ Pet
|
Level 1+ Script |
2 | 4.5 |
N/A | 1 |
150
2:30
|
21+ | ||
|
Any Level 1+ Pet
|
Strategy posted by chezz - credit to roeew on Wowhead
|
Level 1+ Script |
2 | 4.0 |
N/A | 6 |
97
1:37
|
13-14 | |
|
Any Level 1+ Pet
|
RNG Shop Level 1+ Unobtainable |
2 | 4.0 |
N/A | 1 |
150
2:30
|
17-20 | ||
|
Any Level 1+ Pet
|
Saintgabrial
|
RNG Level 1+ Script |
2 | 2.0 |
N/A | 1 |
125
2:05
|
15-16 | |

|
Any fast pet with a blinding ability will work in the #2 slot; if you are using Shadow I recommend Shadow Shock over Solar Beam.
|
Shop |
2 | 0.0 |
N/A | 0 |
135
2:15
|
17+ | |

|
Very much a 'strong arm' team, rather than finesse, but if you want a team that works for both teams, this one works extremely well.
|
2 | 0.0 |
N/A | 0 |
150
2:30
|
15 | ||


Any Pet
|
Shop Unobtainable |
2 | 0.0 |
N/A | 0 |
142
2:22
|
22 | ||
|
Any Level 1+ Pet
|
I found this on Wowhead, deven1969's Strategy #4, back when these were about the only pets I had leveled to 25. While there is some RNG and it will occasionally fail, overall, it has proven to be a very solid, though time-consuming, strat.
Your leveling pet will take no damage, so there's no requirements for them. The script is very specific about rounds, because it's a lot of swapping back and forth. As I was testing this in prep for posting it, after having used the strat dozens of times, something that I've never seen before happened--Personal World Destroyer died and Mechanical Pandaren Dragonling was still alive. To account for this, I scripted MPD using Breath to finish them off. |
RNG Level 1+ Script |
2 | 0.0 |
N/A | 0 |
160
2:40
|
26+ | |

|
Requires a bit of RNG luck, but it gets the job done most of the time.
|
RNG Unobtainable |
2 | 0.0 |
N/A | 0 |
145
2:25
|
18+ | |

|
2 | 0.0 |
N/A | 0 |
125
2:05
|
16+ | |||

Any Level 1+ Pet
|
Breed RNG Level 1+ Script |
2 | 0.0 |
N/A | 0 |
120
2:00
|
15+ | ||

|
The Rocket Bot can be replaced by the Darkmoon Tonk for example.
Mostly aimed at using common "cheap" pets. |
RNG |
2 | 1.0 |
N/A | 0 |
110
1:50
|
14+ |
Incl. steps:


Any Level 1+ Pet


| Before | After | Experience Gain | |
|---|---|---|---|
| 1 | ➜ | 13 | 5981 |
| 2 | ➜ | 13 | 6353 |
| 3 | ➜ | 14 | 6683 |
| 4 | ➜ | 14 | 6971 |
| 5 | ➜ | 14 | 7219 |
| 6 | ➜ | 15 | 7425 |
| 7 | ➜ | 15 | 7590 |
| 8 | ➜ | 16 | 7714 |
| 9 | ➜ | 16 | 7796 |
| 10 | ➜ | 17 | 7838 |
| 11 | ➜ | 17 | 7838 |
| 12 | ➜ | 18 | 7796 |
| 13 | ➜ | 19 | 7714 |
| 14 | ➜ | 19 | 7590 |
| 15 | ➜ | 20 | 7425 |
| 16 | ➜ | 20 | 7219 |
| 17 | ➜ | 21 | 6971 |
| 18 | ➜ | 22 | 6683 |
| 19 | ➜ | 22 | 6353 |
| 20 | ➜ | 23 | 5981 |
| 21 | ➜ | 23 | 5569 |
| 22 | ➜ | 24 | 5115 |
| 23 | ➜ | 25 | 3900 |
| 24 | ➜ | 25 | 1980 |
|
Safari Hat |
|
|
Lesser Pet Treat |
|
|
Pet Treat |
|
|
Darkmoon Hat |
|
|
Pet Battle Week |
|
= |
Pet levels to 25 with minimal XP lost |
|
|
= |
Additional XP above level 25 is lost |
|
| Mechanical Pandaren Dragonling | SS |
| Darkmoon Tonk | HP |
For the best display of your strategy, please follow these guidelines:


For the best display of your strategy, please follow these guidelines:
For the best display of your strategy, please follow these guidelines:
For the best display of your strategy, please follow these guidelines:
For the best display of your strategy, please follow these guidelines:
For the best display of your strategy, please follow these guidelines:
For the best display of your strategy, please follow these guidelines:
For the best display of your strategy, please follow these guidelines:
For the best display of your strategy, please follow these guidelines:
For the best display of your strategy, please follow these guidelines:
For the best display of your strategy, please follow these guidelines:
For the best display of your strategy, please follow these guidelines:
For the best display of your strategy, please follow these guidelines:
For the best display of your strategy, please follow these guidelines:
For the best display of your strategy, please follow these guidelines:
For the best display of your strategy, please follow these guidelines:
For the best display of your strategy, please follow these guidelines:
For the best display of your strategy, please follow these guidelines:
For the best display of your strategy, please follow these guidelines:
For the best display of your strategy, please follow these guidelines:

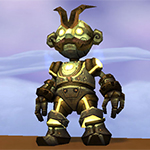
Jeremy Feasel, World of Warcraft Senior Designer, Pet Battle "inventor" and... showmaster at the Darkmoon Faire

1
DragonsAfterDark
wrote on 2025-01-25 09:10:46
1
Jose#1593
wrote on 2019-07-09 12:20:30
if [ enemy(#2).active ]
use(Decoy:334)
use(Thunderbolt:779)
use(Breath:115)
endif
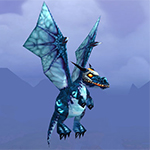
change(Darkmoon Tonk:338) [ self(Mechanical Pandaren Dragonling:844).dead ]
use(Missile:777) [ enemy.is(Honky-Tonk:1067) & !enemy.aura(Mechanical:244).exists ]
use(Shock and Awe:646) [ enemy.is(Honky-Tonk:1067) & enemy.aura(Mechanical:244).exists ]
change(#2) [ enemy.is(Fezwick:1066) & !self(#2).played ]
change(#3) [ self(#2).active ]
use(Missile:777) [ enemy.hp>1098 ]
use(Ion Cannon:209)
1
Anonymous wrote on 2017-09-07 18:14:23
1: Decoy
2+: Breath, or if Judgment is low enough that a Thunderbolt split 3 way will kill him, do it)
Sometimes Judgment changes the order of its attacks and debuffs you, it's still possible to win in that case, although less likely.
You are sometimes able to survive to Decoy again vs Honky-Tonk, if you pull that off it's 100% win, regardless of whether you got debuffed vs Judgment. (sometimes the speed debuff wears off just as he will finish you, letting you Decoy first)
Although overall the strat has about 3/5 success rate for me now, as opposed to close to 100% in the past.
1
Ockham wrote on 2017-02-08 17:31:19
0
Muqaddisa wrote on 2017-02-05 11:21:47
0
Evil wrote on 2017-01-08 13:05:19
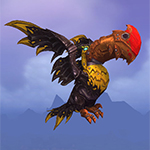
LEVEL 1 PET Mechanical Pandaren Dragonling 1/2/2 Mechanical Axebeak P/P breed 1/2/1
*P/P breed is very important, because its s the best one for most flying pets, so dont buy/make just any breed, get P/P.
vs 1st and 2nd enemy pet:
(2 alternatives, some people use method A, some method B, doesnt really matter, but i prefere metod A)
METHOD A: Thunderbolt on CD > Decoy on CD > Spam Breath
METHOD B: Decoy on CD > Thunderbolt on CD > Spam Breath
(if your MPD dies before Tonk, bring Mechanical Axebeak and finish with Alpha Strike)
vs 3rd enemy pet
Bring LEVEL 1 PET to soak the stun
Swap to Mechanical Axebeak ->
Decoy if u want (but your pet shouldnt die if u skip that part, so dont worry, u would have to be very very very unlucky to get killed by the monkey)
Haywire -> Alpha Strike if needed.
I am using this strategy every single day when DMF is up, and it never failed.
Mechanical Pandaren Dragonling is way better thank Tonk because of few reasons
- it s a flying pet, so it moves 1st
- P/P breed + Haywire (strong vs beasts) is Brutal!
- very powerful pet, and also cheap to make (engineering from WoD)
Decided to sum things up, and make one solid post about this fight, because imo it s the best strategy, very easy fight, but i see some people having a lot of problems anyway.
Those two pets are must have for any collection.
0
Schahmaar wrote on 2017-02-05 03:41:29
0
Aranesh
wrote on 2017-02-05 06:00:46
0
Anonymous wrote on 2017-01-06 08:11:53
0
Cohibadad wrote on 2017-01-06 15:53:57
0
Kateryn wrote on 2017-01-07 16:14:44
0
Mush wrote on 2017-01-04 07:04:44
Jeremy Feasel:67370:1167:115:611:598:175:113:173:409:338:777:646:209:
The drake just Breathes on the Eye and it quickly dies
The Phoenix just Burns and the Tonk quickly dies
The monkey then stuns my bird so I swap for My Tonk
Shock Awe then Ion and the monkey is dead too :)
I sometimes put Immolate on my bird or heal her but most of the times it is not really necessary.
0
Zaymaa wrote on 2017-01-03 13:46:24
0
Chlouck wrote on 2017-01-04 03:37:56
0
Morokie wrote on 2016-12-11 00:36:33
0
Данила wrote on 2018-02-04 05:39:18
0
Anonymous wrote on 2017-09-09 06:00:36
0
tjer wrote on 2017-06-05 15:29:21
if [enemy(#1).active]
ability(115)
endif
if [enemy(#2).active]
ability(334)
ability(779)
ability(115)
change(#3) [self(#1).dead]
ability(646) [enemy.aura(244).exists]
ability(777)
endif
if [enemy(#3).active]
change(#2) [enemy.round=1]
change(#3) [self(#2).active]
ability(209) [enemy.hpp<=1098]
ability(777)
endif
0
tjer wrote on 2017-06-06 13:01:19
1
Anonymous wrote on 2017-06-05 05:21:18
2)Действие 3. Лучше написать."Фескель вступает в бой. Выберите питомца, которого прокачиваете." Если вас оглушили там не нужно.
Поправьте пожалуйста.
New Comment: