^
vs. Gnomeregan Guard Tiger

Strategy added by DragonsAfterDark

14

14

Strategy 4 of 13
Browse all alternatives

Incl. steps:

Click the button to copy the script into your clipboard:

ability(Photosynthesis:268) [ self.aura(Photosynthesis:267).duration < 2 ]
ability(Poisoned Branch:630) [ enemy.aura(Poisoned:379).duration < 1 ]
ability(Poisoned Branch:630) [ self.aura(Ironbark:961).exists & enemy(#1).active ]
ability(Ironbark:962)
ability(Stoneskin:436) [self.aura(Stoneskin:435).duration < 2 ]
standby [ self.speed.slow & enemy.ability(Smoke Cloud:2239).usable ]
standby [ enemy.aura(Dodge:2060).exists ]
standby [ enemy.aura(Undead:242).exists ]
ability(Poison Spit:380) [self.ability(Poison Spit:380).strong]
ability(Burn:113)
change(next)
Gnomeregan Guard Tiger 146003
Special or not:0Special or not:3221204331882040

Skills: 2 2 1
Breed: Any

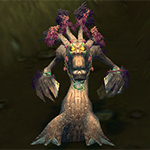
Teldrassil Sproutling
This pet can have the following breeds:

Breed Health Power Speed
BB 1481 276 276


Special or not:0Special or not:5122554629225540

Skills: 1 2 2
Breed: Any

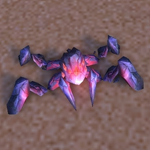
Crimson Shale Hatchling
This pet can have the following breeds:

Breed Health Power Speed
BB 1400 292 276
HP 1465 305 260
HS 1465 276 289


Special or not:0Special or not:5122480621814800

Skills: 1 2 2
Breed: Any

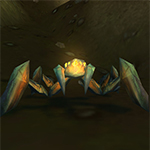
Topaz Shale Hatchling
This pet can have the following breeds:

Breed Health Power Speed
BB 1481 292 260
HH 1725 276 244
HS 1546 276 273


Substitutes:

Note: You have selected a substitute pet.
The strategy might fail if you use it with this pet instead of the one the strategy creator intended.

The substitute finder looks for these criteria in relation to the original pet:
  • Same family
  • Has the required skills
  • Has the required stats (if specified)
  • Ignores specific breed requirements for the main pet, as breeds can be very different for substitutes

1 / 3

Note: You have selected a substitute pet.
The strategy might fail if you use it with this pet instead of the one the strategy creator intended.

The substitute finder looks for these criteria in relation to the original pet:
  • Same family
  • Has the required skills
  • Has the required stats (if specified)
  • Ignores specific breed requirements for the main pet, as breeds can be very different for substitutes

1 / 5

If a cockroach comes in I'd suggest switching to one of the Shale Hatchlings. Since he casts Apocalypse followed by Shell Shield, you have a round to get your hatchling in, a round to get Stoneskin up, and then just Poison Spit from that point on.

Low XP
At least one of the pets for this strategy require the use of a specific breed.
Not every strategy can be bullet proof. This is one of them. You might have to restart it, since there are some random elements that increase the risk of your pets failing. Don't blame them, please!
This strategy is using pets obtainable from the Wow Trading Card Game (TCG) or the auction house for potentially high sums of gold.
This strategy is using pets obtainable only from the WoW In-Game Shop for Battle.net Balance or real money.
You can use this strategy to carry a low level pet to give it experience.
Some instructions are more difficult to follow than others. That's exactly what you might find in this strategy!
Script
The strategy offers a Script that can be used with the Pet Battle Script addon. You can copy the script by clicking on the button to the left of the pets.
At least one pet in the strategy cannot be obtained anymore. If you have it, congrats!
Staff Pick
A Strategy Curator found this strategy to be especially helpful and higlighted it with this tag to give it more exposure.
In Dragonflight Patch 10.2, the ability Time Bomb has been changed. This tag is marking strategies using Time Bomb so they can be reviewed.
Time: 3:20
This time was entered by a strategy curator. It is quite reliable especially when using TDScript, however times can always vary slightly.
Rounds: 23+
The number of rounds for this fight were added by a strategy curator. This number is usually very reliable.
This table shows the level increase for completing the fight with level 25 pets and one carry pet.
Partial level experience is not included in the calculation.

Before After Experience Gain
161196
271271
371337
471394
581444
681485
791518
8101543
9111559
10111568
11121568
12131559
13141543
14151518
15161485
16171444
17171394
18181337
19191271
20201196
21211114
22221023
2323924
2424817

Safari Hat

Lesser Pet Treat

Pet Treat

Darkmoon Hat

Pet Battle Week


Strategy Details
3 Min 20 Sec
This time was entered by a strategy curator. It is quite reliable especially when using TDScript, however times can always vary slightly.
23+
The number of rounds for this fight were added by a strategy curator. This number is usually very reliable.
2018-12-12 02:04:22
The strategy was last updated on this date.
2018-12-12 02:04:22
The strategy was created on this date.
143,902
Pageviews. This number indicates how often this strategy has been accessed by visitors.
Tamer Details
31.1 71.4 (TomTom / Map Pin)
Low XP
This fight provides very low experience. It is usually not worth bringing a low level pet in. You can see detailed values by hovering over the XP tag.
Turn 1

For the best display of your strategy, please follow these guidelines:

  • Use QuickFill elements where possible
  • Enter custom instructions in English
  • Check the Strategy Creation Guide for more info
Teldrassil Sproutling
Ironbark
Poisoned Branch
Photosynthesis
Crimson Shale Hatchling
Burn
Poison Spit
Stoneskin
Topaz Shale Hatchling
Burn
Poison Spit
Stoneskin
Pass
Bring in your Teldrassil Sproutling
Bring in your Crimson Shale Hatchling
Bring in your Topaz Shale Hatchling
Swap to your Teldrassil Sproutling
Swap to your Crimson Shale Hatchling
Swap to your Topaz Shale Hatchling
Gnomeregan Guard Tiger comes in
An enemy pet comes in
Any standard attack will finish the fight
 
Teldrassil Sproutling
Crimson Shale Hatchling
Topaz Shale Hatchling
Ironbark
Poisoned Branch
Photosynthesis
Burn
Poison Spit
Stoneskin
Burn
Poison Spit
Stoneskin
Gnomeregan Guard Tiger
Turn 2

For the best display of your strategy, please follow these guidelines:

  • Use QuickFill elements where possible
  • Enter custom instructions in English
  • Check the Strategy Creation Guide for more info
Teldrassil Sproutling
Ironbark
Poisoned Branch
Photosynthesis
Crimson Shale Hatchling
Burn
Poison Spit
Stoneskin
Topaz Shale Hatchling
Burn
Poison Spit
Stoneskin
Pass
Bring in your Teldrassil Sproutling
Bring in your Crimson Shale Hatchling
Bring in your Topaz Shale Hatchling
Swap to your Teldrassil Sproutling
Swap to your Crimson Shale Hatchling
Swap to your Topaz Shale Hatchling
Gnomeregan Guard Tiger comes in
An enemy pet comes in
Any standard attack will finish the fight
 
Teldrassil Sproutling
Crimson Shale Hatchling
Topaz Shale Hatchling
Ironbark
Poisoned Branch
Photosynthesis
Burn
Poison Spit
Stoneskin
Burn
Poison Spit
Stoneskin
Gnomeregan Guard Tiger
Turn 3

For the best display of your strategy, please follow these guidelines:

  • Use QuickFill elements where possible
  • Enter custom instructions in English
  • Check the Strategy Creation Guide for more info
Teldrassil Sproutling
Ironbark
Poisoned Branch
Photosynthesis
Crimson Shale Hatchling
Burn
Poison Spit
Stoneskin
Topaz Shale Hatchling
Burn
Poison Spit
Stoneskin
Pass
Bring in your Teldrassil Sproutling
Bring in your Crimson Shale Hatchling
Bring in your Topaz Shale Hatchling
Swap to your Teldrassil Sproutling
Swap to your Crimson Shale Hatchling
Swap to your Topaz Shale Hatchling
Gnomeregan Guard Tiger comes in
An enemy pet comes in
Any standard attack will finish the fight
 
Teldrassil Sproutling
Crimson Shale Hatchling
Topaz Shale Hatchling
Ironbark
Poisoned Branch
Photosynthesis
Burn
Poison Spit
Stoneskin
Burn
Poison Spit
Stoneskin
Gnomeregan Guard Tiger
Turn 4

For the best display of your strategy, please follow these guidelines:

  • Use QuickFill elements where possible
  • Enter custom instructions in English
  • Check the Strategy Creation Guide for more info
Teldrassil Sproutling
Ironbark
Poisoned Branch
Photosynthesis
Crimson Shale Hatchling
Burn
Poison Spit
Stoneskin
Topaz Shale Hatchling
Burn
Poison Spit
Stoneskin
Pass
Bring in your Teldrassil Sproutling
Bring in your Crimson Shale Hatchling
Bring in your Topaz Shale Hatchling
Swap to your Teldrassil Sproutling
Swap to your Crimson Shale Hatchling
Swap to your Topaz Shale Hatchling
Gnomeregan Guard Tiger comes in
An enemy pet comes in
Any standard attack will finish the fight
 
Teldrassil Sproutling
Crimson Shale Hatchling
Topaz Shale Hatchling
Ironbark
Poisoned Branch
Photosynthesis
Burn
Poison Spit
Stoneskin
Burn
Poison Spit
Stoneskin
Gnomeregan Guard Tiger
Turn 5

For the best display of your strategy, please follow these guidelines:

  • Use QuickFill elements where possible
  • Enter custom instructions in English
  • Check the Strategy Creation Guide for more info
Teldrassil Sproutling
Ironbark
Poisoned Branch
Photosynthesis
Crimson Shale Hatchling
Burn
Poison Spit
Stoneskin
Topaz Shale Hatchling
Burn
Poison Spit
Stoneskin
Pass
Bring in your Teldrassil Sproutling
Bring in your Crimson Shale Hatchling
Bring in your Topaz Shale Hatchling
Swap to your Teldrassil Sproutling
Swap to your Crimson Shale Hatchling
Swap to your Topaz Shale Hatchling
Gnomeregan Guard Tiger comes in
An enemy pet comes in
Any standard attack will finish the fight
 
Teldrassil Sproutling
Crimson Shale Hatchling
Topaz Shale Hatchling
Ironbark
Poisoned Branch
Photosynthesis
Burn
Poison Spit
Stoneskin
Burn
Poison Spit
Stoneskin
Gnomeregan Guard Tiger
Random Pet Comes in When Guard Tiger Feigns Death

For the best display of your strategy, please follow these guidelines:

  • Use QuickFill elements where possible
  • Enter custom instructions in English
  • Check the Strategy Creation Guide for more info
Teldrassil Sproutling
Ironbark
Poisoned Branch
Photosynthesis
Crimson Shale Hatchling
Burn
Poison Spit
Stoneskin
Topaz Shale Hatchling
Burn
Poison Spit
Stoneskin
Pass
Bring in your Teldrassil Sproutling
Bring in your Crimson Shale Hatchling
Bring in your Topaz Shale Hatchling
Swap to your Teldrassil Sproutling
Swap to your Crimson Shale Hatchling
Swap to your Topaz Shale Hatchling
Gnomeregan Guard Tiger comes in
An enemy pet comes in
Any standard attack will finish the fight
 
Teldrassil Sproutling
Crimson Shale Hatchling
Topaz Shale Hatchling
Ironbark
Poisoned Branch
Photosynthesis
Burn
Poison Spit
Stoneskin
Burn
Poison Spit
Stoneskin
Gnomeregan Guard Tiger
Turn 1

For the best display of your strategy, please follow these guidelines:

  • Use QuickFill elements where possible
  • Enter custom instructions in English
  • Check the Strategy Creation Guide for more info
Teldrassil Sproutling
Ironbark
Poisoned Branch
Photosynthesis
Crimson Shale Hatchling
Burn
Poison Spit
Stoneskin
Topaz Shale Hatchling
Burn
Poison Spit
Stoneskin
Pass
Bring in your Teldrassil Sproutling
Bring in your Crimson Shale Hatchling
Bring in your Topaz Shale Hatchling
Swap to your Teldrassil Sproutling
Swap to your Crimson Shale Hatchling
Swap to your Topaz Shale Hatchling
Gnomeregan Guard Tiger comes in
An enemy pet comes in
Any standard attack will finish the fight
 
Teldrassil Sproutling
Crimson Shale Hatchling
Topaz Shale Hatchling
Ironbark
Poisoned Branch
Photosynthesis
Burn
Poison Spit
Stoneskin
Burn
Poison Spit
Stoneskin
Gnomeregan Guard Tiger
Turn 2

For the best display of your strategy, please follow these guidelines:

  • Use QuickFill elements where possible
  • Enter custom instructions in English
  • Check the Strategy Creation Guide for more info
Teldrassil Sproutling
Ironbark
Poisoned Branch
Photosynthesis
Crimson Shale Hatchling
Burn
Poison Spit
Stoneskin
Topaz Shale Hatchling
Burn
Poison Spit
Stoneskin
Pass
Bring in your Teldrassil Sproutling
Bring in your Crimson Shale Hatchling
Bring in your Topaz Shale Hatchling
Swap to your Teldrassil Sproutling
Swap to your Crimson Shale Hatchling
Swap to your Topaz Shale Hatchling
Gnomeregan Guard Tiger comes in
An enemy pet comes in
Any standard attack will finish the fight
 
Teldrassil Sproutling
Crimson Shale Hatchling
Topaz Shale Hatchling
Ironbark
Poisoned Branch
Photosynthesis
Burn
Poison Spit
Stoneskin
Burn
Poison Spit
Stoneskin
Gnomeregan Guard Tiger
Turn 3

For the best display of your strategy, please follow these guidelines:

  • Use QuickFill elements where possible
  • Enter custom instructions in English
  • Check the Strategy Creation Guide for more info
Teldrassil Sproutling
Ironbark
Poisoned Branch
Photosynthesis
Crimson Shale Hatchling
Burn
Poison Spit
Stoneskin
Topaz Shale Hatchling
Burn
Poison Spit
Stoneskin
Pass
Bring in your Teldrassil Sproutling
Bring in your Crimson Shale Hatchling
Bring in your Topaz Shale Hatchling
Swap to your Teldrassil Sproutling
Swap to your Crimson Shale Hatchling
Swap to your Topaz Shale Hatchling
Gnomeregan Guard Tiger comes in
An enemy pet comes in
Any standard attack will finish the fight
 
Teldrassil Sproutling
Crimson Shale Hatchling
Topaz Shale Hatchling
Ironbark
Poisoned Branch
Photosynthesis
Burn
Poison Spit
Stoneskin
Burn
Poison Spit
Stoneskin
Gnomeregan Guard Tiger
After that:

For the best display of your strategy, please follow these guidelines:
  • Use QuickFill elements where possible
  • Enter custom instructions in English
  • Check the Strategy Creation Guide for more info
Teldrassil Sproutling
Ironbark
Poisoned Branch
Photosynthesis
Crimson Shale Hatchling
Burn
Poison Spit
Stoneskin
Topaz Shale Hatchling
Burn
Poison Spit
Stoneskin
Pass
Bring in your Teldrassil Sproutling
Bring in your Crimson Shale Hatchling
Bring in your Topaz Shale Hatchling
Swap to your Teldrassil Sproutling
Swap to your Crimson Shale Hatchling
Swap to your Topaz Shale Hatchling
Gnomeregan Guard Tiger comes in
An enemy pet comes in
Any standard attack will finish the fight
 
Teldrassil Sproutling
Crimson Shale Hatchling
Topaz Shale Hatchling
Ironbark
Poisoned Branch
Photosynthesis
Burn
Poison Spit
Stoneskin
Burn
Poison Spit
Stoneskin
Gnomeregan Guard Tiger
Priority 1
Keep Photosynthesis up, refreshing with 1 round left

For the best display of your strategy, please follow these guidelines:
  • Use QuickFill elements where possible
  • Enter custom instructions in English
  • Check the Strategy Creation Guide for more info
Teldrassil Sproutling
Ironbark
Poisoned Branch
Photosynthesis
Crimson Shale Hatchling
Burn
Poison Spit
Stoneskin
Topaz Shale Hatchling
Burn
Poison Spit
Stoneskin
Pass
Bring in your Teldrassil Sproutling
Bring in your Crimson Shale Hatchling
Bring in your Topaz Shale Hatchling
Swap to your Teldrassil Sproutling
Swap to your Crimson Shale Hatchling
Swap to your Topaz Shale Hatchling
Gnomeregan Guard Tiger comes in
An enemy pet comes in
Any standard attack will finish the fight
 
Teldrassil Sproutling
Crimson Shale Hatchling
Topaz Shale Hatchling
Ironbark
Poisoned Branch
Photosynthesis
Burn
Poison Spit
Stoneskin
Burn
Poison Spit
Stoneskin
Gnomeregan Guard Tiger
Priority 2
Ironbark to kill the Guard Tiger

For the best display of your strategy, please follow these guidelines:
  • Use QuickFill elements where possible
  • Enter custom instructions in English
  • Check the Strategy Creation Guide for more info
Teldrassil Sproutling
Ironbark
Poisoned Branch
Photosynthesis
Crimson Shale Hatchling
Burn
Poison Spit
Stoneskin
Topaz Shale Hatchling
Burn
Poison Spit
Stoneskin
Pass
Bring in your Teldrassil Sproutling
Bring in your Crimson Shale Hatchling
Bring in your Topaz Shale Hatchling
Swap to your Teldrassil Sproutling
Swap to your Crimson Shale Hatchling
Swap to your Topaz Shale Hatchling
Gnomeregan Guard Tiger comes in
An enemy pet comes in
Any standard attack will finish the fight
 
Teldrassil Sproutling
Crimson Shale Hatchling
Topaz Shale Hatchling
Ironbark
Poisoned Branch
Photosynthesis
Burn
Poison Spit
Stoneskin
Burn
Poison Spit
Stoneskin
Gnomeregan Guard Tiger
Priority 3
Keep Poisoned Branch applied

For the best display of your strategy, please follow these guidelines:

  • Use QuickFill elements where possible
  • Enter custom instructions in English
  • Check the Strategy Creation Guide for more info
Teldrassil Sproutling
Ironbark
Poisoned Branch
Photosynthesis
Crimson Shale Hatchling
Burn
Poison Spit
Stoneskin
Topaz Shale Hatchling
Burn
Poison Spit
Stoneskin
Pass
Bring in your Teldrassil Sproutling
Bring in your Crimson Shale Hatchling
Bring in your Topaz Shale Hatchling
Swap to your Teldrassil Sproutling
Swap to your Crimson Shale Hatchling
Swap to your Topaz Shale Hatchling
Gnomeregan Guard Tiger comes in
An enemy pet comes in
Any standard attack will finish the fight
 
Teldrassil Sproutling
Crimson Shale Hatchling
Topaz Shale Hatchling
Ironbark
Poisoned Branch
Photosynthesis
Burn
Poison Spit
Stoneskin
Burn
Poison Spit
Stoneskin
Gnomeregan Guard Tiger
Priority 4
Ironbark as filler

For the best display of your strategy, please follow these guidelines:

  • Use QuickFill elements where possible
  • Enter custom instructions in English
  • Check the Strategy Creation Guide for more info
Teldrassil Sproutling
Ironbark
Poisoned Branch
Photosynthesis
Crimson Shale Hatchling
Burn
Poison Spit
Stoneskin
Topaz Shale Hatchling
Burn
Poison Spit
Stoneskin
Pass
Bring in your Teldrassil Sproutling
Bring in your Crimson Shale Hatchling
Bring in your Topaz Shale Hatchling
Swap to your Teldrassil Sproutling
Swap to your Crimson Shale Hatchling
Swap to your Topaz Shale Hatchling
Gnomeregan Guard Tiger comes in
An enemy pet comes in
Any standard attack will finish the fight
 
Teldrassil Sproutling
Crimson Shale Hatchling
Topaz Shale Hatchling
Ironbark
Poisoned Branch
Photosynthesis
Burn
Poison Spit
Stoneskin
Burn
Poison Spit
Stoneskin
Gnomeregan Guard Tiger

For the best display of your strategy, please follow these guidelines:

  • Use QuickFill elements where possible
  • Enter custom instructions in English
  • Check the Strategy Creation Guide for more info
Teldrassil Sproutling
Ironbark
Poisoned Branch
Photosynthesis
Crimson Shale Hatchling
Burn
Poison Spit
Stoneskin
Topaz Shale Hatchling
Burn
Poison Spit
Stoneskin
Pass
Bring in your Teldrassil Sproutling
Bring in your Crimson Shale Hatchling
Bring in your Topaz Shale Hatchling
Swap to your Teldrassil Sproutling
Swap to your Crimson Shale Hatchling
Swap to your Topaz Shale Hatchling
Gnomeregan Guard Tiger comes in
An enemy pet comes in
Any standard attack will finish the fight
 
Teldrassil Sproutling
Crimson Shale Hatchling
Topaz Shale Hatchling
Ironbark
Poisoned Branch
Photosynthesis
Burn
Poison Spit
Stoneskin
Burn
Poison Spit
Stoneskin
Gnomeregan Guard Tiger
If you have all mechs as enemy pets, you can usually solo with the Sproutling, if not, bring in one of your Shale Hatchlings:

For the best display of your strategy, please follow these guidelines:

  • Use QuickFill elements where possible
  • Enter custom instructions in English
  • Check the Strategy Creation Guide for more info
Teldrassil Sproutling
Ironbark
Poisoned Branch
Photosynthesis
Crimson Shale Hatchling
Burn
Poison Spit
Stoneskin
Topaz Shale Hatchling
Burn
Poison Spit
Stoneskin
Pass
Bring in your Teldrassil Sproutling
Bring in your Crimson Shale Hatchling
Bring in your Topaz Shale Hatchling
Swap to your Teldrassil Sproutling
Swap to your Crimson Shale Hatchling
Swap to your Topaz Shale Hatchling
Gnomeregan Guard Tiger comes in
An enemy pet comes in
Any standard attack will finish the fight
 
Teldrassil Sproutling
Crimson Shale Hatchling
Topaz Shale Hatchling
Ironbark
Poisoned Branch
Photosynthesis
Burn
Poison Spit
Stoneskin
Burn
Poison Spit
Stoneskin
Gnomeregan Guard Tiger
Priority 1
Keep Stoneskin up, refreshing with 1 round left

For the best display of your strategy, please follow these guidelines:

  • Use QuickFill elements where possible
  • Enter custom instructions in English
  • Check the Strategy Creation Guide for more info
Teldrassil Sproutling
Ironbark
Poisoned Branch
Photosynthesis
Crimson Shale Hatchling
Burn
Poison Spit
Stoneskin
Topaz Shale Hatchling
Burn
Poison Spit
Stoneskin
Pass
Bring in your Teldrassil Sproutling
Bring in your Crimson Shale Hatchling
Bring in your Topaz Shale Hatchling
Swap to your Teldrassil Sproutling
Swap to your Crimson Shale Hatchling
Swap to your Topaz Shale Hatchling
Gnomeregan Guard Tiger comes in
An enemy pet comes in
Any standard attack will finish the fight
 
Teldrassil Sproutling
Crimson Shale Hatchling
Topaz Shale Hatchling
Ironbark
Poisoned Branch
Photosynthesis
Burn
Poison Spit
Stoneskin
Burn
Poison Spit
Stoneskin
Gnomeregan Guard Tiger
If
Mech/Undead pets are up: Burn +

For the best display of your strategy, please follow these guidelines:

  • Use QuickFill elements where possible
  • Enter custom instructions in English
  • Check the Strategy Creation Guide for more info
Teldrassil Sproutling
Ironbark
Poisoned Branch
Photosynthesis
Crimson Shale Hatchling
Burn
Poison Spit
Stoneskin
Topaz Shale Hatchling
Burn
Poison Spit
Stoneskin
Pass
Bring in your Teldrassil Sproutling
Bring in your Crimson Shale Hatchling
Bring in your Topaz Shale Hatchling
Swap to your Teldrassil Sproutling
Swap to your Crimson Shale Hatchling
Swap to your Topaz Shale Hatchling
Gnomeregan Guard Tiger comes in
An enemy pet comes in
Any standard attack will finish the fight
 
Teldrassil Sproutling
Crimson Shale Hatchling
Topaz Shale Hatchling
Ironbark
Poisoned Branch
Photosynthesis
Burn
Poison Spit
Stoneskin
Burn
Poison Spit
Stoneskin
Gnomeregan Guard Tiger
If
Critter pets are up: Poison Spit +

For the best display of your strategy, please follow these guidelines:

  • Use QuickFill elements where possible
  • Enter custom instructions in English
  • Check the Strategy Creation Guide for more info
Teldrassil Sproutling
Ironbark
Poisoned Branch
Photosynthesis
Crimson Shale Hatchling
Burn
Poison Spit
Stoneskin
Topaz Shale Hatchling
Burn
Poison Spit
Stoneskin
Pass
Bring in your Teldrassil Sproutling
Bring in your Crimson Shale Hatchling
Bring in your Topaz Shale Hatchling
Swap to your Teldrassil Sproutling
Swap to your Crimson Shale Hatchling
Swap to your Topaz Shale Hatchling
Gnomeregan Guard Tiger comes in
An enemy pet comes in
Any standard attack will finish the fight
 
Teldrassil Sproutling
Crimson Shale Hatchling
Topaz Shale Hatchling
Ironbark
Poisoned Branch
Photosynthesis
Burn
Poison Spit
Stoneskin
Burn
Poison Spit
Stoneskin
Gnomeregan Guard Tiger

Stealth is not an option, your joints are creaking.


AdTrip

wrote on 2021-06-26 11:03:03

Script does not auto swap in case of cockroach, otherwise works fine

spottsy

wrote on 2020-11-03 19:10:26

Works in Shadowlands prepatch.

ICEBERG430#1112

wrote on 2020-10-19 18:58:46

Why would a "tiger" play dead so many times??

(OP) DragonsAfterDark

wrote on 2020-10-19 23:21:46

It's a scaredy cat :D

Anna wrote on 2020-05-08 18:34:22

A Jade Tentacle soloed the fight with 3 mechanical pets. I kept up Photosynthesis, used Entangling Roots on CD and filled with Poisoned Branch.

Lobombre wrote on 2019-08-28 11:47:17

Pandaren Water Spirit and Grumpy allowed for leveling pet

Alayea

wrote on 2019-08-06 20:21:15

Great back-up strategy if things go south with jtrezzo's strat.

Nicole wrote on 2018-12-22 11:35:21

Broot solos all 3, keep photosythis up, sunlight and iron bark

Triser

wrote on 2019-01-15 18:47:39

Yes! This works very well! Had the shale pets as back up, but this Broot soloed the fight with a mech and undead as enemy backup pets. Also, Blossoming Ancient from the Blizz store has the same move set and works great too!

Gibari wrote on 2019-01-08 13:29:32

doesn't always work, sometimes you get cockroaches as enemies which you can't kill before the greater apocalypse hits your team and thus wipes you

(OP) DragonsAfterDark

wrote on 2019-01-08 20:10:18

I wrote on another comment: Once the cockroach comes in I'd suggest switching to one of the Shale Hatchlings. I did this and had 9 rounds left over on Apocalypse. Since he casts Apocalypse followed by Shell Shield, you have a round to get your hatchling in, then a round to get Stoneskin up, then just Poison Spit from that point on.

But I'll put it up in the info.

SithDi#1898

wrote on 2019-01-07 18:45:11

Soloed with Withers on an all Mech battle; great strat.

OrRogettaacalk wrote on 2019-01-07 16:04:44

Hello.
What interesting message
sd987hefd8a7shjisudhfasd657gdy

Anon wrote on 2018-12-31 18:02:08

Used Broot (2,2,2). Was able to solo whole fight this time around. How ever, this is the first time I've been here so I will be updating this later on to include a fall back for if there is a roach. Below is a script for Broot worked well. Restarted the fight before Tiger would die six times in testing and had no issues.

if [self(#1).active]
use(#3) [weather(Sunny Day:403).duration<=1]
use(#1) [enemy.ability(Elemental Gatling Gun:2243).duration=1]
use(#2) [self.aura(Photosynthesis:267).duration<=1]
endif
use(#1)

Anon wrote on 2019-01-01 14:19:03

Update ~

if [enemy.type=critter]
use(Stoneskin:436) [self.aura(Stoneskin:435).duration<=1]
use(Poison Spit:380) [self.ability(Poison Spit:380).strong]
change(next)
endif
use(Ironbark:962) [enemy.ability(Elemental Gatling Gun:2243).duration=1]
use(Stoneskin:436) [enemy.ability(Elemental Gatling Gun:2243).duration=1]
use(Sunlight)
use(Photosynthesis:268) [self.aura(Photosynthesis:267).duration<=1]
use(#1)
change(#1)

AnonymousCoward wrote on 2018-12-26 13:28:03

This tactic works fine when there's no Cockroach.

This week, I had a Cockroach as a first random pet which immediately cast Greater Apocalypse. I won only with a turn to spare.

(OP) DragonsAfterDark

wrote on 2018-12-26 21:18:01

Once the cockroach comes in I'd suggest switching to one of the Shale Hatchlings. I did this and had 9 rounds left over on Apocalypse. Since he casts Apocalypse followed by Shell Shield, you have a round to get your hatchling in, then a round to get Stoneskin up, then just Poison Spit from that point on.

Prudentius

wrote on 2018-12-26 17:22:16

TD Script

ability(Photosynthesis:268) [ self.aura(Photosynthesis:267).duration < 2 ]
ability(Poisoned Branch:630) [ enemy.aura(Poisoned:379).duration < 1 ]
ability(Poisoned Branch:630) [ self.aura(Ironbark:961).exists & enemy(#1).active ]
ability(Ironbark:962)
ability(Stoneskin:436) [self.aura(Stoneskin:435).duration < 2 ]
standby [ self.speed.slow & enemy.ability(Smoke Cloud:2239).usable ]
standby [ enemy.aura(Dodge:2060).exists ]
standby [ enemy.aura(Undead:242).exists ]
ability(Poison Spit:380) [self.ability(Poison Spit:380).strong]
ability(Burn:113)
change(next)

Caolynn#1359

wrote on 2018-12-20 16:44:40

Soloed whole fight with Teldrassil Sproutling

Caolynn#1359

wrote on 2018-12-20 16:44:36

Soloed whole fight with Teldrassil Sproutling

Yina

wrote on 2018-12-18 02:46:55

Magma rageling with 1-2-2 worked well, keep fire shield up, place trap whenever it's not up, and spam 1. Not enough to solo the fight, but goes fast with this.

New Comment:


Name:

Link: