
Strategy added by Prudentius
8
8
|
Average rating: |
3 |
|
Ratings: |
22 |
|
Your vote: |
|
Creator |
|||||||||
|---|---|---|---|---|---|---|---|---|---|
|
Tags
Filter strategies:
|
|||||||||


Any Level 1+ Pet
|

9 rounds.
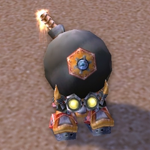
This strat also works with other breeds of Motorized Croakers. Just add one more Water Jet before the Supercharge. The P/S breed will never work though. The best breed to use is H/P. With it the only way for this strat to fail is if both Flame Breath and Time Bomb crit during round 8. Then you will win the fight before your level pet has a chance to earn XP. |
Breed Level 1+ Script |
2 | 4.7 |
N/A | 23 |
72
1:12
|
9 | |


|
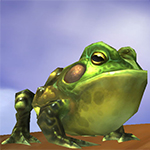
Thanks to Krigath on Wowhead for this strategy. I used Benax but Mud Jumper was the original beginning pet, both work great.
https://www.wowhead.com/npc=66822/goz-banefury#comments Thank you to Malhado below for the TDScript! |
Tricky Script |
2 | 4.6 |
N/A | 62 |
150
2:30
|
24 | |
Any Level 1+ Pet
|
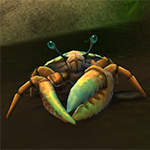
I imagine this will go belly up if Time Bomb crits Twilight, hence the quit line for the script and instructions in the strategy, but possibly if crits happen elsewhere, too.
I also haven't had the Broom die to Twilight, but maybe it could happen? In all, I'd say like a ~ 92% chance it works fine. |
Level 1+ Script |
2 | 4.5 |
N/A | 10 |
86
1:26
|
11 | |
Any Level 1+ Pet

|
This is a pet carry strategy I picked up somewhere. This is an Elekk Plushie approved strategy.
|
Level 1+ Script |
2 | 3.0 |
N/A | 8 |
87
1:27
|
11 | |
|
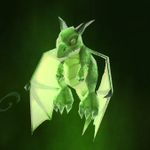
EDIT (2019-03-04): Stabilised with another pet. The inherent RNG from Amythel may lead to cringeworthy moments, but once this foe is gone, it's fast and clean.
Rematch String for levelling: Goz Banefury:2186:22271IN:11292L:ZL: |
Breed |
2 | 4.3 |
N/A | 3 |
81
1:21
|
11 | |
Any Level 1+ Pet
|
Credit: Albinoette on Wowhead
Source: Guide: An Awfully Big (and Comprehensive) Adventure Note: A rare crit may cause Twilight to use Dark Rebirth early. If that happens, Forfeit and try again. Changelog 3/10/2020 - Added string that will forfeit if Twilight is affected by Dark Rebirth at start of Turn 5. |
RNG Level 1+ Script |
2 | 2.9 |
N/A | 1 |
135
2:15
|
19 | |

Any Pet
|
All Credits to Malachi68 on wowhead from who this is taken. I have changed so I dont have a leveling pet since I didnt feel secure with that
|
RNG |
2 | 2.5 |
N/A | 3 |
138
2:18
|
17 |
Incl. steps:


Any Level 1+ Pet


Substitutes:
1 / 4
This is a pet carry strategy I picked up somewhere. This is an Elekk Plushie approved strategy.
| Before | After | Experience Gain | |
|---|---|---|---|
| 1 | ➜ | 10 | 3589 |
| 2 | ➜ | 11 | 3812 |
| 3 | ➜ | 11 | 4010 |
| 4 | ➜ | 11 | 4183 |
| 5 | ➜ | 12 | 4331 |
| 6 | ➜ | 12 | 4455 |
| 7 | ➜ | 13 | 4554 |
| 8 | ➜ | 13 | 4628 |
| 9 | ➜ | 14 | 4678 |
| 10 | ➜ | 14 | 4703 |
| 11 | ➜ | 15 | 4703 |
| 12 | ➜ | 16 | 4678 |
| 13 | ➜ | 17 | 4628 |
| 14 | ➜ | 17 | 4554 |
| 15 | ➜ | 18 | 4455 |
| 16 | ➜ | 19 | 4331 |
| 17 | ➜ | 19 | 4183 |
| 18 | ➜ | 20 | 4010 |
| 19 | ➜ | 21 | 3812 |
| 20 | ➜ | 22 | 3589 |
| 21 | ➜ | 22 | 3341 |
| 22 | ➜ | 23 | 3069 |
| 23 | ➜ | 24 | 2772 |
| 24 | ➜ | 25 | 1980 |
|
Safari Hat |
|
|
Lesser Pet Treat |
|
|
Pet Treat |
|
|
Darkmoon Hat |
|
|
Pet Battle Week |
|
= |
Pet levels to 25 with minimal XP lost |
|
|
= |
Additional XP above level 25 is lost |
|
For the best display of your strategy, please follow these guidelines:


For the best display of your strategy, please follow these guidelines:
For the best display of your strategy, please follow these guidelines:
For the best display of your strategy, please follow these guidelines:
For the best display of your strategy, please follow these guidelines:
For the best display of your strategy, please follow these guidelines:
For the best display of your strategy, please follow these guidelines:
For the best display of your strategy, please follow these guidelines:
For the best display of your strategy, please follow these guidelines:
For the best display of your strategy, please follow these guidelines:
For the best display of your strategy, please follow these guidelines:
For the best display of your strategy, please follow these guidelines:
For the best display of your strategy, please follow these guidelines:

The Twilight, it is strong in this one.


0
WarDrumsOfJ5 wrote on 2024-11-28 04:03:48
4
kusoleon
wrote on 2024-10-23 15:38:23
2
Toenail
wrote on 2022-04-16 17:21:18
2
KrisHeart
wrote on 2022-03-16 23:45:14
2
DragonsAfterDark
wrote on 2022-03-17 03:51:06
2
Neverfade#1803
wrote on 2020-10-18 22:30:05
1
Tofke
wrote on 2020-10-20 12:33:06
2
TheSickness747
wrote on 2020-10-11 09:48:35
Then, for Helios, it was a little bit RNG: I did the Shock and Awe then Ion Cannon, praying that he didn't heal.
2
Corgi
wrote on 2020-09-19 01:08:08
https://www.warcraftpets.com/community/forum/viewtopic.php?t=7556
1
Gráinne
wrote on 2020-09-19 01:35:01
1
Ivanella#1279
wrote on 2018-08-05 17:14:04
1
Captain_Flan
wrote on 2020-03-17 19:32:27
1
Maceye1#1882
wrote on 2019-05-25 19:12:25
1
Sardrimm wrote on 2018-12-28 00:09:20
0
Xarx wrote on 2019-01-30 22:03:44
1
Moara
wrote on 2019-04-13 23:12:57
1
Malachi wrote on 2019-01-12 05:30:18
0
Malachi wrote on 2019-02-23 16:49:42
0
Malachi wrote on 2019-02-24 15:20:56
0
Umbos wrote on 2019-03-10 21:11:00
0
Malachi wrote on 2019-03-10 05:53:40
1
Cernunnas
wrote on 2019-02-14 14:58:17
1
Saiko
wrote on 2019-01-09 00:08:03
2
Michele wrote on 2018-11-20 19:55:48
1
hELEAH#1974
wrote on 2018-11-10 03:30:16
New Comment: