
35
35
|
Average rating: |
4.1 |
|
Ratings: |
38 |
|
Your vote: |
|
Creator |
|||||||||
|---|---|---|---|---|---|---|---|---|---|
|
Tags
Filter strategies:
|
|||||||||


Any Level 1+ Pet
|

In this vast jungle, a low-hanging fruit isn't entirely unexpected.
While Immolation is much, much better for backline healing, I've found out Flamethrower adds a little more stability, as dropping a DoT later means it smoothes out the Burn's RNG. You can use Immolation first cast only, but you will risk Gyrexle healing out because Failsafe didn't trigger. I think it has something to do with different backline/weather abilities affecting the Gyrexle's health in a way that causes them to use Repair late/early enough. Managed to succeed with a crit of Rot. (A forfeit is for continued testing.) |
Breed Level 1+ Script |
2 | 5.0 |
N/A | 17 |
118
1:58
|
14 | |

Any Level 1+ Pet
|
Time: 01:55 (14-15 rounds)
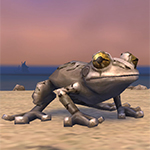
If you don't have Baa'l then try this strategy Inland Croaker breed recommendation: HH > HP > BB > PP/PS |
Level 1+ Script |
2 | 4.8 |
N/A | 66 |
115
1:55
|
14-15 | |

Any Level 1+ Pet
Any Level 1+ Pet
|
Script thanks to ZoeyStarwind
|
Level 1+ Script |
2 | 4.6 |
N/A | 61 |
300
5:00
|
36+ | |
Any Level 1+ Pet
|
I found this strategy on Wowhead, posted by Kalkoh. Easy and fast. It did not fail yet.
Other breeds may work as well, I haven't tested them yet. |
Level 1+ Script |
2 | 4.5 |
N/A | 82 |
110
1:50
|
14 | |

Any Level 1+ Pet
|
Time: 01:55 (15 rounds)
|
Level 1+ Script |
2 | 4.4 |
N/A | 15 |
130
2:10
|
15 | |
Any Level 2+ Pet
|
|
Level 2+ Script |
2 | 4.1 |
N/A | 35 |
138
2:18
|
16 | |


Any Level 3+ Pet
|
OrionAssante
|
RNG Level 3+ Script |
2 | 3.4 |
N/A | 42 |
205
3:25
|
25+ | |

Any Level 10+ Pet
|
Cymre
|
Original video by Cymre
Script thanks to Shaka |
Shop Level 10+ Script |
2 | 3.7 |
N/A | 7 |
187
3:07
|
23+ |
Any Level 1+ Pet
|
Thanks to Wazzak for some log samples.
As usual, if WBL crits, this is over. :( Don't worry about your own RNG, and as the Idol of Decay is slower it can be swapped out even as it went into Damned. P/S and P/P imps should work too, but a custom judgment regarding throwing in Immolation again is required around its expiration. |
Breed Level 1+ Script |
2 | 5.0 |
N/A | 1 |
110
1:50
|
14 | |
Any Level 3+ Pet
|
This is a reliable strategy posted by Helbrecht of Eldrethalas on the US forums, Drrum on her blog, and Rythian on Wowhead, but the actual origin remains obscured at the moment of publication. Please comment with any details you might share.
I have also done this fight multiple times with Darkflame instead of Early Advantage. See which one you prefer. Your Level Pet has to be able to take a hit from Swarm of Flies (around 117 points). There is no backline damage during this fight. |
Breed Level 3+ |
2 | 0.0 |
N/A | 1 |
210
3:30
|
25+ | |
|
Any Level 6+ Pet
|
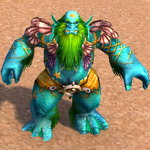
This strategy has worked for me since Broken Isles and never failed. You can do this with one Puddle Terror and 2 lvling pets using Sunlight and Natures Ward but it takes a lot longer to do'
|
Level 6+ |
2 | 5.0 |
N/A | 1 |
240
4:00
|
25+ | |
Any Level 1+ Pet
|
Level 1+ Script |
2 | 5.0 |
N/A | 4 |
208
3:28
|
29-30 | ||
|
Any Level 1+ Pet
|
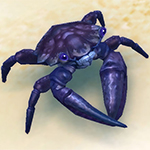
I found this fairly recent strat on Wowhead https://www.wowhead.com/npc=83837/cymre-brightblade#comments, with thanks to creator daaani. It looks similar to another strat posted here, but this one worked perfectly for me.
NOTE: this only seemed to work with the P/P breed Crab. Had no success with the H/H breed. |
Breed Level 1+ Unobtainable |
2 | 5.0 |
N/A | 2 |
195
3:15
|
21 | |

|
I only tried this twice, it worked 2nd time and first time I jumped the gun and foolishly swapped to Sunfire Kalari while my Beetle was still alive. Considering how well the pets were doing I expect them to win more than half the time.
|
RNG |
2 | 5.0 |
N/A | 0 |
180
3:00
|
20+ | |

Any Level 1+ Pet
|
Original strategy comes from Sp1naker on Wowhead
Note if using an undead pet the minimum health must be 176. You can set the minimum health in Rematch to 118 and expected damage type to critter to account for this. |
Breed RNG Level 1+ Script |
2 | 2.8 |
N/A | 5 |
190
3:10
|
23 | |


Any Level 1+ Pet
|
Borrowed from one of Xu-Fu's options for An Awfully Big Adventure, modified for lvl pet.
|
Level 1+ Script |
2 | 1.0 |
N/A | 1 |
340
5:40
|
38+ | |
Any Level 1+ Pet
|
~21 rounds
Breed recommendation Slot 2: H/S >> S/B >> S/S, P/S |
Breed Level 1+ Script |
2 | 0.0 |
N/A | 0 |
180
3:00
|
21 | |
|
|
I'd like to start off by saying that the suggested strategy using Puddle Terror is by far the safest strategy out there, i was able to solo it with just Sunlight/Nature's Ward, killing off the back line entirely during the first encounter.
And considering that the pet is very cheap on AH, there's hardly any excuse not to use that strategy. But for this one, i was basically messing around to bring back a little bit of a challenge, while also playing it safe. This strategy is not THE strategy by any means, it's just a variation of the known working tropes. |
RNG |
2 | 0.0 |
N/A | 0 |
171
2:51
|
22+ | |


|
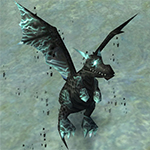
extremely consistent; can use any dragonkin w/ Scorched Earth & Breath in place of Wild Crimson Hatchling.
|
2 | 1.0 |
N/A | 0 |
145
2:25
|
16+ |
Incl. steps:


Any Level 2+ Pet


Substitutes:
1 / 8
| Before | After | Experience Gain | |
|---|---|---|---|
| 1 | ➜ | 13 | 5981 |
| 2 | ➜ | 13 | 6353 |
| 3 | ➜ | 14 | 6683 |
| 4 | ➜ | 14 | 6971 |
| 5 | ➜ | 14 | 7219 |
| 6 | ➜ | 15 | 7425 |
| 7 | ➜ | 15 | 7590 |
| 8 | ➜ | 16 | 7714 |
| 9 | ➜ | 16 | 7796 |
| 10 | ➜ | 17 | 7838 |
| 11 | ➜ | 17 | 7838 |
| 12 | ➜ | 18 | 7796 |
| 13 | ➜ | 19 | 7714 |
| 14 | ➜ | 19 | 7590 |
| 15 | ➜ | 20 | 7425 |
| 16 | ➜ | 20 | 7219 |
| 17 | ➜ | 21 | 6971 |
| 18 | ➜ | 22 | 6683 |
| 19 | ➜ | 22 | 6353 |
| 20 | ➜ | 23 | 5981 |
| 21 | ➜ | 23 | 5569 |
| 22 | ➜ | 24 | 5115 |
| 23 | ➜ | 25 | 3900 |
| 24 | ➜ | 25 | 1980 |
|
Safari Hat |
|
|
Lesser Pet Treat |
|
|
Pet Treat |
|
|
Darkmoon Hat |
|
|
Pet Battle Week |
|
= |
Pet levels to 25 with minimal XP lost |
|
|
= |
Additional XP above level 25 is lost |
|
For the best display of your strategy, please follow these guidelines:


For the best display of your strategy, please follow these guidelines:
For the best display of your strategy, please follow these guidelines:
For the best display of your strategy, please follow these guidelines:
For the best display of your strategy, please follow these guidelines:
For the best display of your strategy, please follow these guidelines:
For the best display of your strategy, please follow these guidelines:
For the best display of your strategy, please follow these guidelines:
For the best display of your strategy, please follow these guidelines:
For the best display of your strategy, please follow these guidelines:
For the best display of your strategy, please follow these guidelines:
For the best display of your strategy, please follow these guidelines:
For the best display of your strategy, please follow these guidelines:
For the best display of your strategy, please follow these guidelines:
For the best display of your strategy, please follow these guidelines:
For the best display of your strategy, please follow these guidelines:
For the best display of your strategy, please follow these guidelines:
For the best display of your strategy, please follow these guidelines:
For the best display of your strategy, please follow these guidelines:
For the best display of your strategy, please follow these guidelines:

One of the hardest fights in Draenor. It is not suitable to use for leveling a pet as it takes way too long and is unreliable.

1
Bomigab
wrote on 2023-06-08 08:24:34
1
Serpe
wrote on 2021-07-10 15:55:33
I tried this tactic about 50 times now and the result is always the same!
1
Rosqo
wrote on 2021-07-10 16:46:52
2
Sigri
wrote on 2020-12-26 05:51:44
2
Bukah
wrote on 2020-12-23 06:20:08
2
Ivaelia
wrote on 2020-10-14 13:44:11
2
riotus#1682
wrote on 2020-09-25 15:20:07
1
Chassuer#1583
wrote on 2020-03-26 20:03:27
1
thatguy181
wrote on 2020-05-01 14:37:46
3
Kay
wrote on 2019-02-16 11:15:00
1. Idol of Decay will cast Dark Rebirth when its HP is 350 or below. (swap to level pet - takes 1 hit) Whatever you do, DO NOT kill Idol while Dark Rebirth is up or it will get full health.
2. Kill Lantern before Wish is activated (after 2 rounds).
3. Early Advantage will hit Gyrexi hard, its health will be very low and forced to repair for 3 rounds. You kill it while it's repairing. If for any reason your Early Advantage didn't hit hard enough he will use rocket --- then you are screwed and probably need to restart.
0
Leaann wrote on 2020-04-29 15:35:45
2
Alauraa#2331
wrote on 2020-03-11 11:55:40
1
Gráinne
wrote on 2020-03-11 12:31:17
2
Gráinne
wrote on 2020-03-11 13:34:01
1
Gráinne
wrote on 2020-03-11 13:34:21
[Rot] dealt 276 damage to your Emperor Crab (Weak).", -- [2]
[Rot] applied [Rot] to your Emperor Crab.", -- [3]
[Rot] applied [Undead Mark] to your Emperor Crab.", -- [4]
[Whirlpool] applied [Whirlpool] to enemy team.", -- [5]
Round 2", -- [6]
[Rot] applied [Undead Mark] to your Emperor Crab.", -- [7]
[Swarm of Flies] applied |T2027883:14|t[Swarm of Flies] to your team.", -- [8]
[Snap] dealt 377 damage to enemy Idol of Decay.", -- [9]
[Swarm of Flies] dealt 87 damage to your Emperor Crab (Strong).", -- [10]
Round 3", -- [11]
[Rot] applied [Undead Mark] to your Emperor Crab.", -- [12]
[Swarm of Flies] applied [Swarm of Flies] to your team.", -- [13]
[Snap] dealt 377 damage to enemy Idol of Decay.", -- [14]
[Swarm of Flies] dealt 87 damage to your Emperor Crab (Strong).", -- [15]
[Whirlpool] dealt 565 damage to enemy Idol of Decay.", -- [16]
[Whirlpool] applied [Rooted] to enemy Idol of Decay.", -- [17]
[Whirlpool] fades from enemy team.", -- [18]
Round 4", -- [19]
[Rot] applied [Undead Mark] to your Emperor Crab.", -- [20]
[Swarm of Flies] applied [Swarm of Flies] to your team.", -- [21]
[Snap] dealt 377 damage to enemy Idol of Decay.", -- [22]
[Swarm of Flies] dealt 87 damage to your Emperor Crab (Strong).", -- [23]
Round 5", -- [24]
[Rot] applied [Undead Mark] to your Emperor Crab.", -- [25]
Chrominius is now your active pet.", -- [26]
[Dark Rebirth] applied [Dark Rebirth] to enemy Idol of Decay.", -- [27]
[Swarm of Flies] dealt 176 damage to your Chrominius (Critical).", -- [28]
Your Chrominius died.", -- [29]
[Rooted] fades from enemy Idol of Decay.", -- [30]
Round 5", -- [31]
[Rot] applied [Undead Mark] to your Emperor Crab.", -- [32]
Emperor Crab is now your active pet.", -- [33]
[Dark Rebirth] fades from enemy Idol of Decay.", -- [34]
Round 6", -- [35]
[Rot] applied [Undead Mark] to your Emperor Crab.", -- [36]
[Undead Mark] fades from your Emperor Crab.", -- [37]
[Rot] dealt 276 damage to your Emperor Crab (Weak).", -- [38]
[Rot] applied [Rot] to your Emperor Crab.", -- [39]
[Rot] applied [Undead Mark] to your Emperor Crab.", -- [40]
[Renewing Mists] applied [Renewing Mists] to your team.", -- [41]
[Swarm of Flies] dealt 87 damage to your Emperor Crab (Strong).", -- [42]
[Renewing Mists] healed 165 damage from your Emperor Crab.", -- [43]
Round 7", -- [44]
[Rot] applied [Undead Mark] to your Emperor Crab.", -- [45]
[Swarm of Flies] applied [Swarm of Flies] to your team.", -- [46]
[Snap] dealt 377 damage to enemy Idol of Decay.", -- [47]
Enemy Idol of Decay died.", -- [48]
[Damned] healed 18 damage from enemy Idol of Decay.", -- [49]
[Damned] applied [Undead] to enemy Idol of Decay.", -- [50]
[Swarm of Flies] dealt 65 damage to your Emperor Crab (Strong).", -- [51]
[Renewing Mists] healed 164 damage from your Emperor Crab.", -- [52]
Round 8", -- [53]
[Rot] applied [Undead Mark] to your Emperor Crab.", -- [54]
Infinite Whelpling is now your active pet.", -- [55]
-2
Malachi wrote on 2019-12-23 10:30:12
The crab does too little damage (312 hp per Snap) so you have to actually do a fifth Snap in order for the Idol to cast Rebirth. My leveling pet (Humanoid) that I brought in when the Idol was at 365 hp took a 650+ hit but was level 15 so it didn't die.
2
Gráinne
wrote on 2019-12-24 04:14:05
There are separate instructions for H/H and P/P breed Emperor Crabs, and in both cases, with the Whirlpool hit, the numbers do seem to add up for me. The Emperor Crabs haven't changed stats ever (which is great!) but I have to wonder whether you were using one of the alternative crabs that are automatically added by the Substitutes function. If you were, I think it's quite likely that the alternative Substitute crabs don't work the same way.
1
Hstrader wrote on 2018-12-27 10:46:31
any 12+
any 1+
Puddle Terror 111
Use any spell (try not to hit very hard)
rotate to terror
(If u want lvl on second pet rotate him in and go to terror)
Use natures ward
then sunlight
Natures ward continually Sunlight on CD
after back pets are dead you can kill first pet with water jet and sunlight
1
hstrader wrote on 2019-02-11 14:49:09
Puddle Terror 111
Puddle Terror 111
Use any spell (try not to hit very hard)
rotate to terror
Sunlight
Natures Ward
change to second Puddle Terror
Sunlight
Natures Ward
do this rotation till the back pets are dead
then take care of front pet with water jet
0
hstrader wrote on 2019-03-29 14:12:36
(edited)
0
Averiane wrote on 2019-09-07 21:42:36
7
shawnmp1
wrote on 2018-06-09 19:20:04
1
iphegenia#1809
wrote on 2018-08-03 22:28:03
1
shawnmp1
wrote on 2018-08-04 22:31:45
1
Hyattmeister
wrote on 2018-09-24 01:22:19
1
shawnmp1
wrote on 2018-09-24 19:34:41
1
Belle
wrote on 2019-08-31 06:34:39
1
Zaraedora
wrote on 2019-08-18 13:49:38
1
Geki wrote on 2019-05-08 10:14:55
1
3clipse
wrote on 2019-07-30 05:10:33
5
Eekwibble
wrote on 2018-10-16 10:43:24
1. You can sometimes crit Idol of Decay into its Undead round before he casts Dark Rebirth, at which point you need to quit and reset, and;
2. You can sometime take the Lantern out in 2 Tail Sweeps which will leave Wish active on Gyrexle. When this happens, you need to stall Early Advantage for 1 round.
3. I added Renewing Mists at round 2 and have it refresh on the round after Idol uses Dark Rebirth. This ensures that neither your carry pet or whelpling will be hit by Rot.
4. Your whelpling can sometimes catch a bad run on Gyrexle and die so I added a line to bring the crab back in.
quit [ enemy.aura(Undead:242).exists & enemy.ability(Dark Rebirth:794).usable ]
ability(Whirlpool:513) [ round=1 ]
change(#2) [ enemy(#1).hp<320 & !enemy.aura(Undead:242).exists & !self(#2).played ]
change(#1) [ self(#2).active ]
change(#3) [ enemy.aura(Undead:242).duration=1 ]
ability(Renewing Mists:511) [ !self.aura(Renewing Mists:510).exists & enemy(#1).active ]
ability(Healing Flame:168) [ enemy(#2).active ]
ability(Early Advantage:405) [ enemy(#3).active & !enemy.aura(Wish:274).exists ]
ability(#1)
change(#1)
2
Diashio
wrote on 2019-01-22 16:10:50
3
Eekwibble
wrote on 2019-01-24 22:06:59
2
Ebbiemay
wrote on 2019-03-19 15:28:14
2
Eekwibble
wrote on 2019-03-26 10:35:05
1
Tony wrote on 2018-11-11 07:54:48
0
Jere wrote on 2019-02-21 00:29:03
1
Hobbyhorse
wrote on 2019-01-11 01:19:15
Do not use Whirlpool.
1
Eekwibble
wrote on 2019-01-24 21:34:20
2
Hobbyhorse
wrote on 2019-01-25 06:17:34
I do not use ability(#1) anymore in script, because it say ability(#1) and not what spell you want to use. Some pet battles would not work if you use another pet with same abilities because ability 1 and 2 has changed position.
-1
kess wrote on 2018-12-30 10:28:58
1
shawnmp1
wrote on 2019-01-02 09:01:03
0
Devious05 wrote on 2018-12-25 16:16:09
0
HST wrote on 2017-07-22 01:43:01
lvl 12 - 19 pet and lvl 1 pet ( Optional if you want to lvl 2 but they share lvling points )
It is a long fight must warn you
Attack with first pet (try not to hit too hard). (Cycle through 2nd pet if used)
Switch to Puddle of Terror open with Natures Ward then sunlight then Natures Ward till cd for Sunlight repeat till back 2 pets are dead, then you can also use Water Jet to help finish him off. ( Has work almost every time )
0
Devious05 wrote on 2018-12-25 16:14:20
4
Tie wrote on 2017-11-16 07:45:40
Start with crab and do
WHIRLPOOL
SNAP
SNAP
RENEWING MISTS
SNAP
SNAP
SWAP TO LEVEL PET AND IDOL WILL CAST REBIRTH (as long as you dont hit him the rebirth will drop off)
SWAP BACK TO CRAB (rebirth is now gone)
RENEWING MISTS
SNAP
SWAP TO WHELPLING ( idol dies)
TAILSWEEP
TAILSWEEP
TAILSWEEP (lantern dies)
HEALING FLAME
EARLY ADVANTAGE
TAILSWEEP
TAILSWEEP
TAILSWEEP
EARLY ADVANTAGE (whelpling dies)
BRING IN CRAB
WHIRLPOOL
SNAP (crab dies but you won the fight)
My level pet went from level 5 to 11.
**** IF AT ANY TIME YOU HIT HIM WHILE REBIRTH IS STILL ON END THE FIGHT AND START AGAIN****
the key here is to not hit him while he has rebirth on if you swap or pass after he casts it will drop off.
-1
Triser wrote on 2018-02-16 14:48:19
1
Amarante
wrote on 2018-05-23 03:21:43
1
Elaeana
wrote on 2018-08-05 09:44:00
1
Jagûar
wrote on 2018-11-04 18:40:39
Also, it's worth (imo) to mention that if Idol has exactly! 450hp left after 1 whirlpool and 2 snap, and if your Crab is P/P, do 1 more snap, before swapping in your lvl pet (that ofc has to be lvl 2+) and then swap back to Crab and follow the strategy from Turn 6
But you're all ofc welcome to try your hand on making a reliable easy to use strategy with pets that aren't too hard to aquire... Those of us, who'se done Pet Battles for a long time, has all sorts of pets, but there are those who's stable aren't quite as full :)
-1
Brawler wrote on 2017-07-14 21:22:04
Searing Scorchling
Molten Corgi
Level 1 pet
Rd1: scorched earth
Rd2: conflagrate
Rd3: swap to Molten Corgi
Rd4: flamethrower
Rd5: inferno herding
Rd6: superbark
Rd7: flamethrower
Rd8: flamethrower
Rd9: flamethrower
Rd10: flamethrower
Bring in leveling pet
Rd11: swap to Scorchling
Rd12: scorched earth
Rd13: conflagrate
Rd14: pass
Done
*Railgun crit will cause loss
2
Hobbyhorse wrote on 2017-08-29 02:52:34
After round 14, Wishbright Lantern is still alive with 100% healt.
-1
Anonymous wrote on 2017-09-07 12:36:35
This works.
0
CIrce wrote on 2018-08-02 19:49:25
6
Unktehila
wrote on 2018-04-20 02:37:24
if [enemy(#1).active]
change(#2) [enemy.hp<350 & !self(#2).played]
change(#1) [self(#2).active]
change(#3) [enemy.aura(242).exists]
ability(513) [enemy.round=1]
ability(511) [self(#2).played & !self.aura(510).exists]
ability(356)
endif
if [enemy(#2).active]
ability(168) [enemy.round=1]
ability(122)
endif
if [enemy(#3).active]
ability(405) [enemy.round=1]
ability(122)
endif
quit
1
Azero
wrote on 2018-06-12 17:23:52
0
Kabilos wrote on 2018-06-14 15:01:57
0
Octopwns#2686
wrote on 2018-05-23 09:18:17
-1
Hstrader wrote on 2018-04-30 01:15:56
Puddle Terror 1, 1, 1
any lvl pet around 15 to 20
any lvl pet
start with nature's ward
Sunlight on CD
Keep using narure's ward and nothing other than Sunlight on CD
after the two back pets are dead you can use natures ward and water jet to kill thefirst pet
0
DavidG wrote on 2018-04-04 03:15:00
If it were up to me, I'd swap this and the #2 strat.
2
Szuzsika wrote on 2017-09-16 01:58:01
0
Eekwibble wrote on 2017-10-17 20:44:10
0
tess wrote on 2017-10-19 03:51:51
1
Prudentius wrote on 2017-07-06 11:54:27
tested ~12 times
quit [ enemy.aura(795).exists & enemy.aura(242).exists ]
ability(513) [ enemy.hp.full ]
ability(356) [ enemy.hp > 451 ]
change(#3) [ ! self(#3).played ]
change(#1) [ enemy(#1).active ]
if [ ! enemy.aura(242).exists ]
ability(356) [ self.aura(510).exists ]
ability(511)
endif
change(#2)
ability(405) [ self.ability(405).strong ]
ability(122) [ weather(403) ]
ability(168)
Notes: First line of script is a safeguard against critical strikes that push Idol of Decay into Undead round before Rebirth.
** Ideal results when using P/P breed for crab and whelpling.
0
Prudentius wrote on 2017-07-08 11:05:10
ability(356) [ enemy.hp > 451 ]
with
ability(356) [ enemy.hp > 450 ]
1
Omy wrote on 2017-10-06 23:27:04
to
ability(356) [ enemy.hp > 350 ]
if you don't change it, when idol reaches 18Hp TD quits the match
1
Firedrake1 wrote on 2017-10-11 09:49:04
0
Vhale wrote on 2017-08-23 11:41:36
0
Aifee wrote on 2017-07-09 23:42:23
0
Yttrius wrote on 2017-07-05 02:27:19
0
Blowmyarrow wrote on 2017-06-20 03:48:35
Because if I do that snap with my emperor crab (H/H breed) in the 4th turn, the Idols hp will be below 450, but over 250 (tested 5-6 times). Yes it's simple: another snap is missing from here.
So I suggest either to correct 450 to 250 or put in one more snap-turn. Cheers!
0
Hobbyhorse wrote on 2017-06-19 09:36:52
ability(Whirlpool) [round=1]
if [enemy(#1).hp<=250]
change(#2) [!self(#2).played]
change(#1) [self(#2).active]
ability(Renewing Mists) [!self.aura(Renewing Mists).exists]
endif
change(#3) [enemy.aura(Undead).exists]
ability(Healing Flame) [enemy(#2).active]
ability(Early Advantage) [enemy(#3).active]
ability(#1)
0
ßenehime wrote on 2017-06-07 01:46:32
if [enemy(#1).active]
change(#2) [enemy.hp<138 & !self(#2).played]
change(#1) [self(#2).active]
change(#3) [enemy.aura(242).exists]
ability(513) [enemy.round=1]
ability(511) [self(#2).played & !self.aura(510).exists]
ability(356)
endif
if [enemy(#2).active]
ability(168) [enemy.round=1]
ability(122)
endif
if [enemy(#3).active]
ability(405) [enemy.round=1]
ability(122)
endif
0
Rakenessa wrote on 2017-04-27 12:50:26
0
Aby wrote on 2017-05-12 00:07:17
0
Tormentia-Kul Tiras wrote on 2017-05-17 23:45:02
0
Anonymous wrote on 2017-03-22 00:58:50
0
kkm wrote on 2017-04-01 02:17:32
0
Quenais wrote on 2017-04-17 23:40:06
0
Gary wrote on 2017-03-31 12:53:51
0
Novylen wrote on 2017-03-12 19:30:33
0
Vhale wrote on 2017-02-10 21:53:12
0
Boodha wrote on 2017-01-13 15:00:50
0
Smoggy wrote on 2017-01-12 10:43:02
0
Aranesh
wrote on 2017-01-13 07:46:43
If that was not the case for you, you must have done a critical hit or one Snap too much in the beginning.
0
Argent wrote on 2016-12-27 13:31:54
1. Whirlpool
2-5: Snap (x4)
6: Swap leveling pet in (Idol casts Rebirth, leveling pet takes one tick of its DoT)
7: Swap Emperor Crab back in
8+: Proceed as written (Renewing Mists, Snap, swap Infinite Whelpling in, etc...)
0
Jay wrote on 2016-12-21 16:00:13
0
Saintgabrial wrote on 2016-12-24 14:26:03
Make sure you use Healing Flame as soon as you bring in the Infinite Whelpling.
When Gyrexle comes in and you hit him with (Early Advantage) he should start to repair himself and one Tail Sweep should kill him the first time and the second Tail Sweep should kill him. He should never get that heal off.
0
Duskbunny wrote on 2016-10-22 16:11:40
0
Jagûar
wrote on 2016-10-17 09:03:17
0
Anonymous wrote on 2016-09-27 03:33:23
0
Susie wrote on 2016-09-13 23:10:00
0
Susie wrote on 2016-09-14 20:08:52
0
Swyftlyght wrote on 2016-08-27 03:08:25
0
Orpho wrote on 2016-08-16 21:44:02
0
Hammerforge wrote on 2016-07-22 06:17:24
0
Aranesh
wrote on 2016-07-23 01:41:57
0
Anonymous wrote on 2016-07-20 06:27:59
0
Pilfer wrote on 2016-05-17 04:10:28
0
Aranesh
wrote on 2016-05-18 02:48:41
0
Jere wrote on 2015-11-11 22:06:49
0
Aranesh
wrote on 2015-11-13 13:59:32
0
Anonymous wrote on 2015-10-20 20:28:02
0
Aranesh
wrote on 2015-10-25 13:28:08
0
Zoltar wrote on 2015-09-08 12:48:49
0
Montysix wrote on 2017-06-28 03:47:56
1
moundaye
wrote on 2020-10-18 16:00:52
Pour info, Crabe empereur et jeune dragonnet infini sont "Puissance/Puissance" dans mon équipe.
2
Macochey
wrote on 2018-10-10 15:33:46
0
Feralz wrote on 2017-12-06 00:11:19
J'ai donc choisi d autres mascottes et maintenant je la bat à tous les coups : Hanneton doré (pour appocalipse et ensuite l'encaisser face à la lanterne) + Crabe empereur (tue l'idole en restant full vie) + Ancien en fleurs (tue le mécégnome en restant quasi full vie).
0
Aby wrote on 2017-05-12 00:05:44
0
Hythiel wrote on 2017-09-14 17:06:09
0
Miou wrote on 2017-10-22 13:00:24
0
V3 wrote on 2017-10-11 10:43:03
0
TAPO wrote on 2017-09-27 03:29:19
1
antiromantik#2444
wrote on 2018-12-30 10:13:17
-1
Anonymous wrote on 2017-08-26 10:07:25
0
Anonymous wrote on 2017-10-15 06:39:25
0
Anonymous wrote on 2017-05-07 04:13:56
0
Excelence wrote on 2017-04-24 18:56:14
0
Chasmine wrote on 2017-04-16 12:11:55
New Comment: