
33
33
|
Durchschnittliche Bewertung: |
4.6 |
|
Bewertungen |
31 |
|
Deine Bewertung: |
|
Creator |
||||||||||
|---|---|---|---|---|---|---|---|---|---|---|
|
Tags
Filter strategies:
|
|||||||||
| 1 | 

Stufe 1+ Haustier
|

Carry Pet will take no damage, No RNG against Lil' Tarecgosa and Fledgling Warden Owl. TD Script credit: TURBOKillex
|
Stufe 1+ Script |
2 | 5.0 |
74 |
80
1:20
|
12+ | ||
| 2 | 

Stufe 1+ Haustier
|
I am using this every day, works flawlessly, and its fast.
|
Breed Stufe 1+ Script |
2 | 4.7 |
27 |
105
1:45
|
16+ | ||
| 3 | 
Stufe 1+ Haustier
|
|
This method is an alteration of Mel's guide from Wowhead. Mel's method is much safer to use as it includes deflecting the only damaging ability from Dor, but also more complicated as you need to track the ability cooldowns.
It used to feature Götze des Anubisath, added Leerenvernarbter Anubisath for coverage (You can still use the classic one though if you start from Steinhaut). |
Stufe 1+ Script |
2 | 4.6 |
33 |
149
2:29
|
19+ | |
| 4 | 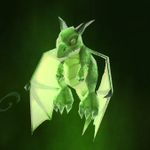
Stufe 1+ Haustier
|
Didn't bother to test every Traumwelpling breed since it shouldn't matter.
|
Stufe 1+ Script |
2 | 4.5 |
30 |
105
1:45
|
15+ | ||
| 5 |

Stufe 1+ Haustier
|
Your most powerful breeds will make this fight go fast and smooth, but it will work with other breeds.
|
Stufe 1+ Script |
2 | 5.0 |
5 |
123
2:03
|
21 | ||
| 6 | 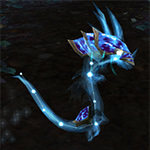
Stufe 1+ Haustier
|
|
Stufe 1+ |
2 | 5.0 |
13 |
150
2:30
|
20 | ||
| 7 | 
Stufe 1+ Haustier
|
Kakjens
|
Stufe 1+ |
2 | 5.0 |
1 |
175
2:55
|
24+ | ||
| 8 | 
Stufe 1+ Haustier
|
Nexus Whelpling (1,2,2) is a drop in replacement for the Stormborne Whelpling, and you can use any moth in the second slot that has Alpha Strike, Cocoon Strike and Moth Dust.
|
Stufe 1+ Script |
2 | 0.0 |
2 |
125
2:05
|
17+ | ||
| 9 | 
Stufe 1+ Haustier
|
|
Stufe 1+ Script |
2 | 5.0 |
0 |
112
1:52
|
18+ | ||
| 10 | 
Stufe 1+ Haustier
|
Unlucky crits can cause your dragon to die before Fangor does, but don't worry! Your bird should still be able to finish the job easily.
|
Stufe 1+ Script |
2 | 4.5 |
2 |
95
1:35
|
13+ | ||
| 11 |

Stufe 1+ Haustier
|
|
Stufe 1+ |
2 | 3.0 |
2 |
170
2:50
|
28+ | ||
| 12 | 
Stufe 10+ Haustier
|
|
Stufe 10+ |
2 | 0.0 |
0 |
162
2:42
|
24 | ||
| 13 | 
Stufe 1+ Haustier
|
This is a variation of a strat first posted on Wowhead by Midobu.
It works best with an H/P NFD. It's also fine with P/P and P/B breeds although they are slightly riskier. I haven't tested them but I would avoid S/S and S/B breeds. |
Breed Zufall Stufe 1+ Script |
2 | 0.0 |
0 |
105
1:45
|
16 | ||
| 14 | 
Stufe 1+ Haustier
|
Hyuna of the Shrines:215A:122A14D:21141LK:ZL:P:::::1::
Stategy by Stabbystick on Wowhead. Fast and reliable |
Breed Stufe 1+ |
2 | 0.0 |
0 |
98
1:38
|
14+ | ||
| 15 | 
Stufe 1+ Haustier
|
Stufe 1+ |
2 | 0.0 |
0 |
98
1:38
|
15+ | |||
| 16 |
Stufe 1+ Haustier
|
You can tweak the script if Albino Chimaeraling is faster than Dor The Wall by changing the duration from 1 to 0. Slower is stronger (faster clear) due to Tail Sweep being stronger.
|
Breed Zufall Stufe 1+ Script |
2 | 0.0 |
0 |
100
1:40
|
16+ | ||
| 17 | 
Stufe 1+ Haustier
|
This is a fun and fast strategy that will allow you to power boost any level carry pet. My original strategy uses a Nexus Whelpling in the first slot with Arcane Storm, Mana Surge.
|
Stufe 1+ |
2 | 0.0 |
0 |
85
1:25
|
13-14 | ||
| 18 | 
Stufe 1+ Haustier
|
Any excuse to get out the cannon...
|
Stufe 1+ Script |
2 | 0.0 |
0 |
113
1:53
|
16+ | ||
| 19 | 

Stufe 1+ Haustier
|
I had Siedeblut (P/P) here because hit hits like a darn truck. Does alot of damage.
Had Eisernes Sternchen (H/H) for the extra health. But I do believe it would work out as well with a (H/P) Good Luck! |
Breed Zufall Stufe 1+ |
2 | 1.0 |
0 |
120
2:00
|
16+ |
Notizen:


Stufe 1+ Haustier

This method is an alteration of Mel's guide from Wowhead. Mel's method is much safer to use as it includes deflecting the only damaging ability from Dor, but also more complicated as you need to track the ability cooldowns.
It used to feature Götze des Anubisath, added Leerenvernarbter Anubisath for coverage (You can still use the classic one though if you start from Steinhaut).
| Vorher | Nachher | Erfahrungsgewinn | |
|---|---|---|---|
| 1 | ➜ | 13 | 5981 |
| 2 | ➜ | 13 | 6353 |
| 3 | ➜ | 14 | 6683 |
| 4 | ➜ | 14 | 6971 |
| 5 | ➜ | 14 | 7219 |
| 6 | ➜ | 15 | 7425 |
| 7 | ➜ | 15 | 7590 |
| 8 | ➜ | 16 | 7714 |
| 9 | ➜ | 16 | 7796 |
| 10 | ➜ | 17 | 7838 |
| 11 | ➜ | 17 | 7838 |
| 12 | ➜ | 18 | 7796 |
| 13 | ➜ | 19 | 7714 |
| 14 | ➜ | 19 | 7590 |
| 15 | ➜ | 20 | 7425 |
| 16 | ➜ | 20 | 7219 |
| 17 | ➜ | 21 | 6971 |
| 18 | ➜ | 22 | 6683 |
| 19 | ➜ | 22 | 6353 |
| 20 | ➜ | 23 | 5981 |
| 21 | ➜ | 23 | 5569 |
| 22 | ➜ | 24 | 5115 |
| 23 | ➜ | 25 | 3900 |
| 24 | ➜ | 25 | 1980 |
|
Safarihelm |
|
|
Kleines Leckerli |
|
|
Leckerli |
|
|
Dunkelmond-Zylinder |
|
|
Haustierkampf-Woche |
|
= |
Das Haustier levelt bis 25 mit minimalem XP-Verlust |
|
|
= |
Zusätzliche XP über Stufe 25 gehen verloren |
|
 Geisterfeuerblitz bis Himmelsformer stirbt
Für die beste Darstellung deiner Strategie befolge bitte diese Richtlinien:


Für die beste Darstellung deiner Strategie befolge bitte diese Richtlinien:
Für die beste Darstellung deiner Strategie befolge bitte diese Richtlinien:
Für die beste Darstellung deiner Strategie befolge bitte diese Richtlinien:
Für die beste Darstellung deiner Strategie befolge bitte diese Richtlinien:
Für die beste Darstellung deiner Strategie befolge bitte diese Richtlinien:
Für die beste Darstellung deiner Strategie befolge bitte diese Richtlinien:
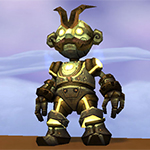
 Metallfaust bis Schlingor stirbt
Für die beste Darstellung deiner Strategie befolge bitte diese Richtlinien:
Für die beste Darstellung deiner Strategie befolge bitte diese Richtlinien:
Metallfaust bis Aufziehgnom stirbtFür die beste Darstellung deiner Strategie befolge bitte diese Richtlinien:
Für die beste Darstellung deiner Strategie befolge bitte diese Richtlinien:
Für die beste Darstellung deiner Strategie befolge bitte diese Richtlinien:
Geisterfeuerblitz until Dor is dead. There is no need to use  Abwehr, unless you feel you may need too.
Für die beste Darstellung deiner Strategie befolge bitte diese Richtlinien:

Die Schildkröte scheint die ruhige und defensive Lebensweise bei den Mönchen an dem Schrein abgeschaut zu haben.

 Geschützturm bauen
7
Thargorn
schrieb am 2022-03-06 13:15:00
use(Spiritfire Bolt:1066) [enemy(#1).active]
change(#2) [self(#1).active & enemy(#2).active]
use(Build Turret:710) [enemy(#2).active]
use(Metal Fist:384)
change(#3) [self(#2).dead & !self(#3).played]
change(#1)
use(Deflection:490) [enemy(#3).ability(Headbutt:376).usable & !enemy(#3).ability(Healing Wave:123).usable]
use(Spiritfire Bolt:1066)
1
Gutling
schrieb am 2024-02-17 01:49:32
1
Vincent_83 schrieb am 2022-06-02 19:23:18
1
Toenail
schrieb am 2021-10-29 22:28:18
0
John schrieb am 2021-07-23 08:01:54
1
Toenail
schrieb am 2021-07-21 15:37:39
1
vaqueroxx17
schrieb am 2021-01-04 21:55:23
1
Ta
schrieb am 2021-04-28 18:51:35
1
Doozer
schrieb am 2021-01-02 23:12:55
1
Unscene#1837
schrieb am 2020-12-03 10:52:45
0
PhD schrieb am 2020-11-19 20:21:34
1
Shywillow
schrieb am 2020-11-11 22:07:12
0
tarc
schrieb am 2020-10-25 20:45:21
1
Ivaelia
schrieb am 2020-10-15 14:13:32
1
Dakender#1566
schrieb am 2020-09-06 11:42:01
1
Ephera#11569
schrieb am 2020-02-13 23:57:32
2
jtrezzo#1973
schrieb am 2018-12-30 13:31:02
1
PenisShark#1163
schrieb am 2018-12-28 16:43:11
1
BunnyHunny#1229
schrieb am 2018-12-27 13:31:15
2
Jagûar
schrieb am 2018-12-28 00:35:53
Turn 1: Stoneskin
Turn 2+ Crush until Skyshaper is dead
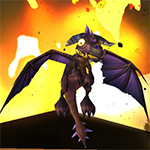
Fangor comes in
Turn 1: Swap to Clockwork Gnome
Turn 2: Build Turret
Turn 3: Metal Fist
Turn 4: Metal Fist
Turn 5: Build Turret
Turn 6+ Metal Fist until Fangor is dead
Dor the Wall comes in
Turn 1+ Metal Fist until your Gnome is dead
Swap in Level Pet
Swap in Anubisath Idol
Turn 1+ Crush until Dor is dead.
Ps. If Dor is low ln health (like 400-500 hp) and has Heabutt and Healing Wave ready then 9 out of 10 time he'll use Healing Wave first and Heatbutt second. If Healing Wave is already on cd, then he'll use Headbutt 9 outta 10 times. And in those last 9 out of 10 time is where you need to use Deflection in your round. And then simply track it from there. It takes a little getting use to, but I promise you it does work.
2
Aerithel
schrieb am 2018-09-22 09:50:30
1
jtrezzo#1973
schrieb am 2018-12-28 00:05:19
4
Eekwibble
schrieb am 2018-03-12 14:19:47
Nether Faerie Dragon P/P 2-1-1
Lvl1+ carry pet
Crackers 2-2-1 (or any P/P pet with the same moveset:- Axebeak Hatchling, Junglebeak, Bloodbeak, even a P/B Fruit Hunter would work fine)
Turn 1. Evanescence
2. Moonfire
3&4. Arcane Blast
Skyshaper dies
Fangor comes in
1. Arcane Blast
2. Evanescence
3&4. Arcane Blast
Fangor dies
Dor the Wall comes in
1. Pass
NFD dies
Bring in carry pet
Swap to Crackers
2. Flyby
3+. Peck and refresh Flyby's debuff when it wears off
TDScript:
quit [ self(#1).dead & enemy(#2).active ]
if [ enemy(#3).active ]
standby [ enemy.round=1 ]
change(#2) [ !self(#2).played ]
change(#3)
ability(#1) [ enemy.aura(516).exists ]
ability(#2)
endif
ability(#2)
ability(#1) [ weather(596) ]
ability(#3)
0
Bop schrieb am 2018-03-10 15:54:21
if [enemy(#1).active]
ability(436) [enemy.round=1]
ability(406)
endif
if [enemy(#2).active]
change(#2) [enemy.round=1]
ability(710)
ability(384)
endif
if [enemy(#3).active]
ability(384)
change(#3) [self(#2).dead & !self(#1).active]
change(#1) [self(#3).active]
ability(406)
standby [self.aura(Stunned).exists]
endif
0
MichaelJ
schrieb am 2017-12-28 07:31:01
if [enemy(Skyshaper).active]
ability(Stoneskin) [enemy.round=1]
ability(Crush)
endif
if [enemy(Fangor).active]
change(#2) [enemy.round=1]
ability(Build Turret)
ability(Metal Fist)
change(Anubisath Idol:1155) [ self(Clockwork Gnome:277).dead ]
ability(Crush:406)
endif
if [enemy(Dor the Wall).active]
ability(Deflection:490) [enemy.round=1]
ability(Deflection:490) [self(Anubisath Idol:1155).hp < 451 & enemy.ability(Headbutt).usable & !enemy.ability(Healing Wave).usable ]
ability(Metal Fist)
change(#3) [!self(#3).played & enemy.round>1]
change(#1) [self(#3).active]
ability(Crush)
endif
3
fr0z3night
schrieb am 2018-02-06 11:19:24
if [enemy(Skyshaper).active]
ability(Stoneskin) [enemy.round=1]
ability(Crush)
endif
if [enemy(Fangor).active]
change(#2) [enemy.round=1]
ability(Build Turret)
ability(Metal Fist)
change(Anubisath Idol:1155) [ self(Clockwork Gnome:277).dead ]
ability(Crush:406)
endif
if [enemy(Dor the Wall).active]
standby [self.aura(Stunned:927).exists]
ability(Metal Fist:384)
change(#3) [!self(#3).played & enemy.round>1]
change(#1) [self(#3).active]
ability(Crush:406) [enemy.ability(Headbutt:376).usable & enemy.ability(Healing Wave:123).usable]
ability(Deflection:490) [ enemy.ability(Headbutt:376).usable ]
ability(Crush)
endif
1
Corgi
schrieb am 2017-12-07 16:14:41
Idol[/]
Sandstorm
Crush x5 (usually)
* Skyshaper dies
* Fangor swaps in
Crush
Pass
Deflect
Gnome
Turret
Metal Fist until
* Fangor dies
(Gnome has 200ish health left)
* Dor swaps in
* Gnome dies 1st time to Headbutt
* Gnome revives
Metal Fist until 2nd Headbutt
Trainee Pet
Dor shields
Idol
Sandstorm (maintain)
Crush x however many times it takes
Deflect Headbutts
* Dor dies... eventually
Yes, the Idol can afford to take at least one Headbutt, but the Sandstorm hits Dor right through his shields for about the same amount he just healed, so it's worth the occasional frustrating misses for me.
I have also noticed, likely not the first one to do so, that when Headbutt and Healing Wave are off cooldown simultaneously, Healing Wave always goes first, so Deflect doesn't need to be wasted.
1
Hobbyhorse schrieb am 2017-06-19 07:27:36
ability(Stoneskin) [round=1]
standby [self.aura(Stunned).exists]
change(#1) [self(#3).played]
if [enemy(#2).active]
change(#2)
ability(Build Turret)
endif
ability(#1)
change(#3) [!self(#3).played & self(#3).level<25]
change(#1)
1
Hobbyhorse
schrieb am 2017-11-14 12:57:34
standby [self.aura(Stunned:927).exists]
change(#1) [self(#3).active]
ability(Stoneskin:436) [round=1]
if [enemy(#2).active]
change(#2)
ability(Build Turret:710)
endif
ability(#1)
change(#3) [!self(#3).played & !self(#3).level.max]
change(#2)
1
Xpariah schrieb am 2017-08-23 15:51:23
A quick workaround (no code solution from me, I'm afraid) is to manually hit pass then resume using the auto button.
0
Liramei schrieb am 2017-06-22 15:29:31
0
Aranesh
schrieb am 2017-06-23 02:55:41
0
Kakjens schrieb am 2016-09-25 04:24:29
Wouldn't Launch Rocket work better, at least on the third mob?
Why swap to carry after Metal Fist? Swap after Gnome dies.
No Deflection on Dor? Depending on amount of hits for Slicing Wind, Idol could be in pretty bad shape.
0
Saintgabrial schrieb am 2016-12-01 13:34:42
I've tried the Launch Rocket a few times now and its about the same. Didn't finish faster or do more damage so either one can be used.
As for Deflection, I do use that once in awhile it all depends on if I think I may need too. Most of the time I do not. You'll just have to watch your pets HP and decide for yourself if its needed.
0
Kakjens schrieb am 2016-12-09 10:47:46
I would like to see a math whether that extra large hit of Sandstorm isn't negated due to subsequently smaller crushes.
"Also your Idol takes an extra hit." you probably meant "Also your Idol does an extra hit which restores some hp."
Turrets don't work on Dor after Shell Shield but rockets do. There's also a benefit of casting Launch Rocket instead of Metal Fist but it's not easy to make statements when to use which (like, if Clockwork Gnome will die and similar). Additionally , Launch Rocket seems to have slightly faster animation.
0
Saintgabrial schrieb am 2016-12-14 13:24:10
Yes I made a mistake with Sandstorm being strong against flyers. It is strong against Dor the Wall. But you wouldn't want to use it on Dor the Wall until the very last hit, otherwise you will lessen the damage you do to Dor the Wall and miss more due to the 10% accuracy loss.
What I meant was you get an extra strong hit with Sandstorm where Stoneskin has no attack and you also get hit, being the extra hit you take. Sandstorm and 4 Crush if no misses and you get hit 5 times (Most of the time there is no misses). Where stoneskin you need 5 crushes, so you get hit 6 times. It will equal the same if the first method gets one miss.
Yes the rocket is good against Dor the Wall vs Turrets for the Turrets only hit him for 2 turns. But, if you get stunned after you set up the first (Launch Rocket) it screws the whole thing up. Where Metal Fist if you get stunned you can just pass and continue.
The swapping of the level pet after the first Metal Fist is because sometimes you get a few critical hits in and will kill Dor the Wall before Clockwork Gnome dies and you won’t get to swap the level pet in. It did this 2 times while testing these two strategies. Not sure out of how many tough I lost track, it was over 2 hours of testing all the different ways to do this strategy. I will change this part though, for it’s such a small chance that it may never happen for most people.
Thank you for your input. I did change a few things and made a guide with the whole thing you suggested. This way people have an option if they can track enemy abilities.
0
Kakjens schrieb am 2016-12-17 05:15:31
I like this iteration of strategy. Including of "Pass if stunned" would remove the wondering of the beginner of what do do.
You could also add that Headbutt does approximately 420 Beast damage - so simply 420 damage on Anubisath Idol.
If I remember correctly, battle pet spells crit 5% of time. So indeed, having at least two on them crit is even rarer.
0
Zaymaa schrieb am 2016-09-14 04:39:20
0
Kakjens schrieb am 2016-09-25 04:25:34
0
Kakjens schrieb am 2016-12-17 05:00:04
0
Gráinne
schrieb am 2015-06-07 12:06:39
0
Aranesh
schrieb am 2015-07-19 05:46:25
0
TDPetBattle-Script schrieb am 2017-06-13 17:50:19
Line 10: if [enemy(#3l).active]
should be: if [enemy(#3).active]
2
chernuw#2888
schrieb am 2022-07-14 00:05:40
use(Spiritfire Bolt:1066) [enemy(#1).active]
change(#2) [self(#1).active & enemy(#2).active]
use(Build Turret:710) [enemy(#2).active]
use(Metal Fist:384)
change(#3) [self(#2).dead & !self(#3).played]
change(#1)
use(Deflection:490) [enemy(#3).ability(Headbutt:376).usable & !enemy(#3).ability(Healing Wave:123).usable]
use(Spiritfire Bolt:1066)
0
Anonymous schrieb am 2017-02-10 14:50:19
0
Lea schrieb am 2017-02-12 06:04:16
0
Anonymous schrieb am 2017-08-27 10:00:10
0
Суриката schrieb am 2017-07-08 06:18:31
-1
Canoptek schrieb am 2017-06-17 04:39:16
if [enemy(#1).active]
ability(436) [enemy.round=1]
ability(406)
endif
if [enemy(#2).active]
change(#2)
ability(710)
ability(384)
endif
if [enemy(#3).active]
ability(384) [enemy.hp>304]
change(#3) [self(#2).dead & !self(#3).played]
change(#1) [self(#3).active]
ability(406)
standby
endif
Neuer Kommentar: