
Estratégia adicionada por kallasha
|
Média de Avaliação: |
1 |
|
Avaliações: |
1 |
|
Seu voto: |
|
Creator |
|||||||||
|---|---|---|---|---|---|---|---|---|---|
|
Etiquetas
Filtro de estratégias:
|
|||||||||

Qualquer Nível 1+ Mascote
|

Carry Pet will take no damage, No RNG against Lil' Tarecgosa and Fledgling Warden Owl. TD Script credit: TURBOKillex
|
Nível 1+ Script |
2 | 5.0 |
N / D | 82 |
80
1:20
|
12+ | |

Qualquer Nível 1+ Mascote

|
Nível 1+ Script |
2 | 5.0 |
N / D | 20 |
78
1:18
|
9 | ||

Qualquer Nível 1+ Mascote
|
I am using this every day, works flawlessly, and its fast.
|
Raça (breed) Nível 1+ Script |
2 | 4.7 |
N / D | 29 |
105
1:45
|
16+ | |
Qualquer Nível 1+ Mascote
|
|
This method is an alteration of Mel's guide from Wowhead. Mel's method is much safer to use as it includes deflecting the only damaging ability from Dor, but also more complicated as you need to track the ability cooldowns.
It used to feature Ídolo Anubisath, added Anubisath Marcado pelo Caos for coverage (You can still use the classic one though if you start from Litopele). |
Nível 1+ Script |
2 | 4.6 |
N / D | 37 |
149
2:29
|
19+ |
Qualquer Nível 1+ Mascote
|
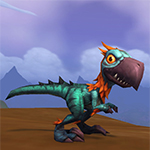
Didn't bother to test every Dragonetinho Onírico breed since it shouldn't matter.
|
Nível 1+ Script |
2 | 4.5 |
N / D | 29 |
105
1:45
|
15+ | |

Qualquer Nível 1+ Mascote
|
Your most powerful breeds will make this fight go fast and smooth, but it will work with other breeds.
|
Nível 1+ Script |
2 | 5.0 |
N / D | 6 |
123
2:03
|
21 | |

Qualquer Nível 1+ Mascote
|
|
Nível 1+ |
2 | 5.0 |
N / D | 12 |
150
2:30
|
20 | |

Qualquer Nível 1+ Mascote
|
Kakjens
|
Nível 1+ |
2 | 5.0 |
N / D | 2 |
175
2:55
|
24+ | |
|
Qualquer Nível 1+ Mascote
|
Nexus Whelpling (1,2,2) is a drop in replacement for the Stormborne Whelpling, and you can use any moth in the second slot that has Alpha Strike, Cocoon Strike and Moth Dust.
|
Nível 1+ Script |
2 | 0.0 |
N / D | 2 |
125
2:05
|
17+ | |
Qualquer Nível 1+ Mascote
|
|
Nível 1+ Script |
2 | 5.0 |
N / D | 0 |
112
1:52
|
18+ | |
|
Qualquer Nível 1+ Mascote

|
Aleatório Nível 1+ Script |
2 | 5.0 |
N / D | 0 |
86
1:26
|
12+ | ||

Qualquer Nível 1+ Mascote
|
Unlucky crits can cause your dragon to die before Fangor does, but don't worry! Your bird should still be able to finish the job easily.
|
Nível 1+ Script |
2 | 4.5 |
N / D | 2 |
95
1:35
|
13+ | |

Qualquer Nível 1+ Mascote
|
|
Nível 1+ |
2 | 3.0 |
N / D | 3 |
170
2:50
|
28+ | |

Qualquer Nível 10+ Mascote
|
|
Nível 10+ |
2 | 0.0 |
N / D | 0 |
162
2:42
|
24 | |
Qualquer Nível 1+ Mascote
|
This is a variation of a strat first posted on Wowhead by Midobu.
It works best with an H/P NFD. It's also fine with P/P and P/B breeds although they are slightly riskier. I haven't tested them but I would avoid S/S and S/B breeds. |
Raça (breed) Aleatório Nível 1+ Script |
2 | 0.0 |
N / D | 0 |
105
1:45
|
16 | |
|
Qualquer Nível 1+ Mascote
|
Hyuna of the Shrines:215A:122A14D:21141LK:ZL:P:::::1::
Stategy by Stabbystick on Wowhead. Fast and reliable |
Raça (breed) Nível 1+ |
2 | 0.0 |
N / D | 0 |
98
1:38
|
14+ | |
Qualquer Nível 1+ Mascote
|
You can tweak the script if Albino Chimaeraling is faster than Dor The Wall by changing the duration from 1 to 0. Slower is stronger (faster clear) due to Tail Sweep being stronger.
|
Raça (breed) Aleatório Nível 1+ Script |
2 | 0.0 |
N / D | 0 |
100
1:40
|
16+ | |

Qualquer Nível 1+ Mascote
|
Nível 1+ |
2 | 0.0 |
N / D | 0 |
98
1:38
|
15+ | ||
Qualquer Nível 1+ Mascote
|
This is a fun and fast strategy that will allow you to power boost any level carry pet. My original strategy uses a Nexus Whelpling in the first slot with Arcane Storm, Mana Surge.
|
Nível 1+ |
2 | 0.0 |
N / D | 0 |
85
1:25
|
13-14 | |
Qualquer Nível 1+ Mascote
|
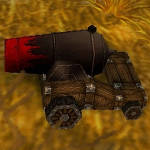
Any excuse to get out the cannon...
|
Nível 1+ Script |
2 | 0.0 |
N / D | 0 |
113
1:53
|
16+ | |

Qualquer Nível 1+ Mascote
|
Brilhapata works as alt #1; Select: Morder, It might add an extra round.
H/H #2 is BIS (~65%, 11 rounds). You can skip level pet swap if you want to save a round |
Nível 1+ Script |
2 | 0.0 |
N / D | 0 |
84
1:24
|
12 | |

Qualquer Nível 1+ Mascote
|
I had Sangue Fervente (P/P) here because hit hits like a darn truck. Does alot of damage.
Had Estrelita de Ferro (H/H) for the extra health. But I do believe it would work out as well with a (H/P) Good Luck! |
Raça (breed) Aleatório Nível 1+ |
2 | 1.0 |
N / D | 0 |
120
2:00
|
16+ |
Incl. passos:


Habilidades: 2 2 1
Raça (breed): PP
| Raça (breed) | Vida | Poder | Velocidade |
|---|---|---|---|
| PP | 1400 | 325 | 260 |
| BB | 1481 | 276 | 276 |
| SS | 1400 | 260 | 325 |
| HH | 1725 | 260 | 260 |
| HP | 1546 | 289 | 260 |
| PS | 1400 | 289 | 289 |
| HS | 1546 | 260 | 289 |
| PB | 1465 | 289 | 273 |
| HB | 1546 | 273 | 273 |
>324 |


Qualquer Nível 1+ Mascote
I had Sangue Fervente (P/P) here because hit hits like a darn truck. Does alot of damage.
Had Estrelita de Ferro (H/H) for the extra health. But I do believe it would work out as well with a (H/P)
Good Luck!
| Antes | Depois | Ganho de Experiência | |
|---|---|---|---|
| 1 | ➜ | 13 | 5981 |
| 2 | ➜ | 13 | 6353 |
| 3 | ➜ | 14 | 6683 |
| 4 | ➜ | 14 | 6971 |
| 5 | ➜ | 14 | 7219 |
| 6 | ➜ | 15 | 7425 |
| 7 | ➜ | 15 | 7590 |
| 8 | ➜ | 16 | 7714 |
| 9 | ➜ | 16 | 7796 |
| 10 | ➜ | 17 | 7838 |
| 11 | ➜ | 17 | 7838 |
| 12 | ➜ | 18 | 7796 |
| 13 | ➜ | 19 | 7714 |
| 14 | ➜ | 19 | 7590 |
| 15 | ➜ | 20 | 7425 |
| 16 | ➜ | 20 | 7219 |
| 17 | ➜ | 21 | 6971 |
| 18 | ➜ | 22 | 6683 |
| 19 | ➜ | 22 | 6353 |
| 20 | ➜ | 23 | 5981 |
| 21 | ➜ | 23 | 5569 |
| 22 | ➜ | 24 | 5115 |
| 23 | ➜ | 25 | 3900 |
| 24 | ➜ | 25 | 1980 |
|
Chapéu de Safari |
|
|
Petisco Menor |
|
|
Petisco |
|
|
Chapéu Darkmoon |
|
|
Pet Battle Week |
|
= |
Níveis de animal de estimação para 25 com perda mínima de XP |
|
|
= |
XP adicional acima do nível 25 é perdido |
|
Para melhor exibição da sua estratégia, por favor siga estas orientações:


Para melhor exibição da sua estratégia, por favor siga estas orientações:
Para melhor exibição da sua estratégia, por favor siga estas orientações:
Para melhor exibição da sua estratégia, por favor siga estas orientações:
Para melhor exibição da sua estratégia, por favor siga estas orientações:
Para melhor exibição da sua estratégia, por favor siga estas orientações:
Para melhor exibição da sua estratégia, por favor siga estas orientações:
Para melhor exibição da sua estratégia, por favor siga estas orientações:
Para melhor exibição da sua estratégia, por favor siga estas orientações:
Para melhor exibição da sua estratégia, por favor siga estas orientações:
Para melhor exibição da sua estratégia, por favor siga estas orientações:
Para melhor exibição da sua estratégia, por favor siga estas orientações:
Para melhor exibição da sua estratégia, por favor siga estas orientações:
Para melhor exibição da sua estratégia, por favor siga estas orientações:
Para melhor exibição da sua estratégia, por favor siga estas orientações:

Dor a Muralha - o nome cai bem com esta tartaruga irritante.

1
(OP) kallasha
escreveu em 2024-02-11 18:35:43
1
DragonsAfterDark
escreveu em 2024-01-01 07:56:06
1
DragonsAfterDark
escreveu em 2022-03-29 21:16:46
My biggest issue in following the strat came with Dor the Wall. I definitely needed three sets of Wind-Up followed by Toxic Smoke then Explode with the H/H breed. This is mostly because of the heal, because even without getting stunned Dor healed too much for it to end on 6 rounds vs Dor as indicated above.
This is where not going as many rounds on Fangor with Blood Boil can cause an issue. If Fangor gets a couple hits, then if you get stunned on Dor, it can get dicey on the Iron Starlette's health vs Dor, as well as the IS being slower.
Just things to keep in mind while using this strategy ^^
Novo Comentário: