
전략이 추가됨. 추가자: DragonsAfterDark
167
167
|
Average rating: |
4.7 |
|
Ratings: |
132 |
|
귀하의 투표: |
|
Creator |
|||||||||
|---|---|---|---|---|---|---|---|---|---|
|
Tags
Filter strategies:
|
|||||||||


|
스크립트 |
2 | 4.8 |
100% | 76 |
95
1:35
|
10-11 | ||


|
스크립트 |
2 | 4.8 |
99% | 50 |
90
1:30
|
9 | ||

|
스크립트 |
2 | 4.8 |
100% | 65 |
68
1:08
|
8 | ||


|

|
스크립트 |
2 | 4.7 |
100% | 167 |
125
2:05
|
17-18 | |


|
10 rounds.
|
스크립트 |
2 | 4.7 |
100% | 15 |
87
1:27
|
10 | |

|
스크립트 |
2 | 4.7 |
100% | 12 |
90
1:30
|
10 | ||
|
|
스크립트 |
2 | 4.5 |
100% | 49 |
115
1:55
|
13 | ||


|
알엔지 스크립트 |
2 | 4.3 |
98% | 44 |
149
2:29
|
17+ | ||


|
I was struggling to win this fight so I tried to mix up some strategies and I came up with this one which has never failed so far.
Hope this helps some of you. Edit 25/01/2025: - Adjusted the strategy to better align with the script, which appears to yield more consistent outcomes. - Specified the breeds that offer the best chances of success. However, the other breeds, while more prone to RNG, still deliver acceptable results. |
번식 스크립트 |
2 | 4.2 |
100% | 47 |
146
2:26
|
19 | |


|
If using 영원의 소형 기계용 as an alt #1 pet;
the 2nd pet must have at least 304 Power. |
스크립트 |
2 | 5.0 |
100% | 8 |
67
1:07
|
7 | |
|
|
Kills em every time.
|
번식 스크립트 |
2 | 5.0 |
99% | 4 |
100
1:40
|
10+ | |
|
|
There is a chance for Rocko to heal back to a point where your Wind-Up (even with the 305 Power Starlette) won't kill Rocko before 2nd turn of Stone Form... I recommend P/P breed.
(10-12 rounds) |
알엔지 스크립트 |
2 | 4.2 |
100% | 10 |
113
1:53
|
12 | |
|
|
Tested on live, worked multiple times in a row.
|
번식 스크립트 |
2 | 4.9 |
97% | 4 |
137
2:17
|
16 | |

|
알엔지 |
2 | 4.6 |
N/A | 6 |
126
2:06
|
16+ | ||
|
|
All credit for this strat goes to DragonsAfterDark.
I simply modified it to be Unborn Valkyr in the final slot to replace Macabre Marrionette. |
알엔지 스크립트 |
2 | 4.5 |
100% | 11 |
102
1:42
|
13+ | |

|
This basically comes down too surviving and bursting the last pet before he heals to much.
The first slot could be any mechanical pet, Personally i've just lil'bling with 금화를 내리소서 and 팽창 If you can get a bit of damage on the second pet that is fine but not necessary for victory. Spectral Raven deals very well with the healing of Rocko |
2 | 4.5 |
N/A | 8 |
158
2:38
|
18 | ||
|
|
알엔지 스크립트 |
2 | 4.4 |
87% | 5 |
115
1:55
|
15 | ||
|
|
알엔지 |
2 | 4.3 |
N/A | 4 |
127
2:07
|
15 | ||

|
알엔지 스크립트 |
2 | 4.2 |
84% | 4 |
125
2:05
|
14+ | ||
|
|
Power breeds of 강철의 샛별 tested. 12 rounds.
|
스크립트 |
2 | 5.0 |
100% | 2 |
96
1:36
|
12 | |
|
|
8
|
스크립트 |
2 | 5.0 |
100% | 5 |
73
1:13
|
8 | |

|
I haven't had Rocko kill the Revenant, but there's a chance it could happen. I've done the math for the undead decrease in damage, and I'm *pretty sure* that with the Lightning Storm damage you should still be fine. However, the script should still run for Supercharge & Call Lightning for the Yeti in case.
Video for Fight |
스크립트 |
2 | 5.0 |
100% | 0 |
75
1:15
|
9 | |


|
스크립트 |
2 | 5.0 |
100% | 1 |
72
1:12
|
9 | ||


|
번식 스크립트 |
2 | 5.0 |
100% | 1 |
80
1:20
|
8 | ||

|
Not quick but fun... JUDO CHOP
I really like seeing Eyegor(s pets) get punched S/S > P/P Note: If using a P/P skip round 9 |
번식 스크립트 |
2 | 5.0 |
100% | 1 |
100
1:40
|
11 | |

|
Make sure you're using a P/P 강철의 샛별.
|
번식 스크립트 |
2 | 0.0 |
98% | 1 |
123
2:03
|
12 | |


모든 애완동물
|
Becareful check if your third pet has less hp than the second or the strat fail
|
알엔지 스크립트 |
2 | 5.0 |
73% | 2 |
122
2:02
|
16 | |


모든 레벨 10+ 애완동물
|
Had to overwrite strat;
So made this... Very RNG |
번식 알엔지 레벨 10+ 스크립트 |
2 | 5.0 |
44% | 2 |
101
1:41
|
12 | |
|
I tried to come up with a faster strategy but I couldn't seem to get it below 1:40 despite experimenting with different pets in second slot.
I think my favorite was Eye Of Corruption with Chaos Beam x 2, Curse of Doom, Nightmare for its moves but it ended up being just as fast. Dibbler was a more common pet I decided. I was using the Stun from Lovestruck to prevent the additional healing rounds of Stone Form as a reactionary measure, If it has to be scripted its either where I put it or 1200 health or below I'd guess.. |
2 | 0.0 |
N/A | 1 |
105
1:45
|
12-13 | ||
|
|
2 | 0.0 |
N/A | 1 |
127
2:07
|
15+ | |||
|
|
2 | 5.0 |
N/A | 0 |
99
1:39
|
10 | |||
|
|
8
|
스크립트 |
2 | 4.8 |
97% | 2 |
70
1:10
|
8 | |
|
|
스크립트 |
2 | 4.8 |
99% | 1 |
152
2:32
|
18+ | ||
|
|
I have tested the script 5 times and won all of them. Lil Bling will die to Spindler AoE after being switches out, but will revive.
Rocko might take a long time to kill but just use Supercharge off CD and follow with either Call Lightning or Wind-Up. |
알엔지 스크립트 |
2 | 3.3 |
60% | 4 |
157
2:37
|
19 | |
|
번식 알엔지 |
2 | 3.6 |
N/A | 4 |
102
1:42
|
11+ | ||
|
|
알엔지 |
2 | 3.3 |
N/A | 2 |
144
2:24
|
17 | ||
|
|
3 pets for all SL WQ
|
알엔지 스크립트 |
2 | 3.5 |
80% | 2 |
95
1:35
|
10 | |
|
|
Haven't tested other breeds.
RNG seems to decide this fight with this team, but I'll keep looking for a surefire. If you have a Warbot, try my similar strat. GL. |
번식 알엔지 |
2 | 3.8 |
N/A | 2 |
150
2:30
|
21+ | |
|
|
This is my first strategy so sorry in advance if it ends up being inconsistent.
Might be breed dependent idk. There seems to be a threshold where Rocko uses his heal, and I found armageddon into savage talon puts him just in range to get nuked by Iron Starlette while still being out of his heal range. There might be ranges where savage talon fails, but I haven't had it happen. I'm using savage talon since it more often than not saves a turn. If it doesn't work for you, try using quills. |
알엔지 |
2 | 3.0 |
N/A | 2 |
99
1:39
|
12 | |


|
a slightly different twist if you aren't stocked up on lil' blings
|
알엔지 |
2 | 3.0 |
N/A | 1 |
130
2:10
|
16+ | |
|
|
This strategy for user who don't have pets in other strategies.
|
알엔지 |
2 | 2.5 |
N/A | 4 |
104
1:44
|
12+ | |

|
알엔지 |
2 | 2.6 |
N/A | 2 |
100
1:40
|
12 | ||
|
|
알엔지 |
2 | 2.9 |
N/A | 1 |
130
2:10
|
16+ | ||
|
|
A slightly optimized strategy (but still not using DoTs on my first pet for eventual Toxic Wound fixes). Wanted to get rid of these round-wasting 태엽 감기 charges and damage going into Rocko's 돌 변신 in my other strategy.
You can also use B/B Dibbler but with Explode dealing less damage you'll need a standard attack to finish off Rocko or Feline Familiar for the bigger Darkness damage. |
번식 스크립트 |
2 | 0.0 |
100% | 0 |
89
1:29
|
9-10 | |

|
Strategy after changing the world quest in patch 9.1
|
알엔지 |
2 | 0.0 |
N/A | 0 |
116
1:56
|
15+ | |

|
Haven't tested other breeds; comment and I'll add.
Early crits and Spiderling Swarm RNG can lose the fight. If you have a Warbot, try my similar strat. GL. |
번식 알엔지 |
2 | 0.0 |
N/A | 0 |
143
2:23
|
17+ | |

|
This one seems solid, if a bit of a mess, but I haven't tested enough to call it RNG-proof. Call it in the comments and I can add the RNG tag.
Haven't tested other breeds. Comment and I will add. Adjust as necessary if RNG favors you, e.g. save Warbot's Extra Plating for turn before Spindler's Spiderling Swarm is up. |
번식 알엔지 트리키 |
2 | 0.0 |
N/A | 0 |
152
2:32
|
18+ | |


|
I have not tried this strategy with other breeds of Iron Starlette or Ultratonk, but I am curious to see if they work.
|
번식 알엔지 |
2 | 0.0 |
N/A | 0 |
132
2:12
|
17 | |
|
|
알엔지 |
2 | 0.0 |
N/A | 0 |
127
2:07
|
15+ | ||
|
I found this setup super comfy. No RNG and any crits on your side trivializes the fight further. I have not tested with other breeds of Blighthawks but I assume any will work.
|
2 | 0.0 |
N/A | 0 |
145
2:25
|
17+ | ||

|
알엔지 |
2 | 0.0 |
N/A | 0 |
142
2:22
|
15+ | ||


|
2 | 0.0 |
N/A | 0 |
127
2:07
|
17 | |||

|
(By Facetious#1105, based on KaZan#3856's strategy)
|
알엔지 스크립트 |
2 | 2.0 |
39% | 0 |
144
2:24
|
17+ | |
|
|
알엔지 |
2 | 1.6 |
N/A | 0 |
133
2:13
|
17 |
Incl. steps:


| Before | After | Experience Gain | |
|---|---|---|---|
| 1 | ➜ | 3 | 239 |
| 2 | ➜ | 4 | 254 |
| 3 | ➜ | 4 | 267 |
| 4 | ➜ | 5 | 279 |
| 5 | ➜ | 6 | 289 |
| 6 | ➜ | 6 | 297 |
| 7 | ➜ | 7 | 304 |
| 8 | ➜ | 8 | 309 |
| 9 | ➜ | 9 | 312 |
| 10 | ➜ | 10 | 314 |
| 11 | ➜ | 11 | 314 |
| 12 | ➜ | 12 | 312 |
| 13 | ➜ | 13 | 309 |
| 14 | ➜ | 14 | 304 |
| 15 | ➜ | 15 | 297 |
| 16 | ➜ | 16 | 289 |
| 17 | ➜ | 17 | 279 |
| 18 | ➜ | 18 | 267 |
| 19 | ➜ | 19 | 254 |
| 20 | ➜ | 20 | 239 |
| 21 | ➜ | 21 | 223 |
| 22 | ➜ | 22 | 205 |
| 23 | ➜ | 23 | 185 |
| 24 | ➜ | 24 | 163 |
|
탐험대 모자 |
|
|
하급 애완동물 간식 |
|
|
애완동물 간식 |
|
|
다크문 중산모 |
|
|
애완동물 전투 주 |
|
= |
Pet levels to 25 with minimal XP lost |
|
|
= |
Additional XP above level 25 is lost |
|
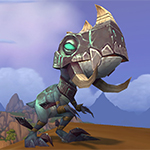
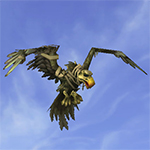
| 지옥 깃든 하늘지느러미 | PP |
| 익키 | PS |
| 죽음의 무도 해골 | HP |
For the best display of your strategy, please follow these guidelines:


For the best display of your strategy, please follow these guidelines:
For the best display of your strategy, please follow these guidelines:
For the best display of your strategy, please follow these guidelines:
For the best display of your strategy, please follow these guidelines:
For the best display of your strategy, please follow these guidelines:
For the best display of your strategy, please follow these guidelines:
For the best display of your strategy, please follow these guidelines:
For the best display of your strategy, please follow these guidelines:
For the best display of your strategy, please follow these guidelines:
For the best display of your strategy, please follow these guidelines:
For the best display of your strategy, please follow these guidelines:
For the best display of your strategy, please follow these guidelines:
For the best display of your strategy, please follow these guidelines:
For the best display of your strategy, please follow these guidelines:
For the best display of your strategy, please follow these guidelines:

Beware; for I am fearless, and therefore powerful!


1
Ophy 글 올리기 2022-02-19 04:28:28
0
Kiirrah 글 올리기 2020-12-26 23:32:02
0
Allure 글 올리기 2021-10-01 14:04:41
2
花生村#3459
글 올리기 2021-06-29 03:32:53
1
Martin 글 올리기 2021-03-19 07:16:03
3
Gráinne
글 올리기 2021-03-19 08:28:06
I normally run this strat, with a couple of minor tweaks, so since it the WQ was up today, I thought I'd have a look at your idea of leveraging the remaining rounds of Shattered Defenses on Rocko with a burst pet.
I used Fledgling Warden Owl rather than Gilnean Raven, for the extra Power.
Darkness would of course cut Rocko's healing by half, but as it happened, my Call Darkness, buffed by Shattered Defenses, killed Rocko in one, with no crits anywhere on Rocko, so I'll be using that in future. :)
3
Maizou
글 올리기 2021-04-22 00:41:40
2
Paww
글 올리기 2021-05-23 14:31:09
1
Pilgara 글 올리기 2021-05-23 10:12:55
1
Dyz
글 올리기 2021-05-08 23:58:20
3
(OP) DragonsAfterDark
글 올리기 2021-05-09 00:08:40
ability(Wild Magic:592) [enemy(#2).active & enemy.round=2]
You might need to update your tdscript addons, or recopy the script and re-paste it
1
Dyz
글 올리기 2021-05-17 18:10:08
1
dawni
글 올리기 2021-04-08 15:30:53
1
GCSuns
글 올리기 2021-03-06 15:18:21
0
ziboo
글 올리기 2021-02-14 18:50:22
Today on a lvl 58 it's failed 3x in a row. I'm not trying to be paranoid, but I have noticed that non-max lvls doing pet battles in SL seem to fail more than the max lvls.
Maybe it's just bad RNG, but seriously - nothing different, follow the steps and RNG says not today! 2/14/21.
EDIT: Worked the fourth time. Must be bad RNG. Very Weird. (edited)
2
(OP) DragonsAfterDark
글 올리기 2021-02-14 20:11:08
1
TheGrandmaGamer
글 올리기 2021-03-06 12:01:25
1
Purpleangelcat
글 올리기 2021-02-14 15:37:31
0
Dorelei 글 올리기 2021-02-03 17:27:08
So it doesn't change the strat or effect at all, but if you want to see Boneclaw die without ever making it back out again, it's worth a smile.
1
ModusPwnens
글 올리기 2021-01-05 00:18:48
...should I? Or should I not? Is it actually useful, or is it unnecessary and pointless? If you're writing a guide to the fight, why don't you actually tell people what is ideal rather than shrugging like this? (edited)
1
(OP) DragonsAfterDark
글 올리기 2021-01-05 00:25:01
0
Paul#16227
글 올리기 2021-02-01 20:44:50
1
ResidentWeevil
글 올리기 2021-01-20 02:09:18
2
Maritan
글 올리기 2020-12-23 11:39:31
1
Cheddur 글 올리기 2020-12-08 18:26:46
3
Sins
글 올리기 2020-12-06 06:13:33
0
cyberob 글 올리기 2020-12-06 03:07:32
1
범죄연구소#3102
글 올리기 2020-12-03 16:17:23
1
Shade
글 올리기 2020-12-02 15:01:55
1
Caolynn#1359
글 올리기 2020-11-28 18:46:33
1
Undyingone#1778
글 올리기 2020-11-28 10:33:39
0
Raggy 글 올리기 2020-11-28 06:31:27
Fel Immolate and Quake until it dies, swap into Ikky and Black Claw into Quills until Spindler dies. Should be able to hit the Black Claw/Flock combo for Rocko.
2
Ponderwoman
글 올리기 2020-11-28 06:24:02
Direbeak Hatchling 121
Snowfeather Hatchling 121
Macabre Marionette 221
0
Rodricous 글 올리기 2020-11-25 12:33:45
2
The_Zwut
글 올리기 2020-11-25 11:09:10
2
Bandar3
글 올리기 2020-11-25 10:04:30
4
qraparta
글 올리기 2020-11-25 02:46:26
1
Dakender#1566
글 올리기 2020-08-29 17:49:04
0
rony 글 올리기 2021-04-27 23:08:56
ability(Magia salvaje:592) [round=2]
ability(Sacudida de alas:1756) [round=3]
ability(Inmolación vil:901) [round=4]
ability(Magia salvaje:592) [round=5]
ability(Inmolación vil:901) [enemy(Tejedor:2993).active]
change(Ikky:1532)
ability(Púas:184) [enemy(Tejedor:2993).active]
ability(Garra negra:919) [enemy(Rocko:2994).hp.full]
ability(Bandada:581) [enemy(Rocko:2994).active]
change(Marioneta macabra:1351)
ability(Fiesta de los muertos:1093)
ability(Mordisco en hueso:648)
새로운 댓글: