
| Human Resources | Dragons Make Everything Better | Fun With Flying | Not Quite Dead Yet |  Critters With Huge Teeth Critters With Huge Teeth |
| Magicians Secret | Element of Success | Beast Mode | Hobbyist Aquarist | Machine Learning |
Strategy added by Amilmadien
1
1
|
Average rating: |
3.4 |
|
Ratings: |
7 |
|
Your vote: |
|
Creator |
|||||||||
|---|---|---|---|---|---|---|---|---|---|
|
Tags
Filter strategies:
|
|||||||||

Initially tried with a baneling. Was close. Switched out wolper and it was an easy win.
|
2 | 4.9 |
N/A | 14 |
124
2:04
|
16 | |||
Script |
2 | 4.6 |
74% | 25 |
160
2:40
|
22+ | |||

Any snail can be used =)
|
2 | 3.2 |
N/A | 3 |
165
2:45
|
23+ | |||

I was having trouble getting the other strategies to work consistently.
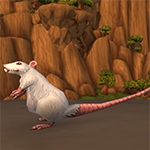
50+ bandages later, the only reason I failed with this strat was RNG due to Sandstorm/Call Darkness. Per Hammerforge's and Zivarra's comments, I've updated the breed on the Blind/Frostfur Rat to HB/HP/BB, but please let me know if other breeds work. |
Breed RNG |
2 | 3.4 |
N/A | 1 |
135
2:15
|
18 | ||

Strategy has a relativley high chance of failure, but it may work after a few tries
|
RNG |
2 | 2.8 |
N/A | 0 |
155
2:35
|
24 | ||

Very RNG based, may take a few tries.
|
RNG |
2 | 2.3 |
N/A | 1 |
147
2:27
|
23+ | ||
RNG Tricky |
2 | 1.0 |
N/A | 1 |
175
2:55
|
27-28 | |||

This is a tough battle, Critter vs. Beast but this strategy is safe and RNG free, though it will be tough due to the opponents being heavily stacked against your Critters!
That said, we manage to deal good damage to Delta via Woodchipper and Nut Barrage -both of which leave DOTs, all aided by a speed boost from Adrenaline Rush. Your Shy Bandicoon will finish up against Delta with Powerball and Tongue Lash. Finally, your Fawn (or variant) will even up the odds, casting Nature's Ward changing itself into the Elemental state thus giving it enough longevity to finish off Little Blue with Headbutt and Hoof. A tdbattlescript is supplied and tested. |
RNG Script |
2 | 1.9 |
2% | 0 |
170
2:50
|
26+ |
Incl. steps:


Substitutes:
1 / 5
1 / 2
I was having trouble getting the other strategies to work consistently.
50+ bandages later, the only reason I failed with this strat was RNG due to Sandstorm/Call Darkness.
Per Hammerforge's and Zivarra's comments, I've updated the breed on the Blind/Frostfur Rat to HB/HP/BB, but please let me know if other breeds work.
| Before | After | Experience Gain | |
|---|---|---|---|
| 1 | ➜ | 3 | 239 |
| 2 | ➜ | 4 | 254 |
| 3 | ➜ | 4 | 267 |
| 4 | ➜ | 5 | 279 |
| 5 | ➜ | 6 | 289 |
| 6 | ➜ | 6 | 297 |
| 7 | ➜ | 7 | 304 |
| 8 | ➜ | 8 | 309 |
| 9 | ➜ | 9 | 312 |
| 10 | ➜ | 10 | 314 |
| 11 | ➜ | 11 | 314 |
| 12 | ➜ | 12 | 312 |
| 13 | ➜ | 13 | 309 |
| 14 | ➜ | 14 | 304 |
| 15 | ➜ | 15 | 297 |
| 16 | ➜ | 16 | 289 |
| 17 | ➜ | 17 | 279 |
| 18 | ➜ | 18 | 267 |
| 19 | ➜ | 19 | 254 |
| 20 | ➜ | 20 | 239 |
| 21 | ➜ | 21 | 223 |
| 22 | ➜ | 22 | 205 |
| 23 | ➜ | 23 | 185 |
| 24 | ➜ | 24 | 163 |
|
Safari Hat |
|
|
Lesser Pet Treat |
|
|
Pet Treat |
|
|
Darkmoon Hat |
|
|
Pet Battle Week |
|
= |
Pet levels to 25 with minimal XP lost |
|
|
= |
Additional XP above level 25 is lost |
|
For the best display of your strategy, please follow these guidelines:




For the best display of your strategy, please follow these guidelines:


For the best display of your strategy, please follow these guidelines:


For the best display of your strategy, please follow these guidelines:


For the best display of your strategy, please follow these guidelines:


For the best display of your strategy, please follow these guidelines:


For the best display of your strategy, please follow these guidelines:


For the best display of your strategy, please follow these guidelines:


For the best display of your strategy, please follow these guidelines:


For the best display of your strategy, please follow these guidelines:


For the best display of your strategy, please follow these guidelines:


For the best display of your strategy, please follow these guidelines:


Eighty-eight turbo whiplashes? No, thanks.

1
serephita
wrote on 2023-03-19 03:49:31
1
Gráinne
wrote on 2023-03-19 06:36:47
Breeds and RNG definitely play a role here.
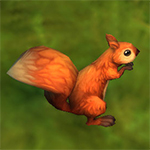
I used Nuts as my squirrel, as the squirrel I had that most closely satisfies the speed > 285 constraint. That 285 constraint is essential against Turbo. Without it, your squirrel WILL die a round early, as you describe, because you won't have the advantage of the first move.
I used a P/P Frostfur Rat both times. It seemed to work well enough.
Both times, the strat went exactly as specified until the last pet.
You have to factor into the usual crit RNG that you will be operating in Sandstorm, then Immediately Darkness, for the last 6 rounds. With an added 10% miss chance, you just gotta roll the dice.
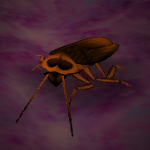
My first attempt, I used an S/S Nether Roach. That wasn't the best idea. Whiplash is a flyer, and therefore faster than anything you can use until it hits half-health; then its speed drops to 260, which is slower than any Nether Roach. The S/S Nether Roach almost did it.
Second attempt I switched to a H/H Nether Roach, and that won the battle easily.
So there is RNG, but hey, it's a Family strat, with a weak Family at that. I'll take it! (edited)
0
ifloops wrote on 2022-05-02 21:08:25
1
mowanza#1156
wrote on 2021-01-18 22:27:57
1
maxxownage
wrote on 2021-01-18 05:59:10
0
aaa wrote on 2020-12-22 14:14:49
1
Liadrin
wrote on 2020-12-07 15:53:17
0
Zomandrya
wrote on 2020-07-19 11:09:36
1
D3adbolt
wrote on 2020-03-14 23:06:15
1
Shadowland
wrote on 2020-01-24 18:40:22
2
Splinterverse
wrote on 2019-09-06 08:09:15
1
Tovia wrote on 2019-06-09 04:00:19
3
Saiko
wrote on 2019-01-09 03:01:20
2
Saiko
wrote on 2019-01-09 03:02:40
2
Hammerforge
wrote on 2019-01-05 00:44:19
1
(OP) Amilmadien
wrote on 2019-01-05 22:52:11
2
Zivarra
wrote on 2018-12-31 18:30:38
2
Canukistani
wrote on 2018-12-25 17:44:31
1
(OP) Amilmadien
wrote on 2018-12-26 22:14:26
I ran up to the step you described 5 times each with an SB Alpine Chipmunk, a PS Grizzly Squirrel, and a BB Squirrel with no deaths.
1
Axanum#2197
wrote on 2019-05-12 05:37:21
0
Pyve wrote on 2020-01-08 16:42:12
2
Shi-shi
wrote on 2020-01-30 02:59:43
0
metotron wrote on 2019-01-05 00:11:51
New Comment: