
| Haunted Humanoids | Deathly Dragonkin | Flickering Fliers | Unholy Undead |  Creepy Critters Creepy Critters |
| Mummified Magics | Eerie Elementals | Beast Busters | Aquatic Apparitions | Macabre Mechanicals |
Strategy added by Berendain
38
38
|
Average rating: |
4.9 |
|
Ratings: |
49 |
|
Your vote: |
|
Creator |
|||||||||
|---|---|---|---|---|---|---|---|---|---|
|
Tags
Filter strategies:
|
|||||||||


|
Script |
2 | 4.9 |
97% | 38 |
125
2:05
|
18+ | ||


|
Script |
2 | 4.8 |
98% | 68 |
93
1:33
|
11 | ||


|

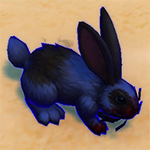
Used a BB Spireshell, BB Mudshell and HS Rabbit
|
Breed RNG |
2 | 4.6 |
N/A | 21 |
126
2:06
|
16+ | |


|
RNG |
2 | 4.2 |
N/A | 27 |
129
2:09
|
15+ | ||


|
Updated 3 March 24 by changing pets 1 & 2. Those snails are just too good to pass up! A Script has also been added. ^^
|
Script |
2 | 5.0 |
100% | 6 |
88
1:28
|
12 | |


|
The rabbits with 257 power work best here. Rabbits with 227 power rely too much on RNG from flurry.
|
Breed RNG |
2 | 4.1 |
N/A | 10 |
125
2:05
|
17 | |

|
Same outcome 5 times in a row
|
Breed |
2 | 5.0 |
N/A | 3 |
109
1:49
|
14+ | |

|
thinks boodha and DragonsAfterDark,I have combined the strategies of two people
|
2 | 5.0 |
N/A | 0 |
122
2:02
|
15-16 | ||

|
Breed RNG |
2 | 3.0 |
1% | 1 |
105
1:45
|
14+ | ||


|
Script |
2 | 0.0 |
99% | 0 |
93
1:33
|
10 |
Incl. steps:


Skills: * * 2
Breed: Any
| Breed | Health | Power | Speed |
|---|---|---|---|
| BB | 1481 | 276 | 276 |
| PP | 1400 | 325 | 260 |
| SS | 1400 | 260 | 325 |
| HS | 1546 | 260 | 289 |
| PB | 1465 | 289 | 273 |
| SB | 1465 | 273 | 289 |
>219 |
Skills: * * 2
Breed: HS
| Breed | Health | Power | Speed |
|---|---|---|---|
| HS | 1790 | 276 | 224 |
| BB | 1725 | 292 | 211 |
>219 |

Skills: * * 2
Breed: Any
| Breed | Health | Power | Speed |
|---|---|---|---|
| BB | 1481 | 276 | 276 |
>219 |

Skills: * * 2
Breed: Any
| Breed | Health | Power | Speed |
|---|---|---|---|
| PB | 1465 | 289 | 273 |
>219 |
Skills: * * 2
Breed: SS
| Breed | Health | Power | Speed |
|---|---|---|---|
| SS | 1644 | 276 | 260 |
| BB | 1725 | 292 | 211 |
| HB | 1790 | 289 | 208 |
>219 |

Skills: * * 1
Breed: Any
| Breed | Health | Power | Speed |
|---|---|---|---|
| HP | 1546 | 289 | 260 |
>219 |

Skills: * * 1
Breed: Any
| Breed | Health | Power | Speed |
|---|---|---|---|
| HP | 1627 | 305 | 227 |
>219 |

Skills: * * 2
Breed: Any
| Breed | Health | Power | Speed |
|---|---|---|---|
| HP | 1546 | 289 | 260 |
>219 |

Skills: * * 2
Breed: Any
| Breed | Health | Power | Speed |
|---|---|---|---|
| HP | 1546 | 289 | 260 |
>219 |

Skills: * * 2
Breed: Any
| Breed | Health | Power | Speed |
|---|---|---|---|
| HB | 1546 | 240 | 305 |
>219 |

Skills: * * 2
Breed: Any
| Breed | Health | Power | Speed |
|---|---|---|---|
| BB | 1400 | 260 | 309 |
| SB | 1384 | 257 | 322 |
>219 |
Skills: * * 2
Breed: HS
| Breed | Health | Power | Speed |
|---|---|---|---|
| HS | 1790 | 276 | 224 |
| BB | 1725 | 292 | 211 |
| HB | 1790 | 289 | 208 |
>219 |

Skills: * * 1
Breed: Any
| Breed | Health | Power | Speed |
|---|---|---|---|
| PB | 1465 | 289 | 273 |
>219 |

Skills: * * 2
Breed: Any
| Breed | Health | Power | Speed |
|---|---|---|---|
| HP | 1546 | 297 | 252 |
>219 |

Skills: * * 2
Breed: Any
| Breed | Health | Power | Speed |
|---|---|---|---|
| SS | 1400 | 256 | 329 |
>219 |

Skills: * 1 *
Breed: Any
| Breed | Health | Power | Speed |
|---|---|---|---|
| HB | 1587 | 277 | 261 |
>219 |

Skills: * * 2
Breed: Any
| Breed | Health | Power | Speed |
|---|---|---|---|
| PB | 1489 | 291 | 266 |
>219 |

Skills: * * 2
Breed: Any
| Breed | Health | Power | Speed |
|---|---|---|---|
| HH | 1887 | 260 | 227 |
| HP | 1709 | 289 | 227 |
| HS | 1709 | 260 | 257 |
| HB | 1709 | 273 | 240 |
>219 |

Skills: 2 * *
Breed: BB, HS, HB
| Breed | Health | Power | Speed |
|---|---|---|---|
| BB | 1644 | 292 | 227 |
| HS | 1709 | 276 | 240 |
| HB | 1709 | 289 | 224 |
| HP | 1709 | 305 | 211 |
>219 |

Skills: * * 2
Breed: Any
| Breed | Health | Power | Speed |
|---|---|---|---|
| HH | 1847 | 260 | 236 |
| HP | 1668 | 289 | 236 |
| HS | 1668 | 260 | 265 |
| HB | 1668 | 273 | 249 |
>219 |
Substitutes:
1 / 6
1 / 29
| Before | After | Experience Gain | |
|---|---|---|---|
| 1 | ➜ | 3 | 239 |
| 2 | ➜ | 4 | 254 |
| 3 | ➜ | 4 | 267 |
| 4 | ➜ | 5 | 279 |
| 5 | ➜ | 6 | 289 |
| 6 | ➜ | 6 | 297 |
| 7 | ➜ | 7 | 304 |
| 8 | ➜ | 8 | 309 |
| 9 | ➜ | 9 | 312 |
| 10 | ➜ | 10 | 314 |
| 11 | ➜ | 11 | 314 |
| 12 | ➜ | 12 | 312 |
| 13 | ➜ | 13 | 309 |
| 14 | ➜ | 14 | 304 |
| 15 | ➜ | 15 | 297 |
| 16 | ➜ | 16 | 289 |
| 17 | ➜ | 17 | 279 |
| 18 | ➜ | 18 | 267 |
| 19 | ➜ | 19 | 254 |
| 20 | ➜ | 20 | 239 |
| 21 | ➜ | 21 | 223 |
| 22 | ➜ | 22 | 205 |
| 23 | ➜ | 23 | 185 |
| 24 | ➜ | 24 | 163 |
|
Safari Hat |
|
|
Lesser Pet Treat |
|
|
Pet Treat |
|
|
Darkmoon Hat |
|
|
Pet Battle Week |
|
= |
Pet levels to 25 with minimal XP lost |
|
|
= |
Additional XP above level 25 is lost |
|
| Amethyst Softshell | BB |
| Mudshell Conch | BB |
| Gleamhoof Fawn | BB |
For the best display of your strategy, please follow these guidelines:


For the best display of your strategy, please follow these guidelines:
For the best display of your strategy, please follow these guidelines:
For the best display of your strategy, please follow these guidelines:
For the best display of your strategy, please follow these guidelines:
For the best display of your strategy, please follow these guidelines:
For the best display of your strategy, please follow these guidelines:
For the best display of your strategy, please follow these guidelines:
For the best display of your strategy, please follow these guidelines:
For the best display of your strategy, please follow these guidelines:
For the best display of your strategy, please follow these guidelines:
For the best display of your strategy, please follow these guidelines:
For the best display of your strategy, please follow these guidelines:
For the best display of your strategy, please follow these guidelines:
For the best display of your strategy, please follow these guidelines:

Get the holy water!


0
Agrogas#2257
wrote on 2023-10-05 19:02:09
1
serephita
wrote on 2023-03-31 22:39:27
0
Dgrl wrote on 2022-09-03 21:34:02
1
WhyDaRumGone
wrote on 2022-04-29 16:31:18
1
iphegenia#1809
wrote on 2022-01-27 07:17:34
1
Barbasol#1361
wrote on 2021-11-10 21:20:56
2
etheawen
wrote on 2021-08-24 09:35:40
0
Jacktheknife wrote on 2021-05-05 17:09:47
0
Jacktheknife wrote on 2021-05-05 17:09:44
2
Gladly#11647
wrote on 2021-03-24 17:22:42
3
Rigamorris
wrote on 2021-02-15 12:08:26
1
Saesra#1939
wrote on 2021-03-05 08:11:14
1
DireRaven#1566
wrote on 2021-01-24 20:10:31
2
Sinderbella
wrote on 2021-01-14 14:15:38
-1
Gildarin wrote on 2021-01-12 21:22:46
2
Gildarin wrote on 2021-01-12 21:22:43
0
Tatinte#2946
wrote on 2021-01-03 14:59:38
2
shockawocka
wrote on 2020-12-23 21:43:49
1
djkillj0y#1591
wrote on 2020-12-26 18:28:22
1
shockawocka
wrote on 2020-12-26 20:10:53
1
Strumpett#1199
wrote on 2020-12-28 08:14:09
2
Destinee
wrote on 2020-12-27 15:34:18
2
Jencathen#1392
wrote on 2020-12-22 21:51:23
2
Raoke
wrote on 2020-12-19 12:13:07
New Comment: