
| Haunted Humanoids | Deathly Dragonkin | Flickering Fliers | Unholy Undead | Creepy Critters |
| Mummified Magics | Eerie Elementals | Beast Busters |  Aquatic Apparitions Aquatic Apparitions | Macabre Mechanicals |
Strategy added by Berendain
79
79
|
Average rating: |
4.9 |
|
Ratings: |
78 |
|
Your vote: |
|
Creator |
|||||||||
|---|---|---|---|---|---|---|---|---|---|
|
Tags
Filter strategies:
|
|||||||||

|
Script |
2 | 4.9 |
100% | 79 |
102
1:42
|
14+ | ||


|
RNG |
2 | 4.9 |
N/A | 10 |
107
1:47
|
16+ | ||


|
RNG |
2 | 4.8 |
N/A | 17 |
122
2:02
|
17 | ||


|

Only fails with really bad RNG. Tested with P/P Crab, S/S Slimy. Should work with any.
The script may not work 100% of them time, follow the strat if needed |
RNG Script |
2 | 4.6 |
19% | 12 |
102
1:42
|
14 | |

Any Level 25+ Aquatic
|
Breed Script |
2 | 5.0 |
100% | 7 |
125
2:05
|
17+ | ||


|
RNG |
2 | 5.0 |
N/A | 4 |
160
2:40
|
17+ | ||

|
The different breeds on the Elver can make this a little weird. Your best outcome is to die on Fang's Flyby / the Scorched Earth damage on its first round.
Updated 5 March 24: 1. Put breed restriction on the Elver to make sure your Dodge avoids the Scorched Earth & Immolate. 2. Removed health restriction on the Slimy pet, since Sewage Eruption + Moonfire + 1 Spirit Spikes is enough to kill Fang. That said, a power restriction was placed on the slot. 3. Ghostshell Crab updated with Spirit Spikes for fighting Fang. 4. RNG tag remains for crits on pet 1. 5. Script updated. |
Breed RNG Script |
2 | 4.9 |
100% | 11 |
108
1:48
|
15 | |


|
RNG |
2 | 4.2 |
N/A | 7 |
109
1:49
|
16+ | ||


|
*** Created on Beta, so maybe not final ***
|
RNG Script |
2 | 4.2 |
100% | 6 |
90
1:30
|
11-12 | |

|
Breed restriction for pet 1 is for crits. You will need to be crit by every single attack from Ash, including DoTs to fail with the H/P Chitterspine Deepstalker:
Round 1: 773 (Scorched Earth) + 57 (SE DoT) + Round 2: 344 (Immolate) + 57 (SE DoT) + 71 (Immo DoT) = 1302 However, if you only have the P/S breed, you'd still need crits from both big hits (Scorched Earth & initial Immolate) for this to fail, so you're welcome to give it a go ^^ --- Breed restriction for pet 2 is to make sure any Otter can kill Fang with 1 Surge |
Breed Script |
2 | 5.0 |
100% | 0 |
89
1:29
|
11 | |


|
My Slimy Octopode was P/P 363 AP! Weaker Pets might not work!
|
Breed RNG |
2 | 5.0 |
N/A | 0 |
98
1:38
|
14-15 | |

|
Fast, safe and simple. 2nd slot ANY "Slimy" family aquatic pet, ANY breed, ALL works perfectly well ;).
Enjoy ------------------------- Fight time: 10-13 rounds ------------------------- |
RNG |
2 | 5.0 |
N/A | 5 |
91
1:31
|
11+ | |

|
A twist on the strategy provided by Quickhoof :)
|
RNG |
2 | 0.0 |
N/A | 1 |
160
2:40
|
17+ | |

Any Level 25+ Aquatic
|
At turn 3 Ash should be left with less health than one feedback.
If u use a pet with cleansing rain as a replacement for abyssal then Voidskimmer needs to be PP to kill Fang in 2 turns without acid rain damage. The replacement pet needs to die at turn 3 and leave ash with <366 health. Voidskimmer will kill swarm if he got at most one crit on a dot tick, none on a regular attack. Any level 25 aquatic pet will do as back up. |
Breed |
2 | 5.0 |
N/A | 0 |
86
1:26
|
11 | |
|
Guide inspired by this one from Synchronis. I was missing the first pet, so I did the battle this way!
|
2 | 5.0 |
N/A | 0 |
125
2:05
|
17+ | ||
|
Any Level 25+ Aquatic
|
Also works with an H/H Emperor Crab, but I haven't tested other crabs that can use the same three abilities. The instructions and TD script will work if you're using a different pet that has the same moves but has a more than 219 speed.
|
Breed Script |
2 | 4.7 |
100% | 3 |
102
1:42
|
14+ | |


|
Breed RNG |
2 | 4.0 |
N/A | 3 |
111
1:51
|
16+ | ||

|
If anything other than a P/P breed Voidskimmer is used in slot 1, using a P/P breed Slimy pet in Slot 2 is strongly suggested.
|
Breed Script |
2 | 0.0 |
100% | 0 |
88
1:28
|
11 |
Incl. steps:


| Breed | Health | Power | Speed |
|---|---|---|---|
| PS | 1481 | 297 | 265 |
| BB | 1562 | 284 | 252 |
| PP | 1481 | 333 | 236 |
| SS | 1481 | 268 | 301 |
| HH | 1806 | 268 | 236 |
| HP | 1627 | 297 | 236 |
| HS | 1627 | 268 | 265 |
| PB | 1546 | 297 | 249 |
| SB | 1546 | 281 | 265 |
| HB | 1627 | 281 | 249 |
>260 | >287 |


Substitutes:
1 / 4
1 / 9
| Before | After | Experience Gain | |
|---|---|---|---|
| 1 | ➜ | 3 | 239 |
| 2 | ➜ | 4 | 254 |
| 3 | ➜ | 4 | 267 |
| 4 | ➜ | 5 | 279 |
| 5 | ➜ | 6 | 289 |
| 6 | ➜ | 6 | 297 |
| 7 | ➜ | 7 | 304 |
| 8 | ➜ | 8 | 309 |
| 9 | ➜ | 9 | 312 |
| 10 | ➜ | 10 | 314 |
| 11 | ➜ | 11 | 314 |
| 12 | ➜ | 12 | 312 |
| 13 | ➜ | 13 | 309 |
| 14 | ➜ | 14 | 304 |
| 15 | ➜ | 15 | 297 |
| 16 | ➜ | 16 | 289 |
| 17 | ➜ | 17 | 279 |
| 18 | ➜ | 18 | 267 |
| 19 | ➜ | 19 | 254 |
| 20 | ➜ | 20 | 239 |
| 21 | ➜ | 21 | 223 |
| 22 | ➜ | 22 | 205 |
| 23 | ➜ | 23 | 185 |
| 24 | ➜ | 24 | 163 |
|
Safari Hat |
|
|
Lesser Pet Treat |
|
|
Pet Treat |
|
|
Darkmoon Hat |
|
|
Pet Battle Week |
|
= |
Pet levels to 25 with minimal XP lost |
|
|
= |
Additional XP above level 25 is lost |
|
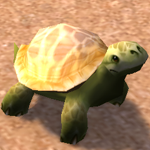
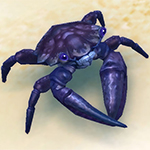
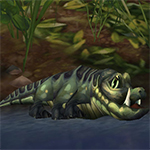
| Hissing Chitterspine | PP |
| Emerald Turtle | BB |
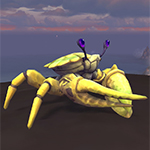
| Emperor Crab | PP |
For the best display of your strategy, please follow these guidelines:


For the best display of your strategy, please follow these guidelines:
For the best display of your strategy, please follow these guidelines:
For the best display of your strategy, please follow these guidelines:
For the best display of your strategy, please follow these guidelines:
For the best display of your strategy, please follow these guidelines:
For the best display of your strategy, please follow these guidelines:
For the best display of your strategy, please follow these guidelines:
For the best display of your strategy, please follow these guidelines:
For the best display of your strategy, please follow these guidelines:
For the best display of your strategy, please follow these guidelines:
For the best display of your strategy, please follow these guidelines:
For the best display of your strategy, please follow these guidelines:
For the best display of your strategy, please follow these guidelines:
For the best display of your strategy, please follow these guidelines:
For the best display of your strategy, please follow these guidelines:
For the best display of your strategy, please follow these guidelines:
For the best display of your strategy, please follow these guidelines:
For the best display of your strategy, please follow these guidelines:
For the best display of your strategy, please follow these guidelines:
For the best display of your strategy, please follow these guidelines:

Get the holy water!


2
Otto wrote on 2022-10-24 14:28:27
2
Michael#23334
wrote on 2022-11-04 17:55:13
1
DragonsAfterDark
wrote on 2024-03-05 06:48:50
1
Kay
wrote on 2021-03-03 19:17:40
2
Kateuk
wrote on 2021-02-08 13:21:05
0
Nehenne wrote on 2021-02-07 17:49:51
1
Haru wrote on 2021-01-30 01:05:10
2
Levrone#1624
wrote on 2021-01-15 08:40:59
2
Buclock
wrote on 2021-01-12 08:59:25
1
Kali#1382
wrote on 2021-01-08 18:15:16
2
piglet
wrote on 2020-12-30 16:59:50
2
Hamz
wrote on 2020-12-30 09:46:23
3
Tormentia
wrote on 2020-12-30 12:47:17
2
Markolious
wrote on 2020-12-27 18:30:55
1
Lord_Vivec
wrote on 2020-12-26 17:59:19
1
Lupita wrote on 2020-12-27 03:30:09
2
polovbobra#2810
wrote on 2021-02-13 15:52:38
New Comment: