^
vs. Pack Leader

전략이 추가됨. 추가자: Remte

Strategy 15 of 25
Browse all alternatives

Incl. steps:

원고를 클립보드에 복사하려면 버튼을 클릭하세요:

if [ enemy.aura(Undead:242).exists ]
ability(Burrow:159)
ability(Minefield:634)
standby
change(next)
endif
if [ self.speed.slow ]
ability(Powerball:566)
ability(Adrenaline Rush:162)
endif
ability(Spirit Spikes:914) [ enemy(#1).active ]
ability(Explode:282) [ enemy(#3).hp.can_explode & ! self(#3).played ]
ability(Flank:193)
ability(#1)
change(#3) [ ! enemy(#2).dead ]
change(next)
Pack Leader 141799
Special or not:0Special or not:121113447368813440

스킬: 2 1 1
번식: 모든 종류

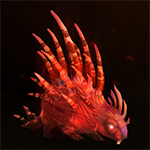
복수심에 불타는 새끼 호저
This pet can have the following breeds:

번식 체력 파워 속도
HP 1587 289 252


Special or not:0Special or not:1112859656850

스킬: 1 1 2
번식: 모든 종류

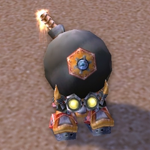
꼬마 폭탄
This pet can have the following breeds:

번식 체력 파워 속도
HS 1627 244 289


Special or not:0Special or not:14211378610803780

스킬: 2 1 1
번식: 모든 종류

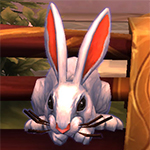
토끼
This pet can have the following breeds:

번식 체력 파워 속도
BB 1481 244 309
SS 1400 227 357
HP 1546 257 292
HS 1546 227 322
SB 1465 240 322
HB 1546 240 305


Substitutes:

1
1
Note: You have selected a substitute pet.
The strategy might fail if you use it with this pet instead of the one the strategy creator intended.

The substitute finder looks for these criteria in relation to the original pet:
  • Same family
  • Has the required skills
  • Has the required stats (if specified)
  • Ignores specific breed requirements for the main pet, as breeds can be very different for substitutes

1 / 14

Updated and secured against odds as much as possible.
Thanks to @Prudentius for tips and new TD script.

Pet 3 info: It not always has to enter the battle and therefore has number 3 despite appearing earlier. You can use something else than a 토끼 as long as it can finish Scars. A pet with 죽은 척하기, such as one of marsuuls, would be nice.

낮은 XP
이 전략을 위한 애완동물 중 적어도 하나는 특정 품종의 사용이 요구됩니다.
모든 전략이 무적일 수는 없습니다. 이 전략도 마찬가지입니다. 애완동물의 실패 위험을 증가시키는 일부 무작위의 요소가 있으므로 다시 시작해야 할 수도 있습니다. 여러분의 애완동물을 탓하지 마세요, 제발!
이 전략은 확률적으로 많은 금을 얻기 위해 와우트레이딩 카드 게임(TCG) 또는 경매장에서 얻을 수 있는 애완동물을 사용합니다.
이 전략은 와우인 게임 샵에서 Battle.net 화폐 또는 현실의 실제 화폐로만 얻을 수 있는 애완동물을 사용합니다.
이 전략으로 낮은 레벨의 애완동물에게 경험을 줄 수 있습니다.
종종 다른 지시사항들보다 더 따르기 어려운 지시사항이 있습니다. 이 전략의 지시사항도 보통보다 어렵습니다!
스크립트
이 전략은 스크립트 추가와 함께 사용할 수 있는 Pet Battle Script 스크립트를 제공합니다. 애완동물의 왼쪽에 있는 버튼을 클릭하면 스크립트를 복사할 수 있습니다.
이 전략에서는 하나 이상의 애완 동물을 얻을 수 없습니다. 만약 그 애완동물을 가지고 있다면 축하드립니다!
A Strategy Curator found this strategy to be especially helpful and higlighted it with this tag to give it more exposure.
In Dragonflight Patch 10.2, the ability Time Bomb has been changed. This tag is marking strategies using Time Bomb so they can be reviewed.
Time: 1:34
This time was entered by a strategy curator. It is quite reliable especially when using TDScript, however times can always vary slightly.
Rounds: 10+
The number of rounds for this fight were added by a strategy curator. This number is usually very reliable.
This table shows the level increase for completing the fight with level 25 pets and one carry pet.
Partial level experience is not included in the calculation.

Before After Experience Gain
13239
24254
34267
45279
56289
66297
77304
88309
99312
1010314
1111314
1212312
1313309
1414304
1515297
1616289
1717279
1818267
1919254
2020239
2121223
2222205
2323185
2424163

탐험대 모자

하급 애완동물 간식

애완동물 간식

다크문 중산모

애완동물 전투 주


Strategy Details
1 Min 34 Sec
This time was entered by a strategy curator. It is quite reliable especially when using TDScript, however times can always vary slightly.
10+
The number of rounds for this fight were added by a strategy curator. This number is usually very reliable.
2018-09-22 03:35:17
The strategy was last updated on this date.
2018-09-22 03:35:17
The strategy was created on this date.
12,488
방문자 수. 해당 숫자는 이 전략이 방문자들로부터 얼마나 자주 접속되는지를 나타냅니다.
Tamer Details
Nazmir 35.93 54.60 (TomTom / Map Pin)
낮은 XP
Turns 1-2

For the best display of your strategy, please follow these guidelines:

  • Use QuickFill elements where possible
  • Enter custom instructions in English
  • Check the Strategy Creation Guide for more info
복수심에 불타는 새끼 호저
공굴리기
영혼의 가시
휩쓸기
꼬마 폭탄
감전
지뢰밭
폭파
토끼
질풍
아드레날린 촉진
숨기
Pass
Bring in your 복수심에 불타는 새끼 호저
Bring in your 꼬마 폭탄
Bring in your 토끼
Swap to your 복수심에 불타는 새끼 호저
Swap to your 꼬마 폭탄
Swap to your 토끼
델타 comes in
스카스 comes in
꼬마 파랑 comes in
An enemy pet comes in
Any standard attack will finish the fight
 
복수심에 불타는 새끼 호저
꼬마 폭탄
토끼
공굴리기
영혼의 가시
휩쓸기
감전
지뢰밭
폭파
질풍
아드레날린 촉진
숨기
꼬마 파랑
스카스
델타
Important: Please enter your instructions in English or a large parts of the community will not be able to read them.
Some typical sentences are translated automatically. Move your mouse over this part for more details.
The following strings are auto-translated if you enter them in the defined format. It is recommended to use them where possible:
[ability=123:Spellname] - [pet=123:Petname] dies
[ability=123:Name] - [enemy=123:Enemyname] dies
[ability=123:Name] until [pet=123:Petname] dies
[ability=123:Name] until [enemy=123:Enemyname] dies
Swap back to [pet=123:Petname]
[ability=123:Name] until the fight is won
Turn 3

For the best display of your strategy, please follow these guidelines:

  • Use QuickFill elements where possible
  • Enter custom instructions in English
  • Check the Strategy Creation Guide for more info
복수심에 불타는 새끼 호저
공굴리기
영혼의 가시
휩쓸기
꼬마 폭탄
감전
지뢰밭
폭파
토끼
질풍
아드레날린 촉진
숨기
Pass
Bring in your 복수심에 불타는 새끼 호저
Bring in your 꼬마 폭탄
Bring in your 토끼
Swap to your 복수심에 불타는 새끼 호저
Swap to your 꼬마 폭탄
Swap to your 토끼
델타 comes in
스카스 comes in
꼬마 파랑 comes in
An enemy pet comes in
Any standard attack will finish the fight
 
복수심에 불타는 새끼 호저
꼬마 폭탄
토끼
공굴리기
영혼의 가시
휩쓸기
감전
지뢰밭
폭파
질풍
아드레날린 촉진
숨기
꼬마 파랑
스카스
델타
Important: Please enter your instructions in English or a large parts of the community will not be able to read them.
Some typical sentences are translated automatically. Move your mouse over this part for more details.
The following strings are auto-translated if you enter them in the defined format. It is recommended to use them where possible:
[ability=123:Spellname] - [pet=123:Petname] dies
[ability=123:Name] - [enemy=123:Enemyname] dies
[ability=123:Name] until [pet=123:Petname] dies
[ability=123:Name] until [enemy=123:Enemyname] dies
Swap back to [pet=123:Petname]
[ability=123:Name] until the fight is won
Turns 4+
휩쓸기 until your 복수심에 불타는 새끼 호저 dies. The results will vary from 스카스 lingering on the undead round to 300+ damage dealt to 꼬마 파랑.

For the best display of your strategy, please follow these guidelines:

  • Use QuickFill elements where possible
  • Enter custom instructions in English
  • Check the Strategy Creation Guide for more info
복수심에 불타는 새끼 호저
공굴리기
영혼의 가시
휩쓸기
꼬마 폭탄
감전
지뢰밭
폭파
토끼
질풍
아드레날린 촉진
숨기
Pass
Bring in your 복수심에 불타는 새끼 호저
Bring in your 꼬마 폭탄
Bring in your 토끼
Swap to your 복수심에 불타는 새끼 호저
Swap to your 꼬마 폭탄
Swap to your 토끼
델타 comes in
스카스 comes in
꼬마 파랑 comes in
An enemy pet comes in
Any standard attack will finish the fight
 
복수심에 불타는 새끼 호저
꼬마 폭탄
토끼
공굴리기
영혼의 가시
휩쓸기
감전
지뢰밭
폭파
질풍
아드레날린 촉진
숨기
꼬마 파랑
스카스
델타
Important: Please enter your instructions in English or a large parts of the community will not be able to read them.
Some typical sentences are translated automatically. Move your mouse over this part for more details.
The following strings are auto-translated if you enter them in the defined format. It is recommended to use them where possible:
[ability=123:Spellname] - [pet=123:Petname] dies
[ability=123:Name] - [enemy=123:Enemyname] dies
[ability=123:Name] until [pet=123:Petname] dies
[ability=123:Name] until [enemy=123:Enemyname] dies
Swap back to [pet=123:Petname]
[ability=123:Name] until the fight is won
!
Sometimes 델타 will kill itself during 무리 사냥, if it happens, your 복수심에 불타는 새끼 호저 will die early; check out the "Pet 3" line. Otherwise, skip to Pet Bombling. :)

For the best display of your strategy, please follow these guidelines:

  • Use QuickFill elements where possible
  • Enter custom instructions in English
  • Check the Strategy Creation Guide for more info
복수심에 불타는 새끼 호저
공굴리기
영혼의 가시
휩쓸기
꼬마 폭탄
감전
지뢰밭
폭파
토끼
질풍
아드레날린 촉진
숨기
Pass
Bring in your 복수심에 불타는 새끼 호저
Bring in your 꼬마 폭탄
Bring in your 토끼
Swap to your 복수심에 불타는 새끼 호저
Swap to your 꼬마 폭탄
Swap to your 토끼
델타 comes in
스카스 comes in
꼬마 파랑 comes in
An enemy pet comes in
Any standard attack will finish the fight
 
복수심에 불타는 새끼 호저
꼬마 폭탄
토끼
공굴리기
영혼의 가시
휩쓸기
감전
지뢰밭
폭파
질풍
아드레날린 촉진
숨기
꼬마 파랑
스카스
델타
Important: Please enter your instructions in English or a large parts of the community will not be able to read them.
Some typical sentences are translated automatically. Move your mouse over this part for more details.
The following strings are auto-translated if you enter them in the defined format. It is recommended to use them where possible:
[ability=123:Spellname] - [pet=123:Petname] dies
[ability=123:Name] - [enemy=123:Enemyname] dies
[ability=123:Name] until [pet=123:Petname] dies
[ability=123:Name] until [enemy=123:Enemyname] dies
Swap back to [pet=123:Petname]
[ability=123:Name] until the fight is won
Pet 3
Bring in your 토끼. If slower, use 아드레날린 촉진. Keep using 질풍 until the critter dies, use 숨기 if you make it to undead round.

For the best display of your strategy, please follow these guidelines:

  • Use QuickFill elements where possible
  • Enter custom instructions in English
  • Check the Strategy Creation Guide for more info
복수심에 불타는 새끼 호저
공굴리기
영혼의 가시
휩쓸기
꼬마 폭탄
감전
지뢰밭
폭파
토끼
질풍
아드레날린 촉진
숨기
Pass
Bring in your 복수심에 불타는 새끼 호저
Bring in your 꼬마 폭탄
Bring in your 토끼
Swap to your 복수심에 불타는 새끼 호저
Swap to your 꼬마 폭탄
Swap to your 토끼
델타 comes in
스카스 comes in
꼬마 파랑 comes in
An enemy pet comes in
Any standard attack will finish the fight
 
복수심에 불타는 새끼 호저
꼬마 폭탄
토끼
공굴리기
영혼의 가시
휩쓸기
감전
지뢰밭
폭파
질풍
아드레날린 촉진
숨기
꼬마 파랑
스카스
델타
Important: Please enter your instructions in English or a large parts of the community will not be able to read them.
Some typical sentences are translated automatically. Move your mouse over this part for more details.
The following strings are auto-translated if you enter them in the defined format. It is recommended to use them where possible:
[ability=123:Spellname] - [pet=123:Petname] dies
[ability=123:Name] - [enemy=123:Enemyname] dies
[ability=123:Name] until [pet=123:Petname] dies
[ability=123:Name] until [enemy=123:Enemyname] dies
Swap back to [pet=123:Petname]
[ability=123:Name] until the fight is won
Bring in your 꼬마 폭탄

For the best display of your strategy, please follow these guidelines:

  • Use QuickFill elements where possible
  • Enter custom instructions in English
  • Check the Strategy Creation Guide for more info
복수심에 불타는 새끼 호저
공굴리기
영혼의 가시
휩쓸기
꼬마 폭탄
감전
지뢰밭
폭파
토끼
질풍
아드레날린 촉진
숨기
Pass
Bring in your 복수심에 불타는 새끼 호저
Bring in your 꼬마 폭탄
Bring in your 토끼
Swap to your 복수심에 불타는 새끼 호저
Swap to your 꼬마 폭탄
Swap to your 토끼
델타 comes in
스카스 comes in
꼬마 파랑 comes in
An enemy pet comes in
Any standard attack will finish the fight
 
복수심에 불타는 새끼 호저
꼬마 폭탄
토끼
공굴리기
영혼의 가시
휩쓸기
감전
지뢰밭
폭파
질풍
아드레날린 촉진
숨기
꼬마 파랑
스카스
델타
Important: Please enter your instructions in English or a large parts of the community will not be able to read them.
Some typical sentences are translated automatically. Move your mouse over this part for more details.
The following strings are auto-translated if you enter them in the defined format. It is recommended to use them where possible:
[ability=123:Spellname] - [pet=123:Petname] dies
[ability=123:Name] - [enemy=123:Enemyname] dies
[ability=123:Name] until [pet=123:Petname] dies
[ability=123:Name] until [enemy=123:Enemyname] dies
Swap back to [pet=123:Petname]
[ability=123:Name] until the fight is won
지뢰밭 only when Scars is still on undead round.

For the best display of your strategy, please follow these guidelines:

  • Use QuickFill elements where possible
  • Enter custom instructions in English
  • Check the Strategy Creation Guide for more info
복수심에 불타는 새끼 호저
공굴리기
영혼의 가시
휩쓸기
꼬마 폭탄
감전
지뢰밭
폭파
토끼
질풍
아드레날린 촉진
숨기
Pass
Bring in your 복수심에 불타는 새끼 호저
Bring in your 꼬마 폭탄
Bring in your 토끼
Swap to your 복수심에 불타는 새끼 호저
Swap to your 꼬마 폭탄
Swap to your 토끼
델타 comes in
스카스 comes in
꼬마 파랑 comes in
An enemy pet comes in
Any standard attack will finish the fight
 
복수심에 불타는 새끼 호저
꼬마 폭탄
토끼
공굴리기
영혼의 가시
휩쓸기
감전
지뢰밭
폭파
질풍
아드레날린 촉진
숨기
꼬마 파랑
스카스
델타
Important: Please enter your instructions in English or a large parts of the community will not be able to read them.
Some typical sentences are translated automatically. Move your mouse over this part for more details.
The following strings are auto-translated if you enter them in the defined format. It is recommended to use them where possible:
[ability=123:Spellname] - [pet=123:Petname] dies
[ability=123:Name] - [enemy=123:Enemyname] dies
[ability=123:Name] until [pet=123:Petname] dies
[ability=123:Name] until [enemy=123:Enemyname] dies
Swap back to [pet=123:Petname]
[ability=123:Name] until the fight is won
꼬마 파랑 comes in

For the best display of your strategy, please follow these guidelines:

  • Use QuickFill elements where possible
  • Enter custom instructions in English
  • Check the Strategy Creation Guide for more info
복수심에 불타는 새끼 호저
공굴리기
영혼의 가시
휩쓸기
꼬마 폭탄
감전
지뢰밭
폭파
토끼
질풍
아드레날린 촉진
숨기
Pass
Bring in your 복수심에 불타는 새끼 호저
Bring in your 꼬마 폭탄
Bring in your 토끼
Swap to your 복수심에 불타는 새끼 호저
Swap to your 꼬마 폭탄
Swap to your 토끼
델타 comes in
스카스 comes in
꼬마 파랑 comes in
An enemy pet comes in
Any standard attack will finish the fight
 
복수심에 불타는 새끼 호저
꼬마 폭탄
토끼
공굴리기
영혼의 가시
휩쓸기
감전
지뢰밭
폭파
질풍
아드레날린 촉진
숨기
꼬마 파랑
스카스
델타
Important: Please enter your instructions in English or a large parts of the community will not be able to read them.
Some typical sentences are translated automatically. Move your mouse over this part for more details.
The following strings are auto-translated if you enter them in the defined format. It is recommended to use them where possible:
[ability=123:Spellname] - [pet=123:Petname] dies
[ability=123:Name] - [enemy=123:Enemyname] dies
[ability=123:Name] until [pet=123:Petname] dies
[ability=123:Name] until [enemy=123:Enemyname] dies
Swap back to [pet=123:Petname]
[ability=123:Name] until the fight is won
Turns 1+
감전 if necessary to get the enemy to 650 HP, then 폭파

For the best display of your strategy, please follow these guidelines:

  • Use QuickFill elements where possible
  • Enter custom instructions in English
  • Check the Strategy Creation Guide for more info
복수심에 불타는 새끼 호저
공굴리기
영혼의 가시
휩쓸기
꼬마 폭탄
감전
지뢰밭
폭파
토끼
질풍
아드레날린 촉진
숨기
Pass
Bring in your 복수심에 불타는 새끼 호저
Bring in your 꼬마 폭탄
Bring in your 토끼
Swap to your 복수심에 불타는 새끼 호저
Swap to your 꼬마 폭탄
Swap to your 토끼
델타 comes in
스카스 comes in
꼬마 파랑 comes in
An enemy pet comes in
Any standard attack will finish the fight
 
복수심에 불타는 새끼 호저
꼬마 폭탄
토끼
공굴리기
영혼의 가시
휩쓸기
감전
지뢰밭
폭파
질풍
아드레날린 촉진
숨기
꼬마 파랑
스카스
델타
Important: Please enter your instructions in English or a large parts of the community will not be able to read them.
Some typical sentences are translated automatically. Move your mouse over this part for more details.
The following strings are auto-translated if you enter them in the defined format. It is recommended to use them where possible:
[ability=123:Spellname] - [pet=123:Petname] dies
[ability=123:Name] - [enemy=123:Enemyname] dies
[ability=123:Name] until [pet=123:Petname] dies
[ability=123:Name] until [enemy=123:Enemyname] dies
Swap back to [pet=123:Petname]
[ability=123:Name] until the fight is won

Is a group of dinosaurs really called a pack? How about a pride? A bask? A ... business?


Arnor

글 올리기 2018-10-29 10:00:02

If Scar goes for a bone bite when you have shattered defenses and black claw up you are unfortunately toast and don't get scar anywhere near his undead round.
Very range dependend.

(OP) Remte

글 올리기 2018-10-29 16:22:56

I've checked it out.
The case you describe is indeed possible and it involves Delta killing itself while performing Hunting Party. Delta seems to always start from Thrash, and so this may occur in two cases between rounds 2 and 4:
Thrash, Black Claw, Hunting Party – this is bad
Black Claw, Hunting Party – there it's complicated, with no crits/beast racial of yours Delta will have 11 HP at round 4 for you to finish it off, otherwise it will die
In all other cases, either you should be killing the enemy off when the round 4 has started, or it will kill itself performing Thrash. Note that without Black Claw, Hunting Party will be blocked as soon as the spikes are up, so 2!T+3!HP is excluded.

Thank you for this. I will expand the note.

There are only so little you can do to keep external RNG in check, usually either a team control or the quickness is a key. The Direbeak strat seems to have a similar dynamic. :)

Noozlie 글 올리기 2018-09-24 02:18:59

This strategy worked for me! Thanks!

Epox 글 올리기 2018-09-24 01:03:38

You are a saint! I've had hard time finding a good leveling strategy for this fight, and this is by far the best one I've come across.

새로운 댓글:


Name:

링크: