
| 전투형 인간 | 최강의 드래곤이 울부짖었다 | 편안한 비행 되셨나요? | 살아 있네! | 너... 너를 문다! |
| 마법에 걸린 전투 | 성공의 정령 | 폭주 야수 모드 |  물 만난 애완동물 물 만난 애완동물 | 머신 러닝 |
전략이 추가됨. 추가자: Runisco
1
1
|
Average rating: |
3 |
|
Ratings: |
6 |
|
귀하의 투표: |
|
Creator |
|||||||||
|---|---|---|---|---|---|---|---|---|---|
|
Tags
Filter strategies:
|
|||||||||

|

A couple of expansions out and we still don't have a good way of dealing with this fight for aquatics, lol
Still RNG, but hopefully this helps a bit xD |
번식 알엔지 스크립트 |
2 | 4.6 |
49% | 12 |
120
2:00
|
18+ | |
|
Not sure about the breeds, for the slimy's I used a S/S as first pet and B/B 2nd and for the Moon Crab a H/P.
|
알엔지 |
2 | 3.9 |
N/A | 2 |
130
2:10
|
17+ | |
|
Has RNG, sorry. That first enemy is unpredictable.
|
알엔지 스크립트 |
2 | 3.1 |
25% | 10 |
130
2:10
|
17+ | |

|
I used this strat several times, lost very few to the RNG... this is only the 2nd time im publishing a strat, hope it works well for y'all
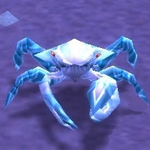
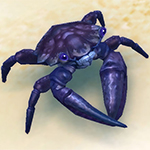
Shack Crab H/H *[Surge] - [Spiny Carapace] - [Rain Dance] Hermit Crab S/S *[Pinch] - [Shell Armor] - [Dive] Moon Shell Crab H/P *[Arcane Slash] - [Shell Shield] - [Renewing Mists] ** i have not tested other breeds Neodymion suggested a P/S Moonshell Crab which worked for them, so i am including this as well with a thanks to Neodymion for the suggestion. ( i personally did not try the P/S breed) |
알엔지 |
2 | 3.0 |
N/A | 4 |
185
3:05
|
25+ | |

|
알엔지 스크립트 |
2 | 3.0 |
48% | 1 |
135
2:15
|
18+ | ||
|
As all strategies for this fight with aquatics, it's RNG at multiple spots.
I've included a few CHECKpoints where if a pet has died before it's opposite enemy has, to restart. |
알엔지 스크립트 |
2 | 3.0 |
22% | 1 |
110
1:50
|
14+ | |
|
This is a very difficult fight for Aquatic pets, as the attacks of the enemy are random this adds a big RNG element
|
알엔지 |
2 | 2.8 |
N/A | 1 |
121
2:01
|
16+ | |
|
This is a tough fight but I got it to work with this set up. Heavy RNG on the first pet. please let me know how I did on my first guide. I didn't make a script because of the RNG.
|
알엔지 |
2 | 2.4 |
N/A | 0 |
220
3:40
|
27+ | |
|
This super sucked a lot and I won by the skin of my teeth so there is probably some RNG involved. Feathers doesn't always cast Nocturnal Strike and Lift off in a specific pattern, so you might have to attempt it more than once. I tested it and won 2 out of 3 times. Failed on one attempt due to a crit from Brite
|
알엔지 |
2 | 1.6 |
N/A | 0 |
120
2:00
|
15+ | |
|
알엔지 |
2 | 1.0 |
N/A | 0 |
115
1:55
|
17+ | ||

모든 레벨 25+ 아쿠아
|
I don't like and at the same time like this kind of fights. At one hand, the fight is unfair as it has high RNG. At another hand, this is why we like pet battles, coming up with new strategies. Not going to write script for this. Don't downvote because of bad RNG, I created this because of common pets that almost everyone has.
|
번식 알엔지 |
2 | 1.2 |
N/A | 1 |
160
2:40
|
20+ |
Incl. steps:


Substitutes:
1 / 6
1 / 6
As all strategies for this fight with aquatics, it's RNG at multiple spots.
I've included a few CHECKpoints where if a pet has died before it's opposite enemy has, to restart.
| Before | After | Experience Gain | |
|---|---|---|---|
| 1 | ➜ | 3 | 239 |
| 2 | ➜ | 4 | 254 |
| 3 | ➜ | 4 | 267 |
| 4 | ➜ | 5 | 279 |
| 5 | ➜ | 6 | 289 |
| 6 | ➜ | 6 | 297 |
| 7 | ➜ | 7 | 304 |
| 8 | ➜ | 8 | 309 |
| 9 | ➜ | 9 | 312 |
| 10 | ➜ | 10 | 314 |
| 11 | ➜ | 11 | 314 |
| 12 | ➜ | 12 | 312 |
| 13 | ➜ | 13 | 309 |
| 14 | ➜ | 14 | 304 |
| 15 | ➜ | 15 | 297 |
| 16 | ➜ | 16 | 289 |
| 17 | ➜ | 17 | 279 |
| 18 | ➜ | 18 | 267 |
| 19 | ➜ | 19 | 254 |
| 20 | ➜ | 20 | 239 |
| 21 | ➜ | 21 | 223 |
| 22 | ➜ | 22 | 205 |
| 23 | ➜ | 23 | 185 |
| 24 | ➜ | 24 | 163 |
|
탐험대 모자 |
|
|
하급 애완동물 간식 |
|
|
애완동물 간식 |
|
|
다크문 중산모 |
|
|
애완동물 전투 주 |
|
= |
Pet levels to 25 with minimal XP lost |
|
|
= |
Additional XP above level 25 is lost |
|
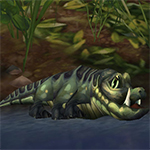
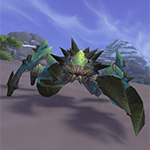
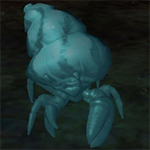
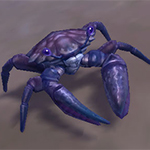
| 끈적끈적한 소라게 | BB |
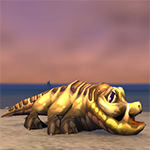
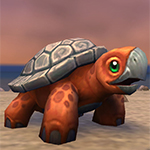
| 다크문 거북이 | HB |
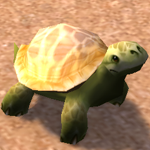
| 에메랄드 거북 | BB |
For the best display of your strategy, please follow these guidelines:


For the best display of your strategy, please follow these guidelines:
For the best display of your strategy, please follow these guidelines:
For the best display of your strategy, please follow these guidelines:
For the best display of your strategy, please follow these guidelines:
For the best display of your strategy, please follow these guidelines:
For the best display of your strategy, please follow these guidelines:
For the best display of your strategy, please follow these guidelines:
For the best display of your strategy, please follow these guidelines:
For the best display of your strategy, please follow these guidelines:
For the best display of your strategy, please follow these guidelines:
For the best display of your strategy, please follow these guidelines:
For the best display of your strategy, please follow these guidelines:
For the best display of your strategy, please follow these guidelines:
For the best display of your strategy, please follow these guidelines:
For the best display of your strategy, please follow these guidelines:

There is nothing accidental about my feelings towards this guy!


1
Django#2738
글 올리기 2024-01-07 15:34:24
0
SteveGraves#1368
글 올리기 2023-11-29 00:46:22
0
SteveGraves#1368
글 올리기 2023-11-29 00:45:22
1
Taizun
글 올리기 2023-04-22 21:06:08
Adding these two lines at the beginning of the script ensures that the fight ends if any of the two restart-conditions in the strategy are met:
quit [!enemy(#1).dead & self(#1).dead]
quit [enemy(#2).played & !enemy(#2).dead & self(#2).dead] (edited)
1
Alayea
글 올리기 2022-11-14 06:28:24
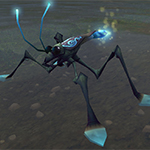
Some observations with Feathers based on my attempts with this strategy:
* For best result, Sewage Eruption going off needs to finish Feathers. (You may have stated this implicitly already, but I'm making it explicit here.)
* If Feathers used 비상 in round 1, restart. That's too much damage the bird's avoided.
* If Feathers succeeds in landing a hit using 야밤의 일격, restart. It's extra damage that you cannot afford to take. (It is nice when Feathers uses it and misses, though!)
* If Feathers lands any critical strike prior to round 4 (when Sewage Eruption activates), restart. Such instances left my P/P Slimy Hermit Crab with not enough health to make it to round 4.
* If Feathers used 날개짓 more than once and lands three hits every time, probably best to restart. (On my successful attempt, Quills inflicted damage three times but was used only the once by Feathers.)
* Not once did my Slimy Hermit Crab make it past Feathers to get a chance at Splat. It's fine if the former dies the same round as the latter, though.
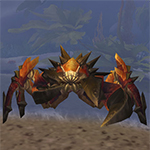
Moving on to Splat:
* There were times that I killed Splat using Darkmoon Turtle and the former never used 폭발. I believe those occurrences had the end result of Darkmoon Turtle dying at the same time as Splat, and that cannot be afforded because DT needs to land an attack on Brite at the very least. I would change the phrasing from "should" to "must" in your notes. (edited)
새로운 댓글: