
| Human Resources | Dragons Make Everything Better | Fun With Flying | Not Quite Dead Yet |  Critters With Huge Teeth Critters With Huge Teeth |
| Magicians Secret | Element of Success | Beast Mode | Hobbyist Aquarist | Machine Learning |
Strategy added by BurntGinger#1399
2
2
|
Average rating: |
4.8 |
|
Ratings: |
5 |
|
Your vote: |
|
Creator |
|||||||||
|---|---|---|---|---|---|---|---|---|---|
|
Tags
Filter strategies:
|
|||||||||

|

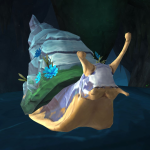
I only have the H/P breed of Cobbleshell, and thank you to Zim for letting me know about the H/B & Rima for the H/H! ^^
|
Script |
2 | 4.4 |
95% | 9 |
103
1:43
|
16 | |
|
Substitutions are definitely possible for Creepy Crawly and Tolai Hare. Lovebird Hatchling is a must have.
For Creepy Crawly, any Critter with >260 Speed rating with Flank, Survival and Apocalypse will work. For Tolai Hare, any Critter with >260 Speed rating with Flurry, Dodge and Burrow will work. For both pets, get the one with the highest Power stat. A possible mishap is that B/B Creepy Crawly, with only 1400 Health, might be killed by backline damage. If that happens, restart the match. ADDENDUM: Please note, you just need the Creepy Crawly and the Tolai Hare (or their substitutes) to be faster than 260. S/S is NOT recommended because of its low power stat. Faster than 260, highest power stat you can get. ADDITIONAL ADDENDUM: I've noticed some insisting that this strat doesn't work. That is unadulterated nonsense; I use it every single time I do this fight. Yes, there is the occasional misfire, but in general, it does work. Then one day, I experienced several consecutive failures, But I discovered what my problem was: My 1st slot of Lovebird Hatching was set to Alpha Strike instead of Peck. You must use Peck. Since Bruce is faster than Lovebird Hatchling, the second Alpha Strike will never go off, making your attack about half as effective as Peck would be.. |
Breed |
2 | 4.3 |
N/A | 50 |
104
1:44
|
16 | |
|
1. Not all crits are insta-forfeit, but AoE will still be a mess.
2. I was hestitant to use an expedition pet, but used to be cheap on AH, got mine for 400g in BfA. See comments for more alternatives and Rematch strings. |
Breed |
2 | 4.1 |
N/A | 8 |
142
2:22
|
23 | |
|
Had to go to literal hell and back to get a semi-consistent strategy for this mfer and his gang of murderous sharks. When all else fails, drop a meteor on it. RNG still bad though. The Blood in the Water at the end can really mess with you.
The first ability on Ashen Chomper doesn't particularly matter (you can use Chomp instead of Shadowflame), but it will be used. Haven't tried HP Ashen Chomper yet. |
Breed RNG Script |
2 | 4.8 |
41% | 2 |
105
1:45
|
16 | |

|
Please notice there is some RNG involved.
Credit goes to Jaheesh and Neodiun |
RNG |
2 | 3.4 |
N/A | 4 |
115
1:55
|
15 | |
|
|
Another spin on the Frostfur Rat opener but uses an alternative to the Bush Chicken by using a Darkmoon Hatchling instead. Downside is it is just as RNG heavy but can be overcome with a Gleamhoof Fawn (or any Fawn with this set) with more than 260 Speed. Any less and you will have an RNG fight restart point based on a speed tie.
The Frostfur Rat's breed shouldn't matter that much for this strategy, but speed is definitively useless for it. All breeds will outspeed Chum so Health and Power breeds are recommended. I was 100% consistently able to get Chum into Headbutt range with a P/S breed which is arguably the worst type for this strategy, showing how great the Frostfur Rat is as an opener. |
Breed RNG Script |
2 | 2.8 |
6% | 8 |
110
1:50
|
17+ | |

|
Skitter instead of Flank on purpose to avoid some stupid RNG >.<
(read below) Sometimes Chum uses Megalodon in round 4 instead of 5... (?!) If that happened to you -> Restart No idea why... (bug??) Looks like it happens if you bring him below 50% HP "too fast" PS: as a 3rd pet you could (maybe) use something else (tried a lot of them) (Speed > 260) for example: - Dust Bunny P/S (Dodge / Flurry / Burrow) - Some "Fawn" (Headbutt / Hoof) - Noblegarden Bunny (Egg Barrage / Flurry / Burrow) - etc... Althought after 5 hours of testing this stupid fight, i think that i am the most happy with Frenzied Cottontail because of his 297 Power and Feed. The RNG is STRONG with this one ^^ One of the most ridiculous battles for the [Family Battler] Achievement... |
RNG |
2 | 4.0 |
N/A | 2 |
119
1:59
|
17+ |
Incl. steps:


Substitutes:
1 / 2

Had to go to literal hell and back to get a semi-consistent strategy for this mfer and his gang of murderous sharks. When all else fails, drop a meteor on it. RNG still bad though. The Blood in the Water at the end can really mess with you.
The first ability on Ashen Chomper doesn't particularly matter (you can use Chomp instead of Shadowflame), but it will be used. Haven't tried HP Ashen Chomper yet.
| Before | After | Experience Gain | |
|---|---|---|---|
| 1 | ➜ | 3 | 239 |
| 2 | ➜ | 4 | 254 |
| 3 | ➜ | 4 | 267 |
| 4 | ➜ | 5 | 279 |
| 5 | ➜ | 6 | 289 |
| 6 | ➜ | 6 | 297 |
| 7 | ➜ | 7 | 304 |
| 8 | ➜ | 8 | 309 |
| 9 | ➜ | 9 | 312 |
| 10 | ➜ | 10 | 314 |
| 11 | ➜ | 11 | 314 |
| 12 | ➜ | 12 | 312 |
| 13 | ➜ | 13 | 309 |
| 14 | ➜ | 14 | 304 |
| 15 | ➜ | 15 | 297 |
| 16 | ➜ | 16 | 289 |
| 17 | ➜ | 17 | 279 |
| 18 | ➜ | 18 | 267 |
| 19 | ➜ | 19 | 254 |
| 20 | ➜ | 20 | 239 |
| 21 | ➜ | 21 | 223 |
| 22 | ➜ | 22 | 205 |
| 23 | ➜ | 23 | 185 |
| 24 | ➜ | 24 | 163 |
|
Safari Hat |
|
|
Lesser Pet Treat |
|
|
Pet Treat |
|
|
Darkmoon Hat |
|
|
Pet Battle Week |
|
= |
Pet levels to 25 with minimal XP lost |
|
|
= |
Additional XP above level 25 is lost |
|
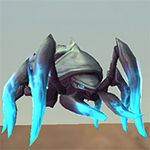
| Vile Deathroach | HH |
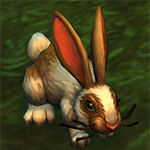
| Darkmoon Hatchling | SS |
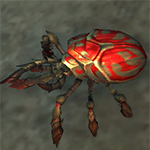
| Ashen Chomper | PS |
For the best display of your strategy, please follow these guidelines:


For the best display of your strategy, please follow these guidelines:
For the best display of your strategy, please follow these guidelines:
For the best display of your strategy, please follow these guidelines:
For the best display of your strategy, please follow these guidelines:
For the best display of your strategy, please follow these guidelines:
For the best display of your strategy, please follow these guidelines:
For the best display of your strategy, please follow these guidelines:
For the best display of your strategy, please follow these guidelines:
For the best display of your strategy, please follow these guidelines:
For the best display of your strategy, please follow these guidelines:
For the best display of your strategy, please follow these guidelines:
For the best display of your strategy, please follow these guidelines:
For the best display of your strategy, please follow these guidelines:
For the best display of your strategy, please follow these guidelines:
For the best display of your strategy, please follow these guidelines:

Wet paws are always bad.

1
Coffe#21587
wrote on 2023-07-18 22:10:56
1
Jadey#11285
wrote on 2022-10-22 19:59:56
New Comment: