
Stratégie proposée par nogulpfrog
113
113
|
Average rating: |
4.9 |
|
Ratings: |
108 |
|
Your vote: |
|
Creator |
|||||||||
|---|---|---|---|---|---|---|---|---|---|
|
Tags
Filter strategies:
|
|||||||||

N'importe quelle mascotte de niveau 1+

N'importe quelle mascotte de niveau 1+
|

Quick way to level two pets at a time. They can be level 1, neither of them take damage. This gives you plenty of flexibility when it comes to what pets you want to level, and are less likely to waste potential xp on pets that are already in their 20s.
Shadowlands Update: I've updated the strategy. Something changed with prepatch and Slow Moe dies quicker than he used to. I've added a Pass in order to better line up Prowl and Feed with Snot's Dive. However, if Xu-Fu crits Slow Moe with Feed, you may be in some trouble now, as Feed may not be available again for Snot. I've updated the TD script, but I think you may need a bandage around 25% of the time now [the chance Headbutt stuns you], and there's even a slim chance for Xu-Fu to die. [That can happen IF you crit Slow Moe with Feed, one shotting him, and then Snot rolls high with Dive and it deals a critical hit. Then you don't crit with Bite, and die one turn before Feed is available again.] |
Niveau 1+ Script |
2 | 5.0 |
N/A | 73 |
97
1:37
|
16-17 | |


N'importe quelle mascotte de niveau 1+
|
Reprint. Create by yzjj.
|
Breed Niveau 1+ Script |
2 | 5.0 |
N/A | 32 |
60
1:00
|
9 | |
N'importe quelle mascotte de niveau 1+
|
Average time :57S
|
Niveau 1+ Script Choix de l'équipe |
2 | 4.9 |
N/A | 113 |
54
0:54
|
8 | |
N'importe quelle mascotte de niveau 1+

N'importe quelle mascotte
|
Niveau 1+ Script |
2 | 4.8 |
N/A | 20 |
115
1:55
|
19+ | ||

N'importe quelle mascotte de niveau 1+
|
9 rounds.
|
Niveau 1+ Script |
2 | 5.0 |
N/A | 7 |
71
1:11
|
9 | |

N'importe quelle mascotte de niveau 1+
|
Breed Niveau 1+ Script |
2 | 5.0 |
N/A | 8 |
57
0:57
|
8 | ||
|
N'importe quelle mascotte de niveau 1+
N'importe quelle mascotte de niveau 1+
|
I like this strategy and WQ because it's very repeatable, only requiring healing every few battles as well as having the option to level more than 1 pet at a time!
Great for pet battle weekly event, as well as character XP (About 50% character XP per hour) Inspired by Nyari =] |
Niveau 1+ Script |
2 | 3.8 |
N/A | 5 |
125
2:05
|
22+ | |

N'importe quelle mascotte de niveau 1+
|
You could also substitute a Petit dragon mécanique pandaren for the Zeppelin de Sombrelune. Just make sure to not Exploser unless Snot's health is 560 or less.
|
Niveau 1+ Script |
2 | 5.0 |
N/A | 0 |
80
1:20
|
12 | |
N'importe quelle mascotte de niveau 1+
|
Took a while for the BfA pets to be available here so I couldn't publish this strategy earlier. Still using Teroclaw but I think to start with Trecker can shorten the fight a bit (usually 12 rounds if he survives the first two enemy pets).
I recommend using the script for more efficient usage of Ravage. |
Niveau 1+ Script |
2 | 5.0 |
N/A | 1 |
89
1:29
|
14 | |

N'importe quelle mascotte de niveau 1+

|
|
Niveau 1+ Script |
2 | 5.0 |
N/A | 0 |
92
1:32
|
15 | |
N'importe quelle mascotte de niveau 1+
|
|
Niveau 1+ Script |
2 | 5.0 |
N/A | 1 |
130
2:10
|
20+ | |

N'importe quelle mascotte de niveau 1+
|
Hello,
This strategy and are TD Script are made from nogulpfrog strategy guide. I just modified the pet and add little things on TD Script. For 100% win, i recommand to choose the nogulpfrog stratégy guide. This is an alternative if you don't have "Baby Ape" and "Unborn Val'kyr" or if you want to create many team for levelling pet sessions (like i do). This stratégy not work at 100%, sometime the "Darkmoon Monkey" take critical hit or is stuned by "Slow Moe". If that happens, the game will be lost. |
RNG Niveau 1+ Script |
2 | 5.0 |
N/A | 1 |
71
1:11
|
10 | |
|
N'importe quelle mascotte de niveau 1+
|
|
Niveau 1+ Script |
2 | 5.0 |
N/A | 0 |
85
1:25
|
14 | |
|
N'importe quelle mascotte de niveau 1+

|
Boutique Niveau 1+ Script |
2 | 5.0 |
N/A | 3 |
57
0:57
|
9 | ||

N'importe quelle mascotte de niveau 1+
|
Fight Time using the TD Script as measured by the Pet Battle Log Keeper add-on:
1:03 - 1:07 on 11 rounds ~75% of the time (when not stunned). 1:12 - 1:16 on 12-13 rounds ~22% of the time (when stunned). 1:19 - 1:30(?) on 13-14 rounds(?) ~3% of the time (when stunned and bad crit RNG causes your Pup to die before killing enemy #2). This strategy is built for top speed, good reliability, and flexibility for the slot #3 pet. Although the TD Script appears long and bloated, it handles different RNG scenarios with various finisher pets in slot #3. Pet substitutions: Slot #1 - Louveteau de givre, Louveteau du Néant perdu, or Louveteau marqué par le Vide can be used here. Slot #3 - Any pet that will finish off enemy #3 in 2 turns works well here. Since there are too many to list here, I have compiled a partial list of 2-turn finishers in the comments section below. The TD Script should be compatible with them all. |
Niveau 1+ Script |
2 | 5.0 |
N/A | 0 |
69
1:09
|
11-12 | |
|
N'importe quelle mascotte de niveau 1+

|
Niveau 1+ Script |
2 | 5.0 |
N/A | 0 |
104
1:44
|
15 | ||
|
N'importe quelle mascotte de niveau 1+
|
Time: ~1:11 (11rounds)
Inspired by Rosqo's PVP Pet Battles . |
Breed Niveau 1+ Script |
2 | 5.0 |
N/A | 1 |
72
1:12
|
11 | |
|
N'importe quelle mascotte de niveau 1+


|
Fight Time: 1:25 - 1:30 on ~14 rounds (with PP Iron Starlette)
A PP breed Iron Starlette (341 power) is optimal for this strategy. A PS, PB, or HP breed can get the job done, but they slower, less reliable, and not recommended. |
Breed Niveau 1+ Script |
2 | 5.0 |
N/A | 0 |
89
1:29
|
14+ | |
|
N'importe quelle mascotte de niveau 1+
|
9 rounds.
|
Niveau 1+ Script |
2 | 4.4 |
N/A | 3 |
66
1:06
|
9 | |
N'importe quelle mascotte de niveau 1+
N'importe quelle mascotte de niveau 1+
|
Strat posted by Aranesh on the Magic pet Family Familiar page and credit to Mistmeddler for the upgrade to wq.
This fight is infinitely repeatable whenever the wq is up and gives high xp which makes it a great alternative to Squirt on Sign of the Critter weeks. |
Niveau 1+ Script |
2 | 4.5 |
N/A | 0 |
102
1:42
|
17+ | |
|
Strategy based on the GOAT pet leveling strategy by nogulpfrog but focused on finishing the fight faster without leveling pets. With this alternative strategy you can finish the fight in one less round (7 instead of 8), which saves a few seconds (~3s) (49s instead of 52s). Sometimes it can even be shorter (~2s) if you are lucky with some crits.
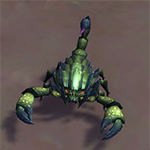
The pet in slot #1 must have at least 309 power. Currently, there are 4 equally functional pet alternatives for slot #1: - [Deathsting Scorpid] - [Gorm Harrier]: You would need two of these as another one is used in slot #3 - [Gorm Needler]: Only the P/P breed is valid - [Buzzworth] The pet in slot #2 must have at least 345 power (or 304 power if from a dragonkin family). Currently, there are 2 equally functional pet alternatives for slot #2: - [Kunchong Hatchling] - [Scaley] There are currently no alternative pets available for slot #3 [Gorm Harrier]. |
Script |
2 | 3.7 |
N/A | 4 |
53
0:53
|
7 | |
|
N'importe quelle mascotte de niveau 1+

|
Your Gorm Harrier can take 1 crit
|
Niveau 1+ Script |
2 | 3.7 |
N/A | 2 |
66
1:06
|
9 | |
|
N'importe quelle mascotte de niveau 1+
|
Tested in SL Live.
Iron Starlette: H/P Other breeds untested Leveling pet can be anything, takes no damage. Tested 5+ times without issue. Double-stun from Slow Moe (25% chance to stun, uses ability 2x before death) along with several enemy crits could potentially cause issues, but not a situation I encountered. |
Script |
2 | 2.5 |
N/A | 1 |
146
2:26
|
22 | |
|
N'importe quelle mascotte de niveau 1+
|
Inspired by nogulpfrog
|
Niveau 1+ Script |
2 | 0.0 |
N/A | 0 |
62
1:02
|
9 | |

N'importe quelle mascotte de niveau 1+
|
Work in progress,
you must select the Turn 8 ability Inspired by Nogulpfrog |
Niveau 1+ Script |
2 | 0.0 |
N/A | 0 |
60
1:00
|
8 | |
|
N'importe quelle mascotte de niveau 1+
|
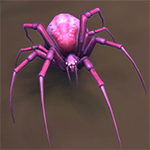
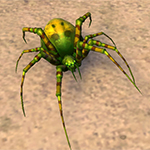
P/P breed works best. There are lots of alternatives for spiders, but the ones that can be P/P are Araignée du Crépuscule, Jeune mandibrûle and Jeune veuve. I tried it with a P/B and a B/B spider and that worked OK but I found S/S was too weak.
|
Breed Niveau 1+ Script |
2 | 0.0 |
N/A | 0 |
140
2:20
|
24-26 | |
N'importe quelle mascotte de niveau 1+
|
This keeps Great Sting on the enemy team for the entire fight, killing the annoying backline pets before they even see combat and avoiding damage from Rocklick's shield.
The fight even goes a little better if you start with an injured Deathsting Scorpid, which will get its Beast racial damage bonus later in the fight. This strat can save you half the bandages when grinding Odrogg. |
Niveau 1+ Difficile |
2 | 0.0 |
N/A | 0 |
90
1:30
|
12-13 | |
|
N'importe quelle mascotte de niveau 1+
|
Niveau 1+ Script |
2 | 0.0 |
N/A | 0 |
89
1:29
|
14 | ||
|
N'importe quelle mascotte de niveau 1+
|
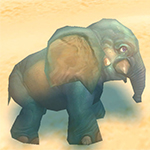
Finally i have the opportunity to use the best beast pet in the game. ;)
Trunks is not crucial to the strategy. Anything wird hard hitting beast abilities can take it's place. Average fight time: 1:20 (1:15 best case scenario, 1:25 worst case) You can also see the strategy in a video. |
Niveau 1+ Script |
2 | 0.0 |
N/A | 0 |
76
1:16
|
11 | |
|
N'importe quelle mascotte de niveau 1+
|
TD script updated for 9.0.1. Combined the fast fight by Lazey, with the no heal fight by Nyari, so you can keep fighting till you can heal.
|
Niveau 1+ Script |
2 | 0.0 |
N/A | 0 |
100
1:40
|
14+ |
Ajout étape:


Talents : * 1 *
Breed: Tous
| Breed | Vie | Puissance | Vitesse |
|---|---|---|---|
| PP | 1502 | 345 | 219 |
>340 |


N'importe quelle mascotte de niveau 1+

Average time :57S
| Avant | Après | Gain xp | |
|---|---|---|---|
| 1 | ➜ | 13 | 5981 |
| 2 | ➜ | 13 | 6353 |
| 3 | ➜ | 14 | 6683 |
| 4 | ➜ | 14 | 6971 |
| 5 | ➜ | 14 | 7219 |
| 6 | ➜ | 15 | 7425 |
| 7 | ➜ | 15 | 7590 |
| 8 | ➜ | 16 | 7714 |
| 9 | ➜ | 16 | 7796 |
| 10 | ➜ | 17 | 7838 |
| 11 | ➜ | 17 | 7838 |
| 12 | ➜ | 18 | 7796 |
| 13 | ➜ | 19 | 7714 |
| 14 | ➜ | 19 | 7590 |
| 15 | ➜ | 20 | 7425 |
| 16 | ➜ | 20 | 7219 |
| 17 | ➜ | 21 | 6971 |
| 18 | ➜ | 22 | 6683 |
| 19 | ➜ | 22 | 6353 |
| 20 | ➜ | 23 | 5981 |
| 21 | ➜ | 23 | 5569 |
| 22 | ➜ | 24 | 5115 |
| 23 | ➜ | 25 | 3900 |
| 24 | ➜ | 25 | 1980 |
|
Chapeau de safari |
|
|
Friandise inférieure |
|
|
Friandise |
|
|
Haut-de-forme sombrelune |
|
|
Événement semaine bonus |
|
= |
Passage niveau 25 avec perte d'xp minimale |
|
|
= |
XP au-delà du niveau 25 en surplus |
|
For the best display of your strategy, please follow these guidelines:


For the best display of your strategy, please follow these guidelines:
For the best display of your strategy, please follow these guidelines:
For the best display of your strategy, please follow these guidelines:
For the best display of your strategy, please follow these guidelines:
For the best display of your strategy, please follow these guidelines:
For the best display of your strategy, please follow these guidelines:
For the best display of your strategy, please follow these guidelines:

Avec du beurre et un peu d'ail. Un délice.

-2
paleoterra#1300
rédigé le 2025-04-27 01:16:45
1
Teraferma#1829
rédigé le 2025-03-04 21:28:28
1
Shirdvinas#2177
rédigé le 2025-03-04 07:54:05
(edited)
1
Varukka#1989
rédigé le 2025-02-16 04:02:17
8
Pyro rédigé le 2024-03-31 12:41:31
1
swotam
rédigé le 2025-01-14 01:24:42
2
swotam
rédigé le 2025-01-14 01:23:23
2
dyljo#1273
rédigé le 2025-01-11 23:34:38
If you have 3 Gorm Harriers and Kunchong Hatchlings you can set up 3 different teams and rotate them, only needing to heal every 12 battles (though the Harriers don't really take much damage so you might only need 1 or 2 of these, though they are super easy to get from the treasure in Ardenweald on a couple different characters, then easily level them with this strat).
Each fight takes around 50 seconds which comes out to around 10 minutes for 12 fights, meaning you never have to bandage since pet heal is an 8 minute CD.
You can also just buy the extra Kunchong Hatchlings on AH if you need them. I've never seen them for more than a couple hundred gold. (edited)
7
Cloud
rédigé le 2023-09-13 03:21:04
1
cataclyzmic rédigé le 2024-02-13 20:54:23
3
RastaWayne#2454
rédigé le 2024-03-12 11:30:30
1
Lexicon#11277
rédigé le 2024-01-05 01:03:11
3
dokeefe1986
rédigé le 2024-02-12 22:37:53
2
wheesper#1889
rédigé le 2023-12-21 07:28:57
2
Jozee
rédigé le 2023-12-20 19:44:22
6
DarkKuno#1481
rédigé le 2023-10-30 12:32:06
4
Poetic
rédigé le 2023-07-24 17:05:18
0
Cilla513
rédigé le 2023-06-28 19:07:02
change(#1) [self(#3).active]
use(Great Sting:1966)
use(Impale:800) [self.aura(Enraged:1391).exists]
use(Enrage:1392) [self(#3).played]
change(#2)
use(Pheromones:1063)
change(#3) [!self(#3).played]
3
Kalagren
rédigé le 2023-06-28 21:01:10
change(#2) [round=2]
change(#3) [round=4]
use(Great Sting:1966)
standby [round=5 & self(#2).dead]
use(Enrage:1392) [!self.aura(Enraged:1391).exists]
use(Impale:800)
use(Pheromones:1063)
Is the posted script, it has an extra line - "standby". I believe this allows for when you are rapidly battling, using 1 bandage every 2-4 fights, and your Kunchong dies.
11
Berendain
rédigé le 2021-08-29 05:45:53
change(#1) [self(#3).played]
change(#2) [round=2]
change(#3) [round=4]
use(Great Sting:1966)
standby [round=5 & self(#2).dead]
use(Enrage:1392) [!self.aura(Enraged:1391).exists]
use(Impale:800)
use(Pheromones:1063) (edited)
2
Stratloc#1112
rédigé le 2021-08-29 09:38:41
3
Mutanis
rédigé le 2021-08-30 10:46:43
1
kidcriticus
rédigé le 2022-11-25 17:16:44
5
Awesome-O
rédigé le 2022-02-13 18:20:08
4
WhyDaRumGone
rédigé le 2022-08-21 12:00:34
of eachJeune kunchong's you are unlikely to have to bandage at all :pEdit: So I ran this for 4 hours today with 2x KH with Ultra Squirt set it to 30 and only had to use 1 bandage. I know the cut off for health is 465 (allows for crits) and that is 31% if KH's health BUT considering my bandage rate of 0.25 bandages per hour it works ok I guess.
Though not sure if it would have been different with 35%. If I had a 3rd KH there would be no issues at all and It'd easily work with 35. (edited)
4
tsaavik
rédigé le 2021-10-18 00:20:11
2
DarkKuno#1481
rédigé le 2021-08-29 01:41:36
Well worth the ground based travel time of taking a level 10-low teens character there.Even better now that skyriding is available at level 10. All the props for it <3 (edited)1
Iniqiuss#2946
rédigé le 2021-08-30 13:03:23
Could you tell me how?
I have 42lvl which cannot see WQ...
2
DarkKuno#1481
rédigé le 2021-08-30 22:23:03
Just go to Chromie in Stormwind or Org as appropriate for faction and pick Legion for Chromie Time. Once you get through the initial intro quests to get Dal Hearthstone and Your Class Hall you can pick any legion zone and quest as normal. You'll probably ding 11 or 12 depending on class.
I leveled my Void Elf from 11-40 and a Nightborne from 12-mid 30's with this battle last time it was up during pet battle week and got a metric ton of pets to 25 in the process. (edited)
2
Iniqiuss#2946
rédigé le 2021-10-17 12:02:26
Thank you very much. It works!
1
DarkKuno#1481
rédigé le 2021-10-17 15:38:57
2
Haxxman
rédigé le 2021-08-30 09:22:10
0
Stratloc#1112
rédigé le 2021-08-29 09:40:16
Safe for level 1s.
During pet week, with a safari hat (no food bonuses) it takes 2 fights for leveling 1-25.
Bring band-aids, I consistently need to revive the Kunchong with 2-3 minutes left on the heal button.
4
Thromkal
rédigé le 2021-08-28 05:26:59
1
Kinrael#21690
rédigé le 2021-08-28 04:09:53
1
JerryMo rédigé le 2021-07-14 03:58:03
6
Mutanis
rédigé le 2021-07-13 12:14:57
1
Tifa
rédigé le 2021-07-14 03:09:19
2
Tifa
rédigé le 2021-07-14 03:07:33
1
Deesee
rédigé le 2021-07-13 16:03:35
3
Nyari
rédigé le 2021-07-13 13:06:29
You only need a bandage every third or fourth fight.
1
Zettalee
rédigé le 2023-02-01 16:25:46
1
ynag0511
rédigé le 2021-08-31 04:48:23
가장 큰 장점은 피가 거의 달지 않아 2마리 정도씩 보유하면
붕대를 쓰지 않고 무한하게 군단쩔을 돌릴 수 있다
Nouveau Commentaire :