
攻略提供者是 millanzarreta
4
4
|
平均評分: |
3.7 |
|
評分: |
3 |
|
你的投票: |
|
Creator |
|||||||||
|---|---|---|---|---|---|---|---|---|---|
|
Tags
Filter strategies:
|
|||||||||

任何等級 1+ 寵物

任何等級 1+ 寵物
|

Quick way to level two pets at a time. They can be level 1, neither of them take damage. This gives you plenty of flexibility when it comes to what pets you want to level, and are less likely to waste potential xp on pets that are already in their 20s.
Shadowlands Update: I've updated the strategy. Something changed with prepatch and Slow Moe dies quicker than he used to. I've added a Pass in order to better line up Prowl and Feed with Snot's Dive. However, if Xu-Fu crits Slow Moe with Feed, you may be in some trouble now, as Feed may not be available again for Snot. I've updated the TD script, but I think you may need a bandage around 25% of the time now [the chance Headbutt stuns you], and there's even a slim chance for Xu-Fu to die. [That can happen IF you crit Slow Moe with Feed, one shotting him, and then Snot rolls high with Dive and it deals a critical hit. Then you don't crit with Bite, and die one turn before Feed is available again.] |
等級 1+ Script |
2 | 5.0 |
N/A | 75 |
97
1:37
|
16-17 | |


任何等級 1+ 寵物
|
Reprint. Create by yzjj.
|
屬性 等級 1+ Script |
2 | 5.0 |
N/A | 32 |
60
1:00
|
9 | |
任何等級 1+ 寵物
|
Average time :57S
|
等級 1+ Script 網站精選 |
2 | 4.9 |
N/A | 115 |
54
0:54
|
8 | |
任何等級 1+ 寵物

任何寵物
|
等級 1+ Script |
2 | 4.8 |
N/A | 21 |
115
1:55
|
19+ | ||

任何等級 1+ 寵物
|
9 rounds.
|
等級 1+ Script |
2 | 5.0 |
N/A | 7 |
71
1:11
|
9 | |

任何等級 1+ 寵物
|
屬性 等級 1+ Script |
2 | 5.0 |
N/A | 7 |
57
0:57
|
8 | ||
|
任何等級 1+ 寵物
任何等級 1+ 寵物
|
I like this strategy and WQ because it's very repeatable, only requiring healing every few battles as well as having the option to level more than 1 pet at a time!
Great for pet battle weekly event, as well as character XP (About 50% character XP per hour) Inspired by Nyari =] |
等級 1+ Script |
2 | 3.8 |
N/A | 5 |
125
2:05
|
22+ | |

任何等級 1+ 寵物
|
|
等級 1+ Script |
2 | 5.0 |
N/A | 0 |
80
1:20
|
12 | |
任何等級 1+ 寵物
|
Took a while for the BfA pets to be available here so I couldn't publish this strategy earlier. Still using Teroclaw but I think to start with Trecker can shorten the fight a bit (usually 12 rounds if he survives the first two enemy pets).
I recommend using the script for more efficient usage of Ravage. |
等級 1+ Script |
2 | 5.0 |
N/A | 1 |
89
1:29
|
14 | |

任何等級 1+ 寵物

|
|
等級 1+ Script |
2 | 5.0 |
N/A | 0 |
92
1:32
|
15 | |
任何等級 1+ 寵物
|
|
等級 1+ Script |
2 | 5.0 |
N/A | 0 |
130
2:10
|
20+ | |

任何等級 1+ 寵物
|
Hello,
This strategy and are TD Script are made from nogulpfrog strategy guide. I just modified the pet and add little things on TD Script. For 100% win, i recommand to choose the nogulpfrog stratégy guide. This is an alternative if you don't have "Baby Ape" and "Unborn Val'kyr" or if you want to create many team for levelling pet sessions (like i do). This stratégy not work at 100%, sometime the "Darkmoon Monkey" take critical hit or is stuned by "Slow Moe". If that happens, the game will be lost. |
RNG 等級 1+ Script |
2 | 5.0 |
N/A | 1 |
71
1:11
|
10 | |
|
任何等級 1+ 寵物
|
|
等級 1+ Script |
2 | 5.0 |
N/A | 0 |
85
1:25
|
14 | |
|
任何等級 1+ 寵物

|
商店 等級 1+ Script |
2 | 5.0 |
N/A | 3 |
57
0:57
|
9 | ||
任何等級 1+ 寵物
|
Fight Time using the TD Script as measured by the Pet Battle Log Keeper add-on:
1:03 - 1:07 on 11 rounds ~75% of the time (when not stunned). 1:12 - 1:16 on 12-13 rounds ~22% of the time (when stunned). 1:19 - 1:30(?) on 13-14 rounds(?) ~3% of the time (when stunned and bad crit RNG causes your Pup to die before killing enemy #2). This strategy is built for top speed, good reliability, and flexibility for the slot #3 pet. Although the TD Script appears long and bloated, it handles different RNG scenarios with various finisher pets in slot #3. Pet substitutions: Slot #1 - 小霜狼, 走失的虛空幼狼, or 虛無之痕幼狼 can be used here. Slot #3 - Any pet that will finish off enemy #3 in 2 turns works well here. Since there are too many to list here, I have compiled a partial list of 2-turn finishers in the comments section below. The TD Script should be compatible with them all. |
等級 1+ Script |
2 | 5.0 |
N/A | 0 |
69
1:09
|
11-12 | |
|
任何等級 1+ 寵物

|
等級 1+ Script |
2 | 5.0 |
N/A | 0 |
104
1:44
|
15 | ||
|
任何等級 1+ 寵物
|
Time: ~1:11 (11rounds)
Inspired by Rosqo's PVP Pet Battles . |
屬性 等級 1+ Script |
2 | 5.0 |
N/A | 1 |
72
1:12
|
11 | |
|
任何等級 1+ 寵物


|
Fight Time: 1:25 - 1:30 on ~14 rounds (with PP Iron Starlette)
A PP breed Iron Starlette (341 power) is optimal for this strategy. A PS, PB, or HP breed can get the job done, but they slower, less reliable, and not recommended. |
屬性 等級 1+ Script |
2 | 5.0 |
N/A | 0 |
89
1:29
|
14+ | |
|
任何等級 1+ 寵物
|
9 rounds.
|
等級 1+ Script |
2 | 4.4 |
N/A | 3 |
66
1:06
|
9 | |

任何等級 1+ 寵物
任何等級 1+ 寵物
|
Strat posted by Aranesh on the Magic pet Family Familiar page and credit to Mistmeddler for the upgrade to wq.
This fight is infinitely repeatable whenever the wq is up and gives high xp which makes it a great alternative to Squirt on Sign of the Critter weeks. |
等級 1+ Script |
2 | 4.5 |
N/A | 0 |
102
1:42
|
17+ | |
|
Strategy based on the GOAT pet leveling strategy by nogulpfrog but focused on finishing the fight faster without leveling pets. With this alternative strategy you can finish the fight in one less round (7 instead of 8), which saves a few seconds (~3s) (49s instead of 52s). Sometimes it can even be shorter (~2s) if you are lucky with some crits.
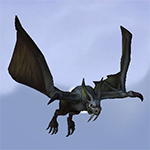
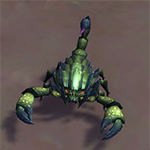
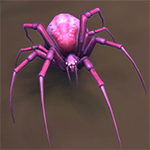
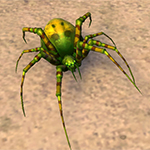
The pet in slot #1 must have at least 309 power. Currently, there are 4 equally functional pet alternatives for slot #1: - [Deathsting Scorpid] - [Gorm Harrier]: You would need two of these as another one is used in slot #3 - [Gorm Needler]: Only the P/P breed is valid - [Buzzworth] The pet in slot #2 must have at least 345 power (or 304 power if from a dragonkin family). Currently, there are 2 equally functional pet alternatives for slot #2: - [Kunchong Hatchling] - [Scaley] There are currently no alternative pets available for slot #3 [Gorm Harrier]. |
Script |
2 | 3.7 |
N/A | 4 |
53
0:53
|
7 | |
|
任何等級 1+ 寵物

|
Your Gorm Harrier can take 1 crit
|
等級 1+ Script |
2 | 3.7 |
N/A | 2 |
66
1:06
|
9 | |
|
任何等級 1+ 寵物
|
Tested in SL Live.
Iron Starlette: H/P Other breeds untested Leveling pet can be anything, takes no damage. Tested 5+ times without issue. Double-stun from Slow Moe (25% chance to stun, uses ability 2x before death) along with several enemy crits could potentially cause issues, but not a situation I encountered. |
Script |
2 | 2.5 |
N/A | 1 |
146
2:26
|
22 | |
|
任何等級 1+ 寵物
|
Inspired by nogulpfrog
|
等級 1+ Script |
2 | 0.0 |
N/A | 0 |
62
1:02
|
9 | |

任何等級 1+ 寵物
|
Work in progress,
you must select the Turn 8 ability Inspired by Nogulpfrog |
等級 1+ Script |
2 | 0.0 |
N/A | 0 |
60
1:00
|
8 | |
|
任何等級 1+ 寵物
|
|
屬性 等級 1+ Script |
2 | 0.0 |
N/A | 0 |
140
2:20
|
24-26 | |
任何等級 1+ 寵物
|
This keeps Great Sting on the enemy team for the entire fight, killing the annoying backline pets before they even see combat and avoiding damage from Rocklick's shield.
The fight even goes a little better if you start with an injured Deathsting Scorpid, which will get its Beast racial damage bonus later in the fight. This strat can save you half the bandages when grinding Odrogg. |
等級 1+ 棘手的 |
2 | 0.0 |
N/A | 0 |
90
1:30
|
12-13 | |
|
任何等級 1+ 寵物
|
等級 1+ Script |
2 | 0.0 |
N/A | 0 |
89
1:29
|
14 | ||
|
任何等級 1+ 寵物
|
Finally i have the opportunity to use the best beast pet in the game. ;)
Trunks is not crucial to the strategy. Anything wird hard hitting beast abilities can take it's place. Average fight time: 1:20 (1:15 best case scenario, 1:25 worst case) You can also see the strategy in a video. |
等級 1+ Script |
2 | 0.0 |
N/A | 0 |
76
1:16
|
11 | |
|
任何等級 1+ 寵物
|
TD script updated for 9.0.1. Combined the fast fight by Lazey, with the no heal fight by Nyari, so you can keep fighting till you can heal.
|
等級 1+ Script |
2 | 0.0 |
N/A | 0 |
100
1:40
|
14+ |
包括步驟


Substitutes:
1 / 4
1 / 4
Strategy based on the GOAT pet leveling strategy by nogulpfrog but focused on finishing the fight faster without leveling pets. With this alternative strategy you can finish the fight in one less round (7 instead of 8), which saves a few seconds (~3s) (49s instead of 52s). Sometimes it can even be shorter (~2s) if you are lucky with some crits.
The pet in slot #1 must have at least 309 power.
Currently, there are 4 equally functional pet alternatives for slot #1:
- [Deathsting Scorpid]
- [Gorm Harrier]: You would need two of these as another one is used in slot #3
- [Gorm Needler]: Only the P/P breed is valid
- [Buzzworth]
The pet in slot #2 must have at least 345 power (or 304 power if from a dragonkin family).
Currently, there are 2 equally functional pet alternatives for slot #2:
- [Kunchong Hatchling]
- [Scaley]
There are currently no alternative pets available for slot #3 [Gorm Harrier].
| 之前 | 之後 | 獲得經驗值 | |
|---|---|---|---|
| 1 | ➜ | 13 | 5981 |
| 2 | ➜ | 13 | 6353 |
| 3 | ➜ | 14 | 6683 |
| 4 | ➜ | 14 | 6971 |
| 5 | ➜ | 14 | 7219 |
| 6 | ➜ | 15 | 7425 |
| 7 | ➜ | 15 | 7590 |
| 8 | ➜ | 16 | 7714 |
| 9 | ➜ | 16 | 7796 |
| 10 | ➜ | 17 | 7838 |
| 11 | ➜ | 17 | 7838 |
| 12 | ➜ | 18 | 7796 |
| 13 | ➜ | 19 | 7714 |
| 14 | ➜ | 19 | 7590 |
| 15 | ➜ | 20 | 7425 |
| 16 | ➜ | 20 | 7219 |
| 17 | ➜ | 21 | 6971 |
| 18 | ➜ | 22 | 6683 |
| 19 | ➜ | 22 | 6353 |
| 20 | ➜ | 23 | 5981 |
| 21 | ➜ | 23 | 5569 |
| 22 | ➜ | 24 | 5115 |
| 23 | ➜ | 25 | 3900 |
| 24 | ➜ | 25 | 1980 |
|
狩旅團之帽 |
|
|
小寵物點心 |
|
|
寵物點心 |
|
|
暗月禮帽 |
|
|
寵物對戰獎勵事件 |
|
= |
將寵物等級提升至25級並最小化經驗損失的方法 |
|
|
= |
獲得 |
|
For the best display of your strategy, please follow these guidelines:


For the best display of your strategy, please follow these guidelines:
For the best display of your strategy, please follow these guidelines:
For the best display of your strategy, please follow these guidelines:
For the best display of your strategy, please follow these guidelines:
For the best display of your strategy, please follow these guidelines:
For the best display of your strategy, please follow these guidelines:

Climbing mountains is always nice, but this fellow is a cave dweller!


1
(OP) millanzarreta
發表在 2025-01-13 06:56:34
Here is a screenshot of various combat time tests for both battles.
As can be seen, the battle pet duration for this strat is 47s-49s, usually 48s, with a 9.98% chance that it will be even 2s shorter (about 45s-47s).
The battle pet duration of the pet leveling strategy is 50s-52s, usually 51s.
The time difference between the two strategies is mainly due to the fact that in this strategy the player makes one less [Swap], which results in one less round for the player; the rest of the combat event sequences are practically the same. The time difference could be even bigger if the [Rocklick] enemy pet was not able to perform his [Spiny Carapace] action in round 7, since in both combats the enemy pet only acts in 7 rounds (in this strat it dies from the DoT tick just after perform its action in round 7, while in the other strat it performs its action in round 7 but cannot perform its action in round 8 because it dies from direct damage just before that).
In fact, in this strat there is a possibility (9.98% chance) that the [Rocklick] enemy pet will not have time to perform its action in round 7. This happens if our last [Impale] hit crits or if the second-to-last [Great Sting] DoT tick crits or if the two first [Great Sting] DoT ticks in rounds 1 and 2 crits. (已編輯)
2
DragonsAfterDark
發表在 2025-01-13 13:20:04
1
(OP) millanzarreta
發表在 2025-01-13 21:44:43
However, it makes no sense for this combat to last longer than the strategy it is based on, since it performs fewer actions. In fact, the action inputs are practically the same minus a pet swap, so the duration has to be actually shorter. How much shorter? Well, that depends on how you measure it. In my tests I've gotten around 3 seconds, but with other measurement methods it might be different, but always shorter.
1
DragonsAfterDark
發表在 2025-01-26 12:15:21
ETA: I just timed it (again) and got 55s. This accounts for not using the script, which the majority of players don't, and having to check the steps of the strategy on my second monitor.
Happy battling (已編輯)
1
(OP) millanzarreta
發表在 2025-01-11 15:07:52
- The fight usually lasts about 49 seconds. There is a 9.98% chance that it will last a few seconds less, and this happens if the enemy pet [Rocklick] receives a crit DoT tick from [Great Sting] in the second-to-last round or if the [Impale] hit in the last round crits or if at the start of the fight the enemy pet [Rocklick] takes two [Great Sting] DoT tick crits in a row. In these conditions the enemy pet [Rocklick] will die directly from the damage of [Impale] instead of the last round [Great Sting] DoT tick, so it will not have time to cast [Spiny Carapace], and this is what saves a few extra seconds in this circumstance.
- The pet in slot #1 will never receive damage during this fight.
- As in the pet leveling strategy, it is normal for the pet in slot #2 to receive two [Water Jet] attacks, although it is possible that it will only receive one if the enemy pet [Rocklick] receives two critical ticks in a row at the beginning of the fight. Thus, your pet in slot #2 will take between 309-926 damage per fight, normally 618.
- The pet in slot #3 will almost never take damage throughout the entire fight, although there is a extremely small chance that it will take a very small amount of damage on rare occasions (in which case it will take between 115 and 172 damage). This will only happen if at the start of the fight the enemy pet [Rocklick] takes two [Great Sting] DoT tick crits in a row.
- Just like Berendain added in the pet leveling strategy, this script also comes prepared to skip a round in case the pet in slot #2 dies from the second hit of [Water Jet]. This way you can set UltraSquirt's HP threshold to 30% almost safely (it should actually be 35% to be mega safe, but it's by such a small margin that it's recommended to set it to 30% just like in the pet leveling strategy).
... (已編輯)
1
(OP) millanzarreta
發表在 2025-01-11 14:31:50
- Any of the alternative pets in this strategy can be chosen, as they do not affect either the success of the battle or its duration.
- Any pet with at least 309 power and the attack [Great Sting] can go in slot #1, with the four alternative pets mentioned in the info box currently existing. Perhaps the most popular alternative to [Deathsting Scorpid] is to use another [Gorm Harrier] in this slot. Other lower power pets will not have enough damage to kill the enemy reserve pets or would also likely affect the abilities order of the [Rocklick] enemy pet, causing additional problems with the strategy.
- While for slot #2 the most popular choice is probably [Kunchong Hatchling], the [Scaley] alternative is completely fine. Normally the power requirement for this slot is high, 345. However, this pet's DoT attacks will necessarily cause the enemy to drop below 50% HP before the last tick of the [Pheromones] DoT, allowing one of the ticks to benefit from the dragonkin passive bonus, bringing down the power requirement for this slot to 304 for Dragonkin family pets. Currently, only these two pets meet these requirements for this strat. In the current strategy the limit is set to >303 to allow this alternative pet [Scaley] to be recognized, and there are no major problems because there are no other pets that meet these characteristics. In the future some modifications to the strategy may be necessary, setting the limit to >344 directly (in which case the pet [Scaley] could be selected directly as the primary pet to be recognized).
- For slot #3 you need as much power as possible (at least 337) and certain specific abilities, which only leaves us with the [Gorm Harrier] pet as an option. (已編輯)
新留言