^
vs. Dark Gazer

Strategy added by Mutanis

100

50

Strategy 1 of 16
Browse all alternatives

Incl. steps:

Click the button to copy the script into your clipboard:

use(Chop:943) [round=7]
change(#1) [round=6]
change(#2) [round=2]
use(Blistering Cold:786)
use(Chop:943)
use(Black Claw:919) [!enemy.aura(Black Claw:918).exists]
use(Blinding Poison:1049)
use(Barbed Stinger:1369)
change(#2)

-- dreamwhelp
use(Healing Flame:168) [self.hpp<70]
use(Emerald Presence:597) [self.aura(Emerald Presence:823).duration<=1]
use(Emerald Presence:597) [self.speed.fast & enemy.aura(Flying:341).exists]
use(Emerald Presence:597) [self.speed.fast & enemy.aura(Underground:340).exists]
use(Emerald Presence:597) [self.speed.fast & enemy.aura(Underwater:830).exists]
use(Emerald Presence:597) [enemy.aura(Dodge:311).exists]
use(Emerald Presence:597) [enemy.aura(Silk Cocoon:505).exists]
use(Emerald Bite:525)

standby
Dark Gazer 94644
Special or not:0Special or not:1110196311514619630

Skills: 1 1 *
Breed: Any

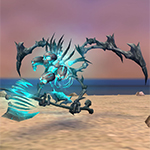
Boneshard
This pet can have the following breeds:

Breed Health Power Speed
BB 1481 276 276


Special or not:0Special or not:111115658813415650

Skills: 1 1 1
Breed: Any

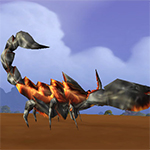
Mechanical Scorpid
This pet can have the following breeds:

Breed Health Power Speed
PP 1400 325 260
SS 1400 260 325
HP 1546 289 260
PB 1465 289 273
SB 1465 273 289


Special or not:0Special or not:112117229720617220

Skills: 1 2 1
Breed: Any

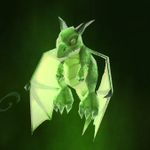
Dream Whelpling
This pet can have the following breeds:

Breed Health Power Speed
PP 1400 341 244
PS 1400 305 273
PB 1465 305 257


Time: ~2-3min

Easy and safe strategy!

Low XP
At least one of the pets for this strategy require the use of a specific breed.
Not every strategy can be bullet proof. This is one of them. You might have to restart it, since there are some random elements that increase the risk of your pets failing. Don't blame them, please!
This strategy is using pets obtainable from the Wow Trading Card Game (TCG) or the auction house for potentially high sums of gold.
This strategy is using pets obtainable only from the WoW In-Game Shop for Battle.net Balance or real money.
You can use this strategy to carry a low level pet to give it experience.
Some instructions are more difficult to follow than others. That's exactly what you might find in this strategy!
Script
The strategy offers a Script that can be used with the Pet Battle Script addon. You can copy the script by clicking on the button to the left of the pets.
At least one pet in the strategy cannot be obtained anymore. If you have it, congrats!
A Strategy Curator found this strategy to be especially helpful and higlighted it with this tag to give it more exposure.
In Dragonflight Patch 10.2, the ability Time Bomb has been changed. This tag is marking strategies using Time Bomb so they can be reviewed.
Time: 2:45
This time was entered by a strategy curator. It is quite reliable especially when using TDScript, however times can always vary slightly.
Rounds: 16+
The number of rounds for this fight were added by a strategy curator. This number is usually very reliable.
This table shows the level increase for completing the fight with level 25 pets and one carry pet.
Partial level experience is not included in the calculation.

Before After Experience Gain
161196
271271
371337
471394
581444
681485
791518
8101543
9111559
10111568
11121568
12131559
13141543
14151518
15161485
16171444
17171394
18181337
19191271
20201196
21211114
22221023
2323924
2424817

Safari Hat

Lesser Pet Treat

Pet Treat

Darkmoon Hat

Pet Battle Week


Strategy Details
2 Min 45 Sec
This time was entered by a strategy curator. It is quite reliable especially when using TDScript, however times can always vary slightly.
16+
The number of rounds for this fight were added by a strategy curator. This number is usually very reliable.
2022-11-06 12:35:25
The strategy was last updated on this date.
2020-10-18 14:06:14
The strategy was created on this date.
59,056
Pageviews. This number indicates how often this strategy has been accessed by visitors.
Tamer Details
Tanaan Jungle 54.0 29.9 (TomTom / Map Pin)
Low XP
This fight provides very low experience. It is usually not worth bringing a low level pet in. You can see detailed values by hovering over the XP tag.
Turn 1

For the best display of your strategy, please follow these guidelines:

  • Use QuickFill elements where possible
  • Enter custom instructions in English
  • Check the Strategy Creation Guide for more info
Boneshard
Chop
Blistering Cold
Mechanical Scorpid
Barbed Stinger
Blinding Poison
Black Claw
Dream Whelpling
Emerald Bite
Emerald Presence
Healing Flame
Pass
Bring in your Boneshard
Bring in your Mechanical Scorpid
Bring in your Dream Whelpling
Swap to your Boneshard
Swap to your Mechanical Scorpid
Swap to your Dream Whelpling
Dark Gazer comes in
An enemy pet comes in
Any standard attack will finish the fight
 
Boneshard
Mechanical Scorpid
Dream Whelpling
Chop
Blistering Cold
Barbed Stinger
Blinding Poison
Black Claw
Emerald Bite
Emerald Presence
Healing Flame
Dark Gazer
Turn 2
Swap to your Mechanical Scorpid

For the best display of your strategy, please follow these guidelines:

  • Use QuickFill elements where possible
  • Enter custom instructions in English
  • Check the Strategy Creation Guide for more info
Boneshard
Chop
Blistering Cold
Mechanical Scorpid
Barbed Stinger
Blinding Poison
Black Claw
Dream Whelpling
Emerald Bite
Emerald Presence
Healing Flame
Pass
Bring in your Boneshard
Bring in your Mechanical Scorpid
Bring in your Dream Whelpling
Swap to your Boneshard
Swap to your Mechanical Scorpid
Swap to your Dream Whelpling
Dark Gazer comes in
An enemy pet comes in
Any standard attack will finish the fight
 
Boneshard
Mechanical Scorpid
Dream Whelpling
Chop
Blistering Cold
Barbed Stinger
Blinding Poison
Black Claw
Emerald Bite
Emerald Presence
Healing Flame
Dark Gazer
Turn 3

For the best display of your strategy, please follow these guidelines:

  • Use QuickFill elements where possible
  • Enter custom instructions in English
  • Check the Strategy Creation Guide for more info
Boneshard
Chop
Blistering Cold
Mechanical Scorpid
Barbed Stinger
Blinding Poison
Black Claw
Dream Whelpling
Emerald Bite
Emerald Presence
Healing Flame
Pass
Bring in your Boneshard
Bring in your Mechanical Scorpid
Bring in your Dream Whelpling
Swap to your Boneshard
Swap to your Mechanical Scorpid
Swap to your Dream Whelpling
Dark Gazer comes in
An enemy pet comes in
Any standard attack will finish the fight
 
Boneshard
Mechanical Scorpid
Dream Whelpling
Chop
Blistering Cold
Barbed Stinger
Blinding Poison
Black Claw
Emerald Bite
Emerald Presence
Healing Flame
Dark Gazer
Turn 4

For the best display of your strategy, please follow these guidelines:

  • Use QuickFill elements where possible
  • Enter custom instructions in English
  • Check the Strategy Creation Guide for more info
Boneshard
Chop
Blistering Cold
Mechanical Scorpid
Barbed Stinger
Blinding Poison
Black Claw
Dream Whelpling
Emerald Bite
Emerald Presence
Healing Flame
Pass
Bring in your Boneshard
Bring in your Mechanical Scorpid
Bring in your Dream Whelpling
Swap to your Boneshard
Swap to your Mechanical Scorpid
Swap to your Dream Whelpling
Dark Gazer comes in
An enemy pet comes in
Any standard attack will finish the fight
 
Boneshard
Mechanical Scorpid
Dream Whelpling
Chop
Blistering Cold
Barbed Stinger
Blinding Poison
Black Claw
Emerald Bite
Emerald Presence
Healing Flame
Dark Gazer
Turn 5

For the best display of your strategy, please follow these guidelines:

  • Use QuickFill elements where possible
  • Enter custom instructions in English
  • Check the Strategy Creation Guide for more info
Boneshard
Chop
Blistering Cold
Mechanical Scorpid
Barbed Stinger
Blinding Poison
Black Claw
Dream Whelpling
Emerald Bite
Emerald Presence
Healing Flame
Pass
Bring in your Boneshard
Bring in your Mechanical Scorpid
Bring in your Dream Whelpling
Swap to your Boneshard
Swap to your Mechanical Scorpid
Swap to your Dream Whelpling
Dark Gazer comes in
An enemy pet comes in
Any standard attack will finish the fight
 
Boneshard
Mechanical Scorpid
Dream Whelpling
Chop
Blistering Cold
Barbed Stinger
Blinding Poison
Black Claw
Emerald Bite
Emerald Presence
Healing Flame
Dark Gazer
Turn 6
Swap to your Boneshard

For the best display of your strategy, please follow these guidelines:

  • Use QuickFill elements where possible
  • Enter custom instructions in English
  • Check the Strategy Creation Guide for more info
Boneshard
Chop
Blistering Cold
Mechanical Scorpid
Barbed Stinger
Blinding Poison
Black Claw
Dream Whelpling
Emerald Bite
Emerald Presence
Healing Flame
Pass
Bring in your Boneshard
Bring in your Mechanical Scorpid
Bring in your Dream Whelpling
Swap to your Boneshard
Swap to your Mechanical Scorpid
Swap to your Dream Whelpling
Dark Gazer comes in
An enemy pet comes in
Any standard attack will finish the fight
 
Boneshard
Mechanical Scorpid
Dream Whelpling
Chop
Blistering Cold
Barbed Stinger
Blinding Poison
Black Claw
Emerald Bite
Emerald Presence
Healing Flame
Dark Gazer
An enemy pet comes in

For the best display of your strategy, please follow these guidelines:

  • Use QuickFill elements where possible
  • Enter custom instructions in English
  • Check the Strategy Creation Guide for more info
Boneshard
Chop
Blistering Cold
Mechanical Scorpid
Barbed Stinger
Blinding Poison
Black Claw
Dream Whelpling
Emerald Bite
Emerald Presence
Healing Flame
Pass
Bring in your Boneshard
Bring in your Mechanical Scorpid
Bring in your Dream Whelpling
Swap to your Boneshard
Swap to your Mechanical Scorpid
Swap to your Dream Whelpling
Dark Gazer comes in
An enemy pet comes in
Any standard attack will finish the fight
 
Boneshard
Mechanical Scorpid
Dream Whelpling
Chop
Blistering Cold
Barbed Stinger
Blinding Poison
Black Claw
Emerald Bite
Emerald Presence
Healing Flame
Dark Gazer
Prio list

For the best display of your strategy, please follow these guidelines:

  • Use QuickFill elements where possible
  • Enter custom instructions in English
  • Check the Strategy Creation Guide for more info
Boneshard
Chop
Blistering Cold
Mechanical Scorpid
Barbed Stinger
Blinding Poison
Black Claw
Dream Whelpling
Emerald Bite
Emerald Presence
Healing Flame
Pass
Bring in your Boneshard
Bring in your Mechanical Scorpid
Bring in your Dream Whelpling
Swap to your Boneshard
Swap to your Mechanical Scorpid
Swap to your Dream Whelpling
Dark Gazer comes in
An enemy pet comes in
Any standard attack will finish the fight
 
Boneshard
Mechanical Scorpid
Dream Whelpling
Chop
Blistering Cold
Barbed Stinger
Blinding Poison
Black Claw
Emerald Bite
Emerald Presence
Healing Flame
Dark Gazer
Bring in your Mechanical Scorpid

For the best display of your strategy, please follow these guidelines:

  • Use QuickFill elements where possible
  • Enter custom instructions in English
  • Check the Strategy Creation Guide for more info
Boneshard
Chop
Blistering Cold
Mechanical Scorpid
Barbed Stinger
Blinding Poison
Black Claw
Dream Whelpling
Emerald Bite
Emerald Presence
Healing Flame
Pass
Bring in your Boneshard
Bring in your Mechanical Scorpid
Bring in your Dream Whelpling
Swap to your Boneshard
Swap to your Mechanical Scorpid
Swap to your Dream Whelpling
Dark Gazer comes in
An enemy pet comes in
Any standard attack will finish the fight
 
Boneshard
Mechanical Scorpid
Dream Whelpling
Chop
Blistering Cold
Barbed Stinger
Blinding Poison
Black Claw
Emerald Bite
Emerald Presence
Healing Flame
Dark Gazer
Prio list

For the best display of your strategy, please follow these guidelines:
  • Use QuickFill elements where possible
  • Enter custom instructions in English
  • Check the Strategy Creation Guide for more info
Boneshard
Chop
Blistering Cold
Mechanical Scorpid
Barbed Stinger
Blinding Poison
Black Claw
Dream Whelpling
Emerald Bite
Emerald Presence
Healing Flame
Pass
Bring in your Boneshard
Bring in your Mechanical Scorpid
Bring in your Dream Whelpling
Swap to your Boneshard
Swap to your Mechanical Scorpid
Swap to your Dream Whelpling
Dark Gazer comes in
An enemy pet comes in
Any standard attack will finish the fight
 
Boneshard
Mechanical Scorpid
Dream Whelpling
Chop
Blistering Cold
Barbed Stinger
Blinding Poison
Black Claw
Emerald Bite
Emerald Presence
Healing Flame
Dark Gazer

For the best display of your strategy, please follow these guidelines:
  • Use QuickFill elements where possible
  • Enter custom instructions in English
  • Check the Strategy Creation Guide for more info
Boneshard
Chop
Blistering Cold
Mechanical Scorpid
Barbed Stinger
Blinding Poison
Black Claw
Dream Whelpling
Emerald Bite
Emerald Presence
Healing Flame
Pass
Bring in your Boneshard
Bring in your Mechanical Scorpid
Bring in your Dream Whelpling
Swap to your Boneshard
Swap to your Mechanical Scorpid
Swap to your Dream Whelpling
Dark Gazer comes in
An enemy pet comes in
Any standard attack will finish the fight
 
Boneshard
Mechanical Scorpid
Dream Whelpling
Chop
Blistering Cold
Barbed Stinger
Blinding Poison
Black Claw
Emerald Bite
Emerald Presence
Healing Flame
Dark Gazer
Prio list

For the best display of your strategy, please follow these guidelines:
  • Use QuickFill elements where possible
  • Enter custom instructions in English
  • Check the Strategy Creation Guide for more info
Boneshard
Chop
Blistering Cold
Mechanical Scorpid
Barbed Stinger
Blinding Poison
Black Claw
Dream Whelpling
Emerald Bite
Emerald Presence
Healing Flame
Pass
Bring in your Boneshard
Bring in your Mechanical Scorpid
Bring in your Dream Whelpling
Swap to your Boneshard
Swap to your Mechanical Scorpid
Swap to your Dream Whelpling
Dark Gazer comes in
An enemy pet comes in
Any standard attack will finish the fight
 
Boneshard
Mechanical Scorpid
Dream Whelpling
Chop
Blistering Cold
Barbed Stinger
Blinding Poison
Black Claw
Emerald Bite
Emerald Presence
Healing Flame
Dark Gazer

Don't look into his eyes! Ehm, eye. I meant eye.


Antilles

wrote on 2024-01-06 17:44:48

Team and script worked well as of 10.2

WhyDaRumGone

wrote on 2022-11-06 11:29:02

I experimented today with Turn 6 using Barbed Stinger then turn 6 swapping and it got the kill turn 6. Then used Blistering Cold, Swap and Black claw swap back etc.

Dont know if it would work all the time or even if it's better but it was a bit fun and different :p

(OP) Mutanis

wrote on 2022-11-06 17:36:58

good suggestion! I changed that. Now it works even better :)

Alayea

wrote on 2022-10-22 04:54:27

Still works great! :)

huldu

wrote on 2020-10-25 04:33:29

This isn't bad at all. A small change would be to change Dream Whelpling to a Shore Butterfly(2,1,1) and put it as first pet. As Dark Gazer comes in cast Wind Buffet. Now kill the backline pet by using a combination of Cocoon and Peck. Make sure you don't kill the first backline pet too quick you want Wind Buffet ready for Dark Gazer as he comes back in. Once he does use Wing Buffet so the last backline pet comes in and kill it.

Of course this probably has some rng in regards to what backline pets you'll end up fighting. The boneshard/scorpid should be able to deal with a backline pet if the Butterfly dies. The strat works quite well on Dark Gazer and the pets(boneshard/scorpid) are often somewhat alive after the fight ends.

The point of the strat is to NOT having to deal with fel corruption on the backline pets. (edited)

(OP) Mutanis

wrote on 2020-10-25 05:00:22

I experimented a lot with "swap strategies" in tanaan jungle. The issue with shore Butterfly is that it drops fast under 50% health. Beside that Shore Butterfly is vulnerable too enemy team speed buffs (dazzling dance) or speed debuffs (hiss) except S/S Shore Butterfly. So the main goal of this strategy was to make it simple as possible.
If you are looking for a safe "swap strategy" I recommend this one: https://wow-petguide.com/?Strategy=9668 But it's tricky if you don't use TD Script.

huldu

wrote on 2020-10-26 00:52:35

So far I've had no issues with swaps actually the success rate has been much higher than before. The strat works great above but the only change I made was using Shore Butterfly(a Darkshore Sentinel would possibly be better since it can heal). My biggest issue is the script doesn't work too well when using something else first and I'm terrible at fixing it.

I think what really helps is to bring in the "dps" pets before the last generic pet dies so their rotation starts off right away as the elite comes out. You should try Darkshore Sentinel if you're having problems with the butterfly! I really recommend having 3 shore butterflies(one with speed for the imp) and 3 darkshore sentinels. They make these fights so much more fun to do honestly!

The scary part with no swap is running into some generic pets, like what you mentioned the snake with fang is *really* dangerous. That's why I started using swap strats for as many tanaan dailies as possible.

Oh the strat you posted I use on Mirecroak actually! I'v been mixing some strats like for example the strat on Fel Sentry works *great* on Dreadwalker(with the rotten helper) too and is so much safer.

Just as I wrote all this text(sorry) I ran into a python with hiss. It took my Darkshore Sentinel down to 341 which is more than fast enough to do well on Defiled Earth, which I am currently fighting using swap strats. As long the butterfly/sentinel is above 50% as the elite comes in the 2nd time it's golden. So far it's really rare that they drop below 50%. As long they're not corrupted the butterfly/sentinel is doing a wonderful job with the generic pets. (edited)

(OP) Mutanis

wrote on 2020-10-26 04:33:19

Totally agree with you "swap strategies" are more fun and safer to play. But for most people these kind of strats are too tricky.

huldu

wrote on 2020-10-27 07:15:33

Yeah, I am trying really hard to learn how to script these just to make it easier for everyone. I really admire the people who create scripts because it's not as easy as one would think. It requires a lot of trial and error to hammer out a script that works when things aren't going as planned.

New Comment:


Name:

Link: