^
vs. Luftabwehr

Strategie eingefügt von Allanon#2570

18

18

Strategy 3 of 11
Alle Alternativen

Notizen:

Luftabwehr 173377
Special or not:0Special or not:1121287216364628720

Sprüche: 1 2 1
Breed: alle

Schattendornjungtier
Dieses Haustier kann die folgenden Werte haben:

Breed Leben Kraft Tempo
SS 1493 271 296


Special or not:0Special or not:122014118010114110

Sprüche: 2 2 *
Breed: alle

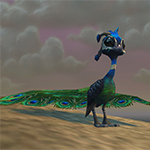
Königspfauenjunges
Dieses Haustier kann die folgenden Werte haben:

Breed Leben Kraft Tempo
PB 1465 289 273


Special or not:0Special or not:122115678822515670

Sprüche: 2 2 1
Breed: alle

Schildwachengefährte
Dieses Haustier kann die folgenden Werte haben:

Breed Leben Kraft Tempo
PS 1319 305 289


Let me start by saying "this strat is heavy RNG" and probably someone else will come up with something better soon.
You'll need a combination of Leerenzyklon hitting a decent amount of times and Star Tail's Mottenkugeln to hit a low amount of time (ideally you'll kill it with your first pet)

Wenig XP
Mindestens eines der Haustiere für diese Strategie erfordert den Einsatz einer bestimmten Breed.
Zufall
Nicht jede Strategie ist kugelsicher. Dies ist eine von ihnen. Vielleicht musst du den Kampf neu starten, denn es gibt einige Zufallselemente, die das Risiko erhöhen, dass deine Haustiere scheitern. Gebe ihnen nicht die Schuld, bitte!
Diese Strategie nutzt Haustiere erhältlich vom WoW Trading Card Game (TCG) oder vom Auktionshaus für eine Menge Gold.
Diese Strategie nutzt Haustiere die nur im Battle.net Shop für Guthaben oder für Echtgeld erhältlich sind.
Du kannst bei dieser Strategie Erfahrung für ein Haustier von niedrigem Level erhalten.
Manche Anweisungen sind schwieriger zu befolgen als andere. Dies wäre bei dieser Strategie der Fall!
Die Strategie bietet ein Script, das mit dem Pet Battle Script Addon verwendet werden kann. Du kannst das Script kopieren, indem du auf die Schaltfläche links neben den Haustieren klickst.
Mindestens ein Haustier in der Strategie kann nicht mehr erhalten werden. Wenn du es hast, herzlichen Glückwunsch!
Ein Strategie-Kurator fand diese Strategie besonders hilfreich und hat sie mit diesem Tag hervorgehoben, um ihr mehr Aufmerksamkeit zu verschaffen.
In Dragonflight Patch 10.2, the ability Time Bomb has been changed. This tag is marking strategies using Time Bomb so they can be reviewed.
Zeit: 1:50
Diese Zeit wurde von einem Strategiekurator eingegeben. Sie ist recht zuverlässig, vor allem wenn du TDScript verwendest, aber die Zeiten können immer leicht abweichen.
Rounds: 12+
Die Anzahl der Runden für diesen Kampf wurde von einem Strategiekurator hinzugefügt. Diese Zahl ist normalerweise sehr zuverlässig.
Diese Tabelle zeigt den Erfahrungsgewinn des Kampfes wenn er mit Stufe 25 Haustieren und einem (1) niedrigstufigen Haustier gewonnen wird.
Teils gefüllte Erfahrungsstufen werden nicht berücksichtigt.

Vorher Nachher Erfahrungsgewinn
13239
24254
34267
45279
56289
66297
77304
88309
99312
1010314
1111314
1212312
1313309
1414304
1515297
1616289
1717279
1818267
1919254
2020239
2121223
2222205
2323185
2424163

Safarihelm

Kleines Leckerli

Leckerli

Dunkelmond-Zylinder

Haustierkampf-Woche


Über die Strategie:
1 Min 50 Sec
Diese Zeit wurde von einem Strategiekurator eingegeben. Sie ist recht zuverlässig, vor allem wenn du TDScript verwendest, aber die Zeiten können immer leicht abweichen.
12+
Die Anzahl der Runden für diesen Kampf wurde von einem Strategiekurator hinzugefügt. Diese Zahl ist normalerweise sehr zuverlässig.
2020-11-27 04:24:28
Die Strategie wurde zuletzt an diesem Datum aktualisiert.
2020-11-27 04:06:51
Die Strategie wurde an diesem Tag erstellt.
48,539
Seitenaufrufe. Diese Zahl gibt an, wie oft diese Strategie von Besuchern aufgerufen wurde.
Über den Zähmer:
Ardenweald 51.2 44.1 (TomTom / Map Pin)
Wenig XP
Runde 1

Für die beste Darstellung deiner Strategie befolge bitte diese Richtlinien:

  • Verwende QuickFill-Elemente wo möglich
  • Gib benutzerdefinierte Anweisungen auf Englisch ein
  • Im Guide zur Strategieerstellung findest du weitere Informationen
Schattendornjungtier
Schattenkralle
Leerenzyklon
Leerenbeben
Königspfauenjunges
Wilde Kralle
Arkaner Sturm
Schildwachengefährte
Dunkelkralle
Seelenrausch
Mondfeuer
Pass
Bring in your Schattendornjungtier
Bring in your Königspfauenjunges
Bring in your Schildwachengefährte
Swap to your Schattendornjungtier
Swap to your Königspfauenjunges
Swap to your Schildwachengefährte
Sternschweif comes in
Nadelnase comes in
Glüh comes in
An enemy pet comes in
Any standard attack will finish the fight
 
Schattendornjungtier
Königspfauenjunges
Schildwachengefährte
Schattenkralle
Leerenzyklon
Leerenbeben
Wilde Kralle
Arkaner Sturm
Dunkelkralle
Seelenrausch
Mondfeuer
Glüh
Nadelnase
Sternschweif
Important: Please enter your instructions in English or a large parts of the community will not be able to read them.
Some typical sentences are translated automatically. Move your mouse over this part for more details.
The following strings are auto-translated if you enter them in the defined format. It is recommended to use them where possible:
[ability=123:Spellname] - [pet=123:Petname] dies
[ability=123:Name] - [enemy=123:Enemyname] dies
[ability=123:Name] until [pet=123:Petname] dies
[ability=123:Name] until [enemy=123:Enemyname] dies
Swap back to [pet=123:Petname]
[ability=123:Name] until the fight is won
Runde 2

Für die beste Darstellung deiner Strategie befolge bitte diese Richtlinien:

  • Verwende QuickFill-Elemente wo möglich
  • Gib benutzerdefinierte Anweisungen auf Englisch ein
  • Im Guide zur Strategieerstellung findest du weitere Informationen
Schattendornjungtier
Schattenkralle
Leerenzyklon
Leerenbeben
Königspfauenjunges
Wilde Kralle
Arkaner Sturm
Schildwachengefährte
Dunkelkralle
Seelenrausch
Mondfeuer
Pass
Bring in your Schattendornjungtier
Bring in your Königspfauenjunges
Bring in your Schildwachengefährte
Swap to your Schattendornjungtier
Swap to your Königspfauenjunges
Swap to your Schildwachengefährte
Sternschweif comes in
Nadelnase comes in
Glüh comes in
An enemy pet comes in
Any standard attack will finish the fight
 
Schattendornjungtier
Königspfauenjunges
Schildwachengefährte
Schattenkralle
Leerenzyklon
Leerenbeben
Wilde Kralle
Arkaner Sturm
Dunkelkralle
Seelenrausch
Mondfeuer
Glüh
Nadelnase
Sternschweif
Important: Please enter your instructions in English or a large parts of the community will not be able to read them.
Some typical sentences are translated automatically. Move your mouse over this part for more details.
The following strings are auto-translated if you enter them in the defined format. It is recommended to use them where possible:
[ability=123:Spellname] - [pet=123:Petname] dies
[ability=123:Name] - [enemy=123:Enemyname] dies
[ability=123:Name] until [pet=123:Petname] dies
[ability=123:Name] until [enemy=123:Enemyname] dies
Swap back to [pet=123:Petname]
[ability=123:Name] until the fight is won
Runde 3+
Schattenkralle (your Schattendornjungtier should be alive to tank Needlenose's Toxische Dämpfe)

Für die beste Darstellung deiner Strategie befolge bitte diese Richtlinien:

  • Verwende QuickFill-Elemente wo möglich
  • Gib benutzerdefinierte Anweisungen auf Englisch ein
  • Im Guide zur Strategieerstellung findest du weitere Informationen
Schattendornjungtier
Schattenkralle
Leerenzyklon
Leerenbeben
Königspfauenjunges
Wilde Kralle
Arkaner Sturm
Schildwachengefährte
Dunkelkralle
Seelenrausch
Mondfeuer
Pass
Bring in your Schattendornjungtier
Bring in your Königspfauenjunges
Bring in your Schildwachengefährte
Swap to your Schattendornjungtier
Swap to your Königspfauenjunges
Swap to your Schildwachengefährte
Sternschweif comes in
Nadelnase comes in
Glüh comes in
An enemy pet comes in
Any standard attack will finish the fight
 
Schattendornjungtier
Königspfauenjunges
Schildwachengefährte
Schattenkralle
Leerenzyklon
Leerenbeben
Wilde Kralle
Arkaner Sturm
Dunkelkralle
Seelenrausch
Mondfeuer
Glüh
Nadelnase
Sternschweif
Important: Please enter your instructions in English or a large parts of the community will not be able to read them.
Some typical sentences are translated automatically. Move your mouse over this part for more details.
The following strings are auto-translated if you enter them in the defined format. It is recommended to use them where possible:
[ability=123:Spellname] - [pet=123:Petname] dies
[ability=123:Name] - [enemy=123:Enemyname] dies
[ability=123:Name] until [pet=123:Petname] dies
[ability=123:Name] until [enemy=123:Enemyname] dies
Swap back to [pet=123:Petname]
[ability=123:Name] until the fight is won
- Shadowbarb Hatchling Dies, bring in Royal Peachick -

Für die beste Darstellung deiner Strategie befolge bitte diese Richtlinien:

  • Verwende QuickFill-Elemente wo möglich
  • Gib benutzerdefinierte Anweisungen auf Englisch ein
  • Im Guide zur Strategieerstellung findest du weitere Informationen
Schattendornjungtier
Schattenkralle
Leerenzyklon
Leerenbeben
Königspfauenjunges
Wilde Kralle
Arkaner Sturm
Schildwachengefährte
Dunkelkralle
Seelenrausch
Mondfeuer
Pass
Bring in your Schattendornjungtier
Bring in your Königspfauenjunges
Bring in your Schildwachengefährte
Swap to your Schattendornjungtier
Swap to your Königspfauenjunges
Swap to your Schildwachengefährte
Sternschweif comes in
Nadelnase comes in
Glüh comes in
An enemy pet comes in
Any standard attack will finish the fight
 
Schattendornjungtier
Königspfauenjunges
Schildwachengefährte
Schattenkralle
Leerenzyklon
Leerenbeben
Wilde Kralle
Arkaner Sturm
Dunkelkralle
Seelenrausch
Mondfeuer
Glüh
Nadelnase
Sternschweif
Important: Please enter your instructions in English or a large parts of the community will not be able to read them.
Some typical sentences are translated automatically. Move your mouse over this part for more details.
The following strings are auto-translated if you enter them in the defined format. It is recommended to use them where possible:
[ability=123:Spellname] - [pet=123:Petname] dies
[ability=123:Name] - [enemy=123:Enemyname] dies
[ability=123:Name] until [pet=123:Petname] dies
[ability=123:Name] until [enemy=123:Enemyname] dies
Swap back to [pet=123:Petname]
[ability=123:Name] until the fight is won
Runde 1

Für die beste Darstellung deiner Strategie befolge bitte diese Richtlinien:

  • Verwende QuickFill-Elemente wo möglich
  • Gib benutzerdefinierte Anweisungen auf Englisch ein
  • Im Guide zur Strategieerstellung findest du weitere Informationen
Schattendornjungtier
Schattenkralle
Leerenzyklon
Leerenbeben
Königspfauenjunges
Wilde Kralle
Arkaner Sturm
Schildwachengefährte
Dunkelkralle
Seelenrausch
Mondfeuer
Pass
Bring in your Schattendornjungtier
Bring in your Königspfauenjunges
Bring in your Schildwachengefährte
Swap to your Schattendornjungtier
Swap to your Königspfauenjunges
Swap to your Schildwachengefährte
Sternschweif comes in
Nadelnase comes in
Glüh comes in
An enemy pet comes in
Any standard attack will finish the fight
 
Schattendornjungtier
Königspfauenjunges
Schildwachengefährte
Schattenkralle
Leerenzyklon
Leerenbeben
Wilde Kralle
Arkaner Sturm
Dunkelkralle
Seelenrausch
Mondfeuer
Glüh
Nadelnase
Sternschweif
Important: Please enter your instructions in English or a large parts of the community will not be able to read them.
Some typical sentences are translated automatically. Move your mouse over this part for more details.
The following strings are auto-translated if you enter them in the defined format. It is recommended to use them where possible:
[ability=123:Spellname] - [pet=123:Petname] dies
[ability=123:Name] - [enemy=123:Enemyname] dies
[ability=123:Name] until [pet=123:Petname] dies
[ability=123:Name] until [enemy=123:Enemyname] dies
Swap back to [pet=123:Petname]
[ability=123:Name] until the fight is won
Runde 2+

Für die beste Darstellung deiner Strategie befolge bitte diese Richtlinien:

  • Verwende QuickFill-Elemente wo möglich
  • Gib benutzerdefinierte Anweisungen auf Englisch ein
  • Im Guide zur Strategieerstellung findest du weitere Informationen
Schattendornjungtier
Schattenkralle
Leerenzyklon
Leerenbeben
Königspfauenjunges
Wilde Kralle
Arkaner Sturm
Schildwachengefährte
Dunkelkralle
Seelenrausch
Mondfeuer
Pass
Bring in your Schattendornjungtier
Bring in your Königspfauenjunges
Bring in your Schildwachengefährte
Swap to your Schattendornjungtier
Swap to your Königspfauenjunges
Swap to your Schildwachengefährte
Sternschweif comes in
Nadelnase comes in
Glüh comes in
An enemy pet comes in
Any standard attack will finish the fight
 
Schattendornjungtier
Königspfauenjunges
Schildwachengefährte
Schattenkralle
Leerenzyklon
Leerenbeben
Wilde Kralle
Arkaner Sturm
Dunkelkralle
Seelenrausch
Mondfeuer
Glüh
Nadelnase
Sternschweif
Important: Please enter your instructions in English or a large parts of the community will not be able to read them.
Some typical sentences are translated automatically. Move your mouse over this part for more details.
The following strings are auto-translated if you enter them in the defined format. It is recommended to use them where possible:
[ability=123:Spellname] - [pet=123:Petname] dies
[ability=123:Name] - [enemy=123:Enemyname] dies
[ability=123:Name] until [pet=123:Petname] dies
[ability=123:Name] until [enemy=123:Enemyname] dies
Swap back to [pet=123:Petname]
[ability=123:Name] until the fight is won
- Royal Preachick dies, bring in Sentinel's Companion -

Für die beste Darstellung deiner Strategie befolge bitte diese Richtlinien:

  • Verwende QuickFill-Elemente wo möglich
  • Gib benutzerdefinierte Anweisungen auf Englisch ein
  • Im Guide zur Strategieerstellung findest du weitere Informationen
Schattendornjungtier
Schattenkralle
Leerenzyklon
Leerenbeben
Königspfauenjunges
Wilde Kralle
Arkaner Sturm
Schildwachengefährte
Dunkelkralle
Seelenrausch
Mondfeuer
Pass
Bring in your Schattendornjungtier
Bring in your Königspfauenjunges
Bring in your Schildwachengefährte
Swap to your Schattendornjungtier
Swap to your Königspfauenjunges
Swap to your Schildwachengefährte
Sternschweif comes in
Nadelnase comes in
Glüh comes in
An enemy pet comes in
Any standard attack will finish the fight
 
Schattendornjungtier
Königspfauenjunges
Schildwachengefährte
Schattenkralle
Leerenzyklon
Leerenbeben
Wilde Kralle
Arkaner Sturm
Dunkelkralle
Seelenrausch
Mondfeuer
Glüh
Nadelnase
Sternschweif
Important: Please enter your instructions in English or a large parts of the community will not be able to read them.
Some typical sentences are translated automatically. Move your mouse over this part for more details.
The following strings are auto-translated if you enter them in the defined format. It is recommended to use them where possible:
[ability=123:Spellname] - [pet=123:Petname] dies
[ability=123:Name] - [enemy=123:Enemyname] dies
[ability=123:Name] until [pet=123:Petname] dies
[ability=123:Name] until [enemy=123:Enemyname] dies
Swap back to [pet=123:Petname]
[ability=123:Name] until the fight is won
Runde 1
Seelenrausch (ideally you get a stun)

Für die beste Darstellung deiner Strategie befolge bitte diese Richtlinien:

  • Verwende QuickFill-Elemente wo möglich
  • Gib benutzerdefinierte Anweisungen auf Englisch ein
  • Im Guide zur Strategieerstellung findest du weitere Informationen
Schattendornjungtier
Schattenkralle
Leerenzyklon
Leerenbeben
Königspfauenjunges
Wilde Kralle
Arkaner Sturm
Schildwachengefährte
Dunkelkralle
Seelenrausch
Mondfeuer
Pass
Bring in your Schattendornjungtier
Bring in your Königspfauenjunges
Bring in your Schildwachengefährte
Swap to your Schattendornjungtier
Swap to your Königspfauenjunges
Swap to your Schildwachengefährte
Sternschweif comes in
Nadelnase comes in
Glüh comes in
An enemy pet comes in
Any standard attack will finish the fight
 
Schattendornjungtier
Königspfauenjunges
Schildwachengefährte
Schattenkralle
Leerenzyklon
Leerenbeben
Wilde Kralle
Arkaner Sturm
Dunkelkralle
Seelenrausch
Mondfeuer
Glüh
Nadelnase
Sternschweif
Important: Please enter your instructions in English or a large parts of the community will not be able to read them.
Some typical sentences are translated automatically. Move your mouse over this part for more details.
The following strings are auto-translated if you enter them in the defined format. It is recommended to use them where possible:
[ability=123:Spellname] - [pet=123:Petname] dies
[ability=123:Name] - [enemy=123:Enemyname] dies
[ability=123:Name] until [pet=123:Petname] dies
[ability=123:Name] until [enemy=123:Enemyname] dies
Swap back to [pet=123:Petname]
[ability=123:Name] until the fight is won
Runde 2

Für die beste Darstellung deiner Strategie befolge bitte diese Richtlinien:

  • Verwende QuickFill-Elemente wo möglich
  • Gib benutzerdefinierte Anweisungen auf Englisch ein
  • Im Guide zur Strategieerstellung findest du weitere Informationen
Schattendornjungtier
Schattenkralle
Leerenzyklon
Leerenbeben
Königspfauenjunges
Wilde Kralle
Arkaner Sturm
Schildwachengefährte
Dunkelkralle
Seelenrausch
Mondfeuer
Pass
Bring in your Schattendornjungtier
Bring in your Königspfauenjunges
Bring in your Schildwachengefährte
Swap to your Schattendornjungtier
Swap to your Königspfauenjunges
Swap to your Schildwachengefährte
Sternschweif comes in
Nadelnase comes in
Glüh comes in
An enemy pet comes in
Any standard attack will finish the fight
 
Schattendornjungtier
Königspfauenjunges
Schildwachengefährte
Schattenkralle
Leerenzyklon
Leerenbeben
Wilde Kralle
Arkaner Sturm
Dunkelkralle
Seelenrausch
Mondfeuer
Glüh
Nadelnase
Sternschweif
Important: Please enter your instructions in English or a large parts of the community will not be able to read them.
Some typical sentences are translated automatically. Move your mouse over this part for more details.
The following strings are auto-translated if you enter them in the defined format. It is recommended to use them where possible:
[ability=123:Spellname] - [pet=123:Petname] dies
[ability=123:Name] - [enemy=123:Enemyname] dies
[ability=123:Name] until [pet=123:Petname] dies
[ability=123:Name] until [enemy=123:Enemyname] dies
Swap back to [pet=123:Petname]
[ability=123:Name] until the fight is won
Runde 3+

Für die beste Darstellung deiner Strategie befolge bitte diese Richtlinien:
  • Verwende QuickFill-Elemente wo möglich
  • Gib benutzerdefinierte Anweisungen auf Englisch ein
  • Im Guide zur Strategieerstellung findest du weitere Informationen
Schattendornjungtier
Schattenkralle
Leerenzyklon
Leerenbeben
Königspfauenjunges
Wilde Kralle
Arkaner Sturm
Schildwachengefährte
Dunkelkralle
Seelenrausch
Mondfeuer
Pass
Bring in your Schattendornjungtier
Bring in your Königspfauenjunges
Bring in your Schildwachengefährte
Swap to your Schattendornjungtier
Swap to your Königspfauenjunges
Swap to your Schildwachengefährte
Sternschweif comes in
Nadelnase comes in
Glüh comes in
An enemy pet comes in
Any standard attack will finish the fight
 
Schattendornjungtier
Königspfauenjunges
Schildwachengefährte
Schattenkralle
Leerenzyklon
Leerenbeben
Wilde Kralle
Arkaner Sturm
Dunkelkralle
Seelenrausch
Mondfeuer
Glüh
Nadelnase
Sternschweif
Important: Please enter your instructions in English or a large parts of the community will not be able to read them.
Some typical sentences are translated automatically. Move your mouse over this part for more details.
The following strings are auto-translated if you enter them in the defined format. It is recommended to use them where possible:
[ability=123:Spellname] - [pet=123:Petname] dies
[ability=123:Name] - [enemy=123:Enemyname] dies
[ability=123:Name] until [pet=123:Petname] dies
[ability=123:Name] until [enemy=123:Enemyname] dies
Swap back to [pet=123:Petname]
[ability=123:Name] until the fight is won

Na gut, dann lasst uns die Zaubersprüche herausholen!


Agrias

schrieb am 2023-04-25 11:24:19

Way better than the top strat, won with only 2 pets.

JohnLocke

schrieb am 2022-10-16 19:45:59

It worked 1st try. I read the comments, but still wanted to get my own opinion and it was worth it. Few notes though:
Your 1st pet will most likely die before the ennemy 1st pet and it's alright. When your second pet comes in, he will finish him off (with 1; dont waste an arcane storm for 300 HP)
VS 2nd pet, I used my Arcane Storm right after his Toxic Fumes
Just use logic (no big attacks when ennemy has low hp), as the script is not 100% accurate.

Luvnstrumph#1318

schrieb am 2022-05-02 04:26:56

I lost track on how many times I failed with each of these strats with the correct pets. I ended up winning on first try with: Nightwreathed Watcher (2,1,2) in slot 1, Cobalt Raven (2,1,*) in slot 2, and another Nightwreathed Watcher (2,1,2) in slot 3.
Turn 1: Call Darkness
Turn 2: Lift-off
Turn 3+: Dark Talon until Nightwreathed Watcher #1 dies
**!! RESTART IF you are put to sleep and also IF Star Tail does not die with using the first Nightwreathed Watcher, you will fail so just start over. You still might fail because of RNG crits but you will 100% lose if ST is not dead.
Bring in Cobalt Raven
Turn 1: Moonfire
Turn 2+: Dark Talon until Cobalt Raven dies
Bring in Second Nightwreathed Watcher
Turn 1: IF Needlenose is still alive use Dark Talon to finish him off NO MATTER the weather
IF vs Brite use Call Darkness
Turn 2+: use Call Darkness if not yet used otherwise use Dark Talon until fight is over.

Remember this is not 100% but if you can get Star Tail dead with your first pet and not get put to sleep your chances are higher going forward. I had many wins from that point in my testing. I wish I had Etherwyrms or my luck might have been better with this one. GL all!! (editiert)

Cosimo

schrieb am 2022-08-25 23:57:27

this strat did not work for me after 12 attempts I gave up. I didnt give the originally posted strat a solid try before upgrading a cobalt raven and a second nightwreathed watcher which was a big mistake.

Iamgladious

schrieb am 2022-04-03 21:57:35

Failed 10 times and I gave up with this strat.

Mayzen

schrieb am 2021-11-24 16:49:52

My Shadowbarb kept dying on turn 3 or 4 (only survived to 4 if he was not stunned in turn 1). Keep going with the strat. Sentinel will handle most of the last 2 enemy pets.
I used Moonfire when the strat said, even though I thought it would be waste of damage, but enemy pets were swapped, so it hit Brite instead of Needlenose. I did get the stun from Soulrush.

Solitha

schrieb am 2021-03-04 12:18:35

Don't give up too quickly! My peachick had to eat Needlenose's first two rounds, and the Sentinel's Companion's Soulrush had to finish off Needlenose. Still managed a convincing win! RNG can work in your favor too.

Boudica#1114

schrieb am 2021-10-19 07:05:20

Same for me, worked great.

Vivienna#2464

schrieb am 2021-09-19 06:36:51

Worked great for me. Thanks.
Vielen Danke - hat bei mir super Funktioniert.

Caolynn#1359

schrieb am 2021-01-25 11:43:33

this worked perfectly as written and won on first try. not sure why others had issues. thanks for strat !

Lisa#1559

schrieb am 2021-01-30 10:19:47

That's beacuse you got lucky. :)

Saan

schrieb am 2021-02-17 20:59:44

It's pretty obvious why others had issues - because the strat states really clearly that it's RNG! So you got good RNG, well done.

Edgey schrieb am 2021-02-10 13:47:57

Took no less then 12 times, but finally worked.. I was very unlucky.

verlucht

schrieb am 2020-12-09 18:19:55

I really dislike restarting fights, so the second time my shadowbarb died to the first pet in round 4, I just stuck it out and I still won. I brought in my peachick and used Arcane Storm, then Rain Dance, Savage Talon (star tail died here).
For Needlenose: Savage Talon, Arcane Storm (royal peachick died here), Dark Talon (needlenose died here).
For Brite: Soulrush, Dark talon (brite died here)

FemaleWario#1119

schrieb am 2020-12-12 18:15:16

My Shadowbard also died really quick (and also in round 4), but I stuck it out and also won!

Sanayrin

schrieb am 2021-01-30 09:12:00

Thank you so much, followed your strat and get won at 1st try! <3

peachhat#1461

schrieb am 2021-02-09 02:40:38

Kept losing, tried your strat and won first try, thank you!

Turbs#1776

schrieb am 2021-01-04 23:40:29

works, just heavy rng.

Priessa

schrieb am 2021-01-04 01:19:22

Worked the 4th time

JestersTear

schrieb am 2020-12-28 01:52:19

Quite simply, don't bother. Ignore Faryl and Rotgut and hit the other 9.

Fry#1150

schrieb am 2020-12-12 12:36:54

Took 14 attempts but this finally worked.

Lobotomizer

schrieb am 2020-12-26 14:44:13

My Hatchling also died early but I stuck it out and it was an easy win.

Jos schrieb am 2020-11-30 14:23:35

Didn't work for me , so used Holomar's strategy, worked first time, luck I think.

Squawkling - 2/x/2
Sky Fry - 2/x/x
Shadowbarb Hatchling - 1/2/1

If the first moth dust puts you to sleep or crits then reset

Arcane Explosion until Squawkling dies
Switch in Shadowbarb
Void Cyclone
Void Tremors
Shadow Talon until Shadowbarb Hatchling dies
Bring in Sky Fry
Arcane Blast until everything is dead.

topferal

schrieb am 2020-12-01 09:02:30

Worked. Thanks!

metaphysis

schrieb am 2020-12-08 01:40:42

Worked after 6 times trying, luck needed. TD Script:

quit [ self.aura(Stunned).exists ]
ability(Arcane Explosion:299)
ability(Void Cyclone:2102) [ self.round = 1 ]
ability(Void Tremors:2360) [ self.round = 2 ]
ability(Shadow Talon:1238)
ability(Arcane Blast:421)
change(next)

GrumpyKitten#215479

schrieb am 2020-12-09 11:16:56

this worked for me as well :) worked on first try, but with all the moth balls and cyclones I imagine I was just very lucky.

UPDATE:
Noticed it's not obvious what I was commenting on. To specify it's Jos' strategy. I used Fledgling Nether Ray instead of Sky Fry for Arcane blast, but that shouldn't matter.

Squawkling (SS)
Shadowbarb Hatchling (SS)
Fledgling Nether Ray (PB)
(editiert)

Sabelle#1592

schrieb am 2020-12-10 07:15:17

So I set my team up as listed above (with Sky Fry in second spot). Using the strats, the best I did was to lose with the last enemy pet at 98 health. I then tried using the script and that pulled out Sky Fry second and was an epic failure. I changed the order of my team to swap Shadowbarb Hatchling to second position and did a little better but still could not win in over 15 tries and only 2 of those tries were restarts because of being slept :(

PositiveRoleMod

schrieb am 2020-12-25 07:52:15

This strat is breed specific. You must have the B/B Squawkling for it to be viable. The S/S breed does not work as it dies too early to be of any use.

Petbattlebuddy

schrieb am 2020-12-07 12:04:11

Cobalt Raven 2/1/X worked great in the second slot

Ashtora#11554

schrieb am 2020-12-03 18:56:59

I actually replaced the royal peachick with a Wild Etherwyrm (2/1/2) since I didn't have the peachick, and it worked just fine as soon as I could get past Star Tail with my first pet. Lots of RNG involved here though :( (editiert)

Clewara

schrieb am 2020-11-30 23:01:42

I got this to work, but would note:

1) if Shadowbarb Hatchling doesn't survive Star Tail to tank Needlenose's Toxic Fumes, restart. It may be many attempts before RNGeezus smiles upon thee, Maw Walker, but keep at it.

2) If Needlenose is still alive when Royal Peachick goes down, Sentinel's Companion should start with a Dark Talon to knock out Needlenose, saving Soul Rush for Brite before Moonlight resets the weather to something favorable.

Yara#1800

schrieb am 2020-11-30 15:34:11

This strategy worked for me but I was probably very lucky and barely had a few HP left on last pet.
Sqwakling 2/2/2
Sentinel's Companion 2/2/1
Shadefeather Hatchling 1/x/2


Open with Shriek ( if asleep or the other pet crits better restart), Arcane blast, Arcane explosion, if you can do another arcane blast fine if not sentinel comes in
On sentinel start with Soulrush/Dark Talon/Dark Talon

2nd pet come in : cast Moonfire, then whatever u have available until sentinel's down, Soulrush preferable and on CD

Bring in Shadefeather Hatchling, Nevermore and Peck/Peck

This did it for me but it was really tight, if you're sick of trying combinations, maybe give it a couple of tries.... Good luck!

sprinter schrieb am 2020-11-28 20:47:08

swapping out the peachick for a second sentinel made this super easy

jana schrieb am 2020-11-30 13:35:32

What was your strategy though... winging it did not work :)

jana schrieb am 2020-11-30 13:35:35

What was your strategy though... winging it did not work :)

Nilremife#1435

schrieb am 2020-11-30 12:36:37

Didn't have shadow barb, so i went with Dread Hatchling 211, started with call darkness then Nocturnal Strike, shadow talon til Star Tail died, Then shadow talon til hatchlking died, then used Cobalt Raven 212 cos my peachick is still lvl 1, start with moonfire, then flyby and shadow talon until either needlenose dies or you do, then sentinels companion, (Dark talon if needlenose still alive) or Moonfire if it's Brite, Soul rush, spam Dark Talon to finish. Still RNG though if needlenmose gets a 2nd toxic off.
(editiert)

tPaste schrieb am 2020-11-28 03:29:35

This fight was super frustrating. Need a lot of luck. One thing I'll say is I found the Cobalt Raven (2/1/*) to be the much better second bird. As long as he could kill the first enemy pet with one hit I continues (because I found the Shadowbarb Hatchling making it to tank Needlenose's toxic fumes did not happen nearly enough (Felt like 5 or 10% maybe).
Anyway the Cobalt Raven does decent on Needlenose but he even died before Needlenose died (I killed Needlenose with Sentinel's Companion before he could attack. Then you need luck, you either need the stun from Soulrush OR you get lucky like I did and have Void Cyclone hit 3 times on 3rd pet so the Void Rush brought him under 50% so I could kill him with Moonfire BEFORE he healed (it's important to note the extra 10% damage from it already being moonlight from the Cobalt Raven definitely made the difference.
However I think 2 Sentinel's Companions and a Cobalt Raven might be the way to go.

Tinibree#1983

schrieb am 2020-11-27 20:46:32

Had to do some on the fly fixing, Shadowbarb died then I brought in Peachick and taloned the first enemy, then arcane, then rain dance, and back to talon for the second. Died before needlenose so owl came in with a talon to mop up and then soul/moon/talon for the last. Did get lucky with a stun.

Neuer Kommentar:


Name:

Link: