
전략이 추가됨. 추가자: Raindawn
12
12
|
Average rating: |
4.5 |
|
Ratings: |
26 |
|
귀하의 투표: |
|
Creator |
|||||||||
|---|---|---|---|---|---|---|---|---|---|
|
Tags
Filter strategies:
|
|||||||||


|

About 97-98% win rate.
See comments for slightly longer 100% version; thank you to Mutanis for suggestion |
스크립트 |
2 | 4.8 |
99% | 17 |
110
1:50
|
13 | |
|
31 rounds.
If you are confusing, check your pet battle combat chat or use TD Script. |
스크립트 |
2 | 4.4 |
100% | 30 |
185
3:05
|
31 | |
|
|
스크립트 |
2 | 4.4 |
97% | 44 |
195
3:15
|
33-34 | |


|
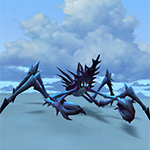
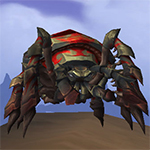
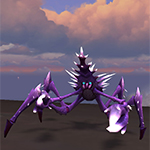
This strategy is basically the same as the ones suggested here as well, but the main difference is that i did not have the Chitterspine Skitterling, and the Silithid Mini-Tank was able to do the job instead, so i figured i'd just put this strategy in here to show that you don't specifically need the Skitterling.
Then again, i might've just been lucky with RNG. Btw, my Tol'vir Scarab was H/S, but i don't think that mattered much. |
알엔지 |
2 | 4.5 |
N/A | 12 |
163
2:43
|
20-21 | |
|
스크립트 직원 추천 |
2 | 4.3 |
100% | 208 |
161
2:41
|
19-21 | ||

|
win rate> 99.8%, recommand using script if you cant comprehend my words.
|
스크립트 |
2 | 5.0 |
100% | 4 |
195
3:15
|
30-31 | |
|
100% safe :)
|
스크립트 |
2 | 4.6 |
100% | 8 |
163
2:43
|
23 | |
|
Script thanks to Roareth
|
번식 스크립트 |
2 | 3.6 |
99% | 44 |
165
2:45
|
20-23 | |
|
알엔지 스크립트 |
2 | 3.6 |
72% | 15 |
161
2:41
|
19-21 | ||
|
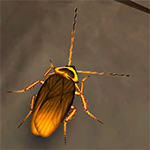
NOTE: You have to use a P/S 쉭쉭울음 딱딱가시
Time: 2:30 (18 rounds) Tested 11/26/2020 (9.0.2) |
번식 스크립트 |
2 | 3.8 |
98% | 12 |
150
2:30
|
18 | |

|
상점 스크립트 |
2 | 3.7 |
95% | 4 |
355
5:55
|
52-57 | ||

|
Long, but you take zero damage ^^
Inspired by Aryäna strat here. |
스크립트 |
2 | 5.0 |
100% | 2 |
465
7:45
|
77 | |

|
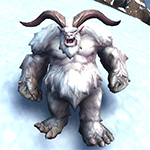
First pet can be ANYTHING with a Stun. Literally. Or anything that switches the enemy to highest Health pet.
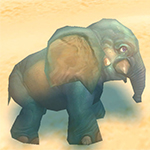
Third pet can be anything that has an Ability to avoid 1 Attack with 7 Rounds CD or less, AND has an AOE that deals the same amount of dmg to every Enemy (maybe not dragon type, dont know if fury dies first if you use dragon) 하이잘 위습 is important, but can be lvl 1, it will take 1 hit max, and its magic, sooo.... wont die any way beware, this tactic is safe, but takes looooong i personally use 죽음의발톱 새끼용수호병 for stun, and 코끼리 아기씨 for the avoid, and switch pets a little more often, because their AOEs have a CD |
스크립트 |
2 | 4.8 |
100% | 2 |
625
10:25
|
94 | |
|
Inspired by Aryäna#2512
First Pet can be any Stun Thirth Pet can be any Pet with a Avoidance and a AOE which does equal dmg to all enemies Pets |
2 | 4.4 |
N/A | 3 |
900
15:00
|
100+ | ||
|
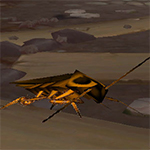
Came up with this Strategy cause I needed slight adjustments of the one Sphynx published.
Your Grasshopper can be Changed to ANY Roach with 생존 and 종말 as long as it has above 293 Speed and about 1,2k Health. Even Uncommon ones work here! And like in his Strategy you can Change 영원의 소형 기계용 to 판다렌 기계용 with 1,X,2 |
번식 스크립트 |
2 | 4.4 |
99% | 2 |
160
2:40
|
21-22 | |
|
16
|
번식 알엔지 스크립트 |
2 | 3.0 |
75% | 5 |
125
2:05
|
15-16 | |
|
|
Inspired by WhyDaRumGone strategy
|
번식 스크립트 |
2 | 3.7 |
100% | 1 |
155
2:35
|
17+ | |
|
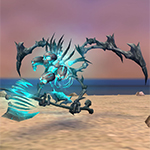
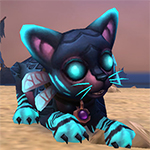
Couldn't get any of the other strats to work and finally got it with this setup. My Chitterspine is SS breed but I think others work. If Twilight gets to go first and has enough HP left to survive 1 hit, this should work. If Twilight has enough health, you could swap the last 2 turns I guess. If you don't have enough HP left to take a hit, you'll have to decide if you're going to gamble for a stun with Surge of Light or a crit with Call Darkness
|
알엔지 상점 스크립트 |
2 | 3.1 |
53% | 2 |
161
2:41
|
19-21 | |
|
|
Came up with this variation of a common strategy. While testing I've got 1 crit with Mech Dragon so I am not sure if it's RNG based.
|
알엔지 스크립트 |
2 | 1.0 |
47% | 0 |
155
2:35
|
22-23 |
Incl. steps:


Substitutes:
1 / 22

This strategy is basically the same as the ones suggested here as well, but the main difference is that i did not have the Chitterspine Skitterling, and the Silithid Mini-Tank was able to do the job instead, so i figured i'd just put this strategy in here to show that you don't specifically need the Skitterling.
Then again, i might've just been lucky with RNG.
Btw, my Tol'vir Scarab was H/S, but i don't think that mattered much.
| Before | After | Experience Gain | |
|---|---|---|---|
| 1 | ➜ | 10 | 3589 |
| 2 | ➜ | 11 | 3812 |
| 3 | ➜ | 11 | 4010 |
| 4 | ➜ | 11 | 4183 |
| 5 | ➜ | 12 | 4331 |
| 6 | ➜ | 12 | 4455 |
| 7 | ➜ | 13 | 4554 |
| 8 | ➜ | 13 | 4628 |
| 9 | ➜ | 14 | 4678 |
| 10 | ➜ | 14 | 4703 |
| 11 | ➜ | 15 | 4703 |
| 12 | ➜ | 16 | 4678 |
| 13 | ➜ | 17 | 4628 |
| 14 | ➜ | 17 | 4554 |
| 15 | ➜ | 18 | 4455 |
| 16 | ➜ | 19 | 4331 |
| 17 | ➜ | 19 | 4183 |
| 18 | ➜ | 20 | 4010 |
| 19 | ➜ | 21 | 3812 |
| 20 | ➜ | 22 | 3589 |
| 21 | ➜ | 22 | 3341 |
| 22 | ➜ | 23 | 3069 |
| 23 | ➜ | 24 | 2772 |
| 24 | ➜ | 25 | 1980 |
|
탐험대 모자 |
|
|
하급 애완동물 간식 |
|
|
애완동물 간식 |
|
|
다크문 중산모 |
|
|
애완동물 전투 주 |
|
= |
Pet levels to 25 with minimal XP lost |
|
|
= |
Additional XP above level 25 is lost |
|
For the best display of your strategy, please follow these guidelines:


For the best display of your strategy, please follow these guidelines:
For the best display of your strategy, please follow these guidelines:
For the best display of your strategy, please follow these guidelines:
For the best display of your strategy, please follow these guidelines:
For the best display of your strategy, please follow these guidelines:
For the best display of your strategy, please follow these guidelines:
For the best display of your strategy, please follow these guidelines:
For the best display of your strategy, please follow these guidelines:
For the best display of your strategy, please follow these guidelines:

Nice boots!


1
TadCh3va7
글 올리기 2024-06-18 21:14:15
1
wheesper#1889
글 올리기 2023-12-14 12:08:12
0
Svenpa 글 올리기 2023-07-30 12:44:35
2
Sawfty#11362
글 올리기 2023-04-22 15:51:50
2
(OP) Raindawn
글 올리기 2023-06-09 20:50:12
I did eventually get a Chitterspine Skitterling S/S eventually, which made it a lot easier, although i haven't done this one in a very long time again, but considering this still kinda worked for you, i assume it hasn't changed that much.
You're welcome though!
2
Isiliel
글 올리기 2023-03-14 21:30:58
0
Baklava 글 올리기 2023-02-09 05:58:20
2
Dunkmaster#2336
글 올리기 2022-11-21 00:48:55
1
fang14mist1
글 올리기 2022-10-21 22:27:53
1
(OP) Raindawn
글 올리기 2022-07-21 22:43:01
새로운 댓글: