
| Haunted Humanoids | Deathly Dragonkin | Flickering Fliers | Unholy Undead | Creepy Critters |
| Mummified Magics |  Eerie Elementals Eerie Elementals | Beast Busters | Aquatic Apparitions | Macabre Mechanicals |
Strategy added by Tarasios#1195
3
3
|
Average rating: |
5 |
|
Ratings: |
2 |
|
Your vote: |
|
Creator |
|||||||||
|---|---|---|---|---|---|---|---|---|---|
|
Tags
Filter strategies:
|
|||||||||


Any Level 25+ Elemental
Any Level 25+ Elemental
|

Soloed this with Tiny Snowman.
Script thanks to Zeeda |
Script |
2 | 5.0 |
95% | 120 |
106
1:46
|
15 | |


Any Level 25+ Elemental
|
The script will run Stoneskin at different spots, but it all comes out in the wash, so no worries.
|
Script |
2 | 5.0 |
100% | 43 |
153
2:33
|
23+ | |

Any Level 25+ Elemental
Any Level 25+ Elemental
|
Script |
2 | 5.0 |
100% | 1 |
162
2:42
|
22 | ||
Any Level 25+ Elemental
|
13-15 rounds
|
Script |
2 | 5.0 |
100% | 1 |
125
2:05
|
15-16 | |
Any Level 25+ Elemental
Any Level 25+ Elemental
|
I ran this originally trying for a back-line clearing strategy, but Battery's group heal with Sunlight up cancels it.
|
Shop |
2 | 5.0 |
N/A | 0 |
225
3:45
|
29 | |

Any Level 25+ Elemental
|
Unobtainable |
2 | 5.0 |
N/A | 0 |
110
1:50
|
15+ | ||

Any Level 25+ Elemental
Any Level 25+ Elemental
|
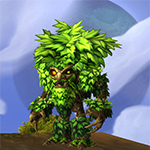
Doom Bloom can solo this fight pretty easily.
|
2 | 5.0 |
N/A | 3 |
170
2:50
|
20-24 | ||

Any Level 25+ Elemental
|
2 | 5.0 |
N/A | 1 |
138
2:18
|
18+ | |||

Any Level 25+ Elemental
Any Level 25+ Elemental
|
I think this strat will have a bit of RNG bc of the 50% burning ground and when the trap actually goes off. I supported with Lil' Ragnaros as my second pet. He had to come in after rageling died to eat the explosion.
|
RNG |
2 | 4.0 |
N/A | 0 |
150
2:30
|
18+ | |

|
2 | 3.0 |
N/A | 0 |
287
4:47
|
31 |
Incl. steps:


Any Level 25+ Elemental
Skills: Any
Breed: Any

Any Level 25+ Elemental
Skills: Any
Breed: Any

Doom Bloom can solo this fight pretty easily.
| Before | After | Experience Gain | |
|---|---|---|---|
| 1 | ➜ | 3 | 239 |
| 2 | ➜ | 4 | 254 |
| 3 | ➜ | 4 | 267 |
| 4 | ➜ | 5 | 279 |
| 5 | ➜ | 6 | 289 |
| 6 | ➜ | 6 | 297 |
| 7 | ➜ | 7 | 304 |
| 8 | ➜ | 8 | 309 |
| 9 | ➜ | 9 | 312 |
| 10 | ➜ | 10 | 314 |
| 11 | ➜ | 11 | 314 |
| 12 | ➜ | 12 | 312 |
| 13 | ➜ | 13 | 309 |
| 14 | ➜ | 14 | 304 |
| 15 | ➜ | 15 | 297 |
| 16 | ➜ | 16 | 289 |
| 17 | ➜ | 17 | 279 |
| 18 | ➜ | 18 | 267 |
| 19 | ➜ | 19 | 254 |
| 20 | ➜ | 20 | 239 |
| 21 | ➜ | 21 | 223 |
| 22 | ➜ | 22 | 205 |
| 23 | ➜ | 23 | 185 |
| 24 | ➜ | 24 | 163 |
|
Safari Hat |
|
|
Lesser Pet Treat |
|
|
Pet Treat |
|
|
Darkmoon Hat |
|
|
Pet Battle Week |
|
= |
Pet levels to 25 with minimal XP lost |
|
|
= |
Additional XP above level 25 is lost |
|
For the best display of your strategy, please follow these guidelines:


For the best display of your strategy, please follow these guidelines:
For the best display of your strategy, please follow these guidelines:
For the best display of your strategy, please follow these guidelines:
For the best display of your strategy, please follow these guidelines:
For the best display of your strategy, please follow these guidelines:
For the best display of your strategy, please follow these guidelines:
For the best display of your strategy, please follow these guidelines:
For the best display of your strategy, please follow these guidelines:
For the best display of your strategy, please follow these guidelines:
For the best display of your strategy, please follow these guidelines:
For the best display of your strategy, please follow these guidelines:
For the best display of your strategy, please follow these guidelines:
For the best display of your strategy, please follow these guidelines:
For the best display of your strategy, please follow these guidelines:
For the best display of your strategy, please follow these guidelines:
For the best display of your strategy, please follow these guidelines:
For the best display of your strategy, please follow these guidelines:
For the best display of your strategy, please follow these guidelines:

Micro defence with macro shininess

1
DragonsAfterDark
wrote on 2024-02-08 06:17:32
1
Kinrael#21690
wrote on 2021-02-24 10:22:40
1
Petunia
wrote on 2021-02-24 08:51:16
The rotation did go a little bit out of order with the first pet dying early but I think worked well with Healing wave as priority.
New Comment: