
전략이 추가됨. 추가자: DragonsAfterDark
50
50
|
Average rating: |
4.6 |
|
Ratings: |
44 |
|
귀하의 투표: |
|
Creator |
|||||||||
|---|---|---|---|---|---|---|---|---|---|
|
Tags
Filter strategies:
|
|||||||||


|

Adapted the strategy to the Shadowlands changes.
Note that I excluded the P/P breed from the raptor. In theory every breed can still work but there is a fair chance that the P/P will kill Ruddy too soon and the strategy won't work as described anymore. You can still do it, but you'd have to adapt yourself. |
번식 스크립트 직원 추천 |
2 | 4.9 |
100% | 117 |
156
2:36
|
23-24 | |


|
Long, but all pets survive, and no RNG that I can see.
I would highly recommend using the script. 2/8/20 -- I've updated the steps & script to ensure that Wanderer will be in for Apoc. Thank you for your feedback :) |
번식 트리키 스크립트 |
2 | 4.6 |
100% | 50 |
300
5:00
|
48 | |

|
스크립트 |
2 | 4.6 |
98% | 54 |
160
2:40
|
21-24 | ||


|
9.0 Update: Still works just as well.
I wrote the TD script first, and I recommend using that if you're able to. I've done my best to translate the TD script into step by instructions that are readable. The basic idea is to use the Nexus Whelpling's Arcane Winds to prevent your pets from being stunned, and its Sear Magic ability to trigger the Magma Trap. This will damage the Nexus Whelpling, but your Nexus Whelpling can take the damage without issue. The Bile Larva will deal with Ruddy, and the Periwinkly Calf will take care of Wanderer. Frill will be last and will be cleaned up by the Periwinkle Calf and, if needed, the Nexus Whelpling as well. |
알엔지 스크립트 |
2 | 4.5 |
40% | 14 |
190
3:10
|
28-33 | |


|
I tried one of the strategies here, and failed miserably due to a miss. I found this gem of a strategy on wowhead, posted by a member named Buuloki. It worked flawlessly, and leaves little room for RNG. It is also very simple by comparison. I hope it works as well for you as it did for me!
Don't bother counting turns. Prioritize Apocalypse's timer and Sticky Goo as specified. Long? Yes. 1-shot? Yes. (Thanks to ZeroOrDie453#1916 for the TD Script!) |
알엔지 스크립트 |
2 | 4.4 |
72% | 9 |
290
4:50
|
40-42 | |

|
알엔지 스크립트 |
2 | 4.2 |
95% | 29 |
175
2:55
|
24-25 | ||


|
Time: 2:40 (~20-24 rounds)
Tested 01/15/2021 |
스크립트 |
2 | 5.0 |
100% | 9 |
160
2:40
|
20-25 | |

|
Time: ~ 2:30
Tested 10/15/2020 |
번식 스크립트 |
2 | 5.0 |
99% | 9 |
150
2:30
|
23-24 | |


|
Super Cheese! 100% win... looong fight. it will consume over 100 rounds to complete.
Credit to Xchino @ Wowhead "Just spam sunlight on CD, keep up photosynthesis and keep swapping between your two Sunlight pets, making sure to refresh your HoT before swapping so your pets heal on the backline. You will easily outheal Ruddy while Sunfire whittles away the enemies backline pets. Once they are dead, swap to your apocalypse pet, cast it and swap back to your healing pets and just continue tanking. Remember to swap back to your roach for Apocalypse if you don't want to sacrifice a pet to this encounter." |
상점 스크립트 |
2 | 4.9 |
100% | 8 |
600
10:00
|
77-85 | |


|
Fight time:
1:45-2:00 on 16-17 rounds the majority of the time (Strategy A) 2:00-2:15 on 18-20 rounds when stunned on Round 1 (Strategy B) Given the fight, this is actually a pretty fast strategy (16-20 rounds compared to the popular Tricorne+Apocalypse strategy that averages around 20-26 rounds). Although the strategy wall of text below makes it look like a long and daunting fight at first glance, do note that you will only be applying one-half of it to the fight. You can also just use the TD Script for simplicity. Pet Breed Notes: Pet #1 - I have tested PP Nexus Whelpling and PS Stormborne Whelpling breeds. I'm assuming any breed with power > 304 would work fine. If given the choice though, go with the PP Nexus Whelpling with 341 power. Pet #3 - I have done limited testing with different Zandalari breeds, but they all seem to work well so far. If given the choice, go with the PS breed (305 power / 305 speed). |
알엔지 스크립트 |
2 | 4.0 |
81% | 62 |
123
2:03
|
16-17 | |
|
|
best breeds: SB > PS >> PS
Time: 2:30 Pet battle video Tested 26 April 2021 |
번식 스크립트 |
2 | 4.7 |
97% | 12 |
150
2:30
|
21-23 | |


|
Another work in progress:
#1 pet either: * Needs to be high health or * Above 302 speed; 독액 isn't required but ensures 19 rounds. |
스크립트 |
2 | 4.6 |
100% | 6 |
140
2:20
|
19-22 | |


|
스크립트 |
2 | 4.3 |
94% | 12 |
195
3:15
|
29+ | ||


모든 애완동물
|
This strategy is more boring than your typical office meeting, but it works and saves pets, as none of your pets will come close to dying.
WARNING THIS IS STUPIDLY LONG (135 TURNS) YOU HAVE BEEN WARNED THANKS Truthfulness for TD Script |
스크립트 |
2 | 4.1 |
0% | 7 |
900
15:00
|
100+ | |

|
The fight is very very long (75+ turns), but there is no RNG (always wins)
Using script is recommended as it's all priority based. How does it work: The enemy Imp (Frill) is almost harmless to critters. The idea is to keep him as enemy front pet (he uses Fade and next turn you stun the pet you don't want to see and Frill comes back) and to kill enemy backline pets with Pheromones. A fawn provides needed healing. Any fawn type and breed works, but the more power it has, the better it works (best is P/P Gleamhoof Fawn) - more power = more healing = less turns wasted on healing. The strategy works with 1 lovebird, but the script won't work in this case. Pheromones' going to have lower uptime and the bird'll need more healing. The fight is going to last even longer. With 1 lovebird I'd use additional fawn for faster healing. |
트리키 스크립트 |
2 | 0.0 |
100% | 1 |
570
9:30
|
70+ | |

|
Another WIP:
<1% chance this fails. ~1% chance this goes to 19/20 rounds. Health breed for your #1 pet recommend My UC Cockroach I used was Uncommon Other breed #2/3 work but not consistent. |
번식 스크립트 |
2 | 5.0 |
100% | 1 |
107
1:47
|
16 | |


|
Recommend health breeds.
Work in progress. Use at your own risk :p Full critter squad |
스크립트 |
2 | 5.0 |
99% | 2 |
140
2:20
|
19-22 | |
|
|
번식 알엔지 스크립트 |
2 | 4.5 |
91% | 1 |
150
2:30
|
23-24 | ||

|
~35 Rounds Safe. No Specific Breeds. No RNG. Cheap Pets.
Critters are used to avoid all potential stuns from Frill/Ruddy. Any Critters with Apocalypse will work for slots 1 and 3. |
스크립트 |
2 | 4.0 |
100% | 3 |
210
3:30
|
33-35 | |
|
|
알엔지 스크립트 |
2 | 2.6 |
0% | 19 |
190
3:10
|
27-28 | ||


|
This strategy was posted by Means in a comment to another strategy.
|
알엔지 스크립트 |
2 | 2.8 |
83% | 6 |
205
3:25
|
32-34 | |

|
51 rounds safe
|
스크립트 |
2 | 4.0 |
100% | 0 |
300
5:00
|
47-50 | |


|
This is a Beast AoE team built to take advantage of the humanoid's low damage and decimate the backline.
The Flying pet may be anything capable of stunning or sleeping the imp to deny it an action. The goal is get the anubisath swapped in so that the Pyreclaw can hit the backline while Zao keeps it healed. |
스크립트 |
2 | 2.3 |
85% | 3 |
295
4:55
|
46+ | |
|
Usually wins around round 41. Only fails if 부정깃털 gets crit and top-ended by Crush.
Both breeds of 태어나지 않은 발키르 work, but H/H basically can't fail to crits while B/B sometimes can. I highly recommend just using the script. The steps might be a little hard to follow, so I'll explain in more detail here: Frill It's important to note that the 초강력 끈적이 debuff must have 2 turns left to stop 소실 from swapping. If it only has 1 turn left, Frill will swap out anyways. His 소실 casts aren't 100% consistent, so whenever its CD is 1 round or less, you can only cast 초강력 끈적이 or you risk getting juked and Frill swapping out. Ruddy You continue to tank with 쌔앵 until the 마그마 덫 is gone and 흠씬 패기 has 5 turns of CD left (so you have time to combo with your 태어나지 않은 발키르 and 부정깃털). Sometimes you'll only have to keep 쌔앵 in for the first round and other times you'll have to tank a full 흠씬 패기 cycle. |
번식 알엔지 트리키 스크립트 |
2 | 0.0 |
98% | 0 |
225
3:45
|
36+ | |
|
|
I tested it manually on PetSim but I couldn't make the correct script because something went wrong after the Hunting Party on round 21 then the automatic simulation fails.
|
번식 |
2 | 0.0 |
N/A | 0 |
220
3:40
|
31+ |
Incl. steps:


Substitutes:
1 / 12
1 / 7

Long, but all pets survive, and no RNG that I can see.
I would highly recommend using the script.
2/8/20 -- I've updated the steps & script to ensure that Wanderer will be in for Apoc. Thank you for your feedback :)
| Before | After | Experience Gain | |
|---|---|---|---|
| 1 | ➜ | 10 | 3589 |
| 2 | ➜ | 11 | 3812 |
| 3 | ➜ | 11 | 4010 |
| 4 | ➜ | 11 | 4183 |
| 5 | ➜ | 12 | 4331 |
| 6 | ➜ | 12 | 4455 |
| 7 | ➜ | 13 | 4554 |
| 8 | ➜ | 13 | 4628 |
| 9 | ➜ | 14 | 4678 |
| 10 | ➜ | 14 | 4703 |
| 11 | ➜ | 15 | 4703 |
| 12 | ➜ | 16 | 4678 |
| 13 | ➜ | 17 | 4628 |
| 14 | ➜ | 17 | 4554 |
| 15 | ➜ | 18 | 4455 |
| 16 | ➜ | 19 | 4331 |
| 17 | ➜ | 19 | 4183 |
| 18 | ➜ | 20 | 4010 |
| 19 | ➜ | 21 | 3812 |
| 20 | ➜ | 22 | 3589 |
| 21 | ➜ | 22 | 3341 |
| 22 | ➜ | 23 | 3069 |
| 23 | ➜ | 24 | 2772 |
| 24 | ➜ | 25 | 1980 |
|
탐험대 모자 |
|
|
하급 애완동물 간식 |
|
|
애완동물 간식 |
|
|
다크문 중산모 |
|
|
애완동물 전투 주 |
|
= |
Pet levels to 25 with minimal XP lost |
|
|
= |
Additional XP above level 25 is lost |
|
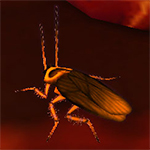
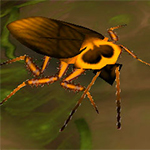
| 실험용 바퀴벌레 | HH |
| 새끼 사랑새 | SS |
| 새끼 사슴 | BB |
For the best display of your strategy, please follow these guidelines:


For the best display of your strategy, please follow these guidelines:
For the best display of your strategy, please follow these guidelines:
For the best display of your strategy, please follow these guidelines:
For the best display of your strategy, please follow these guidelines:
For the best display of your strategy, please follow these guidelines:
For the best display of your strategy, please follow these guidelines:
For the best display of your strategy, please follow these guidelines:
For the best display of your strategy, please follow these guidelines:
For the best display of your strategy, please follow these guidelines:
For the best display of your strategy, please follow these guidelines:
For the best display of your strategy, please follow these guidelines:
For the best display of your strategy, please follow these guidelines:
For the best display of your strategy, please follow these guidelines:
For the best display of your strategy, please follow these guidelines:
For the best display of your strategy, please follow these guidelines:
For the best display of your strategy, please follow these guidelines:
For the best display of your strategy, please follow these guidelines:
For the best display of your strategy, please follow these guidelines:
For the best display of your strategy, please follow these guidelines:
For the best display of your strategy, please follow these guidelines:
For the best display of your strategy, please follow these guidelines:
For the best display of your strategy, please follow these guidelines:
For the best display of your strategy, please follow these guidelines:
For the best display of your strategy, please follow these guidelines:
For the best display of your strategy, please follow these guidelines:
For the best display of your strategy, please follow these guidelines:
For the best display of your strategy, please follow these guidelines:
For the best display of your strategy, please follow these guidelines:
For the best display of your strategy, please follow these guidelines:
For the best display of your strategy, please follow these guidelines:
For the best display of your strategy, please follow these guidelines:
For the best display of your strategy, please follow these guidelines:
For the best display of your strategy, please follow these guidelines:
For the best display of your strategy, please follow these guidelines:
For the best display of your strategy, please follow these guidelines:
For the best display of your strategy, please follow these guidelines:
For the best display of your strategy, please follow these guidelines:
For the best display of your strategy, please follow these guidelines:
For the best display of your strategy, please follow these guidelines:
For the best display of your strategy, please follow these guidelines:
For the best display of your strategy, please follow these guidelines:
For the best display of your strategy, please follow these guidelines:
For the best display of your strategy, please follow these guidelines:
For the best display of your strategy, please follow these guidelines:
For the best display of your strategy, please follow these guidelines:
For the best display of your strategy, please follow these guidelines:

He might win by style alone!


1
thebl4ckd0g
글 올리기 2023-11-04 22:15:58
1
(OP) DragonsAfterDark
글 올리기 2024-04-08 23:27:15
1
(OP) DragonsAfterDark
글 올리기 2024-04-08 23:30:33
1
Cybelwinna#1467
글 올리기 2024-12-25 23:16:50
1
(OP) DragonsAfterDark
글 올리기 2024-12-26 03:01:29
1
Cybelwinna#1467
글 올리기 2024-12-26 03:22:41
1
(OP) DragonsAfterDark
글 올리기 2024-12-26 08:17:05
re: Baa'lial
I have it in the weekly article form the previous week, and onc ethe giveaway post breathes a bit I'll have it in the one for this week, too ^^
1
(OP) DragonsAfterDark
글 올리기 2024-12-29 07:52:36
1
Serntis#1505
글 올리기 2023-02-25 16:57:02
Invalid Condition: 'enemy(#3).dead' (not found cmd: 'enemy.dead')
1
(OP) DragonsAfterDark
글 올리기 2023-02-25 22:56:02
Link
1
Sneaks
글 올리기 2022-11-24 04:25:04
1
Azuremyst
글 올리기 2022-05-10 15:13:20
3
iceshayde
글 올리기 2021-01-31 16:33:08
-1
Kabandha 글 올리기 2020-10-17 23:35:37
4
Shade
글 올리기 2020-10-15 02:46:20
1
Innovindel
글 올리기 2020-10-15 02:14:38
On another note, the script didn't swap my roach back in for the 2nd Apocalypse. It's possible that this was because I used a sub in Deepholm Cockroach? I realized only after this I forgot to switch my fawn's Hoof for Stampede, so that may also have had something to do with it. Trying again with the right move, though as my Experimental Roach is H/P rather than H/H, I'll stick with my Deepholm roach. Only *just* over 1800 HP, but should be enough.
Update: Making sure that my fawn had Stampede set as its ability seemed to allow the script to work right. I really need to stop doing that. >.< (edited)
1
tarabeza
글 올리기 2020-09-23 20:59:34
1
(OP) DragonsAfterDark
글 올리기 2020-09-23 22:34:56
1
tarabeza
글 올리기 2020-09-24 16:16:12
2
(OP) DragonsAfterDark
글 올리기 2020-09-24 22:25:05
2
Snafu
글 올리기 2020-06-19 13:17:46
2
Lunapi
글 올리기 2020-06-04 07:58:00
2
Rioriel
글 올리기 2020-04-16 04:29:44
1
Ennin
글 올리기 2020-03-01 03:28:39
Anyway, I guess Lovebird can be set to have only Lovestruck to have Peddlefeet and Sister of Temptation alternatives?
2
(OP) DragonsAfterDark
글 올리기 2020-03-01 12:58:07
1
Shenk
글 올리기 2020-03-01 13:21:33
1
(OP) DragonsAfterDark
글 올리기 2020-03-01 13:25:20
1
Ennin
글 올리기 2020-03-05 01:27:15
2
Caanrial
글 올리기 2020-02-23 22:06:33
1
Oxling#1486
글 올리기 2020-03-01 12:57:12
1
(OP) DragonsAfterDark
글 올리기 2020-03-01 13:01:17
1
Nessahelyan#1259
글 올리기 2020-02-20 14:24:48
-4
Malachi 글 올리기 2020-02-08 12:31:20
4
(OP) DragonsAfterDark
글 올리기 2020-02-08 12:45:10
My roach never goes below 900 hp, and that only happens when it comes in against Wanderer. Prior to Wanderer, your roach should be taking maybe two hits from Ruddy, and the odd Magma Trap when coming in for a swap, which Bleat should be taking care of. So, please explain where and why your roach is dying, unless you're just not using Bleat.
-5
Malachi 글 올리기 2020-02-08 13:59:09
4
(OP) DragonsAfterDark
글 올리기 2020-02-08 14:35:22
Here's a link to the images of my log:
https://imgur.com/a/cyYNaAQ
I still didn't go below 1k hp on this particular fight, even with a Scorched Earth crit, triggering the Magma Trap, the passive from Scorched Earth, and a passive crit from Immolation.
When you page through the images, please note all of the 'Bleat healed 0 damage from your Experimental Roach' because it spends the majority of this fight at full hp.
As a side note, your comment about me supposedly thinking I'm a 'bad person' for defending a strat when I know, by the numbers, that I'm correct, was out of left field and uncalled for.
2
CoJo
글 올리기 2020-01-31 15:18:06
https://i.imgur.com/YpzcsSB.png
https://i.imgur.com/rT3AGV4.jpg
I can provide a full log of the fight if you want.
===
Worked flawlessly second time around.
(edited)
2
(OP) DragonsAfterDark
글 올리기 2020-01-31 15:34:14
I'm assuming it's something in the RNG with Frill's moves, and I can add an extra round with the Roach's second Apocalypse once I can get back in next week. (edited)
2
(OP) DragonsAfterDark
글 올리기 2020-01-31 22:23:19
1
Tacto#2341
글 올리기 2020-01-30 08:51:06
0
DarqGenocyde 글 올리기 2020-01-20 15:24:32
1
(OP) DragonsAfterDark
글 올리기 2020-01-20 15:53:27
0
PetCollector 글 올리기 2020-01-24 16:57:19
0
Wynndra 글 올리기 2020-01-24 12:53:05
0
Shami 글 올리기 2020-01-21 06:00:06
1
Coltreign#1355
글 올리기 2020-01-20 23:27:30
I have the pets/breeds and everything set up and copied the string correctly. I attempted this on the first clear (healing allowed) and it worked with all pets alive. Tried it the second time around in the challenge run (no healing allowed) and it failed.
My TD Script is set up to "A" and the only thing I ever pushed in both fights was only the "A" button. One fight worked, the second did not. In the second fight, the second application of Apocalypse landed on Frill and not on Wanderer as I assume it is supposed to. My roach was then killed by Wanderer and both Wanderer and Frill were at pretty much full health.
Just thought I'd share this info as this DID work the first attempt and for some reason DID NOT work the second time in the dungeon. I also assure that nothing was changed between runs....To be honest, on this fight in particular, I usually just look at stuff on my phone while spamming the Auto button.
1
(OP) DragonsAfterDark
글 올리기 2020-01-21 00:03:53
1
Steve
글 올리기 2020-01-18 23:12:48
1
Quira
글 올리기 2020-01-17 21:27:37
0
Rich 글 올리기 2020-01-16 23:41:31
1
(OP) DragonsAfterDark
글 올리기 2020-01-16 23:42:57
0
Rich 글 올리기 2020-01-17 12:30:49
0
Wex 글 올리기 2020-01-17 08:55:20
1
(OP) DragonsAfterDark
글 올리기 2020-01-17 10:38:27
1
Alayea
글 올리기 2020-01-16 17:11:43
1
Renevant#1144
글 올리기 2020-01-16 01:11:19
1st attempt: Roach dies in Round 48; Strat fails
2nd atempt: Win in Round 50
1
(OP) DragonsAfterDark
글 올리기 2020-01-16 01:49:41
1
Renevant#1144
글 올리기 2020-01-16 02:04:34
I think I might have been mashing my Auto button during Attempt #1 - so long as I take it easy, there seems to be no issue.
1
Rylene
글 올리기 2020-01-15 19:11:08
Also did it first try with a level 23 PH experimental roach blue quality
1
Djenn 글 올리기 2020-01-15 10:00:04
0
(OP) DragonsAfterDark
글 올리기 2020-01-15 15:23:19
1
Articca#2843
글 올리기 2023-11-30 16:49:00
2
Noxic
글 올리기 2022-11-23 23:19:52
1
Roxxa#11361
글 올리기 2020-05-21 03:59:45
1
Klep
글 올리기 2022-05-27 13:55:10
1
Klep
글 올리기 2022-05-27 13:54:54
0
coco 글 올리기 2020-10-20 18:10:04
1
(OP) DragonsAfterDark
글 올리기 2020-10-20 21:38:38
1
Orkrane#2246
글 올리기 2020-11-11 18:45:37
1
(OP) DragonsAfterDark
글 올리기 2020-11-11 22:15:47
0
Светундрия 글 올리기 2020-04-06 17:21:20
2
Putin-XyuLo
글 올리기 2022-07-28 18:38:25
1
Tantalos#21315
글 올리기 2024-08-11 12:44:10
1
Putin-XyuLo
글 올리기 2022-07-28 16:21:09
1
Keikomasaomi
글 올리기 2020-09-12 08:39:03
2
Котэшечко
글 올리기 2020-01-28 03:26:02
3
Drekhann#2657
글 올리기 2020-01-15 13:14:11
새로운 댓글: