
7
7
|
Puntuación media: |
4 |
|
Puntuaciones: |
32 |
|
Tu voto: |
|
Creator |
|||||||||
|---|---|---|---|---|---|---|---|---|---|
|
Etiquetas
Filtrar estrategias:
|
|||||||||

I do NOT have the skill to write a TD script for this. If someone is able to, PLEASE share :)
Update 21st of August 2019 - Added a TD script that worked for me, one time. Let's see if it's good. |
Script |
2 | 4.5 |
N/A | 37 |
160
2:40
|
26 | ||
|
|
RNG Script |
2 | 4.0 |
N/A | 7 |
155
2:35
|
18+ | ||
RNG No Obtenible |
2 | 4.2 |
N/A | 3 |
194
3:14
|
22+ | |||

Breed restriction is there for crit protection for Nairn. This makes sure you can get through at least 3 Curse of Dooms on him, making the strat more stable.
I haven't had Stormoen resurrect on the second Deep Freeze, meaning the third one will likely kill it. If this happens, I believe the Snowman should be able to handle him, and still have enough hp to take one hit from Summer (315 damage). If this happens to you, let me know if it turned out okay. If Nairn dies on the backline from the third Curse of Doom, attack on the stun swap, then continue with Summer's section on turn 20 below. Then, once the Snowman kills Summer, Stormoen should only need 1 hit form the Snowman to die. Video for Fight |
Raza Complicada Script |
2 | 4.3 |
N/A | 1 |
152
2:32
|
29-30 | ||
|
|
RNG |
2 | 3.9 |
N/A | 1 |
150
2:30
|
16+ | ||

Note: If the fight doesn't go exactly as planned, make sure you use Congelación profunda only when Invocar ventisca is up or enemy is chilled and make sure to not Congelación profunda when Summer's Esquivar is off cooldown.
Credit for this strategy goes to wowhead user Baanos |
Raza RNG |
2 | 3.7 |
N/A | 0 |
215
3:35
|
31 | ||

Tried these strategie 3 times with success, but you can't fail any step and too much crits will make it fail.
|
RNG |
2 | 3.0 |
N/A | 1 |
225
3:45
|
22 |
Incl. pasos:


| Antes | Después | Ganancia de Experiencia | |
|---|---|---|---|
| 1 | ➜ | 9 | 2393 |
| 2 | ➜ | 9 | 2541 |
| 3 | ➜ | 9 | 2673 |
| 4 | ➜ | 9 | 2789 |
| 5 | ➜ | 10 | 2888 |
| 6 | ➜ | 10 | 2970 |
| 7 | ➜ | 11 | 3036 |
| 8 | ➜ | 12 | 3086 |
| 9 | ➜ | 12 | 3119 |
| 10 | ➜ | 13 | 3135 |
| 11 | ➜ | 14 | 3135 |
| 12 | ➜ | 15 | 3119 |
| 13 | ➜ | 15 | 3086 |
| 14 | ➜ | 16 | 3036 |
| 15 | ➜ | 17 | 2970 |
| 16 | ➜ | 18 | 2888 |
| 17 | ➜ | 18 | 2789 |
| 18 | ➜ | 19 | 2673 |
| 19 | ➜ | 20 | 2541 |
| 20 | ➜ | 21 | 2393 |
| 21 | ➜ | 22 | 2228 |
| 22 | ➜ | 23 | 2046 |
| 23 | ➜ | 23 | 1848 |
| 24 | ➜ | 24 | 1634 |
|
Sombrero de safari |
|
|
Chuchería inferior para mascotas |
|
|
Chuchería para mascotas |
|
|
Chistera de la Luna Negra |
|
|
Semana de Duelos de Mascotas |
|
= |
La mascota sube a nivel 25 con pérdida mínima de EXP |
|
|
= |
Se pierde la EXP adicional por encima del nivel 25 |
|
For the best display of your strategy, please follow these guidelines:


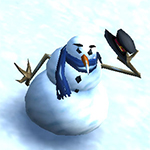
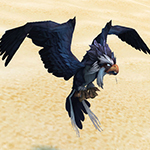
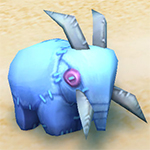


For the best display of your strategy, please follow these guidelines:


For the best display of your strategy, please follow these guidelines:


For the best display of your strategy, please follow these guidelines:


For the best display of your strategy, please follow these guidelines:


For the best display of your strategy, please follow these guidelines:


For the best display of your strategy, please follow these guidelines:


For the best display of your strategy, please follow these guidelines:


For the best display of your strategy, please follow these guidelines:


For the best display of your strategy, please follow these guidelines:


For the best display of your strategy, please follow these guidelines:


For the best display of your strategy, please follow these guidelines:


For the best display of your strategy, please follow these guidelines:


For the best display of your strategy, please follow these guidelines:


For the best display of your strategy, please follow these guidelines:


For the best display of your strategy, please follow these guidelines:


For the best display of your strategy, please follow these guidelines:


For the best display of your strategy, please follow these guidelines:


Parece que ha olvidado que la rescatamos de los Jinyu.
1
FantasticFoxes
escrito el 2024-10-09 11:52:44
1
Marabon
escrito el 2024-02-16 11:28:26
When Stormoen dies, use Snowball as the first attack on Nairn, then continue with Deep Freeze and Blizzard.
This allows for Blizzard to get off cooldown after Deep Freeze is cast.
This was successful. (editado)
1
Morticia24
escrito el 2021-10-16 21:48:20
1
dandepeched
escrito el 2021-06-08 14:41:03
1
Ariadna
escrito el 2020-12-17 19:10:41
2
Merchron
escrito el 2020-10-17 23:18:38
1
Zaphod
escrito el 2020-07-08 07:53:25
1
Xiem#1779
escrito el 2020-03-24 16:51:34
1
PureArmour#1184
escrito el 2019-08-28 22:33:39
6
mr_yggles
escrito el 2018-07-03 13:02:00
1. crystal prison
2. burn (stormoen swaps in)
3. stoneskin
4. burn until stormoen dies
nairn enters
5. crystal prison
6. burn (summer swaps in)
7. pass
8. stoneskin
9. burn until ashstone core dies
bring in ikky
10. black claw
11. flock (one hit should be dodged, the rest will kill)
nairn enters
12. black claw
13. flock
small amount of variance, but all results should lead to success!
4
Entmoot
escrito el 2019-01-10 09:57:26
1
Anonymous escrito el 2018-09-06 21:10:29
2
Nooblet#2332
escrito el 2018-03-16 07:22:45
After using deep freeze on Nairne to get Summer in, I switched to Lil' Bling then did the following:
1. Make it Rain
2. Inflation (RNG is a factor here, and if Lil' Bling dies here you should restart)
3. Blingtron Gift Package (if this misses you need to restart) - Should kill Summer if it hits
4. Nairne comes back in
5. Make it Rain
6. Inflation - Lil' Bling will die
7. Back in with Tiny Snowman and Deep Freeze
8. Call Blizzard (Nairne sometimes dies here, if not use Snowball)
0
Lami escrito el 2017-10-20 10:04:22
0
Kathleene escrito el 2017-10-04 16:31:12
0
Kathleene escrito el 2017-09-14 01:46:48
0
Raimu escrito el 2016-12-11 11:27:35
0
Lilianne escrito el 2017-07-14 08:07:14
7
aidos escrito el 2017-06-26 14:39:49
if [enemy(#1).active]
ability(206) [self.round=1]
ability(481) [self.round=2]
ability(481) [enemy.round=1 & enemy(#2).dead]
ability(206) [enemy(#2).dead]
ability(477)
change(#2) [self(#1).dead]
ability(919) [!enemy.aura(918).exists]
ability(581)
endif
if [enemy(#2).active]
ability(206)
ability(477)
endif
if [enemy(#3).active]
ability(477)
change(#2) [self(#1).dead]
ability(919) [!enemy.aura(918).exists]
ability(581)
endif
0
Roash escrito el 2017-05-31 00:20:37
0
Aranesh
escrito el 2016-08-26 03:59:18
0
Anonymous escrito el 2016-11-26 17:59:45
0
Aelfraed escrito el 2017-05-11 10:07:12
0
Marmite escrito el 2017-05-03 06:36:49
I had much better luck using Zandarali Kneebiter (hunting party/black claw) instead of Ikky, and one-shotted the fight that way using the above strategy.
0
Badjoojoo - SOE escrito el 2017-01-05 17:53:36
0
Devsham escrito el 2016-08-10 01:31:14
Black Claw
Flock
Flock continues (Summer dies and Nairn comes in)
Flock continues
Black Claw
Flock
Flock continues (Nairn dies)
Let me know if it works for you. Thanks.
0
Kevin escrito el 2016-10-14 19:02:33
0
Marne escrito el 2016-11-16 03:34:26
0
Anonymous escrito el 2016-11-26 18:43:55
0
Aranesh
escrito el 2016-12-12 03:43:10
0
Sopherra escrito el 2016-11-01 16:28:52
0
Ectothrix escrito el 2016-11-06 09:51:03
0
Anonymous escrito el 2016-06-04 19:07:48
0
Aranesh
escrito el 2016-08-26 03:58:57
0
Zaymaa escrito el 2016-08-11 06:55:00
1
hjv
escrito el 2024-02-14 14:21:47
1
SkoomaCat#21403
escrito el 2019-11-14 15:14:50
-3
Eirliss escrito el 2018-02-05 02:51:21
-3
Anonymous escrito el 2017-07-28 14:15:05
3
EPHNX
escrito el 2017-11-09 12:47:52
Nuevo comentario: