
| 전투형 인간 | 최강의 드래곤이 울부짖었다 | 편안한 비행 되셨나요? |  살아 있네! 살아 있네! | 너... 너를 문다! |
| 마법에 걸린 전투 | 성공의 정령 | 폭주 야수 모드 | 물 만난 애완동물 | 머신 러닝 |
전략이 추가됨. 추가자: DragonsAfterDark
15
15
|
Average rating: |
4.9 |
|
Ratings: |
37 |
|
귀하의 투표: |
|
Creator |
|||||||||
|---|---|---|---|---|---|---|---|---|---|
|
Tags
Filter strategies:
|
|||||||||

|

If you don't get to Soulrush because Tikka kills you too soon, the priority list for the other pets *should* still work just fine to finish the fight. Let me know if it doesn't.
Script thanks to Prudentius |
스크립트 |
2 | 4.9 |
87% | 15 |
140
2:20
|
19+ | |


모든 레벨 25+ 언데드
|
Sometimes Soulrush will stun Buzzbeak making him switch out, just use Spiritfire Bolt on Tikka until Soulrush is at 1 round, then use Enrage > Soulrush to kill Tikka.
Script thanks to Begija |
스크립트 |
2 | 4.8 |
96% | 30 |
125
2:05
|
15+ | |


|
스크립트 |
2 | 5.0 |
58% | 9 |
138
2:18
|
20 | ||

|
|
스크립트 |
2 | 0.0 |
100% | 1 |
96
1:36
|
12+ | |

|
스크립트 |
2 | 5.0 |
100% | 0 |
76
1:16
|
8 | ||


모든 레벨 25+ 언데드
|
스크립트 |
2 | 5.0 |
N/A | 0 |
117
1:57
|
15 | ||

|
2 | 0.0 |
N/A | 1 |
125
2:05
|
16 | |||
|
A bit RNG-ish as this strategy can sometimes fail if you get very unlucky and your pounces miss twice in a row.
|
알엔지 |
2 | 5.0 |
N/A | 2 |
130
2:10
|
15 | |
|
2 | 4.5 |
N/A | 3 |
135
2:15
|
18-19 | |||
|
It's a long fight this one and was somewhat tricky to make work, so it's slightly rng in my opinion.
Strategy tested and passed January 27th 2019 |
번식 |
2 | 0.0 |
N/A | 0 |
169
2:49
|
25 | |

모든 레벨 25+ 언데드
|
티씨지 |
2 | 1.0 |
N/A | 0 |
140
2:20
|
20+ |
Incl. steps:


If you don't get to Soulrush because Tikka kills you too soon, the priority list for the other pets *should* still work just fine to finish the fight. Let me know if it doesn't.
Script thanks to Prudentius
| Before | After | Experience Gain | |
|---|---|---|---|
| 1 | ➜ | 3 | 239 |
| 2 | ➜ | 4 | 254 |
| 3 | ➜ | 4 | 267 |
| 4 | ➜ | 5 | 279 |
| 5 | ➜ | 6 | 289 |
| 6 | ➜ | 6 | 297 |
| 7 | ➜ | 7 | 304 |
| 8 | ➜ | 8 | 309 |
| 9 | ➜ | 9 | 312 |
| 10 | ➜ | 10 | 314 |
| 11 | ➜ | 11 | 314 |
| 12 | ➜ | 12 | 312 |
| 13 | ➜ | 13 | 309 |
| 14 | ➜ | 14 | 304 |
| 15 | ➜ | 15 | 297 |
| 16 | ➜ | 16 | 289 |
| 17 | ➜ | 17 | 279 |
| 18 | ➜ | 18 | 267 |
| 19 | ➜ | 19 | 254 |
| 20 | ➜ | 20 | 239 |
| 21 | ➜ | 21 | 223 |
| 22 | ➜ | 22 | 205 |
| 23 | ➜ | 23 | 185 |
| 24 | ➜ | 24 | 163 |
|
탐험대 모자 |
|
|
하급 애완동물 간식 |
|
|
애완동물 간식 |
|
|
다크문 중산모 |
|
|
애완동물 전투 주 |
|
= |
Pet levels to 25 with minimal XP lost |
|
|
= |
Additional XP above level 25 is lost |
|
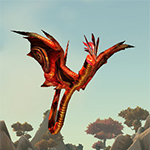
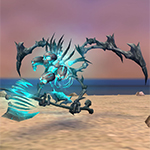
| 격노의 파편 | HP |
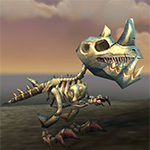
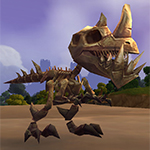
| 세드의 아들 | PS |
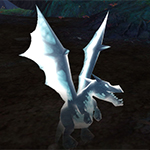
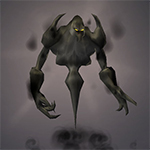
| 돌아온 새끼 | BB |
For the best display of your strategy, please follow these guidelines:


For the best display of your strategy, please follow these guidelines:
For the best display of your strategy, please follow these guidelines:
For the best display of your strategy, please follow these guidelines:
For the best display of your strategy, please follow these guidelines:
For the best display of your strategy, please follow these guidelines:
For the best display of your strategy, please follow these guidelines:
For the best display of your strategy, please follow these guidelines:
For the best display of your strategy, please follow these guidelines:
For the best display of your strategy, please follow these guidelines:
For the best display of your strategy, please follow these guidelines:
For the best display of your strategy, please follow these guidelines:
For the best display of your strategy, please follow these guidelines:
For the best display of your strategy, please follow these guidelines:
For the best display of your strategy, please follow these guidelines:
For the best display of your strategy, please follow these guidelines:
For the best display of your strategy, please follow these guidelines:
For the best display of your strategy, please follow these guidelines:
For the best display of your strategy, please follow these guidelines:
For the best display of your strategy, please follow these guidelines:
For the best display of your strategy, please follow these guidelines:

Champions of Vol'dun? Let's see how you fare against the Champions of the Celestial Tournament!


1
QuestFan
글 올리기 2024-12-08 03:35:34
1
Antilles
글 올리기 2024-01-14 06:46:31
2
Tiamat175
글 올리기 2022-08-03 00:28:52
Good fallback instructions and thank you for the strategy.
1
Dawn#22868
글 올리기 2021-10-21 10:55:14
2
Honeywhiss
글 올리기 2021-03-13 16:24:56
21
Prudentius
글 올리기 2018-12-23 19:44:35
standby [ enemy.aura(Dodge:2060).exists & ! self(#1).active ]
ability(Enrage:1392) [ ! enemy.aura(Hawk Eye:520).exists & enemy(#1).active ]
ability(Enrage:1392) [ enemy.aura(Dodge:2060).exists ]
ability(Soulrush:752) [ self.aura(Undead:242).exists ]
ability(#1) [ enemy(#2).active & enemy.ability(Dust Cloud:2059).usable ]
ability(Drain Blood:1043) [ self.hp.low ]
ability(Touch of the Animus:940)
ability(#3) [ ! self(#1).active & self.speed.slow ]
ability(Ravage:802)
ability(#1)
change(#3) [ enemy.aura(Stunned:927).exists ]
change(next)
Tikka can make this fight a little goofie to script for this strategy. I might try re-optimising it some time.
A few problem spots I found while running several tests of this script:
If the Enrage buffed Spiritfire Bolt low-balls the damage and you have to cast it 3 times there's an increased chance you won't finish the fight. If this happens you might consider restarting the fight to save time. You really want to kill Buzzbeak with just two Spiritfire Bolts to avoid the potential of taking 3 rounds of crits.
You don't want to ever try to use an ability with a cooldown while Tikki's Dust Cloud is off cooldown.
No matter what, if FoA is in its immortal round use Soulrush. Its the best damage move.
After the first use of Son of Sethe's cooldown abilities you want Blood Drain as your top priority. Its ridiculously close, but SoS can finish the fight.
2
voodoomon
글 올리기 2020-05-25 02:58:05
2
Honeywhiss
글 올리기 2021-03-13 16:24:25
0
Lobombre 글 올리기 2019-10-07 09:41:08
1
Tinith
글 올리기 2021-02-17 17:53:24
1
spottsy
글 올리기 2020-11-03 05:22:33
1
voodoomon
글 올리기 2020-05-25 02:58:32
4
jtrezzo#1973
글 올리기 2019-01-12 22:43:23
1
Creek
글 올리기 2020-05-15 23:51:23
1
Mahimahi
글 올리기 2020-03-19 08:54:56
1
Maceye1#1882
글 올리기 2019-05-15 19:56:22
mentioned.
0
Tie33 글 올리기 2019-02-06 10:48:12
Tiny Apparition 1,1,2
Curse of Doom
Arcane Explosion x 5
Buzzbeak dies and Tikka comes in
Arcane Explosion x 3
Curse of Doom
Apparition Dies.
Son of Sethe 2.2.1
Touch of the Animus
Plagued Blood x 2 - Tikka Dies
Drain Blood
Plagued Blood
Touch of the Animus
Plagued Blood
Blighthawk 1.1.2
Cyclone
Infected Claw x 2 for the win!!!!
2
Ash
글 올리기 2019-01-12 17:11:50
1
Xymarra
글 올리기 2019-01-02 16:49:51
4
Mumphie
글 올리기 2018-12-15 12:45:13
1
ShinRyuuken
글 올리기 2018-12-24 00:19:33
1
KMad#1351
글 올리기 2018-12-19 19:23:27
0
Othros 글 올리기 2018-12-19 18:53:07
2
Greeneggs
글 올리기 2018-12-17 13:26:25
2
Lankey#2965
글 올리기 2018-12-13 08:47:49
1
Moxie
글 올리기 2018-12-12 23:03:40
1
Pschotica 글 올리기 2018-12-15 06:24:34
1
(OP) DragonsAfterDark
글 올리기 2018-12-17 04:50:56
1
Booker 글 올리기 2018-12-17 04:37:58
1
(OP) DragonsAfterDark
글 올리기 2018-12-17 04:49:53
Kein Problem! Schön, dass es gut für dich funktioniert hat.
1
Lilli 글 올리기 2018-12-14 13:53:57
1
(OP) DragonsAfterDark
글 올리기 2018-12-17 04:48:38
1
Котэшечко
글 올리기 2019-05-15 04:16:56
새로운 댓글: