
| 전투형 인간 | 최강의 드래곤이 울부짖었다 | 편안한 비행 되셨나요? | 살아 있네! |  너... 너를 문다! 너... 너를 문다! |
| 마법에 걸린 전투 | 성공의 정령 | 폭주 야수 모드 | 물 만난 애완동물 | 머신 러닝 |
전략이 추가됨. 추가자: Rolfson#1694
4
4
|
Average rating: |
3.8 |
|
Ratings: |
12 |
|
귀하의 투표: |
|
Creator |
|||||||||
|---|---|---|---|---|---|---|---|---|---|
|
Tags
Filter strategies:
|
|||||||||


모든 레벨 25+ 크리터
|

Script thanks to Rinoe
|
스크립트 |
2 | 4.9 |
98% | 56 |
84
1:24
|
12 | |
|
스크립트 |
2 | 5.0 |
100% | 8 |
87
1:27
|
11 | ||


|
First pet can go more power heavy if you like, since Fungus has low speed. 2nd and 3rd pets must be SS breed in order to beat out the opponent's 2nd and 3rd pets. It's possible to lose if you roll poorly on flurry multiple times, but on average this strategy should win comfortably.
|
2 | 3.8 |
N/A | 4 |
170
2:50
|
25+ | ||
모든 레벨 25+ 크리터
|
Based on DragonAfterDark's strat, but changing up 1st & 3rd pet, since I didn't have the ones he called for. If you have him, Egbert works well in 3rd slot, as his peck does increased damage vs aquatic.
Script thanks to Tiggles |
스크립트 |
2 | 5.0 |
92% | 3 |
98
1:38
|
13 | |

|
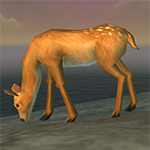
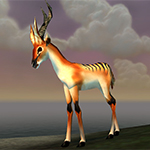
I wanted to follow the strat posted for this fight by DragonsAfterDark, but I didn't have Bush Chicken or Darkmoon Hatchling that he/she uses for Flock. I looked to see if I could replicate that with stampede critters, and sure enough, I had the Gazelle & Gleamhoof Fawns.
There is RNG in this fight as to how many turns it will take b/c the enemy pets don't behave the same way each time, but after many tests, this fight is always a sure win that ends with Lovebird mopping up easily to finish. |
2 | 5.0 |
N/A | 2 |
150
2:30
|
20 | ||
|
|
알엔지 |
2 | 4.3 |
N/A | 2 |
156
2:36
|
22 | ||


|
알엔지 |
2 | 0.0 |
N/A | 0 |
160
2:40
|
21 |
Incl. steps:


Substitutes:
1 / 17
1 / 17
1 / 17
First pet can go more power heavy if you like, since Fungus has low speed. 2nd and 3rd pets must be SS breed in order to beat out the opponent's 2nd and 3rd pets. It's possible to lose if you roll poorly on flurry multiple times, but on average this strategy should win comfortably.
| Before | After | Experience Gain | |
|---|---|---|---|
| 1 | ➜ | 3 | 239 |
| 2 | ➜ | 4 | 254 |
| 3 | ➜ | 4 | 267 |
| 4 | ➜ | 5 | 279 |
| 5 | ➜ | 6 | 289 |
| 6 | ➜ | 6 | 297 |
| 7 | ➜ | 7 | 304 |
| 8 | ➜ | 8 | 309 |
| 9 | ➜ | 9 | 312 |
| 10 | ➜ | 10 | 314 |
| 11 | ➜ | 11 | 314 |
| 12 | ➜ | 12 | 312 |
| 13 | ➜ | 13 | 309 |
| 14 | ➜ | 14 | 304 |
| 15 | ➜ | 15 | 297 |
| 16 | ➜ | 16 | 289 |
| 17 | ➜ | 17 | 279 |
| 18 | ➜ | 18 | 267 |
| 19 | ➜ | 19 | 254 |
| 20 | ➜ | 20 | 239 |
| 21 | ➜ | 21 | 223 |
| 22 | ➜ | 22 | 205 |
| 23 | ➜ | 23 | 185 |
| 24 | ➜ | 24 | 163 |
|
탐험대 모자 |
|
|
하급 애완동물 간식 |
|
|
애완동물 간식 |
|
|
다크문 중산모 |
|
|
애완동물 전투 주 |
|
= |
Pet levels to 25 with minimal XP lost |
|
|
= |
Additional XP above level 25 is lost |
|
For the best display of your strategy, please follow these guidelines:


For the best display of your strategy, please follow these guidelines:
For the best display of your strategy, please follow these guidelines:
For the best display of your strategy, please follow these guidelines:
For the best display of your strategy, please follow these guidelines:
For the best display of your strategy, please follow these guidelines:

Something smells terrible around here...


1
ArcticDragon#1821
글 올리기 2024-03-29 18:59:19
2
DragonsAfterDark
글 올리기 2023-09-25 04:03:54
1
MERMEL#1857
글 올리기 2023-06-04 02:26:22
1
Celestia
글 올리기 2023-05-31 20:13:23
2
Kvasi#2203
글 올리기 2022-03-27 14:53:36
standby [ enemy.aura(242).exists ]
ability(360) [ self.aura(311).exists ]
ability(312)
ability(159)
ability(360)
0
Anna 글 올리기 2021-04-13 05:11:26
새로운 댓글: