
전략이 추가됨. 추가자: Jagûar
4
4
|
Average rating: |
3.3 |
|
Ratings: |
4 |
|
귀하의 투표: |
|
Creator |
|||||||||
|---|---|---|---|---|---|---|---|---|---|
|
Tags
Filter strategies:
|
|||||||||


|

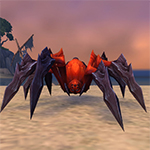
Bloodgazer Team Rumble
Turn 14 - Scenario 1: (Skitter) - Must crit for at least 1085 dmg to make the rest as smooth as possible. Strategy scenarioes tested and passed: January 9th 2019, original strategy partially changed to Scenario 1, added a Scenario 2 as well. |
번식 |
2 | 5.0 |
N/A | 1 |
120
2:00
|
17 | |


|
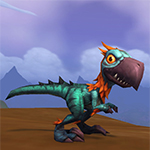
Direbeak Team Rumble
Slightly RNG dependent Complete Strategy overhaul Tested and passed: January 9th 2019, |
알엔지 |
2 | 5.0 |
N/A | 0 |
175
2:55
|
26 | |


|
스크립트 |
2 | 5.0 |
N/A | 3 |
115
1:55
|
17 | ||


|
스크립트 |
2 | 5.0 |
N/A | 0 |
120
2:00
|
18 | ||

|
스크립트 |
2 | 5.0 |
N/A | 0 |
105
1:45
|
15 | ||


|
If Scorched Earth misses on round 4 (10% chance) it's probably best to restart. I haven't had it happen, so I'm not sure if the strat is still viable if this occurs.
|
스크립트 |
2 | 5.0 |
N/A | 0 |
115
1:55
|
13+ | |

|
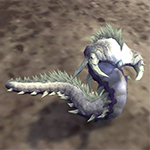
Snowfeather Team Rumble
IMPORTANT: You want Ghastly Kid to help soak the incoming damage from Rock Lobster's Carpnado, because you need Snowfeather Hatchling to stay alive in the backline, so using Etheral on Ghastly Kid before Carpnado comes off cooldown isn't a mistake. It's completely intentional to block one Infected Claw. Timing is everything. Strategy changed, tested and passed: January 9th 2019 |
번식 |
2 | 3.3 |
N/A | 4 |
165
2:45
|
25 | |


|
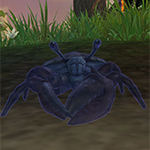
Sharptalon Team Rumble
Strategy tested and passed: January 9th 2019, no changes made |
알엔지 |
2 | 3.0 |
N/A | 0 |
125
2:05
|
21 |
Incl. steps:


Snowfeather Team Rumble
IMPORTANT:
You want Ghastly Kid to help soak the incoming damage from Rock Lobster's Carpnado, because you need Snowfeather Hatchling to stay alive in the backline, so using Etheral on Ghastly Kid before Carpnado comes off cooldown isn't a mistake. It's completely intentional to block one Infected Claw. Timing is everything.
Strategy changed, tested and passed: January 9th 2019
| Before | After | Experience Gain | |
|---|---|---|---|
| 1 | ➜ | 13 | 5981 |
| 2 | ➜ | 13 | 6353 |
| 3 | ➜ | 14 | 6683 |
| 4 | ➜ | 14 | 6971 |
| 5 | ➜ | 14 | 7219 |
| 6 | ➜ | 15 | 7425 |
| 7 | ➜ | 15 | 7590 |
| 8 | ➜ | 16 | 7714 |
| 9 | ➜ | 16 | 7796 |
| 10 | ➜ | 17 | 7838 |
| 11 | ➜ | 17 | 7838 |
| 12 | ➜ | 18 | 7796 |
| 13 | ➜ | 19 | 7714 |
| 14 | ➜ | 19 | 7590 |
| 15 | ➜ | 20 | 7425 |
| 16 | ➜ | 20 | 7219 |
| 17 | ➜ | 21 | 6971 |
| 18 | ➜ | 22 | 6683 |
| 19 | ➜ | 22 | 6353 |
| 20 | ➜ | 23 | 5981 |
| 21 | ➜ | 23 | 5569 |
| 22 | ➜ | 24 | 5115 |
| 23 | ➜ | 25 | 3900 |
| 24 | ➜ | 25 | 1980 |
|
탐험대 모자 |
|
|
하급 애완동물 간식 |
|
|
애완동물 간식 |
|
|
다크문 중산모 |
|
|
애완동물 전투 주 |
|
= |
Pet levels to 25 with minimal XP lost |
|
|
= |
Additional XP above level 25 is lost |
|
For the best display of your strategy, please follow these guidelines:


For the best display of your strategy, please follow these guidelines:
For the best display of your strategy, please follow these guidelines:
For the best display of your strategy, please follow these guidelines:
For the best display of your strategy, please follow these guidelines:
For the best display of your strategy, please follow these guidelines:
For the best display of your strategy, please follow these guidelines:
For the best display of your strategy, please follow these guidelines:
For the best display of your strategy, please follow these guidelines:
For the best display of your strategy, please follow these guidelines:
For the best display of your strategy, please follow these guidelines:
For the best display of your strategy, please follow these guidelines:
For the best display of your strategy, please follow these guidelines:
For the best display of your strategy, please follow these guidelines:
For the best display of your strategy, please follow these guidelines:
For the best display of your strategy, please follow these guidelines:
For the best display of your strategy, please follow these guidelines:
For the best display of your strategy, please follow these guidelines:
For the best display of your strategy, please follow these guidelines:
For the best display of your strategy, please follow these guidelines:
For the best display of your strategy, please follow these guidelines:
For the best display of your strategy, please follow these guidelines:

Hissssss!


0
Aryiana 글 올리기 2022-08-19 05:14:53
It was a bit hit or miss though. Used 2, then 1 then 3 to stun but not swap. Then kept grasping until he healed, used 2 and finished off with 1. Swapped in Snowfeather with Tia. Crouch, then Swarmed, then use pred strike to finish off. Swapped in Ghastly kid for rock. Severs takes the carpedo. Did as above strat and got him down. Snowfeather died but I still got completion.
(edited)
1
Lucetia
글 올리기 2022-07-16 05:36:14
On Turn 7 instead of using Surge I used Amplify Magic and then proceeded to use it until Living Pool was dead (2-3 times depends on if you crit)
Once Tia Mia and Larry come in just spam surge until you die. Once you are in undead form pop amplify and then follow the strat the rest of the way.
0
Alan 글 올리기 2019-03-10 22:55:10
From here, you'll get one more Surge off before Tia Mia and Larry kills your Spirit Crab. If you cast the Amplify Magic during the undead phase, your Falcosaur Swarm will indeed kill Tia Mia, though. I got a crit on one of them, so that may have helped.
In the end, the strat failed. Things started to look like they would work out when Rock Lobster came in, but Snowfeather died at the second turn of Ghastly Kid coming in, or when the strat says to use Ethereal.
1
(OP) Jagûar
글 올리기 2019-04-07 15:53:25
Some strats takes a very long time to get to work (12+ hours (my longest is around 6 days (yes days... where I spent time on only 1 specific strategy)) and will even work several times after and then the next 40 times (times, not tries), it doesn't work... Most, if not all of us, has all been there... us strategy creators probably more than most...
All I can say without writing a book and keep a proper tone, is to try again. And keep trying.
And don't worry if you end up with grey hair, rotten teeth and starved... some strategies are just true pains.
This strat however wasn't, so I'm not going to add an RNG tag.
1
Johra
글 올리기 2022-07-07 05:28:32
0
suutar 글 올리기 2018-03-17 20:40:48
-2
Kathleene 글 올리기 2017-10-05 01:31:44
2
RainFire 글 올리기 2018-02-03 10:51:14
0
Jesper 글 올리기 2017-08-25 14:04:01
0
OriginalNyla 글 올리기 2017-06-08 20:30:25
1
Almyre 글 올리기 2017-04-03 18:32:46
0
(OP) Jagûar
글 올리기 2017-04-05 12:28:40
1
Danila#2651
글 올리기 2025-03-06 18:10:01
새로운 댓글: