
| 인간의 승리인가 | 용이여, 적들을 삼켜라! | 나비처럼 날아서 벌처럼 쏜다 | 언데드에게 대들다니 | 괴물같은 동물들 |
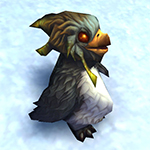
| 마법의 매지컬 | 정녕 정령의 승리로다 | 야수가 한 수 위 |  날 물로 보지 마 날 물로 보지 마 | 기계를 이기게? |
전략이 추가됨. 추가자: Erodrellila
1
1
|
Average rating: |
5 |
|
Ratings: |
4 |
|
귀하의 투표: |
|
Creator |
||||||||||
|---|---|---|---|---|---|---|---|---|---|---|
|
Tags
Filter strategies:
|
|||||||||
| 1 | 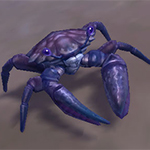

|

Copied directly from Wowhead from NeonShard's comment on Gloamwing's NPC Page
I didn't have much luck with the other strats so I gave this a try and got it first try - though I may have been lucky - Script thanks to glowcloud |
번식 알엔지 스크립트 |
2 | 4.5 |
21 |
91
1:31
|
13 | ||
| 2 | 

|
With new Nazjatar pets this fight is, barring crits, 100% RNG free. It does require three SS breed pets, but the two 딱딱가시 아기게 have only 3 possible breeds and all three pets are easy to find in the wild. Have fun!
|
번식 알엔지 |
2 | 4.5 |
28 |
62
1:02
|
7 | ||
| 3 | 
|
An adaptation of Dragonsafterdark's strategy.
Back in the days I bought two of these expensive Gulp Froglets to get the fight done :D So for everyone, who don't have the Gulp Froglet you can use a hermit crab (2/2/1) instead. Script thanks to Aesetha |
번식 알엔지 스크립트 |
2 | 4.5 |
22 |
80
1:20
|
13 | ||
| 4 | 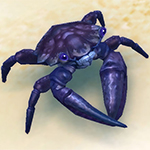

|
번식 |
2 | 4.3 |
29 |
61
1:01
|
8 | |||
| 5 | 
|
All Aquatic fights against Gloamwing are considered RNG.
If your Violet Abyssal Eel is crit by Predatory Strike: restart. Both the Eel and Skitterling should be able to take 3 Regular Slicing Wind hits for one round. Changed slot #3 to an SS Skitterling, that way you get to have 2 rounds of Shattered Defenses on Gloamwing instead of 1. 13 August 23 - Added a script |
번식 알엔지 스크립트 |
2 | 4.5 |
7 |
55
0:55
|
8 | ||
| 6 |
|
DON`T TRY IT WITH THE ALTERNATIVE PETS IT DOESN´T WORK It has to be the hermit and the chitterspine!
So, I had none of those slimy Pets from Naz and found this strategy. The Eel should be very cheap in the AH, so def a good alternative. It`s very important, that your chitterspine is S/S go farm one if neccessary. There is just a small RNG in this strat, you shouldn`t take more than 2or 3 trys. |
번식 알엔지 스크립트 |
2 | 3.7 |
11 |
78
1:18
|
11 | ||
| 7 | 

|
Erodrellila
|
13 August 23 - Pets have been updated. It's still RNG, but not as dependent on Gloamwing only doing 1 Slicing Wind versus a Gulp Frog plus the other points of RNG in the original.
Anything with 1600+ hp and Swarm or Stampede will work for slot 1, though I'm not if anything with 1800+ will die on its second round if Gloamwing doesn't Slicing Wind enough. |
번식 알엔지 |
2 | 5.0 |
1 |
65
1:05
|
8 | |
| 8 | 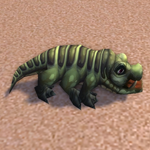
|
Alaurynn
|
13 August 23 - Strategy has been updated with new pets, but somewhat keeping in the spirit of the original by keeping Snarly. This is a pet riff off ProfessorLab's strategy here.
|
번식 알엔지 |
2 | 3.4 |
1 |
65
1:05
|
7 | |
| 9 |

|
From the Battle for Azeroth expansion.
Because of the RNG, you have to adapt the fight, I did 15 tries, with different strategies (with this), I won 12, so this strategy works better than any other on the site. |
번식 알엔지 |
2 | 2.5 |
1 |
100
1:40
|
14-15 | ||
| 10 | 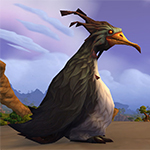
|
Incredibly ill advised with Aquatics but it is mandatory for the achievement. >.< This fight is so awful, and this is by far the most RNG strategy I've done yet. I simply did not own any of the alternatives and this was what I could come up with on my own. Good luck.
|
번식 알엔지 |
2 | 1.9 |
2 |
75
1:15
|
8 |
Incl. steps:


Substitutes:
1 / 3

13 August 23 - Pets have been updated. It's still RNG, but not as dependent on Gloamwing only doing 1 Slicing Wind versus a Gulp Frog plus the other points of RNG in the original.
Anything with 1600+ hp and Swarm or Stampede will work for slot 1, though I'm not if anything with 1800+ will die on its second round if Gloamwing doesn't Slicing Wind enough.
| Before | After | Experience Gain | |
|---|---|---|---|
| 1 | ➜ | 5 | 479 |
| 2 | ➜ | 5 | 508 |
| 3 | ➜ | 5 | 535 |
| 4 | ➜ | 6 | 558 |
| 5 | ➜ | 6 | 578 |
| 6 | ➜ | 7 | 594 |
| 7 | ➜ | 8 | 607 |
| 8 | ➜ | 9 | 617 |
| 9 | ➜ | 9 | 624 |
| 10 | ➜ | 10 | 627 |
| 11 | ➜ | 11 | 627 |
| 12 | ➜ | 12 | 624 |
| 13 | ➜ | 13 | 617 |
| 14 | ➜ | 14 | 607 |
| 15 | ➜ | 15 | 594 |
| 16 | ➜ | 16 | 578 |
| 17 | ➜ | 17 | 558 |
| 18 | ➜ | 18 | 535 |
| 19 | ➜ | 19 | 508 |
| 20 | ➜ | 20 | 479 |
| 21 | ➜ | 21 | 446 |
| 22 | ➜ | 22 | 409 |
| 23 | ➜ | 23 | 370 |
| 24 | ➜ | 24 | 327 |
|
탐험대 모자 |
|
|
하급 애완동물 간식 |
|
|
애완동물 간식 |
|
|
다크문 중산모 |
|
|
애완동물 전투 주 |
|
= |
Pet levels to 25 with minimal XP lost |
|
|
= |
Additional XP above level 25 is lost |
|
For the best display of your strategy, please follow these guidelines:


 압착 - you must survive Predatory Strike
For the best display of your strategy, please follow these guidelines:
For the best display of your strategy, please follow these guidelines:
For the best display of your strategy, please follow these guidelines:
For the best display of your strategy, please follow these guidelines:
For the best display of your strategy, please follow these guidelines:
For the best display of your strategy, please follow these guidelines:
 역순환 - Void Gate cannot crit!
For the best display of your strategy, please follow these guidelines:
For the best display of your strategy, please follow these guidelines:

Still a better love story than twilight.


 산성액
산성액 공허의 울림
 떼
떼
1
Mykaela
글 올리기 2023-05-30 12:01:25
13
Anonymous 글 올리기 2017-10-23 03:37:39
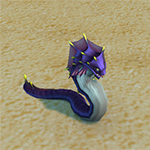
Magical Crawdad - 2,x,2
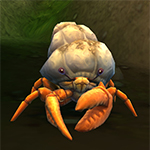
Ghostshell Crab - 2,2,1
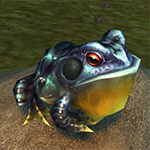
Gulp Froglet - x,x,2
Turn 1: Surge
Turn 2:Spirit Spikes
Turn 3: Bubble
Turn 4: Switch to Magical Crawdad
Turn 5: Gulp Froglet gets switched in; use Corpse Explosion
Turn 6: Bring Magical Crawdad back in and use Wish
Turn 7: Surge
Turn 8 + 9: Grasp
Turn 10: Spirit Spikes
Turn 11: Grasp (battle should be won)
1
Henry Chan 글 올리기 2017-10-23 11:47:33
-1
Lumikor 글 올리기 2017-10-24 08:11:37
-1
Tranmere Fan 글 올리기 2017-10-26 11:26:12
-1
Jim 글 올리기 2017-10-27 08:24:19
0
Gus 글 올리기 2017-10-27 13:31:48
-1
Anonymous 글 올리기 2017-10-30 08:06:54
-1
Zelda 글 올리기 2017-11-08 08:45:04
-1
andrewtabs 글 올리기 2017-11-16 22:26:55
-1
Gamara 글 올리기 2017-11-18 17:32:55
2
Hogri
글 올리기 2017-11-26 13:03:51
2
Askania
글 올리기 2018-01-03 09:07:48
-1
Dillybar 글 올리기 2018-01-07 19:27:20
-1
Ruta 글 올리기 2018-02-01 10:51:54
1
Mhystral#1427
글 올리기 2018-02-02 13:36:09
0
CymreJones 글 올리기 2018-03-15 07:43:47
1
Magpie
글 올리기 2018-06-03 17:14:47
1
Bauwagast
글 올리기 2018-12-09 10:31:35
1
Lumimyrsky87
글 올리기 2022-10-12 12:33:52
1
Nytsua
글 올리기 2022-02-03 18:39:07
1
Baklava#1199
글 올리기 2021-04-16 14:46:36
2
EnderLatias#1305
글 올리기 2020-11-05 14:20:41
4
Calari 글 올리기 2018-01-01 12:04:27
Gemllum posted the following on Battle.net and it worked for me on the first try.
All Strider Team (1 1 1)
** They must be slower than 300 **
I used a Dancing Water Skimmer and two Spring Striders, all 289 speed.
Here's his strat, verbatim from Battle.net:
*****
Strategy :
The first 3 rounds are used for some set up:
Round 1: pass
Round 2: soothe
Round 3: switch to your 3rd strider (If Gloamwing gets a triple hit, you may want to start over just to be safe.)
All 3 of your pets should be still alive. From now on repeat the following steps:
Step 1: Healing wave (At the beginning of the round Gloamwing is asleep for 2 turns)
Step 2: Water Jet (This looks like it breaks the sleep ...)
Step 3: Soothe ( ... but for some reason Gloamwing was very tired and decided to keep napping this round.)
Step 4: Gloamwing swaps your strider out.
Step 5: Go to Step 1.
*****
Be patient. It's a long fight.
My first 20 or so tries used one strider at 305 speed. Did not work. Went back to Val'Sharah and picked up a second Spring Strider with 289 speed. Worked on the first try...all striders were 50% health or above when finished. I ran it a second time just to make sure it wasn't a fluke: two of my striders died due to Void Gate crits, but I still beat him with my last strider.
1
Carmen 글 올리기 2018-01-03 21:16:24
1
Emerald
글 올리기 2018-01-07 06:18:42
2
rockysp
글 올리기 2018-01-07 07:29:15
1
Gráinne
글 올리기 2018-01-14 09:24:27
1
Gráinne
글 올리기 2018-01-14 10:17:32
https://us.battle.net/forums/en/wow/topic/20760625895
1
TimboAZ
글 올리기 2018-02-11 11:10:16
1
Shiny#1629
글 올리기 2018-03-11 23:48:18
0
gbh102 글 올리기 2019-09-05 20:14:06
1
Gráinne
글 올리기 2019-09-05 21:17:07
1
Rawrr
글 올리기 2020-10-22 20:38:01
2
Rawrr
글 올리기 2020-10-22 20:35:29
1
coldcut#2275
글 올리기 2019-12-15 09:46:09
To anyone still needing this for the achievement, I did it with the strategy that uses some cheap new BfA pets (I used B/B Coastal Scuttler and S/S Hermit Crab): https://wow-petguide.com/?Strategy=2054 (edited)
2
huldu
글 올리기 2020-10-16 18:52:18
0
Charys#1604
글 올리기 2018-01-13 12:55:38
3
MisterMan 글 올리기 2018-01-23 10:08:52
2
Belle
글 올리기 2018-11-19 02:18:56
35
Joe 글 올리기 2017-11-26 17:57:02
Benax (1,1,1)
Gulp Froglet (1,1,2)
Ghostshell Crab (2,2,1)
1. Pass - Benax is swapped out for Ghostshell Crab
2. Spirit Spikes
3. Bubble - this is important, you must get hit twice. Restart if you get hit 1 or 3 times
4. Swap in Benax
5. Void Portal brings in Gulp Froglet
6. Mudslide
7. Corpse Explosion - Restart if you don't get this one off. This is the difficult part of having the balance Gulp Froglet. You can only handle 3 hits total.
8. Bring back Benax
9.Bubble
10. Mudslide
11. Waterjet
12. Pass
13. Ghostshell comes back in and he still has his bubble
14. Grasp
15. Bubble
16. Grasp until the fight is won
All the credit goes to Hazelnuttygames:)
Bring some bandages. It took me about 20 tries to get the RNG just right.
1
Shirana 글 올리기 2017-11-27 19:07:35
1
Hogri
글 올리기 2017-11-28 13:14:07
0
Realhero 글 올리기 2017-11-28 18:07:14
1
Jeack
글 올리기 2017-12-10 00:18:07
0
Skyset 글 올리기 2017-12-10 01:14:11
1
Henry#1930
글 올리기 2017-12-10 02:35:57
0
Emerald 글 올리기 2017-12-16 23:27:34
1
Zaiaku#1218
글 올리기 2017-12-18 22:47:14
1
Happeria#1884
글 올리기 2017-12-21 09:02:56
0
Samurai 글 올리기 2017-12-25 19:59:19
0
Lockturnal 글 올리기 2017-12-26 01:25:56
2
Cernunnas
글 올리기 2018-01-02 17:46:54
1
Shamora
글 올리기 2018-01-07 23:36:45
3
Prudentius
글 올리기 2018-01-11 23:51:15
ability(Spirit Spikes:914) [ self.hp.full ]
ability(Bubble:934)
ability(Mudslide:572)
ability(Corpse Explosion:663)
ability(#1)
change(#1)
quit [ self(#3).dead ]
0
Izzy 글 올리기 2018-05-27 09:27:28
1
Telepatra
글 올리기 2018-06-04 22:05:10
1
Bukav
글 올리기 2018-07-15 06:10:34
1
Ravynsur
글 올리기 2018-08-30 15:32:14
8
Corgi
글 올리기 2017-12-05 12:16:13
1
rockysp
글 올리기 2018-01-07 06:48:18
1
TheEducator#11115
글 올리기 2018-01-07 09:57:13
2
Nemy
글 올리기 2018-01-11 15:12:04
1
Dooms
글 올리기 2018-07-20 09:20:38
0
Jocast-sivermoo 글 올리기 2017-11-13 15:16:22
0
Scotlassie 글 올리기 2017-11-24 04:32:45
1
Nemy
글 올리기 2018-01-11 17:33:12
4
Myrrial 글 올리기 2018-01-06 12:09:02
So after Benax is passing away,
Rip
Blood
Surge
Cross fingers for a 2 slicing wind!
1
TheEducator#11115
글 올리기 2018-01-07 10:06:38
1
Nemy
글 올리기 2018-01-11 17:32:31
1
Askania
글 올리기 2018-01-04 00:22:19
0
Saron 글 올리기 2017-09-22 21:06:11
Benax 1 1 1 H/P
Ghostshell Crab 2 2 1 H/S
Gulp Froglet X 1 2 H/B
This mitigates the RNG as much as possible, but there is still some. If at any point Void Gate crits Benax, restart. Good luck!
Edit: Spirit Claws could be used in place of Grasp if for some reason you're having trouble finishing, but that adds some more RNG to the mix.
Turn 1 - Pass (Ghostshell Crab forced in)
Turn 2 - Spirit Spikes (Gloamwing must strike exactly twice, otherwise restart)
Turn 3 - Bubble
Turn 4 - Switch to Benax - Gulp Froglet is forced in
Turn 5 - Mudslide
Turn 6 - Corpse Explosion (Gloamwing must strike no more than four times, otherwise restart)
Switch to Benax
Turn 7 - Bubble
Turn 8 - Mudslide
Turn 9 - Water Jet
Turn 10 - Pass (Dies)
Turn 11 - Grasp
Turn 12 - Bubble
Turn 13 - Grasp
Turn 14 - Grasp
0
LirameiRav 글 올리기 2017-09-22 22:35:15
quit [self(#2).dead & round < 5]
quit [self(#3).dead & round < 7]
change(Benax:1934) [round=4]
ability(Spirit Spikes:914) [round < 5]
ability(Bubble:934)
ability(Mudslide:572)
ability(Corpse Explosion:663)
ability(Water Jet:118)
ability(Grasp:249)
change(Benax:1934)
0
Henry Chan 글 올리기 2017-09-22 23:33:54
Turn5/6: rng % to survive, 6/9 (permutations of Slicing Winds) = 66%
Overall success rate = 33% * 66% = 22%
This is an OK, strat, but there is at least one strat with a 33% overall. success rate Try that one out (replacing Ghostshell Crab with Ghost Shark). One more thing, percentatges do not take crits into account (can work both ways tho)
0
Vàrgas 글 올리기 2017-09-23 17:20:24
0
Za 글 올리기 2017-09-24 14:20:04
0
Josieann 글 올리기 2017-09-27 15:34:09
0
Theeia 글 올리기 2017-10-06 15:03:23
0
Philaetia 글 올리기 2017-10-06 21:44:34
0
Jirki88 글 올리기 2017-10-09 14:18:01
0
Verges 글 올리기 2017-10-13 09:38:46
0
Anonymous 글 올리기 2017-10-26 13:38:46
0
Urlaa 글 올리기 2017-10-28 17:22:32
1
Ziast#1425
글 올리기 2017-11-08 13:47:25
1
Groovjin
글 올리기 2017-11-25 15:19:54
2
Shei
글 올리기 2017-11-24 04:32:08
0
NWGameDad 글 올리기 2017-09-15 22:32:37
Pet 1 - Ghostshell Crab (1, 2, 1)
Pet 2 - Gulp Froglet (1, 1, 2)
Pet 3 - Ghost Shark (2, 2, 1)
Turn 1 - Pass (brings in your Gulp Froglet)
Turn 2 - Corpse Explosion
Turn 3 - (Bring in Ghostshell Crab) Bubble
Turn 4 - Spirit Claws (restart if it misses)
Turn 5 - Spirit Spikes
Turn 6 - Spirit Claws (restart if it misses or if Gloamwing gets off 3 attacks)
Turn 7 - Do whatever, your Ghostshell Crab dies
Turn 8 - (Bring in Ghost Shark and you will be faster than Gloamwing), Dive (avoiding Predatory Strike)
Turn 9 - Ghost Strike if Gloamwing has less than 325 hps, otherwise Consume
Turn 10 (if needed) - Ghost Strike
Good luck!
0
Henry Chan 글 올리기 2017-09-15 23:09:38
0
NWGameDad 글 올리기 2017-09-15 23:18:10
0
Henry Chan 글 올리기 2017-09-15 23:41:36
So at the beginning of turn 3. 66% chance of survivial (if Gloamwing does 3 SW, you die)
Turn 6, you mean if Goamwing gets off or "does *NOT* hit you 3 times"
Assuming, you mean, the latter, ... another 33% chance
So 2 spirit claws @ 80% (=64%)
for a total success rate of 14%
Does this sound about right to you NWGameDad. If so, good job. Bow!
(oh, FYI, Turn 10 - n/a as after a Ghostly Bite, you get stunned)
0
NWGameDad 글 올리기 2017-09-15 23:55:24
Turn 10 is needed, and you're not stunned for it, if in Turn 9 you have to Consume instead of Ghost Strike (i.e. she has more than 325 hps left in turn 9 making you use Consume).
0
Corlegan 글 올리기 2017-09-17 22:19:13
0
Podnov 글 올리기 2017-09-27 15:44:54
0
Dolphin517 글 올리기 2017-10-06 03:46:54
0
Anonymous 글 올리기 2017-10-27 00:58:38
0
Zarria 글 올리기 2017-11-23 17:05:05
0
Zandjil 글 올리기 2017-09-18 13:35:13
By Chidsuey (4,053 – 1·13·28) 7 days ago (Patch 7.2.5)
Aquatic Assault
Benax 1 1 1
Ghostshell Crab 2 2 1
Gulp Froglet X 1 2
This mitigates the RNG as much as possible, but there is still some. If at any point Void Gate crits Benax, restart. Good luck!
Edit: Spirit Claws could be used in place of Grasp if for some reason you're having trouble finishing, but that adds some more RNG to the mix.
Turn 1 - Pass (Ghostshell Crab forced in)
Turn 2 - Spirit Spikes (Gloamwing must strike exactly twice, otherwise restart)
Turn 3 - Bubble
Turn 4 - Switch to Benax - Gulp Froglet is forced in
Turn 5 - Mudslide
Turn 6 - Corpse Explosion (Gloamwing must strike no more than four times, otherwise restart)
Switch to Benax
Turn 7 - Bubble
Turn 8 - Mudslide
Turn 9 - Water Jet
Turn 10 - Pass (Dies)
Turn 11 - Grasp
Turn 12 - Bubble
Turn 13 - Grasp
Turn 14 - Grasp
Victory!
0
Anonymous 글 올리기 2017-09-18 14:44:26
0
Chidsuey 글 올리기 2017-09-18 16:10:08
0
Shunai 글 올리기 2017-09-18 22:09:13
0
Dalaina 글 올리기 2017-09-18 23:50:28
0
Henry Chan 글 올리기 2017-09-19 01:50:19
Yup
0
ttk 글 올리기 2017-09-19 08:32:43
0
Marcus 글 올리기 2017-09-20 02:00:44
0
Tutonik 글 올리기 2017-09-21 03:32:14
0
Ryuuken 글 올리기 2017-09-22 00:32:16
0
Fawnix 글 올리기 2017-09-22 21:21:31
0
Zithras 글 올리기 2017-09-23 04:58:04
0
Anonymous 글 올리기 2017-09-23 23:08:12
0
Dubhglas 글 올리기 2017-09-24 19:01:59
0
Xbones 글 올리기 2017-09-29 00:01:15
0
Chrisski 글 올리기 2017-10-04 03:45:01
0
Niénna 글 올리기 2017-11-17 10:52:07
2
Atkor 글 올리기 2017-09-29 22:26:48
Team:
Snarly (1, 1, 2)
Gulp Froglet (2, 1, 2) - mine was H/P but I'd say breed is irrelevant
Toothy (1, 1, 2)
Surge->(Gulp Froglet is forced in)->Mudslide->Corpse Explosion (you need to be hit ONLY ONCE! If rng is fail restart)->switch to Toothy and do Rip->Blood in the Water->Surge->Toothy dies and Snarly is back->do Blood in the Water->Surge.
IMO this strat needs much less rng than the above where you need to be highly favored by rng twice and it still may not be enough, with this...if everything goes ok with froglet being hit once, you are almost guaranteed.
0
Kast 글 올리기 2017-10-01 16:20:12
0
Jirki88 글 올리기 2017-10-09 14:13:49
0
Eos 글 올리기 2017-10-10 09:35:45
0
Macgam 글 올리기 2017-10-10 19:53:07
0
seïya 글 올리기 2017-10-10 21:44:43
0
Anonymous 글 올리기 2017-10-17 18:53:49
0
paulos 글 올리기 2017-10-20 17:48:46
0
Beace 글 올리기 2017-10-22 22:46:26
1
Zoumz
글 올리기 2017-11-05 15:30:11
0
Aralexi 글 올리기 2017-11-02 15:03:47
0
Lisma 글 올리기 2017-10-28 14:13:22
0
Anonymous 글 올리기 2017-09-10 06:03:51
Ghostshell Crab (2-2-1)
Sea Calf (2-1-2)
Gulp Froglet --> Pass
Ghostshell Crab --> Bubble, Grasp --> Spirit Spikes --> Died
Gulp Froglet --> Corpse Explosion
Sea Calf --> Bubble --> Blood in the Water --> Surge
0
noctus 글 올리기 2017-09-10 09:18:24
also rng dependant... crab must have 3 hits of slicing and gulp less than 3.
also blood has to hit.
0
Anonymous 글 올리기 2017-09-10 09:20:32
0
Mayhemia 글 올리기 2017-09-10 12:32:36
0
Dasetorn 글 올리기 2017-09-10 13:36:08
0
Machista 글 올리기 2017-09-10 14:45:40
0
Marius 글 올리기 2017-09-10 16:10:28
0
Drizz 글 올리기 2017-09-12 06:13:01
0
Henry Chan 글 올리기 2017-09-13 14:46:29
-> 33% * 66% * 50% = 11% -- Good job
0
Gaffa 글 올리기 2017-09-15 20:36:13
0
Tinytoon 글 올리기 2017-09-18 18:51:56
0
Darellma 글 올리기 2017-10-06 13:53:29
0
asslord 글 올리기 2017-10-21 15:33:09
0
Mel Lafferty 글 올리기 2017-10-19 12:11:47
0
Anonymous 글 올리기 2017-10-10 03:11:57
0
dont have to reload 글 올리기 2017-10-19 05:22:16
0
Anonymous 글 올리기 2017-10-02 08:13:11
0
Anonymous 글 올리기 2017-10-17 06:26:56
0
Swampthing 글 올리기 2017-10-13 23:19:40
0
Anonymous 글 올리기 2017-10-12 15:50:38
0
Frosty 글 올리기 2017-10-08 02:28:00
Predatory strike is 1129 hp but slicing wind is 2X with 1st is 396 and 2nd is 700. auto kill gulp froglet.
Did Blizzard change the 2nd slicing wind to crit? All 400-500 fights, slicing wind crit on 2nd hit.
0
Henry Chan 글 올리기 2017-10-08 23:48:37
0
Aranesh
글 올리기 2017-10-03 05:06:12
0
Wreathy 글 올리기 2017-10-06 22:46:09
0
Henry Chan 글 올리기 2017-09-21 11:52:53
Benax (Water Jet, Mudslide, Bubble)
Gulp Froglet (Water Jet, Swarm of Flies (or Mudslide), Corpse Explosion) - 1627 Health Bread
Ghost Shark (Consume, Ghostly Bite, Dive)
Benax - Pass
Gulp Froglet - Mudslide
Gulp Froglet - Corpse Explosion (33.3% chance of success - restart if fails)
Benax - Bubble
Benax - Swarm of Flies
Benax - Water Jet
Benax - Water Jet
Benax - Pass
Ghost Shark - Dive
Ghost Shark - Ghostly Bite
0
Matt 글 올리기 2017-09-23 11:32:42
0
cat 글 올리기 2017-10-05 17:08:49
0
Tungmeister 글 올리기 2017-10-02 08:37:32
0
Quizzus 글 올리기 2017-10-04 04:09:12
0
Dalgasen 글 올리기 2017-09-11 17:27:01
This is RNG based, but not near as RNG as the ones above
1:Pass
2:Spirit Spikes
3:Spirit Claws - 1 hit (Doable) 2 hits (Perfect) 3 hits (You die, Restart)
4:Pet dies
5:Spirit Spikes
6:Bubble - 1 hit (Restart) 2 hits (Depend on 3 first time) 3 hits (Perfect)
7:Spirit Claws
8:Spirit Claws
9:Pass, dead.
10:Spirit Spikes
11:Bubble (Here you need to have a total of at least 7 hits with 'Spirit Strikes' active)
12:Spirit Claws
13:Spirit Claws
This is how i got my achiev. Used 250+ bandages on the other tacs. This worked for me
//Dalgasen-Defias Brotherhood
0
Anonymous 글 올리기 2017-09-12 09:20:39
0
Henry Chan 글 올리기 2017-09-12 18:57:39
Actually the ones above have an 11% (1/3 * 1/3) chance of succeeding
Your strat
is .8^7 (due to spirit claws being .8) * .666 * .666 = 9%
0
Anonymous 글 올리기 2017-09-13 13:09:29
0
Talia 글 올리기 2017-10-02 06:19:53
0
dsc `stormrage 글 올리기 2017-09-25 18:58:28
0
Henry Chan 글 올리기 2017-09-25 20:10:10
You sure about that?
This strat has the same RNG checkpoint as my 33.3% overall strat in addition to another RNG checkpoint at Blood in the Water. In other words, this strat has a lower chance of succeeding.
0
Shunai 글 올리기 2017-09-19 02:35:45
By Alaurynn
Aquatic Battle
Bring bandages and pray that the enemy's Slicing Wind doesn't kill you too quick. You may fail many times before getting the Corpse Explosion off. I only had to do it about ten times. This definitely works, but it requires you to do it EXACTLY as follows:
Snarly (1.1.2), H/P Gulp Froglet (2.1.2), Toothy (1.1.2) (UPDATE: also tested with Muckbreath and Chuck subbed for the two crocs.)
1-Surge (Gulp Froglet is swapped in)
2-Mudslide
3-Corpse Explosion (If Gulp does before explosion, restart.)
4-Choose Toothy (important!)
5-Rip
6-Blood in the Water
7-Surge (if Toothy dies before this, restart.)
8-Snarly comes in.
9-Blood in the Water
10-Surge
0
maladroa-greymane 글 올리기 2017-09-20 01:58:58
0
Anonymous 글 올리기 2017-09-21 03:38:49
0
joeber 글 올리기 2017-09-21 12:02:06
0
Anonymous 글 올리기 2017-09-22 16:18:42
0
Anonymous 글 올리기 2017-09-15 23:55:46
0
Henry Chan 글 올리기 2017-09-12 23:27:26
Sea Calf - Surge, Bubble, Blood In the Water
Gulp Froglet - Water Jet, Mudslide, Corpse Explosion (Breed: Health 1627)
Ghost Shark - Consume, Ghostly Bite, Dive
Sea Calf - Surge
Gulp Froglet - Mudslide
Gulp Froglet - Corpse Explosion (33% chance of success)
Sea Calf - Bubble
Sea Calf - Blood In the Water (50% chance of success)
--- Note: (the probability of you getting here is: 33% * 50% = 16.67%)
Sea Calf - Surge
Sea Calf - Surge
-- Note : (fyi Ghost Shark is now faster than Gloamwing)
Ghost Shark - Dive
Ghost Shark - Ghostly Bite
0
Camille 글 올리기 2017-09-14 06:25:10
0
Lilyboo 글 올리기 2017-09-15 21:25:45
0
Henry Chan 글 올리기 2017-09-15 23:03:49
0
Anonymous 글 올리기 2017-09-15 22:00:34
0
diamand 글 올리기 2017-09-14 02:03:57
0
Sollicity 글 올리기 2017-09-14 11:56:32
0
Yepah 글 올리기 2017-09-15 17:17:04
0
Henry Chan 글 올리기 2017-09-15 17:41:28
0
xsirenxcrusnikx 글 올리기 2017-09-09 00:16:19
Tiny Blue Carp - x/x/2
H/B Gulp Froglet - 1/1/2
Snarly - 1/1/2
Strat went as above, but with Benax replaced with the carp. Used Mana Surge and got a lucky crit I suppose, and then the bleed from Rip finished off Gloamwing. Such an RNG fight, glad to be done with it.
0
Hannah 글 올리기 2017-09-09 15:24:48
0
Henry Chan 글 올리기 2017-09-13 14:50:21
0
adezero 글 올리기 2017-09-15 13:10:27
0
Laeleiweyn 글 올리기 2017-09-15 05:42:05
0
Lilianne 글 올리기 2017-09-09 03:05:50
I was lucky to win on the 4th attempt.
P.S. This is not a criticism of this fight. All the Mac'Aree pets are extremely tough, and it's fantastic to have found a strategy at ALL! ;)
0
Hannah 글 올리기 2017-09-09 18:00:34
0
Izo 글 올리기 2017-09-10 04:59:56
0
Quizzus 글 올리기 2017-09-10 05:01:00
0
Anonymous 글 올리기 2017-09-08 10:48:21
0
Machista 글 올리기 2017-09-08 17:26:08
Too bad this pet is not cheap...
0
Castratia 글 올리기 2017-09-08 21:35:11
0
Anonymous 글 올리기 2017-09-09 10:46:24
0
Hannah 글 올리기 2017-09-09 15:23:57
0
Anonymous 글 올리기 2017-09-08 13:11:53
0
Anonymous 글 올리기 2017-09-09 09:16:22
0
Shashos 글 올리기 2017-09-08 17:49:55
0
Shashos 글 올리기 2017-09-08 17:56:36
0
avshar 글 올리기 2017-09-08 14:41:11
0
Jess 글 올리기 2017-09-08 09:52:07
0
Ograshuk 글 올리기 2017-10-07 08:18:21
Benax - Passen
Gulp Froglet - Schlammlawine
Gulp Froglet - Leichenexplosion (33.3% chance nur einmal getroffen zu werden, neu starten wenn nicht)
Benax - Blase
Benax - Fliegenschwarm
Benax - Wasserjet
Benax - Wasserjet
Benax - Passen
Glitschschockaal - Ausweichen
Glitschschockaal - Griff
Glitschschockaal - Griff
Glitschschockaal - Wenn nötig Tauchen
0
Anonymous 글 올리기 2017-10-18 18:12:29
0
Midnite 글 올리기 2018-10-10 10:16:19
Die Taktik hat funktioniert, wenn leider auch nur sehr knapp, aber sie hat funktioniert. vielen vielen Dank
0
KKTHX 글 올리기 2018-02-16 19:32:33
0
Lunamaris 글 올리기 2017-09-27 12:35:18
Schluckfroschling H/P x/1/2
Zähnchen 1/1/2
Sturmflut - Schluckfroschling wird eingewechselt
Schlammlawine
Leichenexplosion ( sollte Schluckfroschling vorher sterben - Neustart)
wechsel auf Zähnchen!!!
zerfetzen
Blut im Wasser Sturmflut (sollte Zähnchen vorher sterben - Neustart)
Knurri
Blut im Wasser Sturmflut :)
hat bei mir 3 Versuche gebraucht
0
Sturmbotin 글 올리기 2017-09-30 17:28:35
0
Roxander 글 올리기 2017-10-13 09:48:57
nach 3 Versuchen hatte ich es auch.
Mit andern Taktiken hab ich mich davor ewig aufgerieben
0
Kali 글 올리기 2018-01-14 02:05:26
0
pit 글 올리기 2017-10-31 10:45:51
1 x krit aber zwielichtflosse nicht!
0
Anonymous 글 올리기 2017-09-24 08:52:22
0
Anonymous 글 올리기 2017-09-30 07:05:57
Entweder wurde Zwielichtflosse generft oder ich hatte Glück. Der Schneidende Wind traf meist nur 1x.
0
Stephania 글 올리기 2017-10-15 05:05:21
0
Anonymous 글 올리기 2017-09-15 16:42:41
0
Arcardy 글 올리기 2017-09-09 23:28:19
1
infînîty 글 올리기 2017-10-03 02:28:28
Bénax 1-1-1, Crabe coquille-fantômes 2-2-1, Jeune grenouille gobeuse (1627 pv mini) 1-1-2
1 - Passe (Crabe coquille-fantôme forcé à rentrer)
2 - Pointes spirituelles (Brunaile doit attaquer que 2 fois sinon recommencer)
3 - Bulle
4 - Switch avec Benax -> Brunaile fait rentrer Jeune grenouille gobeuse
5 - Coulée de boue
6 - Explosion morbide (Si elle meurt avant de pouvoir lancer Explosion morbide, recommencer)
7 - Switch avec Benax
8 - Bulle
9 - Coulée de boue
10 - Jaillissement d'eau
11 - Passer (mascotte meurt)
12 - Emprise
13 - Bulle
14- Emprise
15 - Emprise
0
tassadar 글 올리기 2017-11-17 16:12:50
0
pepette 글 올리기 2017-11-23 12:29:35
1
unspeak
글 올리기 2018-01-03 01:59:36
0
Ellea 글 올리기 2018-04-05 16:24:54
0
Asterus 글 올리기 2017-10-17 07:55:47
1
Thélurick
글 올리기 2017-12-02 05:49:09
0
korenn 글 올리기 2017-10-28 01:02:36
2 conditions obligatoires :
- la jeune grenouille gobeuses doit lancer son explosion morbide
- Bénax doit lancer les 2 jaillissements d'eau (tours 6 et 7)
Merci Henry
0
Anonymous 글 올리기 2017-10-26 20:17:50
0
Astréide 글 올리기 2017-10-14 03:37:48
0
Yupy 글 올리기 2017-10-02 08:59:18
0
Traque 글 올리기 2017-10-04 22:42:41
3
Painter
글 올리기 2017-11-24 14:19:58
Сработал сетап из вот этого видео https://www.youtube.com/watch?v=Qy7-R0K_GW0 и английский комментариев
Волшебный речной рак 2 x 2
Краб с призрачным панцирем 2 2 1
Юная хваткая лягушка x x 2
1. Бросок, выходит Краб
2. Призрачные колючки
3. Пузырь
4. Меняем на Рака, отгребаем Врата в лицо, выходит лягушка
5. Взрыв трупа (вешает дебаф на босса)
6. Вызываем Рака, Пожелание. Если рак умер - перзапуск, так как нужен отхил для краба
7. Бросок, рак умирает, выходит единственный живой краб
8. Хватка
9. Хватка - тут можно умереть, перезапуск
10. Призрачные колючики - тут можно умереть, перезапуск
11. Хватка
У меня босс умер с примерно 7 попытки этим сетапом на 10 ходу - он трижды сдал удар в колючки и отдача кританула ему в лицо :)
2
Anonymous 글 올리기 2017-12-25 16:18:41
2
Silvy 글 올리기 2018-03-30 17:04:18
0
Nikki 글 올리기 2018-06-19 03:53:29
1
Lorik
글 올리기 2018-06-25 15:28:16
0
Анна 글 올리기 2018-04-04 07:58:20
1
Anonymous 글 올리기 2017-10-16 16:10:01
Три часа по тактикам с этого сайта и 5 минут с Вовхеда
1
Котэшечко
글 올리기 2017-11-11 15:28:46
0
Питка 글 올리기 2017-10-10 12:59:03
0
Anonymous 글 올리기 2017-10-16 07:35:32
0
Блуди 글 올리기 2017-09-24 05:31:55
0
Anonymous 글 올리기 2017-09-15 10:18:54
0
Anonymous 글 올리기 2017-09-15 06:27:03
0
Anonymous 글 올리기 2017-09-15 06:05:10
0
Anonymous 글 올리기 2017-09-09 14:34:02
0
Anonymous 글 올리기 2017-09-09 12:35:33
0
Anonymous 글 올리기 2017-09-09 10:08:19
0
Anonymous 글 올리기 2017-09-09 09:28:39
0
Anonymous 글 올리기 2017-09-08 18:52:34
새로운 댓글: