^
vs. Tutte le mascotte vanno in paradiso

9

9

Strategy 2 of 7
Browse all alternatives

Includi Passaggi:

Clicca il bottone per copiare lo script nei tuoi appunti:

change(#2) [ !self(#2).played & enemy(#2).active & enemy.round ~ 5, 6 ]
if [ self(#1).active ]
ability(Flurry:360) [ enemy(#2).active & enemy.hp > 550 ]
ability(Flurry:360) [ !enemy.aura(Undead:242).exists & self.round > 1 ]
ability(Dodge:312)
endif
if [ enemy(#2).active ]
change(#2) [ self(#1).dead & !self(#2).played & !self(#3).played & enemy.round = 4 ]
change(#3)
ability(Burrow:159) [ enemy.round = 3 ]
ability(Dodge:312) [ enemy.round ~ 1, 9 ]
ability(Flurry:360)
endif
change(#3)
ability(Dodge:312) [ enemy.ability(Curse of Doom:218).usable ]
ability(Flurry:360)
Tutte le mascotte vanno in paradiso 105512
Special or not:0Special or not:15221378610803780

Abilità: 2 2 1
Tipo: BB, HP

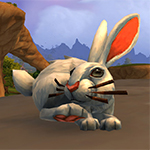
Coniglio
This pet can have the following breeds:

Tipo Health Power Speed
BB 1481 244 309
HP 1546 257 292
SS 1400 227 357
HS 1546 227 322
SB 1465 240 322
HB 1546 240 305

Breeds marked in red are not suited for this strategy.

>240

2 ZL 7 0

Qualsiasi Livello 7+ Mascotte

Special or not:0Special or not:17221479621784790

Abilità: 2 2 1
Tipo: Qualsiasi

Coniglio Elfin
This pet can have the following breeds:

Tipo Health Power Speed
BB 1481 227 325
SB 1465 224 338


Substitutes:

Note: You have selected a substitute pet.
The strategy might fail if you use it with this pet instead of the one the strategy creator intended.

The substitute finder looks for these criteria in relation to the original pet:
  • Same family
  • Has the required skills
  • Has the required stats (if specified)
  • Ignores specific breed requirements for the main pet, as breeds can be very different for substitutes

1 / 15

1
Note: You have selected a substitute pet.
The strategy might fail if you use it with this pet instead of the one the strategy creator intended.

The substitute finder looks for these criteria in relation to the original pet:
  • Same family
  • Has the required skills
  • Has the required stats (if specified)
  • Ignores specific breed requirements for the main pet, as breeds can be very different for substitutes

1 / 17

XP Media
Tipo
Almeno una delle mascotte in questa strategia richiede delle statistiche specifiche.
RNG
Non tutte le strategie sono sempre al 100% sicure. Questa è una di quelle. Potresti dover ricominciare, poichè ci sono eventi casuali che ne aumentano il fallimento. Per favore non prendertela con le mascotte!
Questa strategia usa mascotte ottenute dal gioco di carte di WoW (TCG); qualche volta puoi trovarli anche alla casa d'aste, ma i prezzi sono potenzialmente alti.
Questa strategia usa mascotte ottenibili solo dal Negozio Blizzard, comprabili con saldo Battle.net o soldi reali.
Livello 7+
Puoi usare questa strategia per far prendere esperienza a una mascotte aiutandola a salire di livello più velocemente.
Alcune istruzioni sono più difficili di altre da seguire. E' esattamente quello che troverai in questa strategia!
Script
La strategia offre un script che può essere usato con l'addon Pet Battle Script. Puoi copiare lo script cliccando il bottone a sinistra delle mascotte.
Almeno una mascotte in questa strategia non è più ottenibile. Se ce l'hai, congratulazioni!
Lo staff ha deciso che questa strategia sia particolarmente utile e l'ha evidenziata con questa tag per offrire più visibilittà.
In Dragonflight Patch 10.2, the ability Time Bomb has been changed. This tag is marking strategies using Time Bomb so they can be reviewed.
Time: 1:37
This time was entered by a strategy curator. It is quite reliable especially when using TDScript, however times can always vary slightly.
Rounds: 14+
The number of rounds for this fight were added by a strategy curator. This number is usually very reliable.
Questa tabella illustra l'aumento di livello se si completa il combattimento con mascotte di livello 25 e una a traino.
Es

Prima Dopo Esperienza Guadagnata
1124785
2125082
3125346
4135577
5135775
6145940
7146072
8156171
9156237
10166270
11166270
12176237
13186171
14186072
15195940
16205775
17205577
18215346
19225082
20224785
21234455
22244092
23243696
24251980

Cappello da Safari

Integratore Inferiore

Integratore

Cilindro di Lunacupa

Evento bonus: scontri tra mascotte


=

Le mascotte livellano fino al 25 con minima XP persa

Strategy Details
1 Min 37 Sec
This time was entered by a strategy curator. It is quite reliable especially when using TDScript, however times can always vary slightly.
14+
The number of rounds for this fight were added by a strategy curator. This number is usually very reliable.
2020-01-16 12:39:34
The strategy was last updated on this date.
2017-03-04 23:52:55
The strategy was created on this date.
38,512
Visualizzazioni. Questo numero indica quante volte questa strategia è stata visualizzata dai visitatori.
Tamer Details
Stormheim 62.6 67.4 (TomTom / Map Pin)
XP Media
Turno 1

For the best display of your strategy, please follow these guidelines:

  • Use QuickFill elements where possible
  • Enter custom instructions in English
  • Check the Strategy Creation Guide for more info
Coniglio
Raffica di Colpi
Schivata
Rintanamento
Qualsiasi Livello 7+ Mascotte
Coniglio Elfin
Raffica di Colpi
Schivata
Rintanamento
Pass
Bring in your Coniglio
Bring in your Coniglio Elfin
Bring in your Level Pet
Swap to your Coniglio
Swap to your Coniglio Elfin
Swap to your Level Pet
Araldo dell'Oscurità comes in
Alfiere della Luce comes in
An enemy pet comes in
Any standard attack will finish the fight
 
Coniglio
Level Pet
Coniglio Elfin
Raffica di Colpi
Schivata
Rintanamento
Raffica di Colpi
Schivata
Rintanamento
Alfiere della Luce
Araldo dell'Oscurità
Important: Please enter your instructions in English or a large parts of the community will not be able to read them.
Some typical sentences are translated automatically. Move your mouse over this part for more details.
The following strings are auto-translated if you enter them in the defined format. It is recommended to use them where possible:
[ability=123:Spellname] - [pet=123:Petname] dies
[ability=123:Name] - [enemy=123:Enemyname] dies
[ability=123:Name] until [pet=123:Petname] dies
[ability=123:Name] until [enemy=123:Enemyname] dies
Swap back to [pet=123:Petname]
[ability=123:Name] until the fight is won
Turni 2+
Raffica di Colpi until Araldo dell'Oscurità enters her Undead Round

For the best display of your strategy, please follow these guidelines:

  • Use QuickFill elements where possible
  • Enter custom instructions in English
  • Check the Strategy Creation Guide for more info
Coniglio
Raffica di Colpi
Schivata
Rintanamento
Qualsiasi Livello 7+ Mascotte
Coniglio Elfin
Raffica di Colpi
Schivata
Rintanamento
Pass
Bring in your Coniglio
Bring in your Coniglio Elfin
Bring in your Level Pet
Swap to your Coniglio
Swap to your Coniglio Elfin
Swap to your Level Pet
Araldo dell'Oscurità comes in
Alfiere della Luce comes in
An enemy pet comes in
Any standard attack will finish the fight
 
Coniglio
Level Pet
Coniglio Elfin
Raffica di Colpi
Schivata
Rintanamento
Raffica di Colpi
Schivata
Rintanamento
Alfiere della Luce
Araldo dell'Oscurità
Important: Please enter your instructions in English or a large parts of the community will not be able to read them.
Some typical sentences are translated automatically. Move your mouse over this part for more details.
The following strings are auto-translated if you enter them in the defined format. It is recommended to use them where possible:
[ability=123:Spellname] - [pet=123:Petname] dies
[ability=123:Name] - [enemy=123:Enemyname] dies
[ability=123:Name] until [pet=123:Petname] dies
[ability=123:Name] until [enemy=123:Enemyname] dies
Swap back to [pet=123:Petname]
[ability=123:Name] until the fight is won
Allora:

For the best display of your strategy, please follow these guidelines:

  • Use QuickFill elements where possible
  • Enter custom instructions in English
  • Check the Strategy Creation Guide for more info
Coniglio
Raffica di Colpi
Schivata
Rintanamento
Qualsiasi Livello 7+ Mascotte
Coniglio Elfin
Raffica di Colpi
Schivata
Rintanamento
Pass
Bring in your Coniglio
Bring in your Coniglio Elfin
Bring in your Level Pet
Swap to your Coniglio
Swap to your Coniglio Elfin
Swap to your Level Pet
Araldo dell'Oscurità comes in
Alfiere della Luce comes in
An enemy pet comes in
Any standard attack will finish the fight
 
Coniglio
Level Pet
Coniglio Elfin
Raffica di Colpi
Schivata
Rintanamento
Raffica di Colpi
Schivata
Rintanamento
Alfiere della Luce
Araldo dell'Oscurità
Important: Please enter your instructions in English or a large parts of the community will not be able to read them.
Some typical sentences are translated automatically. Move your mouse over this part for more details.
The following strings are auto-translated if you enter them in the defined format. It is recommended to use them where possible:
[ability=123:Spellname] - [pet=123:Petname] dies
[ability=123:Name] - [enemy=123:Enemyname] dies
[ability=123:Name] until [pet=123:Petname] dies
[ability=123:Name] until [enemy=123:Enemyname] dies
Swap back to [pet=123:Petname]
[ability=123:Name] until the fight is won
Alfiere della Luce si unisce allo scontro

For the best display of your strategy, please follow these guidelines:

  • Use QuickFill elements where possible
  • Enter custom instructions in English
  • Check the Strategy Creation Guide for more info
Coniglio
Raffica di Colpi
Schivata
Rintanamento
Qualsiasi Livello 7+ Mascotte
Coniglio Elfin
Raffica di Colpi
Schivata
Rintanamento
Pass
Bring in your Coniglio
Bring in your Coniglio Elfin
Bring in your Level Pet
Swap to your Coniglio
Swap to your Coniglio Elfin
Swap to your Level Pet
Araldo dell'Oscurità comes in
Alfiere della Luce comes in
An enemy pet comes in
Any standard attack will finish the fight
 
Coniglio
Level Pet
Coniglio Elfin
Raffica di Colpi
Schivata
Rintanamento
Raffica di Colpi
Schivata
Rintanamento
Alfiere della Luce
Araldo dell'Oscurità
Important: Please enter your instructions in English or a large parts of the community will not be able to read them.
Some typical sentences are translated automatically. Move your mouse over this part for more details.
The following strings are auto-translated if you enter them in the defined format. It is recommended to use them where possible:
[ability=123:Spellname] - [pet=123:Petname] dies
[ability=123:Name] - [enemy=123:Enemyname] dies
[ability=123:Name] until [pet=123:Petname] dies
[ability=123:Name] until [enemy=123:Enemyname] dies
Swap back to [pet=123:Petname]
[ability=123:Name] until the fight is won
Turno 1

For the best display of your strategy, please follow these guidelines:

  • Use QuickFill elements where possible
  • Enter custom instructions in English
  • Check the Strategy Creation Guide for more info
Coniglio
Raffica di Colpi
Schivata
Rintanamento
Qualsiasi Livello 7+ Mascotte
Coniglio Elfin
Raffica di Colpi
Schivata
Rintanamento
Pass
Bring in your Coniglio
Bring in your Coniglio Elfin
Bring in your Level Pet
Swap to your Coniglio
Swap to your Coniglio Elfin
Swap to your Level Pet
Araldo dell'Oscurità comes in
Alfiere della Luce comes in
An enemy pet comes in
Any standard attack will finish the fight
 
Coniglio
Level Pet
Coniglio Elfin
Raffica di Colpi
Schivata
Rintanamento
Raffica di Colpi
Schivata
Rintanamento
Alfiere della Luce
Araldo dell'Oscurità
Important: Please enter your instructions in English or a large parts of the community will not be able to read them.
Some typical sentences are translated automatically. Move your mouse over this part for more details.
The following strings are auto-translated if you enter them in the defined format. It is recommended to use them where possible:
[ability=123:Spellname] - [pet=123:Petname] dies
[ability=123:Name] - [enemy=123:Enemyname] dies
[ability=123:Name] until [pet=123:Petname] dies
[ability=123:Name] until [enemy=123:Enemyname] dies
Swap back to [pet=123:Petname]
[ability=123:Name] until the fight is won
Turni 2+3

For the best display of your strategy, please follow these guidelines:

  • Use QuickFill elements where possible
  • Enter custom instructions in English
  • Check the Strategy Creation Guide for more info
Coniglio
Raffica di Colpi
Schivata
Rintanamento
Qualsiasi Livello 7+ Mascotte
Coniglio Elfin
Raffica di Colpi
Schivata
Rintanamento
Pass
Bring in your Coniglio
Bring in your Coniglio Elfin
Bring in your Level Pet
Swap to your Coniglio
Swap to your Coniglio Elfin
Swap to your Level Pet
Araldo dell'Oscurità comes in
Alfiere della Luce comes in
An enemy pet comes in
Any standard attack will finish the fight
 
Coniglio
Level Pet
Coniglio Elfin
Raffica di Colpi
Schivata
Rintanamento
Raffica di Colpi
Schivata
Rintanamento
Alfiere della Luce
Araldo dell'Oscurità
Important: Please enter your instructions in English or a large parts of the community will not be able to read them.
Some typical sentences are translated automatically. Move your mouse over this part for more details.
The following strings are auto-translated if you enter them in the defined format. It is recommended to use them where possible:
[ability=123:Spellname] - [pet=123:Petname] dies
[ability=123:Name] - [enemy=123:Enemyname] dies
[ability=123:Name] until [pet=123:Petname] dies
[ability=123:Name] until [enemy=123:Enemyname] dies
Swap back to [pet=123:Petname]
[ability=123:Name] until the fight is won
Turni 4+
Raffica di Colpi until your first Rabbit dies

For the best display of your strategy, please follow these guidelines:

  • Use QuickFill elements where possible
  • Enter custom instructions in English
  • Check the Strategy Creation Guide for more info
Coniglio
Raffica di Colpi
Schivata
Rintanamento
Qualsiasi Livello 7+ Mascotte
Coniglio Elfin
Raffica di Colpi
Schivata
Rintanamento
Pass
Bring in your Coniglio
Bring in your Coniglio Elfin
Bring in your Level Pet
Swap to your Coniglio
Swap to your Coniglio Elfin
Swap to your Level Pet
Araldo dell'Oscurità comes in
Alfiere della Luce comes in
An enemy pet comes in
Any standard attack will finish the fight
 
Coniglio
Level Pet
Coniglio Elfin
Raffica di Colpi
Schivata
Rintanamento
Raffica di Colpi
Schivata
Rintanamento
Alfiere della Luce
Araldo dell'Oscurità
Important: Please enter your instructions in English or a large parts of the community will not be able to read them.
Some typical sentences are translated automatically. Move your mouse over this part for more details.
The following strings are auto-translated if you enter them in the defined format. It is recommended to use them where possible:
[ability=123:Spellname] - [pet=123:Petname] dies
[ability=123:Name] - [enemy=123:Enemyname] dies
[ability=123:Name] until [pet=123:Petname] dies
[ability=123:Name] until [enemy=123:Enemyname] dies
Swap back to [pet=123:Petname]
[ability=123:Name] until the fight is won
Fai entrare la mascotte di livello basso

For the best display of your strategy, please follow these guidelines:

  • Use QuickFill elements where possible
  • Enter custom instructions in English
  • Check the Strategy Creation Guide for more info
Coniglio
Raffica di Colpi
Schivata
Rintanamento
Qualsiasi Livello 7+ Mascotte
Coniglio Elfin
Raffica di Colpi
Schivata
Rintanamento
Pass
Bring in your Coniglio
Bring in your Coniglio Elfin
Bring in your Level Pet
Swap to your Coniglio
Swap to your Coniglio Elfin
Swap to your Level Pet
Araldo dell'Oscurità comes in
Alfiere della Luce comes in
An enemy pet comes in
Any standard attack will finish the fight
 
Coniglio
Level Pet
Coniglio Elfin
Raffica di Colpi
Schivata
Rintanamento
Raffica di Colpi
Schivata
Rintanamento
Alfiere della Luce
Araldo dell'Oscurità
Important: Please enter your instructions in English or a large parts of the community will not be able to read them.
Some typical sentences are translated automatically. Move your mouse over this part for more details.
The following strings are auto-translated if you enter them in the defined format. It is recommended to use them where possible:
[ability=123:Spellname] - [pet=123:Petname] dies
[ability=123:Name] - [enemy=123:Enemyname] dies
[ability=123:Name] until [pet=123:Petname] dies
[ability=123:Name] until [enemy=123:Enemyname] dies
Swap back to [pet=123:Petname]
[ability=123:Name] until the fight is won
Turno 1
Swap to your second Rabbit

For the best display of your strategy, please follow these guidelines:

  • Use QuickFill elements where possible
  • Enter custom instructions in English
  • Check the Strategy Creation Guide for more info
Coniglio
Raffica di Colpi
Schivata
Rintanamento
Qualsiasi Livello 7+ Mascotte
Coniglio Elfin
Raffica di Colpi
Schivata
Rintanamento
Pass
Bring in your Coniglio
Bring in your Coniglio Elfin
Bring in your Level Pet
Swap to your Coniglio
Swap to your Coniglio Elfin
Swap to your Level Pet
Araldo dell'Oscurità comes in
Alfiere della Luce comes in
An enemy pet comes in
Any standard attack will finish the fight
 
Coniglio
Level Pet
Coniglio Elfin
Raffica di Colpi
Schivata
Rintanamento
Raffica di Colpi
Schivata
Rintanamento
Alfiere della Luce
Araldo dell'Oscurità
Important: Please enter your instructions in English or a large parts of the community will not be able to read them.
Some typical sentences are translated automatically. Move your mouse over this part for more details.
The following strings are auto-translated if you enter them in the defined format. It is recommended to use them where possible:
[ability=123:Spellname] - [pet=123:Petname] dies
[ability=123:Name] - [enemy=123:Enemyname] dies
[ability=123:Name] until [pet=123:Petname] dies
[ability=123:Name] until [enemy=123:Enemyname] dies
Swap back to [pet=123:Petname]
[ability=123:Name] until the fight is won
Turni 2+
Schivata when you can and Raffica di Colpi otherwise until the fight is done

For the best display of your strategy, please follow these guidelines:
  • Use QuickFill elements where possible
  • Enter custom instructions in English
  • Check the Strategy Creation Guide for more info
Coniglio
Raffica di Colpi
Schivata
Rintanamento
Qualsiasi Livello 7+ Mascotte
Coniglio Elfin
Raffica di Colpi
Schivata
Rintanamento
Pass
Bring in your Coniglio
Bring in your Coniglio Elfin
Bring in your Level Pet
Swap to your Coniglio
Swap to your Coniglio Elfin
Swap to your Level Pet
Araldo dell'Oscurità comes in
Alfiere della Luce comes in
An enemy pet comes in
Any standard attack will finish the fight
 
Coniglio
Level Pet
Coniglio Elfin
Raffica di Colpi
Schivata
Rintanamento
Raffica di Colpi
Schivata
Rintanamento
Alfiere della Luce
Araldo dell'Oscurità
Important: Please enter your instructions in English or a large parts of the community will not be able to read them.
Some typical sentences are translated automatically. Move your mouse over this part for more details.
The following strings are auto-translated if you enter them in the defined format. It is recommended to use them where possible:
[ability=123:Spellname] - [pet=123:Petname] dies
[ability=123:Name] - [enemy=123:Enemyname] dies
[ability=123:Name] until [pet=123:Petname] dies
[ability=123:Name] until [enemy=123:Enemyname] dies
Swap back to [pet=123:Petname]
[ability=123:Name] until the fight is won

Luce o Ombra - l'eterna battaglia!


giorgiop79 scritto il 2016-10-01 22:41:51

what about 2 x Zandalari? Black Claw, Hunting Party and gg

CalebFillion scritto il 2016-10-05 04:14:48

this! worked like a charm. didn't need 3rd pet

Kamilya#1607

scritto il 2020-10-30 13:55:02

SL Pre-Patch: I had a Zandalari Anklerrender and Zandalari Kneebiter. It was a close fight. My Sharptalon Hatchling (doing the mount quest) finished the fight easily tho. 82% HP left.

Djinni

scritto il 2020-01-04 09:45:52

Rematch string listed as "placeholder".

Envoy of the Hunt (NPC#105512)

1: Rabbit (2,2,1)
2: Leveling Slot
3: Elfin Rabbit (2,2,1)

Envoy of the Hunt:3718:2210BQ:ZL:2210EV:

StarMinion scritto il 2018-06-26 02:43:14

I've had some good success with getting level 1 battle pets through this using a Dusty Bunny (P/S) and Ruby Sapling (H/S).

Start with the Ruby Sapling (1,2,x) The nice thing about Ruby Sapling is it's Elemental so Call of Darkness won't affect it.
Poisoned Branch
Scratch until Ruby Sapling dies.
Switch in level pet. At this point the Harbringer will be on the resurrection round
Swap in Dusty Bunny and Harbringer dies
For Dust Bunny you want (2, 1, 1)
Flurry
Smoke Bomb (this protects your level 1 pet)
Burrow
Flurry and if Smoke Bomb comes back up use it upon refresh.

Solshine

scritto il 2018-06-19 16:04:13

Very good strat, my first bunny (H/P Rabbit) soloed entire fight.

DragonsAfterDark

scritto il 2018-05-14 11:32:56

I did this one for the Direbeak Team Rumble:

Squirky (1,2,2) Terky (2,1,2) Direbeak (1,2,1)

1: Bubble
2: Stampede until Dead. Bring in Terky
3: Flank until Harbinger enters undead phase.
4: Pass.
5: Stampede until Terky is dead.
6: Predatory Strike
7: Falcosaur Swarm until Herald of Light is Dead.

Eekwibble

scritto il 2018-03-11 19:32:25

I'm not sure what the author of the current TDScript was smoking but here's one that works, as long as you have a couple of power-ish breed bunnies. I actually use a P/S Dust Bunny in slot 1 and an S/B Dust Bunny in slot 3 and this strat works fine in every eventuality that I've encountered so far. This script should also work for some less powerful and maybe higher health rabbits, though.

if [ enemy(#2).active ]
ability(#2) [ self(#1).active ]
ability(#1) [ self(#1).active ]
change(#3) [ self(#2).played ]
ability(#3) [ enemy.aura(Undead:242).exists ]
ability(#2) [ enemy.ability(#2).usable ]
ability(#1)
change(#2)
endif
ability(#3) [ enemy.aura(Undead:242).exists ]
ability(#2) [ round=1 ]
ability(#2) [ round=6 ]
ability(#1)

Eekwibble

scritto il 2018-03-20 05:18:23

Okay, forget that one. This one's better. It will even swap your carry pet in while HoL's Solar Beam has her in recovery then swap back to your 1st rabbit. It just speeds things up a bit when HoD misses a bit due to Darkness and your rabbit doesn't die from Solar Beam. Otherwise you could be passing rounds waiting for the rabbit to die.
I hope that all made sense to someone...

change(#2) [ !enemy.ability(753).usable & !self(#2).played ]
standby [ self(#1).active & enemy(#2).hp<828 ]
ability(312) [ enemy.round=1 ]
ability(312) [ enemy.aura(Undead:242).exists ]
ability(159) [ enemy(#2).active & enemy.round=3 ]
ability(360)
change(#2) [ self(#1).dead & !self(#2).played ]
change(#1) [ self(#2).played ]
change(#3)

Runisco

scritto il 2018-04-25 08:07:35

Changes pet on round 1, then stops.

and your orginal script, rabbit dies on 1 pet, then script fails.

Eekwibble

scritto il 2018-05-01 12:09:49

No mate, the second script works perfectly. It can't change pet until Solar Beam is on cooldown and since only Herald of Light has Solar Beam, it won't change until either your 1st rabbit or Harbinger of Dark is dead.

Prudentius

scritto il 2018-04-26 18:53:20

TD Script

change(next) [ ! enemy.ability(Sunlight:404).usable & ! self(#3).played ]
ability(Dodge:312) [ enemy.ability(Curse of Doom:218).usable ]
ability(Dodge:312) [ enemy.aura(Undead:242).exists ]
ability(Dodge:312) [ enemy.ability(Sunlight:404).duration < 3 ]
ability(Burrow:159) [ enemy.ability(Sunlight:404).usable & ! self.aura(Dodge:311).exists ]
ability(#1)

Note: Due to the randomness of Flurry and Darkness it is possible that you will have to restart the fight. This is not something that can be completely avoided with this strategy's team.

kkm scritto il 2017-04-01 19:35:44

Strat didn't work for me at all. Bunnies got slaughtered after multiple attempts.

Olania scritto il 2017-04-02 01:22:38

I used a H/P Arctic Hare in the first slot and a S/B Snowshoe Hare in the third. Worked perfectly the first time.

Ruta scritto il 2017-04-19 10:13:40

S/S Snowshoe Rabbit and H/P Arctic Hare. Snowshoe finished one and halved the health of other. With Dodge and Burrow I finished off the second opponent without my Arctic Hare taking damage. Faultless.

Emma scritto il 2017-08-27 01:12:15

I used a B/B Brown Rabbit in the first slot (Power = 244) and a S/S Spring Rabbit in my third slot. I had the same results at @Ruta. I have used this team several times (more than six) and have not had any problems.

DavidG scritto il 2018-03-11 22:48:49

Olania has it right. H/P rabbits / hares are plenty fast enough for this, so don't waste breed points on speed. This strat worked flawlessly with a couple of H/P's. FWIW, I keep a pair of S/S bunnies for when I do feel the need for speed, and the aforementioned H/P hares when I'm not up against a fast opponent. At 292, that's often enough.

Placid scritto il 2017-10-15 03:38:11

The TD script provided never burrows, its just dodge (used infrequently, not immediately off cooldown), Flurry out the wazoo, and never ability 3 (Burrow).

Which unsurprisingly, doesn't work very well :)

suutar scritto il 2017-10-15 13:01:18

also does not pull in level pet

suutar scritto il 2017-10-15 14:32:39

This script seems to follow the listed strategy pretty well, I think, but not perfect (dodges while Herald of Light is on recovery for second and later solar beams).

change(#2) [ !self(#2).played & self(#1).dead ]
change(#3) [ self(#1).dead ]
ability(Dodge:312) [ enemy.ability(Curse of Doom:218).usable ]
ability(Dodge:312) [ enemy.aura(Undead:242).exists ]
ability(Burrow:159) [ enemy(#2).active & enemy.round = 2 ]
ability(Dodge:312) [ enemy(#2).active & enemy.round > 5 ]
ability(Flurry:360)

Jagûar

scritto il 2017-03-02 10:13:05

I used a H/B Arctic Hare in slot 1 and a S/B Elfin Rabbit in slot 3 and put in a Burrow to take Herald of Light in to undead round, and used Flurry after that.

Using a normal rabbit with anything at or less than 227 dmg just didn't cut it for me.

tPaste scritto il 2017-03-05 20:38:45

I tend to agree find H/P works best here but P/S also does quite well.

Ruana scritto il 2017-03-13 13:43:50

There are no P/S rabbits/hares/bunnies unless you know something I don't?

Mumps scritto il 2017-03-13 23:38:56

Dust Bunny has a P/S breed available. :)

Vainio scritto il 2016-11-27 19:42:13

I'm sure you know, but darkmoon rabbit does not share the same skill-set as the generic rabbit.

hethos scritto il 2017-02-18 06:50:10

The only difference is the second tier on the first choice, which is a beast attack with bleed instead of a critter attack. The other "difference" between them (first tier, second choice) is just a straight up improvement

Steve scritto il 2017-01-12 03:33:20

If you need to do this for the Snowfeather Team Rumble quest, you need a couple of undead pets that don't have reduced damage against undead.
I started with a Weebombination 2, 2, 1
I started by using death grip to bring in the other, then used diseased bite for a few rounds.
On res round I used corpse explosion which came close to killing the opponent.

Next I brought in Son of Sethe 2, 1, 1
Finished off the first opponent and then got the other one pretty low using abilities that damage and also provide healing. Made sure plagued blood was applied when son of sethe died

Brought in my snowfeather last of all 1, 2, 1
I had intended to use falcosaur swarm since the plagued blood would have healed when it hit. Since the opponent had less than 420 health though I used predatory strike to finish him off. then just had to survive the resurrection round and done.

Macgam scritto il 2017-01-11 11:55:36

If a flurry misses it changes the strat I feel. My H/P keeps dying before Light. 2nd Rabbit can clean up of course.

Zoogore scritto il 2016-12-28 13:23:25

I found that my Elfin Rabbit (224 dmg) didn't hit quite hard enough to kill the first pet. Once I switched to a regular rabbit (240 dmg), it worked great.

Gingerscream scritto il 2016-12-28 12:50:13

For anyone need this for the Sharptalon Team Ruble...

Disgusting Oozeling 2,2,2
Living Fluid 2,2,2
Sharptalon Hatchling 2,1,1

R1 Acidic Goo
R2 Creeping Ooze
R3 Absorb
R4 Absorb
R5 Absorb
R6 (Disgusting Oozeling Dies) Bring Sharptalon Hatchling in, Use Predatory Strike
R7 Swap to Living Fluid
R8 (Harbinger of Dark should be dead by now) Use Acidic Goo
R9 Absorb
R10 Evolution (Living Fluid should die at this point)
R11 Predatory Strike
R12 Savage Talon
R13 Savage Talon

Now there might be some RNG as always but I tested this a few times and it worked everytime. Happy Hunting!

Cojax scritto il 2016-12-24 11:27:10

Just got my Nightmare Treant today all thanks to this wonderful website! #814

EyeSage scritto il 2016-10-29 22:37:41

Beats of Burden - Flying against Ryder - probably any 3 will do it.
Nether fairy dragon with life exchange to bring it down, and then swap in Chrominious with howl and Surge of Power.

Schahmaar scritto il 2016-10-01 04:42:35

Maybe as a comment, you can bring a LvL-Pet (1 should work) and bring it after first bunnies death.

Anonymous scritto il 2016-10-01 03:16:44

My level 21 pet got 2970 xp with Safari Hat.

Trouler scritto il 2016-10-01 06:49:52

Level 1 won't work. Sunny weather kills it. Might work with a 5 or 10 though. Didn't try. If these even give exp that is.

Aranesh

scritto il 2016-10-05 04:44:40

They do, I added a leveling pet now

GnuclearGnome scritto il 2016-10-01 05:10:37

Turn 2+ Flurry unitl Harbinger of Dark enters HER Undead Round. Otherwise, worked excellently! :)

Aranesh

scritto il 2016-10-05 04:44:20

Devil is in the details ^^ Fixed, thanks!

Solitha scritto il 2016-10-02 01:12:24

Xu-Fu, this is one of those fights that makes me think sometimes the reason needs to be marked as well... for instance, the 2nd rabbit's third turn is Dodge. What is it meant to be dodging? The first part of the fight can be kind of iffy with Darkness, and my first rabbit died right after Burrow. When I had the 2nd rabbit in, I wasn't sure if I should Dodge then, or save it... and what to save it for.

Aranesh

scritto il 2016-10-05 04:43:45

Indeed! Thank you :) I edited the strategy now!

Sneaks scritto il 2016-10-05 02:34:02

As always, worked perfectly! Didn't even need the second rabbit (lucky crits, I suppose).

Daedrynn scritto il 2016-10-02 03:03:06

It should be noted that if you pick up this world quest, and then log out or leave the zone, or queue into a dungeon, you won't have the quest when you get back, so you'll need to go pick it up again. Anything you captured before you lost the quest will still count, but you won't get credit for any other captures until you pick it back up again.

Anonymous scritto il 2016-09-30 20:13:59

Is this really rng heavy ? Do you need 2 hits from every flurry to do this or did they nerf this? I am having huge issue even beating 1 with 3 rabbits.

Anonymous scritto il 2016-09-30 23:34:34

Are your pets all 25? Weird that you'd have that much trouble as I just did it with 2 rabbits easily.

Anonymous scritto il 2016-09-30 23:44:47

For me SS and HB did not work for the first rabbit. Worked with HP first and HB second.
And I used Burrow at the end for the undead round.

Anonymous scritto il 2016-10-01 02:34:29

Every flurry will hit at least twice because your rabbits are faster. All rabbits are faster. I just had a "lucky" try with only two hits per cast and the tactics worked perfectly.

Solitha scritto il 2016-10-02 01:14:25

Flurry will not necessarily hit at all because of Darkness being up. I had one round where Flurry did miss-hit-miss.

Brad scritto il 2016-10-01 19:56:34

Should be able to bring in a lvl pet after the 2nd pet is in it's undead phase. Not sure what lvl you need, I'll test it out next time.

Rhoda scritto il 2016-10-01 04:19:38

I had decent luck with Alpine Foxling 2/1/2 but still a bit of rng with flurry hits and the enemy missing.

Wavering scritto il 2016-10-01 01:49:53

Ran Rabbit + Chrominius + Any since I only had 1 rabbit. Solar Beam killed my rabbit, letting Chrominius howl bomb for free right after.

Anonymous scritto il 2016-10-01 03:02:41

how do you have one rabbit i think i have over 10

Xeir scritto il 2016-10-01 03:56:17

Most likely only one rabbit maxed out. I had to max another one myself for this, but I just threw battle-stones at it.

Argent scritto il 2016-10-01 03:02:44

"Any Rabbit" technically excludes the Darkmoon Rabbit - it has Scratch instead of Flurry. It will work just as well, but it won't be 221

Lyta scritto il 2016-10-01 03:02:20

I add my overwhelming thanks to all the rest. Pet battling is my passion but I am a rank amateur so your page is undeniably my go to. Due to lag issues and cpu issues rematch isn't an option and my puter isn't up to it. I love the pop-out feature and all your hard work corralling the best teams in one place. I realize the effort and hours you put into this and can only humbly say thank you.

Terrormew scritto il 2016-10-01 01:10:53

I used a 2/2/1 Mud jumper and a rabbit instead for this fight

Nuovo Commento:


Name:

Collegamento: