
Strategia aggiunta da Kakjens
1
1
|
Average rating: |
5 |
|
Ratings: |
2 |
|
Your vote: |
|
Creator |
||||||||||
|---|---|---|---|---|---|---|---|---|---|---|
|
Tags
Filter strategies:
|
|||||||||
| 1 | 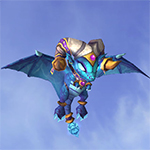

Qualsiasi Livello 1+ Mascotte
|

Carry Pet will take no damage, No RNG against Lil' Tarecgosa and Fledgling Warden Owl. TD Script credit: TURBOKillex
|
Livello 1+ Script |
2 | 5.0 |
74 |
80
1:20
|
12+ | ||
| 2 | 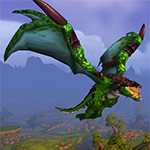

Qualsiasi Livello 1+ Mascotte
|
I am using this every day, works flawlessly, and its fast.
|
Tipo Livello 1+ Script |
2 | 4.7 |
27 |
105
1:45
|
16+ | ||
| 3 | 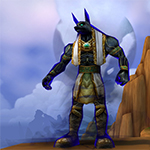
Qualsiasi Livello 1+ Mascotte
|
|
This method is an alteration of Mel's guide from Wowhead. Mel's method is much safer to use as it includes deflecting the only damaging ability from Dor, but also more complicated as you need to track the ability cooldowns.
It used to feature Idolo Anubisath, added Anubisath Sfregiato dal Vuoto for coverage (You can still use the classic one though if you start from Pelle di Pietra). |
Livello 1+ Script |
2 | 4.6 |
33 |
149
2:29
|
19+ | |
| 4 | 
Qualsiasi Livello 1+ Mascotte
|
Didn't bother to test every Draghetto del Sogno breed since it shouldn't matter.
|
Livello 1+ Script |
2 | 4.5 |
30 |
105
1:45
|
15+ | ||
| 5 |

Qualsiasi Livello 1+ Mascotte
|
Your most powerful breeds will make this fight go fast and smooth, but it will work with other breeds.
|
Livello 1+ Script |
2 | 5.0 |
5 |
123
2:03
|
21 | ||
| 6 | 
Qualsiasi Livello 1+ Mascotte
|
|
Livello 1+ |
2 | 5.0 |
13 |
150
2:30
|
20 | ||
| 7 | 
Qualsiasi Livello 1+ Mascotte
|
Kakjens
|
Livello 1+ |
2 | 5.0 |
1 |
175
2:55
|
24+ | ||
| 8 | 
Qualsiasi Livello 1+ Mascotte
|
Nexus Whelpling (1,2,2) is a drop in replacement for the Stormborne Whelpling, and you can use any moth in the second slot that has Alpha Strike, Cocoon Strike and Moth Dust.
|
Livello 1+ Script |
2 | 0.0 |
2 |
125
2:05
|
17+ | ||
| 9 | 
Qualsiasi Livello 1+ Mascotte
|
|
Livello 1+ Script |
2 | 5.0 |
0 |
112
1:52
|
18+ | ||
| 10 | 
Qualsiasi Livello 1+ Mascotte
|
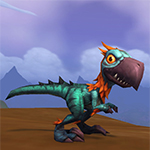
Unlucky crits can cause your dragon to die before Fangor does, but don't worry! Your bird should still be able to finish the job easily.
|
Livello 1+ Script |
2 | 4.5 |
2 |
95
1:35
|
13+ | ||
| 11 |

Qualsiasi Livello 1+ Mascotte
|
|
Livello 1+ |
2 | 3.0 |
2 |
170
2:50
|
28+ | ||
| 12 | 
Qualsiasi Livello 10+ Mascotte
|
|
Livello 10+ |
2 | 0.0 |
0 |
162
2:42
|
24 | ||
| 13 | 
Qualsiasi Livello 1+ Mascotte
|
This is a variation of a strat first posted on Wowhead by Midobu.
It works best with an H/P NFD. It's also fine with P/P and P/B breeds although they are slightly riskier. I haven't tested them but I would avoid S/S and S/B breeds. |
Tipo RNG Livello 1+ Script |
2 | 0.0 |
0 |
105
1:45
|
16 | ||
| 14 | 
Qualsiasi Livello 1+ Mascotte
|
Hyuna of the Shrines:215A:122A14D:21141LK:ZL:P:::::1::
Stategy by Stabbystick on Wowhead. Fast and reliable |
Tipo Livello 1+ |
2 | 0.0 |
0 |
98
1:38
|
14+ | ||
| 15 | 
Qualsiasi Livello 1+ Mascotte
|
Livello 1+ |
2 | 0.0 |
0 |
98
1:38
|
15+ | |||
| 16 |
Qualsiasi Livello 1+ Mascotte
|
You can tweak the script if Albino Chimaeraling is faster than Dor The Wall by changing the duration from 1 to 0. Slower is stronger (faster clear) due to Tail Sweep being stronger.
|
Tipo RNG Livello 1+ Script |
2 | 0.0 |
0 |
100
1:40
|
16+ | ||
| 17 | 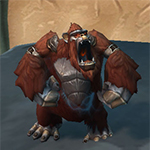
Qualsiasi Livello 1+ Mascotte
|
This is a fun and fast strategy that will allow you to power boost any level carry pet. My original strategy uses a Nexus Whelpling in the first slot with Arcane Storm, Mana Surge.
|
Livello 1+ |
2 | 0.0 |
0 |
85
1:25
|
13-14 | ||
| 18 | 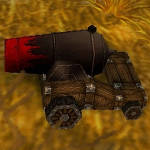
Qualsiasi Livello 1+ Mascotte
|
Any excuse to get out the cannon...
|
Livello 1+ Script |
2 | 0.0 |
0 |
113
1:53
|
16+ | ||
| 19 | 

Qualsiasi Livello 1+ Mascotte
|
I had Sangue Ribollente (P/P) here because hit hits like a darn truck. Does alot of damage.
Had Pirostellina di Ferro (H/H) for the extra health. But I do believe it would work out as well with a (H/P) Good Luck! |
Tipo RNG Livello 1+ |
2 | 1.0 |
0 |
120
2:00
|
16+ |
Includi Passaggi:


Qualsiasi Livello 1+ Mascotte
| Prima | Dopo | Esperienza Guadagnata | |
|---|---|---|---|
| 1 | ➜ | 13 | 5981 |
| 2 | ➜ | 13 | 6353 |
| 3 | ➜ | 14 | 6683 |
| 4 | ➜ | 14 | 6971 |
| 5 | ➜ | 14 | 7219 |
| 6 | ➜ | 15 | 7425 |
| 7 | ➜ | 15 | 7590 |
| 8 | ➜ | 16 | 7714 |
| 9 | ➜ | 16 | 7796 |
| 10 | ➜ | 17 | 7838 |
| 11 | ➜ | 17 | 7838 |
| 12 | ➜ | 18 | 7796 |
| 13 | ➜ | 19 | 7714 |
| 14 | ➜ | 19 | 7590 |
| 15 | ➜ | 20 | 7425 |
| 16 | ➜ | 20 | 7219 |
| 17 | ➜ | 21 | 6971 |
| 18 | ➜ | 22 | 6683 |
| 19 | ➜ | 22 | 6353 |
| 20 | ➜ | 23 | 5981 |
| 21 | ➜ | 23 | 5569 |
| 22 | ➜ | 24 | 5115 |
| 23 | ➜ | 25 | 3900 |
| 24 | ➜ | 25 | 1980 |
|
Cappello da Safari |
|
|
Integratore Inferiore |
|
|
Integratore |
|
|
Cilindro di Lunacupa |
|
|
Evento bonus: scontri tra mascotte |
|
= |
Le mascotte livellano fino al 25 con minima XP persa |
|
|
= |
XP aggiuntiva oltre il livello 25 è persa. |
|
For the best display of your strategy, please follow these guidelines:


 Schiacciamento until Plasmacieli is dead. ( about 6 times).
For the best display of your strategy, please follow these guidelines:
For the best display of your strategy, please follow these guidelines:
For the best display of your strategy, please follow these guidelines:
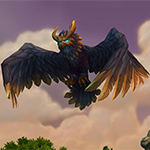
 Lanciarazzo Until Fangor dies. (Should be 4 times, 2 set-up and 2 launch)
For the best display of your strategy, please follow these guidelines:
For the best display of your strategy, please follow these guidelines:
Lanciarazzo (Set up)For the best display of your strategy, please follow these guidelines:
For the best display of your strategy, please follow these guidelines:
For the best display of your strategy, please follow these guidelines:
Lanciarazzo fino a quando Gnomo Meccanico muore.For the best display of your strategy, please follow these guidelines:
Lanciarazzo Launch, set-up and launch.For the best display of your strategy, please follow these guidelines:
 Pugno d'Acciaio your Gnomo Meccanico dies. You'll get one hit in.
For the best display of your strategy, please follow these guidelines:
For the best display of your strategy, please follow these guidelines:
For the best display of your strategy, please follow these guidelines:
For the best display of your strategy, please follow these guidelines:
Schiacciamento and then  Deviazione.
For the best display of your strategy, please follow these guidelines:
Deviazione.For the best display of your strategy, please follow these guidelines:
Schiacciamento, If neither Headbutt or Healing Wave are off cool-down.For the best display of your strategy, please follow these guidelines:

Dor the Wall - the name is just as fitting as that turtle is annoying.

 Pelle di Pietra
1
Mapachote
scritto il 2023-12-08 05:32:14
use(Stoneskin:436) [ !self(Anubisath Idol:1155).aura(Stoneskin:435).exists & enemy(Skyshaper:994).active ]
use(Crush:406) [ enemy(Skyshaper:994).active ]
change(#2) [ enemy(Fangor:993).active ]
use(Launch Rocket:293)
change(#3) [ self(Clockwork Gnome:277).dead & !self(#3).played ]
change(Anubisath Idol:1155) [ self(#3).played ]
use(Deflection:490) [ enemy(Dor the Wall:992).ability(Headbutt:376).usable & !enemy(Dor the Wall:992).ability(Healing Wave:123).usable ]
use(Crush:406)
0
Kakjens scritto il 2016-12-21 04:29:25
"Metal Fist your Clockwork Gnome dies. You'll get one hit in." Did you mean "Metal Fist. Your Clockwork Gnome dies. You'll get one-shotted."
0
Kakjens scritto il 2016-12-17 04:39:15
"Turn 2 Metal Fist until your Clockwork Gnome dies." was probably meant as "Action 2, Turn 2+
Metal Fist until your Clockwork Gnome dies."
Slight improvement (can't test it atm, sorry) :
Replace "Turn 2 Metal Fist until your Clockwork Gnome dies." with
Action 2, Turn 2 Metal Fist. (to do the last unreduced damage for Dor the Wall)
Action 2, Turn 3+ Launch Rocket until your Clockwork Gnome dies.
Leveling pet takes no damage if switching right after Clockwork Gnome dies, and swapping to Anubisath Idol asap.
By the way, if I remember correctly, Dor the Wall does not always have priority Healing Wave>Headbutt. The third time both are off cool-down (way out of the length of the normal battle - obtainable by, for example, passing and repairing), Dor the Wall will first cast Headbutt, and then Healing wave (similar as to the first time). But it doesn't really matter because normal battle will end before the third time both Headbutt and Healing Wave are off cool-down.
Nuovo Commento: