
| Haunted Humanoids | Deathly Dragonkin | Flickering Fliers |  Unholy Undead Unholy Undead | Creepy Critters |
| 유골 마법 | Eerie Elementals | Beast Busters | Aquatic Apparitions | Macabre Mechanicals |
전략이 추가됨. 추가자: WhyDaRumGone
9
9
|
Average rating: |
4.5 |
|
Ratings: |
21 |
|
귀하의 투표: |
|
Creator |
|||||||||
|---|---|---|---|---|---|---|---|---|---|
|
Tags
Filter strategies:
|
|||||||||

|

I ran this 10 times and won 5 of them so about a 50/50 chance depending on your luck. The first round is where most of the RNG is.
I believe H/P is the best breed 역병매. |
알엔지 스크립트 |
2 | 4.5 |
51% | 9 |
120
2:00
|
14+ | |

|
*** Created on Beta, so maybe not final ***
With Muddy Weather critical hits are extremely dangerous so expect to Fail & Repeat, especially when they take out your Blighthawk early. (Haven't had the chance to test more breeds of the first two pets so I'm unchecking others for now) |
번식 알엔지 스크립트 |
2 | 4.4 |
12% | 80 |
123
2:03
|
16+ | |


|
Created this strat and find out, that it's actually pretty good one ;). Since this fight is VERY RNG dependant, fails and repeats are to be expected. There are two bad things that can occur, which might force you to retreat and repeat. One is if you got crit from Mudslide in 1st round, and 2nd is if you got stunned from Bone Crusher's Headbutt in round 6. Apart of it it worked fine 100% for me.
Enjoy ;) ---------------------- Fight time: 22 rounds ---------------------- |
알엔지 |
2 | 4.4 |
N/A | 11 |
180
3:00
|
20+ | |

|
This strat worked even during one test run where Headbutt stunned our pet. It feels pretty reliable. I used an H/P Blightbreath; I have no idea if it will work or fail with other breeds.
|
번식 |
2 | 4.8 |
N/A | 5 |
165
2:45
|
18+ | |

|
Strategy provided by Dolemen#1942.
|
번식 알엔지 상점 |
2 | 3.3 |
N/A | 9 |
168
2:48
|
19+ | |

|
Adjusted strategy to match Amrôth's proposal.
Added TD script from Tequima. |
알엔지 스크립트 |
2 | 3.3 |
51% | 22 |
175
2:55
|
20+ | |
|
Bone Crusher needs to high roll and crit to cause the strategy to fail.
|
알엔지 |
2 | 3.3 |
N/A | 6 |
120
2:00
|
16+ | |
|
알엔지 |
2 | 3.3 |
N/A | 6 |
170
2:50
|
19+ | ||
|
번식 알엔지 스크립트 |
2 | 0.0 |
9% | 0 |
175
2:55
|
20-23 |
Incl. steps:


Substitutes:
1 / 2
1 / 2

I ran this 10 times and won 5 of them so about a 50/50 chance depending on your luck. The first round is where most of the RNG is.
I believe H/P is the best breed 역병매.
| Before | After | Experience Gain | |
|---|---|---|---|
| 1 | ➜ | 3 | 239 |
| 2 | ➜ | 4 | 254 |
| 3 | ➜ | 4 | 267 |
| 4 | ➜ | 5 | 279 |
| 5 | ➜ | 6 | 289 |
| 6 | ➜ | 6 | 297 |
| 7 | ➜ | 7 | 304 |
| 8 | ➜ | 8 | 309 |
| 9 | ➜ | 9 | 312 |
| 10 | ➜ | 10 | 314 |
| 11 | ➜ | 11 | 314 |
| 12 | ➜ | 12 | 312 |
| 13 | ➜ | 13 | 309 |
| 14 | ➜ | 14 | 304 |
| 15 | ➜ | 15 | 297 |
| 16 | ➜ | 16 | 289 |
| 17 | ➜ | 17 | 279 |
| 18 | ➜ | 18 | 267 |
| 19 | ➜ | 19 | 254 |
| 20 | ➜ | 20 | 239 |
| 21 | ➜ | 21 | 223 |
| 22 | ➜ | 22 | 205 |
| 23 | ➜ | 23 | 185 |
| 24 | ➜ | 24 | 163 |
|
탐험대 모자 |
|
|
하급 애완동물 간식 |
|
|
애완동물 간식 |
|
|
다크문 중산모 |
|
|
애완동물 전투 주 |
|
= |
Pet levels to 25 with minimal XP lost |
|
|
= |
Additional XP above level 25 is lost |
|
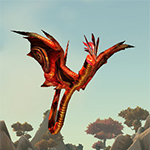
| 죽음의 무도 해골 | HP |
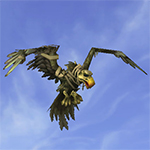
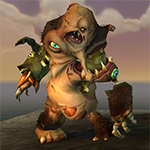
| 역병매 | BB |
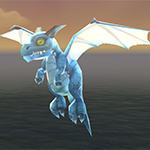
| 영혼이 조각난 새끼용 | SB |
For the best display of your strategy, please follow these guidelines:


For the best display of your strategy, please follow these guidelines:
For the best display of your strategy, please follow these guidelines:
For the best display of your strategy, please follow these guidelines:
For the best display of your strategy, please follow these guidelines:
For the best display of your strategy, please follow these guidelines:
For the best display of your strategy, please follow these guidelines:
For the best display of your strategy, please follow these guidelines:
For the best display of your strategy, please follow these guidelines:
For the best display of your strategy, please follow these guidelines:
For the best display of your strategy, please follow these guidelines:
For the best display of your strategy, please follow these guidelines:
For the best display of your strategy, please follow these guidelines:
For the best display of your strategy, please follow these guidelines:
For the best display of your strategy, please follow these guidelines:

Must mend my mauled mittens


2
Zhic#2301
글 올리기 2024-11-12 14:56:45
used a H/P Macabre, H/H Blighthawk & H/S Fragment of Desire.
1
Crunch#2965
글 올리기 2024-03-28 11:11:02
----
quit [!enemy(#1).dead & self(#1).dead]
use(Bone Barrage:1091)
use(Death and Decay:214) [round=2]
use(Lift-Off:170) [enemy(#2).ability(#2).usable & !self.aura(Undead:242).exists]
use(Consume Corpse:665) [self(#2).hp<691 & !self.aura(Undead:242).exists]
use(Soul Ward:751) [enemy(#3).active & enemy.round=2]
use(#1)
change(next)
1
(OP) WhyDaRumGone
글 올리기 2024-03-29 00:27:12
2
mirjahmia
글 올리기 2023-05-07 16:29:15
2
Alyssania
글 올리기 2023-02-13 02:11:29
2
Zidane#1207
글 올리기 2022-06-12 19:53:34
1
(OP) WhyDaRumGone
글 올리기 2022-06-12 20:11:30
0
Inwe
글 올리기 2022-04-24 21:16:59
2
(OP) WhyDaRumGone
글 올리기 2022-04-27 18:32:20
As I said in my original comment I found it works about 1 in 3 but any constructive feedback is welcome for me to specify or improve it. (edited)
2
Gráinne
글 올리기 2022-04-27 20:06:11
In my experience, most "didn't work" comments are just wrong, PEBCAK. People who walked through the strats correctly, and more than once, commonly give some indication of the what and the where and the why.
I will note that the site has also automatically provided a substitution for the third pet. You specified a Soulbroken Whelpling, but apparently the Fragment of Desire is also an Undead pet with those moves. Its stats will doubtless be different, so that could be another factor to consider.
1
(OP) WhyDaRumGone
글 올리기 2022-04-28 09:42:48
I was genuinly keen to know what I could improve cause I already knew it was RNG but wanted to know if specific breeds (I don't have) or pet were required.
Thanks for the words though I'll 100% keep posting. I love this site and only just discovered a month or so ago and is so good!
2
Gráinne
글 올리기 2022-04-28 10:44:25
You made a mistake in your Bloog calculations. You said they die together if no crits, so that would be about a 90% chance. But you forgot that Burrow has a damage range: Burrow 374-561. A high hit on Burrow can also mess up your Marionette, and that's more like a 50% chance. I failed 3 times because of a high hit on Burrow.
Bonecrusher had 695 HP after Blighthawk in my successful run, so it took two Spiritfire Bolts from Soulbroken Whelpling to finish him off. The reason, again, was the damage range on Horn Gore. A high hit doesn't help.
You also have a 25% chance of a stun from Bonecrusher. Hm. Can you avoid it with Lift-Off? If you do, would it be available to avoid Devour? Would you need to avoid Devour at that point if you didn't take the damage from Headbutt? Just thoughts of how to work around that one.
Soulbroken Whelpling started against Chipper with some damage because the first Spiritfire Bolt hadn't finished Bonecrusher, but finished the battle ok despite that.
A 33% success rate, as you believe, seems optimistic to me. If Bloog/Marionette is 50:50, and the stun is another 25%, and then whatever else can go RNG ...
I used a P/S Blighthawk, since that is what you specified. The Blighthawk only has to face Bonecrusher, though, and Bonecrusher is 211 speed, so a H/P Blighthawk would have to be better for this purpose. I haven't calculated out the other breeds. Maybe Owlsim could help with that: https://owlsim.wow-petguide.com (edited)
1
Inwe
글 올리기 2022-05-14 17:20:55
3
Gráinne
글 올리기 2022-05-15 04:55:55
In this case, from my checking, I can see it is not a breed/substitution issue; it's just RNG. OP thought the strat would work one in three times, whereas I am estimating more like one in six. I guess you were just more unlucky than that with your tries.
But it is always good, when commenting on a fauilure, to give all the detail you can. It saves people time, trouble, and uncertainty when they come to investigate.
2
(OP) WhyDaRumGone
글 올리기 2022-05-23 06:50:50
My 1 in 3 was just how many wins I tried it (2 wins in 5 attempts) so next time I should try a bigger sample size if I am not going to use proper calulators :P
I actually am modifying the strat to include lift off first, I find it has similar results but avoids the 25% chance of a stun on the 2nd round:
With the modified strat I ran it 10 times and won 5 times. First 2 were fine, 3rd attempt I got beat by Bloog so swapped to a B/B Returned Hatchling for the 4th and lost, Refreshed and got it for the 3rd time 5 attempts (With Returned Hatchling). Then lost 3 times in a row (Once I got through to 2nd round but lost to a crit).
I would end it early if either my Returned Hatchling or Macabre Marionette would die in the first slot without taking out Bloog.
I then wanted to test out some different moves/Original strat and won 2 wins in the next 3 :P so pretty happy with a first round RNG (Average Owlism calculator was above 50% for both pets except S/B Returned Hatchling) and the lift off 2nd round strat helping to avoid that 25% stun.
Owlism didn't seem to have anything for Consume corpse so couldb't calulate for that.
Without getting really unlucky with crits or missing to many bone barrages it now seems to be about 50/50 chance so I really apprecaite the feedback :)
Edit: Phrasing/Calulator info etc (edited)
1
(OP) WhyDaRumGone
글 올리기 2022-04-24 16:52:22
새로운 댓글: