
 Haunted Humanoids Haunted Humanoids | Deathly Dragonkin | Flickering Fliers | Unholy Undead | Creepy Critters |
| Mummified Magics | Eerie Elementals | Beast Busters | Aquatic Apparitions | Macabre Mechanicals |
Strategy added by Kyzna
11
11
|
Average rating: |
4.3 |
|
Ratings: |
20 |
|
Your vote: |
|
Creator |
|||||||||
|---|---|---|---|---|---|---|---|---|---|
|
Tags
Filter strategies:
|
|||||||||


|
Script |
2 | 5.0 |
100% | 132 |
93
1:33
|
13+ | ||


Any Level 25+ Humanoid
|

In my many tries I never managed to get the Stun, but you just keep the Deflect for the Swap Ability from Sunset Glimmerfly
|
RNG |
2 | 4.3 |
N/A | 11 |
94
1:34
|
15+ | |
Any Level 25+ Humanoid
|
Father Winter's Helper in my test was even Uncommon. Ended the fight with high health, too.
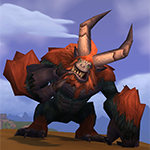
Kun-Lai Runt was P/P, but P/S should be fine too. P/B should work too as long as your third pet still has higher health. Third pet just needs more health than Kun-Lai Runt! The only RNG here is on Turn 1 sleep. My preferred pet in slot 3 is squirky, since his health is higher than Kun-Lai Runt I confirmed he can take on Grazer and the last of peachick solo with Bubble+Stampede. |
Breed |
2 | 4.9 |
N/A | 6 |
108
1:48
|
18 | |
|
Any Level 25+ Humanoid
|
*** Created on Beta, so maybe not final ***
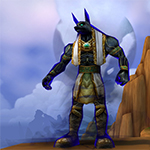
Make sure your Humanoid in Slot#3 has higher health than your Void-Scarred Anubisath, intentionally it's only purpose is a controlled Wind Buffet force-swap. With Rain Dance's 50% increased chance to crit, 150% damage increase for one attack and the horrible RNG of Slicing Wind there is a chance for the strategy to fail (you can still try to win with your last pet) |
Script |
2 | 3.9 |
66% | 4 |
94
1:34
|
16+ | |

|
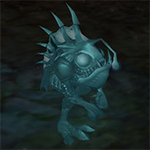
Quite fast (considering RNG nature of this battle ofc), easy, tested roughly 60 times, NEVER failed. As of Slimy Darkhunter I've tested P/S and P/B, I'm 100% sure tho, H/P will work perfectly well too ;).
Enjoy. ------------------------- Fight time: 15-17 rounds ------------------------- TD Script provided by cellardwellar, Thank you!!!! |
Script |
2 | 5.0 |
98% | 0 |
120
2:00
|
15+ | |

|
Script |
2 | 4.5 |
100% | 2 |
130
2:10
|
14+ | ||

Any Level 25+ Humanoid
|
12-14 rounds, 2 pets required
|
2 | 0.0 |
N/A | 0 |
100
1:40
|
12 |
Incl. steps:


Any Level 25+ Humanoid
Skills: Any
Breed: Any
In my many tries I never managed to get the Stun, but you just keep the Deflect for the Swap Ability from Sunset Glimmerfly
| Before | After | Experience Gain | |
|---|---|---|---|
| 1 | ➜ | 3 | 239 |
| 2 | ➜ | 4 | 254 |
| 3 | ➜ | 4 | 267 |
| 4 | ➜ | 5 | 279 |
| 5 | ➜ | 6 | 289 |
| 6 | ➜ | 6 | 297 |
| 7 | ➜ | 7 | 304 |
| 8 | ➜ | 8 | 309 |
| 9 | ➜ | 9 | 312 |
| 10 | ➜ | 10 | 314 |
| 11 | ➜ | 11 | 314 |
| 12 | ➜ | 12 | 312 |
| 13 | ➜ | 13 | 309 |
| 14 | ➜ | 14 | 304 |
| 15 | ➜ | 15 | 297 |
| 16 | ➜ | 16 | 289 |
| 17 | ➜ | 17 | 279 |
| 18 | ➜ | 18 | 267 |
| 19 | ➜ | 19 | 254 |
| 20 | ➜ | 20 | 239 |
| 21 | ➜ | 21 | 223 |
| 22 | ➜ | 22 | 205 |
| 23 | ➜ | 23 | 185 |
| 24 | ➜ | 24 | 163 |
|
Safari Hat |
|
|
Lesser Pet Treat |
|
|
Pet Treat |
|
|
Darkmoon Hat |
|
|
Pet Battle Week |
|
= |
Pet levels to 25 with minimal XP lost |
|
|
= |
Additional XP above level 25 is lost |
|
For the best display of your strategy, please follow these guidelines:


For the best display of your strategy, please follow these guidelines:
For the best display of your strategy, please follow these guidelines:
For the best display of your strategy, please follow these guidelines:
For the best display of your strategy, please follow these guidelines:
For the best display of your strategy, please follow these guidelines:
For the best display of your strategy, please follow these guidelines:
For the best display of your strategy, please follow these guidelines:
For the best display of your strategy, please follow these guidelines:
For the best display of your strategy, please follow these guidelines:
For the best display of your strategy, please follow these guidelines:
For the best display of your strategy, please follow these guidelines:
For the best display of your strategy, please follow these guidelines:
For the best display of your strategy, please follow these guidelines:
For the best display of your strategy, please follow these guidelines:
For the best display of your strategy, please follow these guidelines:
For the best display of your strategy, please follow these guidelines:

Let's test their loyalty!

1
Agrogas#2257
wrote on 2023-10-02 16:21:05
1
Oploveknight
wrote on 2022-10-31 06:10:38
1
keenley
wrote on 2022-02-20 17:09:11
1
Arcuballis
wrote on 2021-06-17 13:39:05
2
auraria
wrote on 2021-05-22 21:35:51
The second attempt I killed the first pet a turn early then peachick was swapped out before I could kill her. It took my 3rd pet two turns to kill her after void-scarred anubisath idol and anubisath idol died. I used Bonkers (P/P) (2/2/2) Dodge then Tornado punch
2
JohntyNZ#1429
wrote on 2021-03-11 20:23:40
2nd time voidscarred almost solo'd the whole thing by timing deflect on grazer for the surge, he was on 8hp when void died.... great strat, remember to use deflect
New Comment: