
 Haunted Humanoids Haunted Humanoids | Deathly Dragonkin | Flickering Fliers | Unholy Undead | Creepy Critters |
| 유골 마법 | Eerie Elementals | Beast Busters | Aquatic Apparitions | Macabre Mechanicals |
전략이 추가됨. 추가자: Kyzna
11
11
|
Average rating: |
4.3 |
|
Ratings: |
20 |
|
귀하의 투표: |
|
Creator |
|||||||||
|---|---|---|---|---|---|---|---|---|---|
|
Tags
Filter strategies:
|
|||||||||


|
스크립트 |
2 | 5.0 |
100% | 132 |
93
1:33
|
13+ | ||
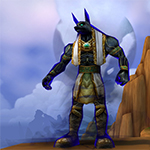


모든 레벨 25+ 휴머노이드
|

In my many tries I never managed to get the Stun, but you just keep the Deflect for the Swap Ability from Sunset Glimmerfly
|
알엔지 |
2 | 4.3 |
N/A | 11 |
94
1:34
|
15+ | |
모든 레벨 25+ 휴머노이드
|
Father Winter's Helper in my test was even Uncommon. Ended the fight with high health, too.
Kun-Lai Runt was P/P, but P/S should be fine too. P/B should work too as long as your third pet still has higher health. Third pet just needs more health than Kun-Lai Runt! The only RNG here is on Turn 1 sleep. My preferred pet in slot 3 is squirky, since his health is higher than Kun-Lai Runt I confirmed he can take on Grazer and the last of peachick solo with Bubble+Stampede. |
번식 |
2 | 4.9 |
N/A | 6 |
108
1:48
|
18 | |
|
모든 레벨 25+ 휴머노이드
|
*** Created on Beta, so maybe not final ***
Make sure your Humanoid in Slot#3 has higher health than your 공허의 자취가 남은 아누비사스, intentionally it's only purpose is a controlled 광풍 force-swap. With 폭우의 춤's 50% increased chance to crit, 150% damage increase for one attack and the horrible RNG of 칼날 바람 there is a chance for the strategy to fail (you can still try to win with your last pet) |
스크립트 |
2 | 3.9 |
66% | 4 |
94
1:34
|
16+ | |

|
Quite fast (considering RNG nature of this battle ofc), easy, tested roughly 60 times, NEVER failed. As of 끈적끈적한 어둠사냥꾼 I've tested P/S and P/B, I'm 100% sure tho, H/P will work perfectly well too ;).
Enjoy. ------------------------- Fight time: 15-17 rounds ------------------------- TD Script provided by cellardwellar, Thank you!!!! |
스크립트 |
2 | 5.0 |
98% | 0 |
120
2:00
|
15+ | |

|
스크립트 |
2 | 4.5 |
100% | 2 |
130
2:10
|
14+ | ||

모든 레벨 25+ 휴머노이드
|
12-14 rounds, 2 pets required
|
2 | 0.0 |
N/A | 0 |
100
1:40
|
12 |
Incl. steps:


모든 레벨 25+ 휴머노이드
스킬: 모든 종류
번식: 모든 종류
In my many tries I never managed to get the Stun, but you just keep the Deflect for the Swap Ability from Sunset Glimmerfly
| Before | After | Experience Gain | |
|---|---|---|---|
| 1 | ➜ | 3 | 239 |
| 2 | ➜ | 4 | 254 |
| 3 | ➜ | 4 | 267 |
| 4 | ➜ | 5 | 279 |
| 5 | ➜ | 6 | 289 |
| 6 | ➜ | 6 | 297 |
| 7 | ➜ | 7 | 304 |
| 8 | ➜ | 8 | 309 |
| 9 | ➜ | 9 | 312 |
| 10 | ➜ | 10 | 314 |
| 11 | ➜ | 11 | 314 |
| 12 | ➜ | 12 | 312 |
| 13 | ➜ | 13 | 309 |
| 14 | ➜ | 14 | 304 |
| 15 | ➜ | 15 | 297 |
| 16 | ➜ | 16 | 289 |
| 17 | ➜ | 17 | 279 |
| 18 | ➜ | 18 | 267 |
| 19 | ➜ | 19 | 254 |
| 20 | ➜ | 20 | 239 |
| 21 | ➜ | 21 | 223 |
| 22 | ➜ | 22 | 205 |
| 23 | ➜ | 23 | 185 |
| 24 | ➜ | 24 | 163 |
|
탐험대 모자 |
|
|
하급 애완동물 간식 |
|
|
애완동물 간식 |
|
|
다크문 중산모 |
|
|
애완동물 전투 주 |
|
= |
Pet levels to 25 with minimal XP lost |
|
|
= |
Additional XP above level 25 is lost |
|
For the best display of your strategy, please follow these guidelines:


For the best display of your strategy, please follow these guidelines:
For the best display of your strategy, please follow these guidelines:
For the best display of your strategy, please follow these guidelines:
For the best display of your strategy, please follow these guidelines:
For the best display of your strategy, please follow these guidelines:
For the best display of your strategy, please follow these guidelines:
For the best display of your strategy, please follow these guidelines:
For the best display of your strategy, please follow these guidelines:
For the best display of your strategy, please follow these guidelines:
For the best display of your strategy, please follow these guidelines:
For the best display of your strategy, please follow these guidelines:
For the best display of your strategy, please follow these guidelines:
For the best display of your strategy, please follow these guidelines:
For the best display of your strategy, please follow these guidelines:
For the best display of your strategy, please follow these guidelines:
For the best display of your strategy, please follow these guidelines:

Let's test their loyalty!


1
Agrogas#2257
글 올리기 2023-10-02 16:21:05
1
Oploveknight
글 올리기 2022-10-31 06:10:38
1
keenley
글 올리기 2022-02-20 17:09:11
1
Arcuballis
글 올리기 2021-06-17 13:39:05
2
auraria
글 올리기 2021-05-22 21:35:51
The second attempt I killed the first pet a turn early then peachick was swapped out before I could kill her. It took my 3rd pet two turns to kill her after void-scarred anubisath idol and anubisath idol died. I used Bonkers (P/P) (2/2/2) Dodge then Tornado punch
2
JohntyNZ#1429
글 올리기 2021-03-11 20:23:40
2nd time voidscarred almost solo'd the whole thing by timing deflect on grazer for the surge, he was on 8hp when void died.... great strat, remember to use deflect
새로운 댓글: