
| Umanoidi Infestati | Dragoidi Letali | Volanti Tremolanti | Non Morti Empi | Animali Inquietanti |
| Magie Mummificate |  Elementali Innaturali Elementali Innaturali | Bestie Fatate | Apparizioni Acquatiche | Meccaniche Macabre |
Strategia aggiunta da Mystofdarkness
5
5
|
Average rating: |
4.4 |
|
Ratings: |
16 |
|
Your vote: |
|
Creator |
|||||||||
|---|---|---|---|---|---|---|---|---|---|
|
Tags
Filter strategies:
|
|||||||||

Qualsiasi Livello 25+ Elementale
|

Reworked
|
RNG Script |
2 | 4.7 |
89% | 76 |
185
3:05
|
19 | |

You know those maze puzzles which can be cheesed with starting from the end? Writing that felt similar.
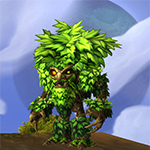
Both H/P and H/H breeds of Sandling checked, but I prefer H/P because the other takes a round longer. My Forest Sproutling is S/S which for this particular target is the weakest (but very good otherwise!). I might need to clarify it later. If your Sandling dies before it can smash L2 with the big cooldowns, you need to restart. |
Tipo RNG |
2 | 4.2 |
N/A | 16 |
147
2:27
|
19-20 | ||

Qualsiasi Livello 25+ Elementale
|

This strat is evergreen. Very Slow but effective. Unless very bad luck you can't lose.
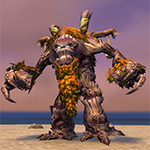
Broot and Singing Sunflower can do all the job, never used third pet. |
RNG |
2 | 4.7 |
N/A | 3 |
210
3:30
|
23+ | |
RNG Negozio Non più ottenibile |
2 | 4.4 |
N/A | 5 |
211
3:31
|
23-24 | |||

Please take note of the avenues of RNG listed below. I believe Driftling can take one Punch crit, but I can't recall how many Bone Barrage hits they took prior to that.
I use Photosynthesis first to help mitigate some of the Bone Barrage damage, but your Singing Sunflower is likely still susceptible to crits. I believe the Quit functions I've put into the script will function properly, please let me know if they don't! ^^ |
RNG Script |
2 | 5.0 |
53% | 2 |
144
2:24
|
16 | ||
RNG |
2 | 5.0 |
N/A | 2 |
195
3:15
|
21+ | |||
Tipo RNG |
2 | 3.5 |
N/A | 7 |
175
2:55
|
17+ | |||
RNG Non più ottenibile |
2 | 4.3 |
N/A | 4 |
210
3:30
|
23+ | |||
RNG |
2 | 3.7 |
N/A | 2 |
185
3:05
|
19+ | |||

Managed to repeat this strategy a couple of times so I believe RNG is not a huge issue here.
|
RNG |
2 | 3.0 |
N/A | 2 |
155
2:35
|
20 | ||

Qualsiasi Livello 25+ Elementale
|
RNG |
2 | 2.6 |
N/A | 2 |
190
3:10
|
20+ | ||
RNG Negozio |
2 | 2.0 |
N/A | 0 |
210
3:30
|
23+ |
Includi Passaggi:


Substitutes:
1 / 2
1 / 2
1 / 3
| Prima | Dopo | Esperienza Guadagnata | |
|---|---|---|---|
| 1 | ➜ | 3 | 239 |
| 2 | ➜ | 4 | 254 |
| 3 | ➜ | 4 | 267 |
| 4 | ➜ | 5 | 279 |
| 5 | ➜ | 6 | 289 |
| 6 | ➜ | 6 | 297 |
| 7 | ➜ | 7 | 304 |
| 8 | ➜ | 8 | 309 |
| 9 | ➜ | 9 | 312 |
| 10 | ➜ | 10 | 314 |
| 11 | ➜ | 11 | 314 |
| 12 | ➜ | 12 | 312 |
| 13 | ➜ | 13 | 309 |
| 14 | ➜ | 14 | 304 |
| 15 | ➜ | 15 | 297 |
| 16 | ➜ | 16 | 289 |
| 17 | ➜ | 17 | 279 |
| 18 | ➜ | 18 | 267 |
| 19 | ➜ | 19 | 254 |
| 20 | ➜ | 20 | 239 |
| 21 | ➜ | 21 | 223 |
| 22 | ➜ | 22 | 205 |
| 23 | ➜ | 23 | 185 |
| 24 | ➜ | 24 | 163 |
|
Cappello da Safari |
|
|
Integratore Inferiore |
|
|
Integratore |
|
|
Cilindro di Lunacupa |
|
|
Evento bonus: scontri tra mascotte |
|
= |
Le mascotte livellano fino al 25 con minima XP persa |
|
|
= |
XP aggiuntiva oltre il livello 25 è persa. |
|
For the best display of your strategy, please follow these guidelines:





For the best display of your strategy, please follow these guidelines:


For the best display of your strategy, please follow these guidelines:


For the best display of your strategy, please follow these guidelines:


For the best display of your strategy, please follow these guidelines:


For the best display of your strategy, please follow these guidelines:


For the best display of your strategy, please follow these guidelines:


For the best display of your strategy, please follow these guidelines:


They say, if you take apart a machine and put it back together, there's always some screws left over. This should not be applied to living organisms!
1
DragonsAfterDark
scritto il 2024-02-18 06:52:53
1
Kaotik#1406
scritto il 2023-02-16 01:04:08
2
Gráinne
scritto il 2023-02-16 01:20:30
An alternate way to use these pets is the classic PvP strat that everybody hates.
1. Start with Broot. Apply Sunlight and then Photsynthesis.
2. Then switch to BA. Apply Sunlight, Photo and then Barkskin until Photo falls off, then reapply it.
3. When you reapply Photo, then swap to Broot (who has been gathering lotsa HP in the back)
Just be sure NEVER to let Sunlight drop. If you do, all that extra gathered HP goes away.
1
thebl4ckd0g
scritto il 2023-09-20 20:14:18
2
Gráinne
scritto il 2023-09-21 02:58:38
I won, but the second pet came close. I can believe that bad RNG might hit you on this one, though 3-4 times in a row sounds unreasonably unlucky.
1
Nerrus
scritto il 2023-11-25 11:14:59
5
Tequima
scritto il 2021-05-25 10:23:10
use(Photosynthesis:268) [enemy(#1).aura(Undead:242).exists]
use(Photosynthesis:268) [!ally(#1).aura(Photosynthesis:267).exists]
use(Sunlight:404)
use(Ironbark:962)
change(#2)
use(Photosynthesis:268) [enemy(#1).aura(Undead:242).exists]
use(Photosynthesis:268) [!ally(#1).aura(Photosynthesis:267).exists]
use(Sunlight:404)
use(Ironbark:962)
change(#3)
use(Puppies of the Flame:1354)
use(Cauterize:173)
use(Blazing Yip:1359)
1
Ai-Shibo
scritto il 2021-09-18 13:02:11
1
Kendyll
scritto il 2021-05-11 05:34:24
1
Kyzna
scritto il 2021-03-10 10:22:31
1
Azrulian#1497
scritto il 2021-02-21 17:10:29
1
Ladiebella
scritto il 2021-02-16 00:01:37
Nuovo Commento: