^
vs. Airborne Defense Force

전략이 추가됨. 추가자: nogulpfrog

42

42

Strategy 2 of 7
Browse all alternatives

Incl. steps:

Airborne Defense Force 173377
Special or not:0Special or not:1211238214304123820

스킬: 2 1 1
번식: 모든 종류

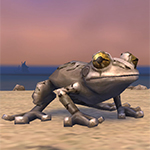
내륙 개구리
This pet can have the following breeds:

번식 체력 파워 속도
BB 1522 284 260
PP 1441 333 244
HH 1766 268 244
HP 1587 297 244
PS 1441 297 273


Special or not:0Special or not:1101836646338360

스킬: 1 * 1
번식: 모든 종류

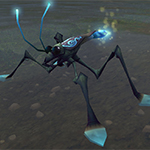
물가 소금쟁이
This pet can have the following breeds:

번식 체력 파워 속도
SS 1319 227 374


>333

Special or not:0Special or not:2121275815169727580

스킬: 1 2 1
번식: PP

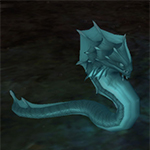
끈적끈적한 뱀장어
This pet can have the following breeds:

번식 체력 파워 속도
PP 1258 363 250
BB 1339 314 266
SS 1258 298 315
PB 1323 327 263

Breeds marked in red are not suited for this strategy.

>350

Substitutes:

1
1
Note: You have selected a substitute pet.
The strategy might fail if you use it with this pet instead of the one the strategy creator intended.

The substitute finder looks for these criteria in relation to the original pet:
  • Same family
  • Has the required skills
  • Has the required stats (if specified)
  • Ignores specific breed requirements for the main pet, as breeds can be very different for substitutes

1 / 2

My first pet breed is HH , this strategy rate of winning should be 10%-15% . I win 4times in 25 attempts.

This strategy took me two night , haha.

낮은 XP
번식
이 전략을 위한 애완동물 중 적어도 하나는 특정 품종의 사용이 요구됩니다.
알엔지
모든 전략이 무적일 수는 없습니다. 이 전략도 마찬가지입니다. 애완동물의 실패 위험을 증가시키는 일부 무작위의 요소가 있으므로 다시 시작해야 할 수도 있습니다. 여러분의 애완동물을 탓하지 마세요, 제발!
이 전략은 확률적으로 많은 금을 얻기 위해 와우트레이딩 카드 게임(TCG) 또는 경매장에서 얻을 수 있는 애완동물을 사용합니다.
이 전략은 와우인 게임 샵에서 Battle.net 화폐 또는 현실의 실제 화폐로만 얻을 수 있는 애완동물을 사용합니다.
이 전략으로 낮은 레벨의 애완동물에게 경험을 줄 수 있습니다.
종종 다른 지시사항들보다 더 따르기 어려운 지시사항이 있습니다. 이 전략의 지시사항도 보통보다 어렵습니다!
이 전략은 스크립트 추가와 함께 사용할 수 있는 Pet Battle Script 스크립트를 제공합니다. 애완동물의 왼쪽에 있는 버튼을 클릭하면 스크립트를 복사할 수 있습니다.
이 전략에서는 하나 이상의 애완 동물을 얻을 수 없습니다. 만약 그 애완동물을 가지고 있다면 축하드립니다!
A Strategy Curator found this strategy to be especially helpful and higlighted it with this tag to give it more exposure.
In Dragonflight Patch 10.2, the ability Time Bomb has been changed. This tag is marking strategies using Time Bomb so they can be reviewed.
Time: 1:48
This time was entered by a strategy curator. It is quite reliable especially when using TDScript, however times can always vary slightly.
Rounds: 14
The number of rounds for this fight were added by a strategy curator. This number is usually very reliable.
This table shows the level increase for completing the fight with level 25 pets and one carry pet.
Partial level experience is not included in the calculation.

Before After Experience Gain
13239
24254
34267
45279
56289
66297
77304
88309
99312
1010314
1111314
1212312
1313309
1414304
1515297
1616289
1717279
1818267
1919254
2020239
2121223
2222205
2323185
2424163

탐험대 모자

하급 애완동물 간식

애완동물 간식

다크문 중산모

애완동물 전투 주


Strategy Details
1 Min 48 Sec
This time was entered by a strategy curator. It is quite reliable especially when using TDScript, however times can always vary slightly.
14
The number of rounds for this fight were added by a strategy curator. This number is usually very reliable.
2020-12-03 07:43:27
The strategy was last updated on this date.
2020-12-03 06:45:31
The strategy was created on this date.
120,225
방문자 수. 해당 숫자는 이 전략이 방문자들로부터 얼마나 자주 접속되는지를 나타냅니다.
Tamer Details
Ardenweald 51.2 44.1 (TomTom / Map Pin)
낮은 XP
Turn 1
얼음 무덤 , restart if your 내륙 개구리 fall asleep.

For the best display of your strategy, please follow these guidelines:

  • Use QuickFill elements where possible
  • Enter custom instructions in English
  • Check the Strategy Creation Guide for more info
내륙 개구리
얼음창
눈보라 부름
얼음 무덤
물가 소금쟁이
물 분출
달래기
끈적끈적한 뱀장어
수액 접촉
오물 분출
달빛섬광
Pass
Bring in your 내륙 개구리
Bring in your 물가 소금쟁이
Bring in your 끈적끈적한 뱀장어
Swap to your 내륙 개구리
Swap to your 물가 소금쟁이
Swap to your 끈적끈적한 뱀장어
별빛꼬리 comes in
바늘코 comes in
반디 comes in
An enemy pet comes in
Any standard attack will finish the fight
 
내륙 개구리
물가 소금쟁이
끈적끈적한 뱀장어
얼음창
눈보라 부름
얼음 무덤
물 분출
달래기
수액 접촉
오물 분출
달빛섬광
반디
바늘코
별빛꼬리
Important: Please enter your instructions in English or a large parts of the community will not be able to read them.
Some typical sentences are translated automatically. Move your mouse over this part for more details.
The following strings are auto-translated if you enter them in the defined format. It is recommended to use them where possible:
[ability=123:Spellname] - [pet=123:Petname] dies
[ability=123:Name] - [enemy=123:Enemyname] dies
[ability=123:Name] until [pet=123:Petname] dies
[ability=123:Name] until [enemy=123:Enemyname] dies
Swap back to [pet=123:Petname]
[ability=123:Name] until the fight is won
Turn 2

For the best display of your strategy, please follow these guidelines:

  • Use QuickFill elements where possible
  • Enter custom instructions in English
  • Check the Strategy Creation Guide for more info
내륙 개구리
얼음창
눈보라 부름
얼음 무덤
물가 소금쟁이
물 분출
달래기
끈적끈적한 뱀장어
수액 접촉
오물 분출
달빛섬광
Pass
Bring in your 내륙 개구리
Bring in your 물가 소금쟁이
Bring in your 끈적끈적한 뱀장어
Swap to your 내륙 개구리
Swap to your 물가 소금쟁이
Swap to your 끈적끈적한 뱀장어
별빛꼬리 comes in
바늘코 comes in
반디 comes in
An enemy pet comes in
Any standard attack will finish the fight
 
내륙 개구리
물가 소금쟁이
끈적끈적한 뱀장어
얼음창
눈보라 부름
얼음 무덤
물 분출
달래기
수액 접촉
오물 분출
달빛섬광
반디
바늘코
별빛꼬리
Important: Please enter your instructions in English or a large parts of the community will not be able to read them.
Some typical sentences are translated automatically. Move your mouse over this part for more details.
The following strings are auto-translated if you enter them in the defined format. It is recommended to use them where possible:
[ability=123:Spellname] - [pet=123:Petname] dies
[ability=123:Name] - [enemy=123:Enemyname] dies
[ability=123:Name] until [pet=123:Petname] dies
[ability=123:Name] until [enemy=123:Enemyname] dies
Swap back to [pet=123:Petname]
[ability=123:Name] until the fight is won
Turn 3
얼음창 , restart if your 내륙 개구리 died.

For the best display of your strategy, please follow these guidelines:

  • Use QuickFill elements where possible
  • Enter custom instructions in English
  • Check the Strategy Creation Guide for more info
내륙 개구리
얼음창
눈보라 부름
얼음 무덤
물가 소금쟁이
물 분출
달래기
끈적끈적한 뱀장어
수액 접촉
오물 분출
달빛섬광
Pass
Bring in your 내륙 개구리
Bring in your 물가 소금쟁이
Bring in your 끈적끈적한 뱀장어
Swap to your 내륙 개구리
Swap to your 물가 소금쟁이
Swap to your 끈적끈적한 뱀장어
별빛꼬리 comes in
바늘코 comes in
반디 comes in
An enemy pet comes in
Any standard attack will finish the fight
 
내륙 개구리
물가 소금쟁이
끈적끈적한 뱀장어
얼음창
눈보라 부름
얼음 무덤
물 분출
달래기
수액 접촉
오물 분출
달빛섬광
반디
바늘코
별빛꼬리
Important: Please enter your instructions in English or a large parts of the community will not be able to read them.
Some typical sentences are translated automatically. Move your mouse over this part for more details.
The following strings are auto-translated if you enter them in the defined format. It is recommended to use them where possible:
[ability=123:Spellname] - [pet=123:Petname] dies
[ability=123:Name] - [enemy=123:Enemyname] dies
[ability=123:Name] until [pet=123:Petname] dies
[ability=123:Name] until [enemy=123:Enemyname] dies
Swap back to [pet=123:Petname]
[ability=123:Name] until the fight is won
Turn 4

For the best display of your strategy, please follow these guidelines:

  • Use QuickFill elements where possible
  • Enter custom instructions in English
  • Check the Strategy Creation Guide for more info
내륙 개구리
얼음창
눈보라 부름
얼음 무덤
물가 소금쟁이
물 분출
달래기
끈적끈적한 뱀장어
수액 접촉
오물 분출
달빛섬광
Pass
Bring in your 내륙 개구리
Bring in your 물가 소금쟁이
Bring in your 끈적끈적한 뱀장어
Swap to your 내륙 개구리
Swap to your 물가 소금쟁이
Swap to your 끈적끈적한 뱀장어
별빛꼬리 comes in
바늘코 comes in
반디 comes in
An enemy pet comes in
Any standard attack will finish the fight
 
내륙 개구리
물가 소금쟁이
끈적끈적한 뱀장어
얼음창
눈보라 부름
얼음 무덤
물 분출
달래기
수액 접촉
오물 분출
달빛섬광
반디
바늘코
별빛꼬리
Important: Please enter your instructions in English or a large parts of the community will not be able to read them.
Some typical sentences are translated automatically. Move your mouse over this part for more details.
The following strings are auto-translated if you enter them in the defined format. It is recommended to use them where possible:
[ability=123:Spellname] - [pet=123:Petname] dies
[ability=123:Name] - [enemy=123:Enemyname] dies
[ability=123:Name] until [pet=123:Petname] dies
[ability=123:Name] until [enemy=123:Enemyname] dies
Swap back to [pet=123:Petname]
[ability=123:Name] until the fight is won
Turn 5
Pass , your 내륙 개구리 died.

For the best display of your strategy, please follow these guidelines:

  • Use QuickFill elements where possible
  • Enter custom instructions in English
  • Check the Strategy Creation Guide for more info
내륙 개구리
얼음창
눈보라 부름
얼음 무덤
물가 소금쟁이
물 분출
달래기
끈적끈적한 뱀장어
수액 접촉
오물 분출
달빛섬광
Pass
Bring in your 내륙 개구리
Bring in your 물가 소금쟁이
Bring in your 끈적끈적한 뱀장어
Swap to your 내륙 개구리
Swap to your 물가 소금쟁이
Swap to your 끈적끈적한 뱀장어
별빛꼬리 comes in
바늘코 comes in
반디 comes in
An enemy pet comes in
Any standard attack will finish the fight
 
내륙 개구리
물가 소금쟁이
끈적끈적한 뱀장어
얼음창
눈보라 부름
얼음 무덤
물 분출
달래기
수액 접촉
오물 분출
달빛섬광
반디
바늘코
별빛꼬리
Important: Please enter your instructions in English or a large parts of the community will not be able to read them.
Some typical sentences are translated automatically. Move your mouse over this part for more details.
The following strings are auto-translated if you enter them in the defined format. It is recommended to use them where possible:
[ability=123:Spellname] - [pet=123:Petname] dies
[ability=123:Name] - [enemy=123:Enemyname] dies
[ability=123:Name] until [pet=123:Petname] dies
[ability=123:Name] until [enemy=123:Enemyname] dies
Swap back to [pet=123:Petname]
[ability=123:Name] until the fight is won
Bring in your 물가 소금쟁이

For the best display of your strategy, please follow these guidelines:

  • Use QuickFill elements where possible
  • Enter custom instructions in English
  • Check the Strategy Creation Guide for more info
내륙 개구리
얼음창
눈보라 부름
얼음 무덤
물가 소금쟁이
물 분출
달래기
끈적끈적한 뱀장어
수액 접촉
오물 분출
달빛섬광
Pass
Bring in your 내륙 개구리
Bring in your 물가 소금쟁이
Bring in your 끈적끈적한 뱀장어
Swap to your 내륙 개구리
Swap to your 물가 소금쟁이
Swap to your 끈적끈적한 뱀장어
별빛꼬리 comes in
바늘코 comes in
반디 comes in
An enemy pet comes in
Any standard attack will finish the fight
 
내륙 개구리
물가 소금쟁이
끈적끈적한 뱀장어
얼음창
눈보라 부름
얼음 무덤
물 분출
달래기
수액 접촉
오물 분출
달빛섬광
반디
바늘코
별빛꼬리
Important: Please enter your instructions in English or a large parts of the community will not be able to read them.
Some typical sentences are translated automatically. Move your mouse over this part for more details.
The following strings are auto-translated if you enter them in the defined format. It is recommended to use them where possible:
[ability=123:Spellname] - [pet=123:Petname] dies
[ability=123:Name] - [enemy=123:Enemyname] dies
[ability=123:Name] until [pet=123:Petname] dies
[ability=123:Name] until [enemy=123:Enemyname] dies
Swap back to [pet=123:Petname]
[ability=123:Name] until the fight is won
Turn 6

For the best display of your strategy, please follow these guidelines:

  • Use QuickFill elements where possible
  • Enter custom instructions in English
  • Check the Strategy Creation Guide for more info
내륙 개구리
얼음창
눈보라 부름
얼음 무덤
물가 소금쟁이
물 분출
달래기
끈적끈적한 뱀장어
수액 접촉
오물 분출
달빛섬광
Pass
Bring in your 내륙 개구리
Bring in your 물가 소금쟁이
Bring in your 끈적끈적한 뱀장어
Swap to your 내륙 개구리
Swap to your 물가 소금쟁이
Swap to your 끈적끈적한 뱀장어
별빛꼬리 comes in
바늘코 comes in
반디 comes in
An enemy pet comes in
Any standard attack will finish the fight
 
내륙 개구리
물가 소금쟁이
끈적끈적한 뱀장어
얼음창
눈보라 부름
얼음 무덤
물 분출
달래기
수액 접촉
오물 분출
달빛섬광
반디
바늘코
별빛꼬리
Important: Please enter your instructions in English or a large parts of the community will not be able to read them.
Some typical sentences are translated automatically. Move your mouse over this part for more details.
The following strings are auto-translated if you enter them in the defined format. It is recommended to use them where possible:
[ability=123:Spellname] - [pet=123:Petname] dies
[ability=123:Name] - [enemy=123:Enemyname] dies
[ability=123:Name] until [pet=123:Petname] dies
[ability=123:Name] until [enemy=123:Enemyname] dies
Swap back to [pet=123:Petname]
[ability=123:Name] until the fight is won
Turn 7

For the best display of your strategy, please follow these guidelines:

  • Use QuickFill elements where possible
  • Enter custom instructions in English
  • Check the Strategy Creation Guide for more info
내륙 개구리
얼음창
눈보라 부름
얼음 무덤
물가 소금쟁이
물 분출
달래기
끈적끈적한 뱀장어
수액 접촉
오물 분출
달빛섬광
Pass
Bring in your 내륙 개구리
Bring in your 물가 소금쟁이
Bring in your 끈적끈적한 뱀장어
Swap to your 내륙 개구리
Swap to your 물가 소금쟁이
Swap to your 끈적끈적한 뱀장어
별빛꼬리 comes in
바늘코 comes in
반디 comes in
An enemy pet comes in
Any standard attack will finish the fight
 
내륙 개구리
물가 소금쟁이
끈적끈적한 뱀장어
얼음창
눈보라 부름
얼음 무덤
물 분출
달래기
수액 접촉
오물 분출
달빛섬광
반디
바늘코
별빛꼬리
Important: Please enter your instructions in English or a large parts of the community will not be able to read them.
Some typical sentences are translated automatically. Move your mouse over this part for more details.
The following strings are auto-translated if you enter them in the defined format. It is recommended to use them where possible:
[ability=123:Spellname] - [pet=123:Petname] dies
[ability=123:Name] - [enemy=123:Enemyname] dies
[ability=123:Name] until [pet=123:Petname] dies
[ability=123:Name] until [enemy=123:Enemyname] dies
Swap back to [pet=123:Petname]
[ability=123:Name] until the fight is won
Turn 8

For the best display of your strategy, please follow these guidelines:

  • Use QuickFill elements where possible
  • Enter custom instructions in English
  • Check the Strategy Creation Guide for more info
내륙 개구리
얼음창
눈보라 부름
얼음 무덤
물가 소금쟁이
물 분출
달래기
끈적끈적한 뱀장어
수액 접촉
오물 분출
달빛섬광
Pass
Bring in your 내륙 개구리
Bring in your 물가 소금쟁이
Bring in your 끈적끈적한 뱀장어
Swap to your 내륙 개구리
Swap to your 물가 소금쟁이
Swap to your 끈적끈적한 뱀장어
별빛꼬리 comes in
바늘코 comes in
반디 comes in
An enemy pet comes in
Any standard attack will finish the fight
 
내륙 개구리
물가 소금쟁이
끈적끈적한 뱀장어
얼음창
눈보라 부름
얼음 무덤
물 분출
달래기
수액 접촉
오물 분출
달빛섬광
반디
바늘코
별빛꼬리
Important: Please enter your instructions in English or a large parts of the community will not be able to read them.
Some typical sentences are translated automatically. Move your mouse over this part for more details.
The following strings are auto-translated if you enter them in the defined format. It is recommended to use them where possible:
[ability=123:Spellname] - [pet=123:Petname] dies
[ability=123:Name] - [enemy=123:Enemyname] dies
[ability=123:Name] until [pet=123:Petname] dies
[ability=123:Name] until [enemy=123:Enemyname] dies
Swap back to [pet=123:Petname]
[ability=123:Name] until the fight is won
Turn 9

For the best display of your strategy, please follow these guidelines:
  • Use QuickFill elements where possible
  • Enter custom instructions in English
  • Check the Strategy Creation Guide for more info
내륙 개구리
얼음창
눈보라 부름
얼음 무덤
물가 소금쟁이
물 분출
달래기
끈적끈적한 뱀장어
수액 접촉
오물 분출
달빛섬광
Pass
Bring in your 내륙 개구리
Bring in your 물가 소금쟁이
Bring in your 끈적끈적한 뱀장어
Swap to your 내륙 개구리
Swap to your 물가 소금쟁이
Swap to your 끈적끈적한 뱀장어
별빛꼬리 comes in
바늘코 comes in
반디 comes in
An enemy pet comes in
Any standard attack will finish the fight
 
내륙 개구리
물가 소금쟁이
끈적끈적한 뱀장어
얼음창
눈보라 부름
얼음 무덤
물 분출
달래기
수액 접촉
오물 분출
달빛섬광
반디
바늘코
별빛꼬리
Important: Please enter your instructions in English or a large parts of the community will not be able to read them.
Some typical sentences are translated automatically. Move your mouse over this part for more details.
The following strings are auto-translated if you enter them in the defined format. It is recommended to use them where possible:
[ability=123:Spellname] - [pet=123:Petname] dies
[ability=123:Name] - [enemy=123:Enemyname] dies
[ability=123:Name] until [pet=123:Petname] dies
[ability=123:Name] until [enemy=123:Enemyname] dies
Swap back to [pet=123:Petname]
[ability=123:Name] until the fight is won

For the best display of your strategy, please follow these guidelines:
  • Use QuickFill elements where possible
  • Enter custom instructions in English
  • Check the Strategy Creation Guide for more info
내륙 개구리
얼음창
눈보라 부름
얼음 무덤
물가 소금쟁이
물 분출
달래기
끈적끈적한 뱀장어
수액 접촉
오물 분출
달빛섬광
Pass
Bring in your 내륙 개구리
Bring in your 물가 소금쟁이
Bring in your 끈적끈적한 뱀장어
Swap to your 내륙 개구리
Swap to your 물가 소금쟁이
Swap to your 끈적끈적한 뱀장어
별빛꼬리 comes in
바늘코 comes in
반디 comes in
An enemy pet comes in
Any standard attack will finish the fight
 
내륙 개구리
물가 소금쟁이
끈적끈적한 뱀장어
얼음창
눈보라 부름
얼음 무덤
물 분출
달래기
수액 접촉
오물 분출
달빛섬광
반디
바늘코
별빛꼬리
Important: Please enter your instructions in English or a large parts of the community will not be able to read them.
Some typical sentences are translated automatically. Move your mouse over this part for more details.
The following strings are auto-translated if you enter them in the defined format. It is recommended to use them where possible:
[ability=123:Spellname] - [pet=123:Petname] dies
[ability=123:Name] - [enemy=123:Enemyname] dies
[ability=123:Name] until [pet=123:Petname] dies
[ability=123:Name] until [enemy=123:Enemyname] dies
Swap back to [pet=123:Petname]
[ability=123:Name] until the fight is won
Turn 10

For the best display of your strategy, please follow these guidelines:
  • Use QuickFill elements where possible
  • Enter custom instructions in English
  • Check the Strategy Creation Guide for more info
내륙 개구리
얼음창
눈보라 부름
얼음 무덤
물가 소금쟁이
물 분출
달래기
끈적끈적한 뱀장어
수액 접촉
오물 분출
달빛섬광
Pass
Bring in your 내륙 개구리
Bring in your 물가 소금쟁이
Bring in your 끈적끈적한 뱀장어
Swap to your 내륙 개구리
Swap to your 물가 소금쟁이
Swap to your 끈적끈적한 뱀장어
별빛꼬리 comes in
바늘코 comes in
반디 comes in
An enemy pet comes in
Any standard attack will finish the fight
 
내륙 개구리
물가 소금쟁이
끈적끈적한 뱀장어
얼음창
눈보라 부름
얼음 무덤
물 분출
달래기
수액 접촉
오물 분출
달빛섬광
반디
바늘코
별빛꼬리
Important: Please enter your instructions in English or a large parts of the community will not be able to read them.
Some typical sentences are translated automatically. Move your mouse over this part for more details.
The following strings are auto-translated if you enter them in the defined format. It is recommended to use them where possible:
[ability=123:Spellname] - [pet=123:Petname] dies
[ability=123:Name] - [enemy=123:Enemyname] dies
[ability=123:Name] until [pet=123:Petname] dies
[ability=123:Name] until [enemy=123:Enemyname] dies
Swap back to [pet=123:Petname]
[ability=123:Name] until the fight is won
Turn 11
수액 접촉 ,enemy first pet died.

For the best display of your strategy, please follow these guidelines:

  • Use QuickFill elements where possible
  • Enter custom instructions in English
  • Check the Strategy Creation Guide for more info
내륙 개구리
얼음창
눈보라 부름
얼음 무덤
물가 소금쟁이
물 분출
달래기
끈적끈적한 뱀장어
수액 접촉
오물 분출
달빛섬광
Pass
Bring in your 내륙 개구리
Bring in your 물가 소금쟁이
Bring in your 끈적끈적한 뱀장어
Swap to your 내륙 개구리
Swap to your 물가 소금쟁이
Swap to your 끈적끈적한 뱀장어
별빛꼬리 comes in
바늘코 comes in
반디 comes in
An enemy pet comes in
Any standard attack will finish the fight
 
내륙 개구리
물가 소금쟁이
끈적끈적한 뱀장어
얼음창
눈보라 부름
얼음 무덤
물 분출
달래기
수액 접촉
오물 분출
달빛섬광
반디
바늘코
별빛꼬리
Important: Please enter your instructions in English or a large parts of the community will not be able to read them.
Some typical sentences are translated automatically. Move your mouse over this part for more details.
The following strings are auto-translated if you enter them in the defined format. It is recommended to use them where possible:
[ability=123:Spellname] - [pet=123:Petname] dies
[ability=123:Name] - [enemy=123:Enemyname] dies
[ability=123:Name] until [pet=123:Petname] dies
[ability=123:Name] until [enemy=123:Enemyname] dies
Swap back to [pet=123:Petname]
[ability=123:Name] until the fight is won
Turn 12

For the best display of your strategy, please follow these guidelines:

  • Use QuickFill elements where possible
  • Enter custom instructions in English
  • Check the Strategy Creation Guide for more info
내륙 개구리
얼음창
눈보라 부름
얼음 무덤
물가 소금쟁이
물 분출
달래기
끈적끈적한 뱀장어
수액 접촉
오물 분출
달빛섬광
Pass
Bring in your 내륙 개구리
Bring in your 물가 소금쟁이
Bring in your 끈적끈적한 뱀장어
Swap to your 내륙 개구리
Swap to your 물가 소금쟁이
Swap to your 끈적끈적한 뱀장어
별빛꼬리 comes in
바늘코 comes in
반디 comes in
An enemy pet comes in
Any standard attack will finish the fight
 
내륙 개구리
물가 소금쟁이
끈적끈적한 뱀장어
얼음창
눈보라 부름
얼음 무덤
물 분출
달래기
수액 접촉
오물 분출
달빛섬광
반디
바늘코
별빛꼬리
Important: Please enter your instructions in English or a large parts of the community will not be able to read them.
Some typical sentences are translated automatically. Move your mouse over this part for more details.
The following strings are auto-translated if you enter them in the defined format. It is recommended to use them where possible:
[ability=123:Spellname] - [pet=123:Petname] dies
[ability=123:Name] - [enemy=123:Enemyname] dies
[ability=123:Name] until [pet=123:Petname] dies
[ability=123:Name] until [enemy=123:Enemyname] dies
Swap back to [pet=123:Petname]
[ability=123:Name] until the fight is won
Turn 13
수액 접촉 , enemy third pet died.

For the best display of your strategy, please follow these guidelines:

  • Use QuickFill elements where possible
  • Enter custom instructions in English
  • Check the Strategy Creation Guide for more info
내륙 개구리
얼음창
눈보라 부름
얼음 무덤
물가 소금쟁이
물 분출
달래기
끈적끈적한 뱀장어
수액 접촉
오물 분출
달빛섬광
Pass
Bring in your 내륙 개구리
Bring in your 물가 소금쟁이
Bring in your 끈적끈적한 뱀장어
Swap to your 내륙 개구리
Swap to your 물가 소금쟁이
Swap to your 끈적끈적한 뱀장어
별빛꼬리 comes in
바늘코 comes in
반디 comes in
An enemy pet comes in
Any standard attack will finish the fight
 
내륙 개구리
물가 소금쟁이
끈적끈적한 뱀장어
얼음창
눈보라 부름
얼음 무덤
물 분출
달래기
수액 접촉
오물 분출
달빛섬광
반디
바늘코
별빛꼬리
Important: Please enter your instructions in English or a large parts of the community will not be able to read them.
Some typical sentences are translated automatically. Move your mouse over this part for more details.
The following strings are auto-translated if you enter them in the defined format. It is recommended to use them where possible:
[ability=123:Spellname] - [pet=123:Petname] dies
[ability=123:Name] - [enemy=123:Enemyname] dies
[ability=123:Name] until [pet=123:Petname] dies
[ability=123:Name] until [enemy=123:Enemyname] dies
Swap back to [pet=123:Petname]
[ability=123:Name] until the fight is won
Turn 14

For the best display of your strategy, please follow these guidelines:

  • Use QuickFill elements where possible
  • Enter custom instructions in English
  • Check the Strategy Creation Guide for more info
내륙 개구리
얼음창
눈보라 부름
얼음 무덤
물가 소금쟁이
물 분출
달래기
끈적끈적한 뱀장어
수액 접촉
오물 분출
달빛섬광
Pass
Bring in your 내륙 개구리
Bring in your 물가 소금쟁이
Bring in your 끈적끈적한 뱀장어
Swap to your 내륙 개구리
Swap to your 물가 소금쟁이
Swap to your 끈적끈적한 뱀장어
별빛꼬리 comes in
바늘코 comes in
반디 comes in
An enemy pet comes in
Any standard attack will finish the fight
 
내륙 개구리
물가 소금쟁이
끈적끈적한 뱀장어
얼음창
눈보라 부름
얼음 무덤
물 분출
달래기
수액 접촉
오물 분출
달빛섬광
반디
바늘코
별빛꼬리
Important: Please enter your instructions in English or a large parts of the community will not be able to read them.
Some typical sentences are translated automatically. Move your mouse over this part for more details.
The following strings are auto-translated if you enter them in the defined format. It is recommended to use them where possible:
[ability=123:Spellname] - [pet=123:Petname] dies
[ability=123:Name] - [enemy=123:Enemyname] dies
[ability=123:Name] until [pet=123:Petname] dies
[ability=123:Name] until [enemy=123:Enemyname] dies
Swap back to [pet=123:Petname]
[ability=123:Name] until the fight is won
you win unless cyclone kill your 끈적끈적한 뱀장어 !

For the best display of your strategy, please follow these guidelines:

  • Use QuickFill elements where possible
  • Enter custom instructions in English
  • Check the Strategy Creation Guide for more info
내륙 개구리
얼음창
눈보라 부름
얼음 무덤
물가 소금쟁이
물 분출
달래기
끈적끈적한 뱀장어
수액 접촉
오물 분출
달빛섬광
Pass
Bring in your 내륙 개구리
Bring in your 물가 소금쟁이
Bring in your 끈적끈적한 뱀장어
Swap to your 내륙 개구리
Swap to your 물가 소금쟁이
Swap to your 끈적끈적한 뱀장어
별빛꼬리 comes in
바늘코 comes in
반디 comes in
An enemy pet comes in
Any standard attack will finish the fight
 
내륙 개구리
물가 소금쟁이
끈적끈적한 뱀장어
얼음창
눈보라 부름
얼음 무덤
물 분출
달래기
수액 접촉
오물 분출
달빛섬광
반디
바늘코
별빛꼬리
Important: Please enter your instructions in English or a large parts of the community will not be able to read them.
Some typical sentences are translated automatically. Move your mouse over this part for more details.
The following strings are auto-translated if you enter them in the defined format. It is recommended to use them where possible:
[ability=123:Spellname] - [pet=123:Petname] dies
[ability=123:Name] - [enemy=123:Enemyname] dies
[ability=123:Name] until [pet=123:Petname] dies
[ability=123:Name] until [enemy=123:Enemyname] dies
Swap back to [pet=123:Petname]
[ability=123:Name] until the fight is won

Well okay then, let's bring out the magic spells!


(OP) nogulpfrog

글 올리기 2022-08-01 03:19:01

100 attempts, 21 wins, 4draw, use hh Inland Frog.

(OP) nogulpfrog

글 올리기 2024-03-02 13:54:13

Pet Sim Link==

(OP) nogulpfrog

글 올리기 2024-03-02 14:02:11

Simulated this strategy on Pet-Sim, but I correct Faryl movement because of swap BUG on Pet-Sim.In addition, enemy second pet may not use sting in game, I can't set random move for enemy second pet.

Lamhaeldor#2183

글 올리기 2024-03-05 22:46:41

Hi, what is the bug on pet-sim you mentioned please? :)

(OP) nogulpfrog

글 올리기 2024-03-06 05:30:09

after first enemy be killed, Faryl will bring in second pet in game, but in website he bring in third pet directly.

Lamhaeldor#2183

글 올리기 2024-03-06 10:54:55

Oooh I see, I wil change that as soon as possible, thanks :)

(OP) nogulpfrog

글 올리기 2024-03-06 10:59:16

Are you the author of the website?

Lamhaeldor#2183

글 올리기 2024-03-06 12:10:21

Yes, and It's a pain to find all the small subtilities of the pet battles ^^"

Valectra

글 올리기 2023-09-26 02:19:10

I used an HP Croaker and a PB Octopode and I got it after 5 tries. It does work when everything goes your way. Thank you!

Joe#21367

글 올리기 2023-08-22 15:48:22

This strat does work, just keep trying - yes it's RNG but thats because this fight is very difficult on a team of aquatic pets.

Sawfty#11362

글 올리기 2023-04-25 16:49:31

PFFFEW! Finally got there with HH/SS/PB pets.

metaphysis

글 올리기 2020-12-07 23:49:00

TD Script for this strat:

standby [ round = 5 ]
quit [ self.aura(Asleep:498).exists & self(#1).active ]
quit [ self(#1).dead & round = 3 ]
ability(Ice Tomb:624)
ability(Call Blizzard:206)
ability(Ice Lance:413)
ability(Water Jet:118) [ self.round < 4 ]
ability(Soothe:497)
ability(Sewage Eruption:2062) [ self.round = 1 ]
ability(Moonfire:595) [ self.round = 2 ]
ability(Ooze Touch:445)
change(next)

Bueller#1107

글 올리기 2022-05-28 02:10:43

75 attempts later i follow advice that works. thank you

Elowyn#2813

글 올리기 2022-11-14 11:03:44

Holy Mother of God, thank you so much!

IvikNier#2114

글 올리기 2022-08-10 20:22:58

How is this dude fair? I can't do anything with my scope of pets of aquatic. Nothing works. Not even close.

MiAuZiNhA

글 올리기 2022-05-14 21:59:13

Very RNG, I've used a P/P Slimy Hermit Crab on slot 3

(OP) nogulpfrog

글 올리기 2022-05-15 03:58:14

pp slimy hermit crab only have 329power, my strategy need a 363power slimy pet, it's rng but not very rng, wrong pet lead a wrong conclusion

NabuArat

글 올리기 2021-05-22 07:54:10

So. Much. RNG. Works in the end though (took me 72 tries).
Godspeed, fellow tamers!

quit [self(#1).dead & round<5]
quit [self(#1).aura(Asleep:498).exists]
quit [self(#1).hp<=529 & round<=3]
use(Ice Tomb:624)
use(Call Blizzard:206)
use(Ice Lance:413)
use(Soothe:497) [self.round=4]
use(Water Jet:118)
use(Sewage Eruption:2062) [self.round=1]
use(Moonfire:595) [enemy.aura(Sewage Eruption:2063).duration=1]
use(Ooze Touch:445)
change(next)
(edited)

Lenaea#1490

글 올리기 2022-01-29 05:12:56

I have never seen a tdscript that automatically forfeits when something doesn't go right. made really quick work of the fights though, that's for sure. really surprised me when it happened the first couple times. script worked great though. 4th try at it with standard pets from above strat aside from an HP croaker instead of the recommended HH. nice work. thanks a lot.

iphegenia#1809

글 올리기 2022-01-26 17:23:07

Whew! I was never so glad to make it out of a Battle with a pet alive! I also used an HH Inland Croaker and PP Slimy Octopod. Worth the hassle of taming/buying/leveling Just. =D

Lily 글 올리기 2022-01-09 02:54:45

Finally, after going back and getting the H/H Inland Croaker and leveling it, I finally got it to work. What a PITA RNG fight. TY!

PS. I make it a point to do every Family fight every expansion (not just enough for the achievements) as a personal goal. This fight has been the worst of any fight BY FAR. (edited)

anybodykilla#1103

글 올리기 2021-08-23 14:25:43

I DID IT ..after literally over 50 fights - diff teams following every instruction to the T. (and killing the last pet but his debuff killed me - so frustrating) i tried because it was a daily FIRST TIME

Houkane#2457

글 올리기 2021-12-10 20:17:40

Same for me. Took me 58 fights until I got luck with the rng. Need to repair my table now *ahem*

Christine 글 올리기 2021-10-29 07:57:44

3 Nexus Whelplings knock this fight right out. The first 2 usually do the trick.

Houkane#2457

글 올리기 2021-12-10 20:07:51

The task is to beat the pets with 3 pets of the same category. You posted a method for dragons in a thread for water pets. That might explain your downvotes.

Jamie 글 올리기 2021-08-07 16:32:50

The amount of RNG this strat relies on is laughable, don't even bother

Lily 글 올리기 2021-09-12 15:38:39

Its not the strat, its the fight. Some are just very heavy RNG fights-so don't blame those trying to do the best they can to find and then share a strat for YOU to use that can sometimes work. Look at all the comments for all the strats listed before being critical (or maybe try to find your own and see how hard it is).

Destiva 글 올리기 2021-08-08 07:00:28

I used Slimy Hermit Crab (PP) in the third slot with a 329 attack and got it the first try

Placid

글 올리기 2021-08-13 01:51:31

Same, but: on the first try AFTER I was able to survive 3 turns (took like 8 tries)

Slow_Robot

글 올리기 2021-04-01 01:24:24

All of my pet teams for Faryl include language not fit for public because of how I hate him so.

But seriously: Nicely done on this strategy! It's a "60% of the time it works every time" because aquatic vs. this pet master is simply madness, so only do it if you really want to flex at your pet battlers.

anybodykilla#1103

글 올리기 2021-08-07 17:07:45

Every time I'm near him (im fae) I feel the urge to try again and end up there for an hour

fenrielle

글 올리기 2021-06-07 14:54:48

8 Ttys, but I only had to restart after the 2nd or 3rd step

Gfassbinder 글 올리기 2021-06-01 11:20:16

Used Slimy Octopode as 3rd pet PP >350

Berendain

글 올리기 2020-12-08 00:44:08

Bloody brilliant! Yes, it's RNG, but this fight is full of it and aquatic is the toughest matchup of them all. This worked perfectly the very first time that my H/H Island Croaker survived round 4. I have to say, when I realised what was going to happen, and that my P/P Slimy Eel's Ooze Touch was going to do THE EXACT amount of damage needed to kill Star Tail as soon as he swapped in, I had a huge grin on my face! This is excellent work, and very creative! I restarted 6 times, three due to being slept on round 1, and three due to taking too much damage from Moth Balls on round 2. Once those hurdles are past you, you're looking good.

TD script I used:

quit [round=2 & self.aura(Asleep:498).exists]
quit [round=3 & self.hp<530]
quit [round=4 & self.dead]
use(Ice Tomb:624)
use(Call Blizzard:206)
use(Soothe:497) [round=9]
use(Sewage Eruption:2062) [!enemy(#1).dead]
use(Moonfire:595) [enemy(#1).dead]
use(#1)
change(next)

5 stars (because of how difficult this family is) (edited)

spottsy

글 올리기 2020-12-09 20:01:09

I tried this with B/B inland croaker and it did NOT work many times. I just farmed up the H/H croaker and got lucky and won first time so don't waste your time on other breeds.

Raventoo#1813

글 올리기 2020-12-17 13:12:28

It also worked using a HP Inland Croaker. You need the extra HP to survive.

Esploratore 글 올리기 2021-02-19 04:02:46

Indeed, great work to the one who made this strategy, people need to take the difficulty into account, only took me like 6-7 tries to make it work and restarted as soon as it was obvious it was lost, no need to go till the end, and honestly, we need challenging fights, I like seeing a fight hard enough that every single strategy proposed is not 100% success chance, I guess this is one of the hardest fights of all. And you're right, those nazjatar pets do 574 damage with ooze touch, which is exactly the amount of hp left, I can only imagine the amount of work that went into making this strategy. (edited)

Zalid

글 올리기 2021-05-31 20:19:53

Did not think my PP croaker was going to be able to do it. But attempt 12 saw the rng gods smile and Moth Balls fail and my team went on to win. I had 3 attempts fail due to sleep, 4 attempts fail due to Moth Balls killing my croaker, and 4 attempts fail as my croaker took too much damage from Moth Balls.
But this strategy did work and so did the script. Nice one.

AlexL

글 올리기 2021-05-29 18:04:22

Used BB+SS+PB (instead of PP on the third pet), and still won on 3-rd attempt. (edited)

gellehar

글 올리기 2021-05-23 03:39:17

Finally completed this! Followed the above instructions, my breeds were Inland Croaker (B/B), Aqua Strider (S/S), and Slimy Hermit Crab (P/P) - didn't have a PP eel.

You need to get lucky on low-rolls for the first part so that your inland croaker survives long enough - be above 520~ health after the Moth Balls and Moth Dust have been used, or you'll need to restart the fight.

For reference, my crab finished with 5HP at the end of the fight.

Good luck! (edited)

Ioso

글 올리기 2021-05-15 02:42:41

This worked for me the first time I used it though I did switch out the third pet for the slimy octopod. Octopod dominated the rest of the fight!

Xade-Kazzak 글 올리기 2021-04-26 09:58:32

By far the hardest fight in all of WoW Pet Battle history, nothing from previous expansions even come close.

Gashlikka#1455

글 올리기 2021-01-15 19:17:36

To everyone whinging about this strategy...
a) you only need 9/11 in each category for the achievement; no one is twisting your arm and forcing you to do it
b) come up with your own strategy if it's that important to you. If it works at all, post it here!
Kudos to nogulpfrog for coming up with something!

Xweaz

글 올리기 2021-03-24 20:54:57

Do you realize that criticizing someone for criticizing someone is about as hypocritical as one can get? Congratulations, grasshopper, you've earned [Hypocritical Zen] worth 10 Achievement points.

Xweaz

글 올리기 2021-03-24 20:53:09

This works about as well as my lazy, alcoholic uncle. Complete and utter trash about nine times out of ten but that tenth time he'll get off the couch and do something worthwhile. Just keep at it.

Kittycad

글 올리기 2021-03-11 14:24:32

Wow...what a crazy tough fight...I was getting ready to give up for today and figured I would try a few times whenever this trainer was up for the WQ and then your lovely strat worked on my last attempt today!

Zanitta 글 올리기 2021-03-04 19:40:01

I gave up on this strat after 15 tries of restart for Inland Croaker (PS) could not get to Ice Lance round without dying. Think I will forgo this Aquatic battle

smul

글 올리기 2021-02-26 21:23:30

got lucky and it worked first try, thanks!

Ismara 글 올리기 2021-02-20 09:14:57

I managed to get it right on my second attemp using Festival Lantern 1-2-2, Lunar Lantern 1-2-2 and Accursed Hexxer 2-2-1. I do admit I had some rng but I think it's possible even without it. Just yse flash on cd, then light, and beam as filler. When you get to your hexxer, use weakness, then Drain Blood, then weakness again, and then and use Arcane blast, weakeness, arcane blast and it should be dead by now. Wanna see if it works for everybody else (edited)

Gráinne

글 올리기 2021-02-24 15:50:24

Those are Magic pets. This is the Aquatic strat section. You might want to look at the Magic section.

Quefear 글 올리기 2021-02-23 11:40:08

3 tries so far and croaker always dies in second round...

Madhatter#1885

글 올리기 2021-02-13 02:50:29

definitely works used B/B Croaker S/S Strider and P/P Eel took at least 6 tries but it's do able (edited)

Weeps

글 올리기 2021-02-08 19:53:28

Took me 4 retries to have my Inland Croaker not get stunned or die.

Once the Inland Croaker survived, the rest was cakewalk! Just keep going.

I used PP Inland Croaker, SS Aqua Strider and PS Slimy Eel.

tarc

글 올리기 2021-02-02 11:39:41

42 hp to spare, brilliant strat, 1st try. :)

Sanayrin

글 올리기 2021-01-30 03:11:59

Worked well for me for 2nd try!
I just followed suggeztion about restart and.. finest work! Thank you, autor!

Rauko#1617

글 올리기 2021-01-26 03:33:33

this one worked for me after 10 attempts (PP croaker)

Oaden 글 올리기 2021-01-17 16:37:54

Heavily RNG dependant and essentially requires no crits, few mothball hits and no sleep, but it works about as well as you can hope with 3 water pets vs 3 overstatted flyers

SmallFryz#1927

글 올리기 2021-01-07 18:00:46

This worked there is a RNG but a lot less than the other strats... I would suggest that you make it listed as HH for the frog I tried over and over with a different breed doesnt work. HH seems to be the only way.

Oaden 글 올리기 2021-01-17 16:32:37

Got it working in two tries with a H/P one, it basically requires the mothball to only hit once and no crits

maladroa 글 올리기 2021-01-15 10:14:42

how do we add strategys eben so long forgot

maladroa 글 올리기 2021-01-15 10:24:33

just bet him twice usin different pets should get posted somewhen today

Wynndra

글 올리기 2021-01-09 15:38:56

Folks. You are putting water pets up against flyers who crit for 1200. Move on.

Khes

글 올리기 2021-01-09 17:38:39

people trying to get the family achieves... did you think it was going to be easy?

Markolious

글 올리기 2021-01-09 18:21:36

You don't have to do every single one for every single family type. There are two battles you don't have to do for each one, and knowing which ones you shouldn't do with a certain family type is a real time saver. Looking at the success of current presented strats, I would agree that it might be best to get your aquatic done with the other trainers

Verges 글 올리기 2021-01-09 11:19:31

Edit: Ended up changing my P/S Croaker to a B/B and finally got this to work. For the last pet any of the Nazjatar Coocoon pets cab be used as long as they are P/P. (edited)

Corgi

글 올리기 2021-01-08 09:17:15

H/P Croaker, S/S Strider (of course), and everything works on schedule except for my Slimy Eel, which is only B/B. It's not getting Star Tail down when it's supposed to, otherwise this probably would have worked just fine. I'm sure I have a P/P Slimy, I'll try again.

Corgi

글 올리기 2021-01-08 09:35:42

P/P Octopode obtained and hastily levelled - worked perfectly. Not cheaply, but by the numbers.

eyo3427 글 올리기 2021-01-07 22:27:57

yeah I call bullshit on EVERYONE who said -THIS- strat worked. I been at this for nearly 3 hours, towards the end I just gave in and moved on, hoping someone on youtube can actually PROVE this strat does in fact work, PROVING that they --successfully-- got it done. anyone can easily comment to say yea it worked just to get likes/stars when it truly does NOT work. At all. Blew all 400 bandages I had trying this strat giving the OP the benefit of the doubt , it just costed me a ton of my sanity and bandages due to the horrible team combo and the stuns (which i know its no one's fault) but i highly recommend folks to STOP giving this strat stars when it truly doesn't work.

annoyedtrainer 글 올리기 2021-01-07 15:57:59

this strat is 90% impossible to defeat. I have NO idea how those claiming it worked for them, or the author for that matter, but i'm by my 40th attempt, probably more, I know I've already gone through 40+bandages, NOT including revive battle pet ability, following step by step stated by the author and by the time i get to my strider he is nearly dead and faryl STILL has 3 of their pets up. By turn 9 you MUST get a crit... if not you WILL lose. this is HEAVY RNG I would suggest finding another method or you trying your own aquatic combination. This is very annoying by the 40th-something attempt. Don't wish this for anyone.

round 11 pet does NOT die. (edited)

CallLightnin

글 올리기 2021-01-03 15:58:00

All the "Slimy" aquatics have the same moves, so use whichever P/P one you have. I tried doing this with a P/S Strider, but you need the S/S to outspeed the second enemy when his racial kicks in. If your frog is above 529 HP after moth balls, there's a good chance you might win. If not, use a bandaid and restart. - in short, it might take a few tries, but you will eventually win. H/H frog, S/S strider, P/P slimy. Big thanks to OP.

Roh 글 올리기 2020-12-29 04:14:50

This worked first try, amazing

Concierge 글 올리기 2021-01-03 15:56:35

you are the Luckyone i think 20 try no fun

Max#2323

글 올리기 2021-01-02 06:20:05

impossible wth pp croaker

Makir 글 올리기 2021-01-01 12:11:15

Did this with a PS Croaker, SS Strider, PB Eel. This fight is extremely RNG dependent and it takes a lot of patience and grit to win, took me about 15 tries to get it done.

Larrypriest

글 올리기 2020-12-30 05:41:41

Had about 10 false starts give or take but worked fine after that. Used a HP croaker SS strider and a PP octopode. Thank you

Risk

글 올리기 2020-12-29 06:39:03

A really terrible strategy, doesn't get anywhere close.

Pankracy#2378

글 올리기 2020-12-26 06:43:54

The only strat which worked for me. Wasn't easy due to sooo RNG nature of battle, but managed to do it. Had H/H Croaker and P/P Eel. Thank you ;)))

Pretton

글 올리기 2020-12-24 22:18:46

This is a hard fight with aquatic. FYI: The achievement is not to beat all trainers, just 9 of the 11, so you can skip 2 trainers.

(OP) nogulpfrog

글 올리기 2020-12-25 10:44:06

:) hahaha. I'm a battler and addicted to work out the hardest fight, not only for achievement. I make this strategy because too many people appeared surprisingly pessimistic about this fight.

Блуди

글 올리기 2020-12-24 18:24:59

Tried this for a several days for a few hours each. None works... tired many teams.
By this guide on round 11 - moth will not die. Never. It will stay alive with 97hp. So you will need to get 100% crit there.
And at that time you are with one pet not full hp. Faryl will still have 2.5 pets.

Honestly, I do not know how this should work.

(OP) nogulpfrog

글 올리기 2020-12-24 19:49:09

your slimy Eel must be pp (with 363power), other breed is not available.

Блуди

글 올리기 2020-12-25 10:08:19

Thank you very much for the clarification. I bought a PP Eel and it worked!

(OP) nogulpfrog

글 올리기 2020-12-22 17:30:29

Only 4 stars.. sad. This strategy still RNG but it's not my bad, I have try my best to reduce RNG and i think this strategy is enough good.

(OP) nogulpfrog

글 올리기 2020-12-22 17:35:03

I only use hh inland croaker in this strategy , but I think other breed is still available if you are very luck. I don't want to force anyone give up they pet and catch another one.

Gráinne

글 올리기 2020-12-22 22:11:09

People rate strats by how well they work in an absolute sense, not how well they work considering the difficulty, or how well they work compared to other strats. The most difficult strats, that have inevitable high RNG rates, will never get the high ratings assigned to easier strats that work reliably. Sorry, that's just how it goes.

(OP) nogulpfrog

글 올리기 2020-12-23 08:02:34

yes. I shouldn't feel frustrated because others criticism for no reason.

Shiney79 글 올리기 2020-12-21 05:40:13

Not really a viable strategy. It can work, sure, but only if every action goes your way with no deviation. That means no crits, no higher damage rolls, no action denial mechanics can hit, there is absolutely zero room for error. Just on the first pet alone, I had to restart the fight 9 times in a row, thanks to being put to sleep, high damage rolls and crits. Might be easier to just miss this guy with aquatics.

acr 글 올리기 2020-12-20 12:52:55

did not work at all with an h/p inland croaker (tried 7 times), never got past the 1st ice lance

Squish

글 올리기 2020-12-20 02:49:15

Worked on the first try where I didn't get put to sleep. I used a P/B Slimy Eel and he crit on the first ooze touch, not sure if that was the only reason I won or not, but it worked, nonetheless.

Rexann 글 올리기 2020-12-18 09:35:33

Thank you! Took a few tries but did work.

heallie#1103

글 올리기 2020-12-17 17:42:43

this strat dont work at all bc u put the any tag when it has to be hh breed to survive the hits

Tanashta 글 올리기 2020-12-17 15:01:07

Sorry but a strat that relies 90% on RNG and request a rare pet from a rare mob is NOT a viable strat. 20 tries so far

Chaos#6450

글 올리기 2020-12-15 20:42:47

Tough fight but eventually successful. I used Berendain Script. Thanks.

Carlos 글 올리기 2020-12-12 18:08:09

absolutely pretty

Hansraj#1828

글 올리기 2020-12-12 14:33:04

When it finally works, it's beautiful!

Glyycerin

글 올리기 2020-12-12 07:02:51

RNG... but works after 4 fights :)
Thanks for this strat ! It was my last fight for "Family Exorcist" :)

Brocknor 글 올리기 2020-12-11 21:24:47

It took 5 tries, all of the fails were exactly as predicted in the strat, but on the final try I won with 51 health left. RNG sucks, but it's accounted for in the strat. (edited)

schmidty 글 올리기 2020-12-08 02:30:19

you need to be extremely lucky using a low hp inland croaker to get minimum damage from moth dust and have 4 misses on moth balls or take 1 hit

Petbattlebuddy

글 올리기 2020-12-07 13:17:54

You just need to make sure you have more than 529 by turn 3 (to survive Peck, and hopefully no crit). You basically want to hope for a low roll on Moth Dust (550~ damage rather than 750~ damage) and then only having 0-1 moth balls hitting you. Strategy worked pretty good after that, with the 35% chance to get killed by Cyclone being relatively negligible.

The whole soothe/ sewage eruption/ triple pet swap at the end is big brain stuff. Thanks for the strategy!

(OP) nogulpfrog

글 올리기 2020-12-07 17:33:11

my hh inland croaker have 1766hp and it can stand 2hit moth ball, if your inland croaker is other breed ,it will be more rng.

LyssaLittleBear

글 올리기 2020-12-07 14:55:23

This strat works but it definitely deserves the RNG tag. My successful run with it had the Moth Dust miraculously missing every single one of the five attempted strikes and the Peck not critting. My Slimy Eel had about 200 hit points left but it made it.

Vertige#21744

글 올리기 2020-12-07 07:12:25

I'm sleep EVERY TIME on first round ... I'll wait another strat

Petbattlebuddy

글 올리기 2020-12-07 13:15:29

I mean, that's just extremely bad luck and could happen no matter what team you bring in considering Moth Dust has a 25% chance to stun. That's not the RNG gate behind this strat, it's getting your croaker to survive the first Peck. (edited)

Serendipity#2418

글 올리기 2020-12-06 12:45:20

worked after around 20 attempts of getting the croaker to survive to turn 4, used a slimy Fangtooth in 3rd slot as it was my highest attack "slimy" pet at 337 attack

새로운 댓글:


Name:

링크: