
Strategia aggiunta da Shenk
14
14
|
Average rating: |
4.4 |
|
Ratings: |
22 |
|
Your vote: |
|
Creator |
||||||||||
|---|---|---|---|---|---|---|---|---|---|---|
|
Tags
Filter strategies:
|
|||||||||
| 1 | 

|

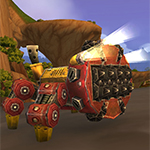
This strategy's goal is to use Richiamo del Fulmine in combination with the other pet's multi-hit abilities.
You can see the team in action here (played multiple times by the random opponent). |
2 | 4.4 |
14 |
9999999- | - | |||
| 2 | 
|
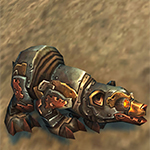
A decent Mechanical team to counter teams with Beasts, Elementals, Mechs and Dragons
|
2 | 4.5 |
1 |
9999999- | - | |||
| 3 | 
|
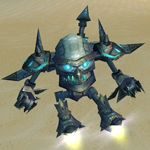
The team was created by the Youtuber Discodoggy, who kindly allowed me to add this to our collection.
If you want to see these pets in action watch his video. This one is themed around bleeding and stalling. |
2 | 3.5 |
1 |
9999999- | - | |||
| 4 | 

|
I went 5-0 during the Pet Battle Bonus Week using these 3 pets with these abilities. I hope it's just as effective for y'all!
|
2 | 3.3 |
2 |
9999999- | - | |||
| 5 | 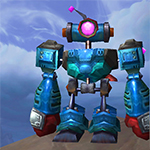

|
Tipo |
2 | 3.5 |
0 |
9999999- | - | |||
| 6 | 
|
The basic strategy is to put Costruzione Torretta down and apply Graffionero to any enemy pet that is active.
|
Tipo |
2 | 3.0 |
0 |
9999999- | - | ||
| 7 | 
|
2 | 0.0 |
0 |
9999999- | - |
Includi Passaggi:


This strategy's goal is to use Richiamo del Fulmine in combination with the other pet's multi-hit abilities.
You can see the team in action here (played multiple times by the random opponent).
 Costruzione Torretta active when it dies to get the most value out of
  Richiamo del Fulmine.
For the best display of your strategy, please follow these guidelines:


 Richiamo del Fulmine, but pay attention to weather effects of your enemy.
For the best display of your strategy, please follow these guidelines:
For the best display of your strategy, please follow these guidelines:
 Rinforzi Speciali whenever possible and keeping the dot from
  Pioggia d'Oro on the enemy.
 For the best display of your strategy, please follow these guidelines:


-1
Xozus
scritto il 2022-11-06 01:49:22
1
Arakyra
scritto il 2021-03-05 07:51:15
1
nightflight
scritto il 2020-10-17 16:19:24
2
(OP) Shenk
scritto il 2020-10-18 04:14:26
3
Daineiara#2565
scritto il 2020-01-25 08:52:54
2
Astyrel
scritto il 2019-10-18 18:00:55
I found it much more effective than the Toad/Scorpid/Frostboar strategy (https://wow-petguide.com/?Strategy=5481). It blasted through most teams I came across; I often didn't even need to use the 3rd pet.
1
OriginalNyla scritto il 2019-03-14 21:33:44
This strat basically relies on dots and speed, but I only had a B/B raptor so I would use Overtune when necessary to get the raptor fast enough to make Batter do more damage with exposed wounds to finish them off. Occasionally I'd heal the gnome, too. This was by no means foolproof, but it is one of the more successful PVP teams I've come up with. I see the value of putting up the dots first and then adding the buff as above, too.
1
(OP) Shenk
scritto il 2019-03-29 17:56:38
Nuovo Commento: