^
vs. Mecânico

Estratégia adicionada por Shenk

14

14

Strategy 1 of 7
Ver todas alternativas

Incl. passos:

Mecânico 0
Special or not:0Special or not:1221277486092770

Habilidades: 2 2 1
Raça (breed): Qualquer

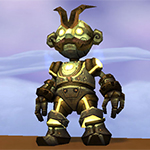
Gnomo Movido à Corda
Este mascote pode ter as seguintes raças:

Raça (breed) Vida Poder Velocidade
SB 1546 257 289


Special or not:0Special or not:1212116156991160

Habilidades: 2 1 2
Raça (breed): Qualquer

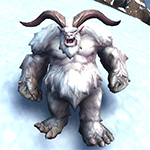
Yeti Mecânico Pacato
Este mascote pode ter as seguintes raças:

Raça (breed) Vida Poder Velocidade
HB 1546 273 273


Special or not:0Special or not:122113207301113200

Habilidades: 2 2 1
Raça (breed): Qualquer

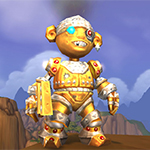
Blingzinho
Este mascote pode ter as seguintes raças:

Raça (breed) Vida Poder Velocidade
SS 1400 260 325


This strategy's goal is to use Chamar Raio in combination with the other pet's multi-hit abilities.

You can see the team in action here (played multiple times by the random opponent).

Pelo menos um dos mascotes para esta estratégia requer o uso de uma raça específica.
Nem todas as estratégias são à prova de bala. Esta é uma delas. Podes ter de recomeçar, já que é imprevisível o que aumenta o risco das mascotes falharem. Não as culpes, por favor!
Esta estratégia usa mascotes obtidas nas cartas de Wow (TCG) ou na Casa de Leilões por quantidades enormes de ouro.
Esta estratégia usa mascotes que só podem ser obtidas na Loja Online com saldo da Battle.net ou dinheiro.
Podes usar esta estratégia para subir uma mascote nível 1.
Algumas instruções são mais difíceis de seguir que outras. É isso que vais encontrar nesta estratégia!
A estratégia oferece um script que pode ser usado com o complemento Pet Battle Script. Você pode copiar o script clicando no botão à esquerda dos pets.
Uma das mascotes desta estratégia já não pode ser obtida. Se a tens, parabéns!
Um tutor de estratégia achou essa estratégia especialmente útil e a destacou com esta tag para dar a ela mais exposição.
In Dragonflight Patch 10.2, the ability Time Bomb has been changed. This tag is marking strategies using Time Bomb so they can be reviewed.
Strategy Details
2019-11-17 07:10:02
A estratégia foi atualizada por último nesta data.
2019-03-01 17:51:31
A estratégia foi criada nesta data.
41,433
Visualizações de página. Este número indica quantas vezes essa estratégia foi acessada pelos visitantes.
Clockwork G
Most of the time you'll want to start the fight with the Gnomo Movido à Corda. Try to have two Construir Torreta active when it dies to get the most value out of Chamar Raio.

Para melhor exibição da sua estratégia, por favor siga estas orientações:

  • Use QuickFill elements where possible
  • Enter custom instructions in English
  • Check the Strategy Creation Guide for more info
Gnomo Movido à Corda
Canhão Elétrico
Ataque Relâmpago
Construir Torreta
Yeti Mecânico Pacato
Surra
Chamar Raio
Canhão Iônico
Blingzinho
Inflação
Blindagem Extra
Chuva Dourada
Pass
Bring in your Gnomo Movido à Corda
Bring in your Yeti Mecânico Pacato
Bring in your Blingzinho
Swap to your Gnomo Movido à Corda
Swap to your Yeti Mecânico Pacato
Swap to your Blingzinho
An enemy pet comes in
Any standard attack will finish the fight
 
Gnomo Movido à Corda
Yeti Mecânico Pacato
Blingzinho
Canhão Elétrico
Ataque Relâmpago
Construir Torreta
Surra
Chamar Raio
Canhão Iônico
Inflação
Blindagem Extra
Chuva Dourada
Important: Please enter your instructions in English or a large parts of the community will not be able to read them.
Some typical sentences are translated automatically. Move your mouse over this part for more details.
The following strings are auto-translated if you enter them in the defined format. It is recommended to use them where possible:
[ability=123:Spellname] - [pet=123:Petname] dies
[ability=123:Name] - [enemy=123:Enemyname] dies
[ability=123:Name] until [pet=123:Petname] dies
[ability=123:Name] until [enemy=123:Enemyname] dies
Swap back to [pet=123:Petname]
[ability=123:Name] until the fight is won
TM Yeti
Aim to always use the Yeti after the Gnomo Movido à Corda died and left turrets. Make sure to use Chamar Raio, but pay attention to weather effects of your enemy.

Para melhor exibição da sua estratégia, por favor siga estas orientações:

  • Use QuickFill elements where possible
  • Enter custom instructions in English
  • Check the Strategy Creation Guide for more info
Gnomo Movido à Corda
Canhão Elétrico
Ataque Relâmpago
Construir Torreta
Yeti Mecânico Pacato
Surra
Chamar Raio
Canhão Iônico
Blingzinho
Inflação
Blindagem Extra
Chuva Dourada
Pass
Bring in your Gnomo Movido à Corda
Bring in your Yeti Mecânico Pacato
Bring in your Blingzinho
Swap to your Gnomo Movido à Corda
Swap to your Yeti Mecânico Pacato
Swap to your Blingzinho
An enemy pet comes in
Any standard attack will finish the fight
 
Gnomo Movido à Corda
Yeti Mecânico Pacato
Blingzinho
Canhão Elétrico
Ataque Relâmpago
Construir Torreta
Surra
Chamar Raio
Canhão Iônico
Inflação
Blindagem Extra
Chuva Dourada
Important: Please enter your instructions in English or a large parts of the community will not be able to read them.
Some typical sentences are translated automatically. Move your mouse over this part for more details.
The following strings are auto-translated if you enter them in the defined format. It is recommended to use them where possible:
[ability=123:Spellname] - [pet=123:Petname] dies
[ability=123:Name] - [enemy=123:Enemyname] dies
[ability=123:Name] until [pet=123:Petname] dies
[ability=123:Name] until [enemy=123:Enemyname] dies
Swap back to [pet=123:Petname]
[ability=123:Name] until the fight is won
Also try to maintain the lightning storm so your Lil' Bling can benefit from it after the Yeti dies.

Para melhor exibição da sua estratégia, por favor siga estas orientações:

  • Use QuickFill elements where possible
  • Enter custom instructions in English
  • Check the Strategy Creation Guide for more info
Gnomo Movido à Corda
Canhão Elétrico
Ataque Relâmpago
Construir Torreta
Yeti Mecânico Pacato
Surra
Chamar Raio
Canhão Iônico
Blingzinho
Inflação
Blindagem Extra
Chuva Dourada
Pass
Bring in your Gnomo Movido à Corda
Bring in your Yeti Mecânico Pacato
Bring in your Blingzinho
Swap to your Gnomo Movido à Corda
Swap to your Yeti Mecânico Pacato
Swap to your Blingzinho
An enemy pet comes in
Any standard attack will finish the fight
 
Gnomo Movido à Corda
Yeti Mecânico Pacato
Blingzinho
Canhão Elétrico
Ataque Relâmpago
Construir Torreta
Surra
Chamar Raio
Canhão Iônico
Inflação
Blindagem Extra
Chuva Dourada
Important: Please enter your instructions in English or a large parts of the community will not be able to read them.
Some typical sentences are translated automatically. Move your mouse over this part for more details.
The following strings are auto-translated if you enter them in the defined format. It is recommended to use them where possible:
[ability=123:Spellname] - [pet=123:Petname] dies
[ability=123:Name] - [enemy=123:Enemyname] dies
[ability=123:Name] until [pet=123:Petname] dies
[ability=123:Name] until [enemy=123:Enemyname] dies
Swap back to [pet=123:Petname]
[ability=123:Name] until the fight is won
Lil' Bling
Prioritize on using Blindagem Extra whenever possible and keeping the dot from Chuva Dourada on the enemy.

Para melhor exibição da sua estratégia, por favor siga estas orientações:

  • Use QuickFill elements where possible
  • Enter custom instructions in English
  • Check the Strategy Creation Guide for more info
Gnomo Movido à Corda
Canhão Elétrico
Ataque Relâmpago
Construir Torreta
Yeti Mecânico Pacato
Surra
Chamar Raio
Canhão Iônico
Blingzinho
Inflação
Blindagem Extra
Chuva Dourada
Pass
Bring in your Gnomo Movido à Corda
Bring in your Yeti Mecânico Pacato
Bring in your Blingzinho
Swap to your Gnomo Movido à Corda
Swap to your Yeti Mecânico Pacato
Swap to your Blingzinho
An enemy pet comes in
Any standard attack will finish the fight
 
Gnomo Movido à Corda
Yeti Mecânico Pacato
Blingzinho
Canhão Elétrico
Ataque Relâmpago
Construir Torreta
Surra
Chamar Raio
Canhão Iônico
Inflação
Blindagem Extra
Chuva Dourada
Important: Please enter your instructions in English or a large parts of the community will not be able to read them.
Some typical sentences are translated automatically. Move your mouse over this part for more details.
The following strings are auto-translated if you enter them in the defined format. It is recommended to use them where possible:
[ability=123:Spellname] - [pet=123:Petname] dies
[ability=123:Name] - [enemy=123:Enemyname] dies
[ability=123:Name] until [pet=123:Petname] dies
[ability=123:Name] until [enemy=123:Enemyname] dies
Swap back to [pet=123:Petname]
[ability=123:Name] until the fight is won


Xozus

escreveu em 2022-11-06 01:49:22

10.0 I just can't make this team work any more

Arakyra

escreveu em 2021-03-05 07:51:15

This one defenitly worked out best for me personally. Thx for posting!

nightflight

escreveu em 2020-10-17 16:19:24

the link to pet in action doesnt lead to this combo

(OP) Shenk

escreveu em 2020-10-18 04:14:26

just read all of it... i said it's being played by the opponent

Daineiara#2565

escreveu em 2020-01-25 08:52:54

A very nice line up! I found it to be weak against those pesky undead teams where every enemy does full team shared damage and takes forever to kill, but other than that particular strategy this has a very nice winrate.

Astyrel

escreveu em 2019-10-18 18:00:55

This is an awesome strategy!
I found it much more effective than the Toad/Scorpid/Frostboar strategy (https://wow-petguide.com/?Strategy=5481). It blasted through most teams I came across; I often didn't even need to use the 3rd pet.

OriginalNyla escreveu em 2019-03-14 21:33:44

This is the first one of the Family Battler I finished. I used what I call my Mechanical Dots team, somewhat like the main one here. I used Cogblade Raptor (211), Lil' Bling (211), and Clockwork Gnome (111). Generally I used exposed wounds first then swapped to the gnome to put up a turret. Then I'd swap to Bling to throw up Make It Rain and Inflation. Depending on how well that was going I'd either restart the rotation or try a Blingtron Gift Package to get a heal on Bling, or I'd swap to the gnome to get a second turret up before restarting the debuff rotation.

This strat basically relies on dots and speed, but I only had a B/B raptor so I would use Overtune when necessary to get the raptor fast enough to make Batter do more damage with exposed wounds to finish them off. Occasionally I'd heal the gnome, too. This was by no means foolproof, but it is one of the more successful PVP teams I've come up with. I see the value of putting up the dots first and then adding the buff as above, too.

(OP) Shenk

escreveu em 2019-03-29 17:56:38

the risk with the cogblade raptor first is that you could just swap the wounded pet out^^

Novo Comentário:


Nome:

Ligação: