
Strategia aggiunta da Berendain
98
98
|
Average rating: |
4.8 |
|
Ratings: |
102 |
|
Your vote: |
|
Creator |
|||||||||
|---|---|---|---|---|---|---|---|---|---|
|
Tags
Filter strategies:
|
|||||||||

Qualsiasi Livello 1+ Mascotte
|

Update: TD Script updated on 20th May, 2021. Make sure you have the updated script.
You should never need to use pet bandages when leveling using this team. You may occasionally want to heal your pets, but the revive pets ability, available every 8 minutes, will be more than enough. Using this strategy, you will normally win between 1:15 and 1:25. You may win in as short a time as 1:12. On the other hand, if you get unlucky and miss Stumpers' Bel Musino several times in a row, the fight may take much longer. The longest the fight has taken me was 1:55, after I missed Stumpers four times. The TD script works if you're using an Anguilla Abissale, which has Pioggia Acida instead of Pioggia Purificatrice. The fight will take the same amount of time, but without healing your team each fight you may need to use a pet bandage occasionally. |
Livello 1+ Script Scelta dallo Staff |
2 | 4.8 |
N/A | 98 |
85
1:25
|
13-19 | |

Qualsiasi Livello 1+ Mascotte
|

Time: 1:20-1:30
Microbot Malfunzionante breed recommendation: BB > HB > SB |
RNG Livello 1+ Script Scelta dallo Staff |
2 | 4.8 |
N/A | 46 |
82
1:22
|
10-12 | |

Qualsiasi Livello 7+ Mascotte
|

TMD can* work but please see alt steps.
TMD = Minidrago Meccanico Senza Tempo |
Livello 7+ Script |
2 | 4.4 |
N/A | 16 |
90
1:30
|
10 | |

Qualsiasi Livello 1+ Mascotte
|

Fight Time: 1:20 - 1:30 on 13 rounds
1:18 - 1:25 using the TD Script as measured by the Pet Battle Log Keeper add-on. This strategy is built for speed. It is also consistent (though not infallible) and safe for all level 1+ pets (except Dragonkin pets will need 200+ HP to survive a critical hit from Dreadful Breath). PS breed Iron Starlette is required (the one with 273 speed). |
Tipo Livello 1+ Script Scelta dallo Staff |
2 | 5.0 |
N/A | 6 |
78
1:18
|
13 | |

Qualsiasi Livello 10+ Mascotte
|

I used this combo tonight. I level up 35 pets in 3/4 hours.
I prefer not to use pet under level 10 because of the first pet who have an AOE ... |
RNG Livello 10+ Script |
2 | 4.0 |
N/A | 22 |
135
2:15
|
16+ | |

Qualsiasi Livello 1+ Mascotte
|

Make sure you are using a P/S Pirostellina di Ferro. Your 2nd pet can be anything with Idropompa as long as it is faster than 260 and has at least 292 power.
Also won't take responsibilities for slippery hands. (:smudge: @Gráinne) I took some advice from the comments and changed the strategy accordingly. It now works 100% reliably and takes 1:25 min. |
Tipo Livello 1+ Script Scelta dallo Staff |
2 | 4.7 |
N/A | 9 |
81
1:21
|
13 | |

Qualsiasi Livello 1+ Mascotte
|

I designed this strategy specifically to allow level 1 and low HP carry pets to survive this encounter. Foof will not get his AOE off during this fight, so you are able to carry any level/hp pet that you want.
DragonsAfterDark: I went through the fight, and these were the steps the tdScript gave me. |
Livello 1+ Script |
2 | 4.0 |
N/A | 10 |
150
2:30
|
20+ | |

Qualsiasi Livello 10+ Mascotte
|

Level pet must have over 600 hp to survive three rounds of Dreadful Breath in the back line plus one round of Puppies of the Flame. Critter and beasts pets can have a bit less, mechanical and dragonkin ones need a bit more. For the second boosting pet any pet with Pump will do, as long as the speed is over 260.
|
TGC Livello 10+ Script |
2 | 4.4 |
N/A | 6 |
65
1:05
|
9+ | |

Qualsiasi Livello 1+ Mascotte
|

Allows to use any pet for leveling. P/S breed on the Pirostellina di Ferro is the only one that will make this possible. If you run one of the other breeds expect the level pet to take 176 damage (266 as a dragon).
Big thanks to Nyari for helping me out with this strategy :) Also please check if you have the newest script before complaining about your old one not working. Both the strategy as well as the script are made specifically for the P/S breed. |
Tipo Livello 1+ Script |
2 | 3.7 |
N/A | 4 |
105
1:45
|
16-17 | |

Qualsiasi Livello 2+ Mascotte
|

220 dmge is human, allows 1 crit
|
Tipo Livello 2+ Script |
2 | 5.0 |
N/A | 2 |
85
1:25
|
13 | |

Qualsiasi Livello 4+ Mascotte
|

Your level pet will take a base of 286 normal damage.
Dragonkin level pets will take strong damage & Beast pets will take weak damage. This does not include crits, or if Foof gets his beast buff a round earlier. |
Tipo Livello 4+ Script |
2 | 5.0 |
N/A | 4 |
83
1:23
|
11-13 | |

Qualsiasi Livello 9+ Mascotte
|

Damage is human and allows a crit
|
Livello 9+ Script |
2 | 5.0 |
N/A | 3 |
89
1:29
|
11 | |

Qualsiasi Livello 4+ Mascotte
|

Strategy created by Lyseria and tweaked by me. It only works with a P/S breed Starlette,
|
Tipo Livello 4+ Difficile Script |
2 | 5.0 |
N/A | 0 |
115
1:55
|
17 | |

Qualsiasi Livello 3+ Mascotte
|

In 99% of the fights this strategy works 100% :)
|
Tipo Livello 3+ |
2 | 0.0 |
N/A | 1 |
131
2:11
|
20+ | |

Qualsiasi Livello 7+ Mascotte
|

354 is non crit human damage.
Thanks to DAD for suggestions :) |
Livello 7+ Script |
2 | 5.0 |
N/A | 1 |
91
1:31
|
12 | |

Qualsiasi Livello 1+ Mascotte
|

Dont bring Dragonkin type as leveling pet Alito Pestilenziale might kill them. And drake needs to be faster than 260 or fight might take ages. Build for fast xp.
|
Tipo Livello 1+ Script |
2 | 0.0 |
N/A | 2 |
195
3:15
|
28+ | |

Qualsiasi Livello 1+ Mascotte
|

By Aerolite2017
|
Tipo Livello 1+ Script |
2 | 5.0 |
N/A | 0 |
86
1:26
|
10+ | |

Qualsiasi Livello 7+ Mascotte
|

Untested
|
Livello 7+ Script Non più ottenibile |
2 | 5.0 |
N/A | 1 |
68
1:08
|
9-10 | |

Qualsiasi Livello 1+ Mascotte
|

Based of Shoff#1714, instead of Ashstone Core, I used Puddle Terror for a much quicker fight.
|
RNG Livello 1+ Script |
2 | 4.3 |
N/A | 4 |
120
2:00
|
15+ | |

Qualsiasi Livello 1+ Mascotte
|

Level pet will take a single Alito Pestilenziale which any level 1 should survive.
The strat is 12-14 turns long (depends on your Level pet's HP) and takes around 1:20-1:30. This comes with the usual disclaimer for this fight that while the success rate is high, it is possible to fail due to bad RNG on the number of Sferzata di Lingua hits/crits or dodges (alleviated by the use of a multi-hitter in Allarme! and slightly more durable pets). |
RNG Livello 1+ Script |
2 | 4.3 |
N/A | 2 |
95
1:35
|
13+ | |

Qualsiasi Livello 1+ Mascotte
|

Level pet should only take 1 hit of Alito Pestilenziale.
Expected damage taken: 88 damage (normal hit, not dragonkin or beast) 132 damage (critical hit, not dragonkin or beast) 132 damage (normal hit, dragonkin) 198 damage (critical hit, dragonkin) 58 damage (normal hit, beast) 87 damage (critical hit, beast) Credit to Nyari for encouraging me to re-work my other strategy where I was hitting Foof too hard. There are still small chances for this to fail due to Stumpers' RNG (too many dodges or too many tongue lash hits), but I tried to minimize it as much as possible. |
Tipo Livello 1+ Script |
2 | 4.3 |
N/A | 3 |
110
1:50
|
16+ | |

Qualsiasi Livello 1+ Mascotte
|

People of accomplishment rarely sat back and let things happen to them. They went out and happened to things.
Repeatable Pet Leveling battles can be found Here. |
Tipo Livello 1+ Script |
2 | 4.4 |
N/A | 1 |
100
1:40
|
12+ | |

Qualsiasi Livello 1+ Mascotte
|
Livello 1+ |
2 | 4.0 |
N/A | 2 |
153
2:33
|
22+ | ||

Qualsiasi Livello 1+ Mascotte
|
RNG Livello 1+ Script |
2 | 4.0 |
N/A | 2 |
180
3:00
|
14+ | ||

Qualsiasi Livello 2+ Mascotte
|

17 rounds.
|
Tipo Livello 2+ Script |
2 | 4.0 |
N/A | 0 |
140
2:20
|
17 | |

Qualsiasi Livello 1+ Mascotte
|

This should work with every +1 Level Pet.
|
RNG Livello 1+ Script |
2 | 2.7 |
N/A | 3 |
135
2:15
|
17 | |

Qualsiasi Livello 1+ Mascotte
|

A fast and reliable strategy permitting the use of a level 1 carry pet.
This is derived from the strategies provided by Shenk and Threewolves11663. I took my favorite parts of each and added some refinements. The result seems to be as fast and more reliable than the 2 original strategies. I've tested it in 30+ pet battles with no losses - even when the enemy pets got multiple crits. |
Tipo Livello 1+ Script |
2 | 3.5 |
N/A | 1 |
132
2:12
|
18 | |

Qualsiasi Livello 1+ Mascotte
|

Based off Mutanis Strategy
Trying to farm Malfunctioning Bot is somewhat frustrating. Darkmoon Zeppelin and Thunderscale Whelpling are both buyable at the AH. |
RNG Livello 1+ Script |
2 | 3.5 |
N/A | 0 |
84
1:24
|
10+ | |

Qualsiasi Livello 1+ Mascotte
|
RNG Livello 1+ Script |
2 | 3.0 |
N/A | 0 |
127
2:07
|
17+ | ||

Qualsiasi Livello 6+ Mascotte
|
|

DragonsAfterDark: Updated from the Darkmoon Tonk / Teroclaw Hatchling strategy. Same concept, just different pets that mitigate most of the RNG.
Ratings have been reset, and tdScript has been added. |
Livello 6+ Script |
2 | 0.0 |
N/A | 0 |
118
1:58
|
17+ |

Qualsiasi Livello 3+ Mascotte
|
Livello 3+ |
2 | 0.0 |
N/A | 0 |
123
2:03
|
17 | ||

Qualsiasi Livello 2+ Mascotte
|

I have a P/P and P/S Starlette which worked for this strategy. I'm not sure how the other breeds will work...
|
RNG Livello 2+ |
2 | 0.0 |
N/A | 0 |
142
2:22
|
19 | |

Qualsiasi Livello 1+ Mascotte
|

I wanted to see if I could come up with an almost no heal strategy like Berendain's here, and though I wasn't able to come up with one as fast, this is another option.
There were ways to make it shorter, but this is the most stable variation given the variance in power in the two breeds and potential crits (yours). Video for Fight |
Tipo Livello 1+ Difficile Script |
2 | 0.0 |
N/A | 0 |
167
2:47
|
26+ | |

Qualsiasi Livello 1+ Mascotte
|

This strategy takes 15-17 rounds and you can do it twice without healing (with some luck) and it's completely safe for level 1 pets :).
|
Tipo RNG Livello 1+ |
2 | 1.5 |
N/A | 0 |
117
1:57
|
15-17 |
Includi Passaggi:


Qualsiasi Livello 1+ Mascotte


Substitutes:
1 / 4
Update: TD Script updated on 20th May, 2021. Make sure you have the updated script.
You should never need to use pet bandages when leveling using this team. You may occasionally want to heal your pets, but the revive pets ability, available every 8 minutes, will be more than enough.
Using this strategy, you will normally win between 1:15 and 1:25. You may win in as short a time as 1:12. On the other hand, if you get unlucky and miss Stumpers' Bel Musino several times in a row, the fight may take much longer. The longest the fight has taken me was 1:55, after I missed Stumpers four times.
The TD script works if you're using an Anguilla Abissale, which has Pioggia Acida instead of Pioggia Purificatrice. The fight will take the same amount of time, but without healing your team each fight you may need to use a pet bandage occasionally.
| Prima | Dopo | Esperienza Guadagnata | |
|---|---|---|---|
| 1 | ➜ | 13 | 5981 |
| 2 | ➜ | 13 | 6353 |
| 3 | ➜ | 14 | 6683 |
| 4 | ➜ | 14 | 6971 |
| 5 | ➜ | 14 | 7219 |
| 6 | ➜ | 15 | 7425 |
| 7 | ➜ | 15 | 7590 |
| 8 | ➜ | 16 | 7714 |
| 9 | ➜ | 16 | 7796 |
| 10 | ➜ | 17 | 7838 |
| 11 | ➜ | 17 | 7838 |
| 12 | ➜ | 18 | 7796 |
| 13 | ➜ | 19 | 7714 |
| 14 | ➜ | 19 | 7590 |
| 15 | ➜ | 20 | 7425 |
| 16 | ➜ | 20 | 7219 |
| 17 | ➜ | 21 | 6971 |
| 18 | ➜ | 22 | 6683 |
| 19 | ➜ | 22 | 6353 |
| 20 | ➜ | 23 | 5981 |
| 21 | ➜ | 23 | 5569 |
| 22 | ➜ | 24 | 5115 |
| 23 | ➜ | 25 | 3900 |
| 24 | ➜ | 25 | 1980 |
|
Cappello da Safari |
|
|
Integratore Inferiore |
|
|
Integratore |
|
|
Cilindro di Lunacupa |
|
|
Evento bonus: scontri tra mascotte |
|
= |
Le mascotte livellano fino al 25 con minima XP persa |
|
|
= |
XP aggiuntiva oltre il livello 25 è persa. |
|
For the best display of your strategy, please follow these guidelines:





For the best display of your strategy, please follow these guidelines:


For the best display of your strategy, please follow these guidelines:


For the best display of your strategy, please follow these guidelines:


For the best display of your strategy, please follow these guidelines:


For the best display of your strategy, please follow these guidelines:


For the best display of your strategy, please follow these guidelines:


For the best display of your strategy, please follow these guidelines:


For the best display of your strategy, please follow these guidelines:


For the best display of your strategy, please follow these guidelines:


For the best display of your strategy, please follow these guidelines:


For the best display of your strategy, please follow these guidelines:


For the best display of your strategy, please follow these guidelines:


For the best display of your strategy, please follow these guidelines:


For the best display of your strategy, please follow these guidelines:


For the best display of your strategy, please follow these guidelines:


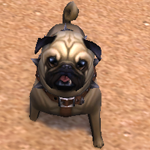
Ma quanto sono belli i Corgi?
1
dbmamaz
scritto il 2025-03-07 01:41:43
1
Teraferma#1829
scritto il 2025-03-03 23:39:43
1
Shaz
scritto il 2025-01-18 02:03:47
2
Clerica#2203
scritto il 2024-01-30 22:00:34
I did experience a few times (bad rng)² out of dozens of battles: when Stumpers keeps dodging until Ultralatrato is off cd Ranishu Piccolo gets a hit. It doesn't mess up the script until you get it twice in a row. Ranishu Piccolo is then too low in hp to win the next battle without bandaging.
I managed to fix this by switching back the lvl pet in when superbark comes off cd. I also found that with this modification, focus is no longer necessary after Foof is dead. Usually Stumpers is already dead before superbark is up again and in one less round. If nevertheless Stumpers manages one or even more extra superbarks, with this modif you can continue without ever bandaging (just using revive when off cd).
So, the version of the script I'm now using:
change(#1) [self(#2).active]
change(#2) [enemy.aura(Cute Face:904).exists & !self(#2).played]
change(#2) [enemy(#2).active & enemy.aura(Cute Face:904).duration > 1 & enemy.ability(Superbark:1357).duration < 2]
change(#3) [enemy(#3).active]
use(Cleansing Rain:230) [self.aura(Pumped Up:296).exists]
use(Acid Rain:1051) [self.aura(Pumped Up:296).exists]
use(Pump:297)
use(Focus:426) [self.aura(Focused:425).duration<2 & enemy(#1).active]
use(Sandstorm:453)
use(Zap:116) (edited)
0
Roads scritto il 2025-01-17 22:41:58
1
fuba82
scritto il 2024-07-28 15:57:05
3
Mutanis
scritto il 2024-04-12 13:10:13
2
Fem
scritto il 2024-03-11 20:26:45
Just awesome … thank you for making my pet levelling experience simple.
1
Taya#2167
scritto il 2023-06-13 17:46:14
1
Entelligente
scritto il 2023-04-20 16:01:25
10
Mot
scritto il 2021-04-03 16:29:15
2
Milundaria
scritto il 2021-04-30 12:47:56
2
Dpartd
scritto il 2022-01-29 19:37:08
2
Milundaria
scritto il 2023-03-31 02:59:08
3
Fem
scritto il 2023-01-11 10:52:55
1
Adunakhyr scritto il 2022-08-27 16:55:59
1
Mysshe
scritto il 2022-01-18 16:38:52
2
Maple
scritto il 2021-07-14 14:15:53
change(#1) [ self(#2).active & !self(#3).played ]
change(#2) [ enemy(#2).active & enemy.round=1 & !self(#2).played ]
change(#3) [ enemy(#3).active ]
use(Cleansing Rain:230) [ self.aura(Pumped Up:296).exists ]
use(Water Jet:118) [ enemy.aura(Puppies of the Flame:1355).exists & self.aura(Pumped Up:296).exists ]
use(Pump:297)
use(Focus:426) [ self.aura(Focused:425).duration<2 ]
use(Sandstorm:453)
use(Zap:116)
Ending the battle with full or near full health on all pets. I'm using a Rare Ranishu Runt and P/S Rare Voidskimmer. There's still always some RNG with this fight because of the dodges but I've let to lose with this script, just really low health sometimes. (edited)
0
Adaren
scritto il 2021-09-28 07:23:37
4
DarkKuno#1481
scritto il 2021-09-18 12:40:59
Mad props for this one <3
4
Arkyle
scritto il 2021-09-04 02:03:13
(edited)
3
Seb
scritto il 2021-08-24 17:43:32
2
enchanterpeng
scritto il 2021-08-11 19:37:37
5
Vordie#2246
scritto il 2021-07-03 00:08:20
change(#1) [self(#2).active]
change(#2) [enemy.aura(Cute Face:904).exists & !self(#2).played]
change(#3) [enemy(#3).active]
use(Water Jet:118) [enemy.round=2]
use(Cleansing Rain:230) [self.aura(Pumped Up:296).exists]
use(Acid Rain:1051) [self.aura(Pumped Up:296).exists]
use(Pump:297)
use(Focus:426) [self.aura(Focused:425).duration<2]
use(Sandstorm:453)
use(Zap:116)
Voidskimmer will cast a waterjet on round one and then continue on with it's original rotation as intended.
Remember to switch back to the original script once the bug is fixed. (edited)
2
Tobolaeh
scritto il 2021-07-12 12:44:51
0
Gratax scritto il 2021-07-12 11:21:19
But happend 1/50 times.
2
Sporkie
scritto il 2021-07-12 07:52:50
7
SammyJoe
scritto il 2021-07-04 19:18:30
change(#1) [self(#2).active]
change(#2) [enemy.aura(Cute Face:904).exists & !self(#2).played]
change(#3) [enemy(#3).active]
use(Cleansing Rain:230) [self.aura(Pumped Up:296).exists]
use(Water Jet:118) [enemy.aura(Puppies of the Flame:1355).exists & self.aura(Pumped Up:296).exists]
use(Pump:297)
use(Focus:426) [self.aura(Focused:425).duration<2]
use(Sandstorm:453)
use(Zap:116)
1
SammyJoe
scritto il 2021-07-04 19:19:14
1
Sleepywillo
scritto il 2021-07-02 23:48:15
Something odd is happening when I get to enemy pet #3 - Lil'Sizzle. It cycles through all of my pets (including the leveling pet again) until my pet #3 dies (voidskimer) and then nothing happens. Its odd because the match would have ended about 5 turns earlier had it just hit the enemy pet?
1
Gráinne
scritto il 2021-07-03 02:59:21
1
CabbageGirl scritto il 2021-07-02 06:10:10
1
HolyCarota#1913
scritto il 2021-07-02 13:09:43
1
Midory#11171
scritto il 2021-07-02 13:11:19
2
Adaren
scritto il 2021-07-02 14:27:00
The same thing is happens sometimes when absorbing superbark by your level pet (edited)
0
osomeloso
scritto il 2021-06-06 05:38:19
https://www.wowhead.com/item=84105/fishy
2
Gráinne
scritto il 2021-06-06 07:32:26
1
osomeloso
scritto il 2021-06-07 13:32:22
2
(OP) Berendain
scritto il 2021-06-08 06:10:25
1
Gráinne
scritto il 2021-06-08 11:02:34
4
Nyari
scritto il 2020-11-22 02:48:30
Fast and you don't need bandages. Super.
2
Nytro
scritto il 2020-11-22 11:28:25
2
(OP) Berendain
scritto il 2020-11-22 21:51:11
2
Nytro
scritto il 2020-11-23 04:51:07
1
Adaren
scritto il 2021-05-04 22:14:07
Adjusting the script to the below truly prioritizes focus. There was a line that caused Sandstorm to be cast first no matter what.
change(#1) [self(#2).active]
change(#2) [enemy.aura(Cute Face:904).exists & !self(#2).played]
change(#3) [enemy(#3).active]
use(Cleansing Rain:230) [self.aura(Pumped Up:296).exists]
use(Acid Rain:1051) [self.aura(Pumped Up:296).exists]
use(Pump:297)
use(Focus:426) [self.aura(Focused:425).duration<2]
use(Sandstorm:453)
use(Zap:116) (edited)
1
(OP) Berendain
scritto il 2021-05-05 01:39:46
1
Adaren
scritto il 2021-05-19 14:50:50
1
(OP) Berendain
scritto il 2021-05-20 02:54:46
1
gengen001
scritto il 2021-05-19 12:29:52
change(#2) [enemy(#2).active&enemy.round~1]
Next, the full version of the modified script:
change(#1) [self(#2).active]
change(#2) [enemy(#2).active&enemy.round~1]
change(#3) [enemy(#3).active]
use(230) [self.aura(296).exists]
use(1051) [self.aura(296).exists]
use(297)
use(453) [enemy(#2).active]
use(426) [self.aura(425).duration<2]
use(453)
use(116)
0
ZadTheGlad
scritto il 2021-02-26 08:57:46
1st slot: Iron Starlette P/S w/ 1-1-1, 2nd slot: level pet any level, 3rd slot: Squirky w/ 2-1-2.
For Foof: Wind-up, Supercharge, Wind-up - Foof dies.
For Stumpers: Powerball, Wind-up, and then Powerball or pass until Stumpers has one Cute Face left, then Supercharge followed by Wind-up - Stumpers dies.
For Lil' Sizzle: Powerball, then pass until Iron Starlette is wiped out by the puppies. Bring in Squirky, and if any of the puppies are left, Bubble to start, followed by a Fish Slap. Lil' Sizzle will swap in your level pet after this. Swap back to Squirky, & hit first with Clobber to stun him, which gives you the opportunity to hit Lil' Sizzle twice with Fish Slap to finish him off.
All credit goes to the original creator of this strategy, with huge thanks from me! (edited)
0
Jenyfear scritto il 2021-04-30 15:08:36
2
Tifa
scritto il 2021-04-03 14:42:01
2
brinylon
scritto il 2021-04-03 06:07:56
5
Threewolves
scritto il 2021-03-23 13:03:11
use(Pump:297) [self(#3).active & enemy(#3).active & weather(Cleansing Rain:229) & !self(#2).played]
to the top of the script.
Well done. (edited)
2
Autofrag#2606
scritto il 2021-01-02 16:54:36
2
Gráinne
scritto il 2021-01-02 11:49:01
2
Maizou
scritto il 2020-12-24 22:56:58
1
(OP) Berendain
scritto il 2020-12-25 01:29:19
4
Softspoken
scritto il 2020-12-24 17:04:11
3
Maritan
scritto il 2020-12-24 14:34:14
3
Busy
scritto il 2020-12-13 10:34:02
1
gengen001
scritto il 2021-05-19 12:40:45
change(#1) [self(#2).active]
change(#2) [enemy(#2).active&enemy.round~1]
change(#3) [enemy(#3).active]
use(230) [self.aura(296).exists]
use(1051) [self.aura(296).exists]
use(297)
use(453) [enemy(#2).active]
use(426) [self.aura(425).duration<2]
use(453)
use(116)
1
Konctantin
scritto il 2021-07-12 06:24:08
1
gengen001
scritto il 2021-08-26 14:05:10
1
Yavih#1298
scritto il 2023-09-01 20:37:29
Nuovo Commento: