
Strategia aggiunta da DragonsAfterDark
157
157
|
Average rating: |
5 |
|
Ratings: |
84 |
|
Your vote: |
|
Creator |
||||||||||
|---|---|---|---|---|---|---|---|---|---|---|
|
Tags
Filter strategies:
|
|||||||||
| 1 | 

Qualsiasi Mascotte
|

Time: ~1 min (7 rounds)
|
Script |
2 | 5.0 |
33 |
60
1:00
|
7 | ||
| 2 | 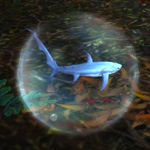
Qualsiasi Livello 25+ Mascotte
Qualsiasi Livello 25+ Mascotte
|
If the backline pets don't die before the active pet, you will face all the enemy pets.
|
Script |
2 | 5.0 |
157 |
130
2:10
|
12+ | ||
| 3 | 
Qualsiasi Mascotte
Qualsiasi Mascotte
|
Script thanks to robbyno89
|
Script |
2 | 5.0 |
8 |
390
6:30
|
60+ | ||
| 4 | 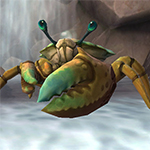
Qualsiasi Mascotte
Qualsiasi Mascotte
|
Long, boring fight. Just hit Auto while watching youtube and on to the next fight!
This is my first attempt at a TD script, let me know if it needs any fixes updated the TD script to the one zolle wrote in the comments so hopefully it'll work for all recommended pets now |
Script |
2 | 5.0 |
6 |
150
2:30
|
15-17 | ||
| 5 | 

Qualsiasi Mascotte
|
I'm inspired by Shenk's Strategy.
8 rounds. |
Script |
2 | 5.0 |
9 |
60
1:00
|
7-8 | ||
| 6 | 
Qualsiasi Mascotte
Qualsiasi Mascotte
|
Feline Familiar soloed all of them. Other pets can be used as backup.
|
Script |
2 | 3.7 |
23 |
75
1:15
|
9-10 | ||
| 7 | 
Qualsiasi Mascotte
Qualsiasi Mascotte
|
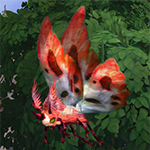
Damage values of Zannacremisi (P/P) against critters:
676 without any buffs/debuffs 846 with one 25% damage buff/debuff 1015 with two 25% damage buffs/debuffs |
Tipo Script |
2 | 5.0 |
0 |
60
1:00
|
6-7 | ||
| 8 |

Qualsiasi Mascotte
|
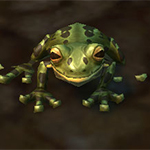
Since the first two backline pets are always critters Granpuntura will assure that they die before the pet in the front. When the backline dies first no further pets will join the fight.
Other hard hitting cleave attacks should work aswell instead of Meteorite del Crepuscolo. |
Script |
2 | 5.0 |
1 |
64
1:04
|
8 | ||
| 9 | 

Qualsiasi Livello 25+ Mascotte
|
Script |
2 | 5.0 |
1 |
180
3:00
|
24-27 | |||
| 10 | 
|
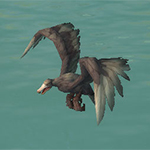
I used the Left Shark in order to get Aquatic protection against the undead attacks. However, any creature with cleave works in order to polish off the back line creatures.
|
2 | 0.0 |
1 |
108
1:48
|
11 | |||
| 11 | 

|
Script |
2 | 5.0 |
1 |
310
5:10
|
32+ | |||
| 12 |

|
Script |
2 | 5.0 |
0 |
60
1:00
|
7 | |||
| 13 | 
Qualsiasi Livello 1+ Mascotte
Qualsiasi Livello 1+ Mascotte
|
Livello 1+ Script |
2 | 4.0 |
5 |
170
2:50
|
18-20 | |||
| 14 |

|
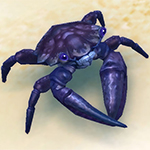
This team & strat are part of a Challenge Run Walkthrough. This ambush is special, for the first time you fight more than 3 pets! They simply replace killed enemies in the standard pet battle UI.
I personally started with the Emperor Crab fighting 7+ enemies one by one. Then people realized they can take a shortcut by killing the backline pets first. So this is a mix of DragonAfterDark's Left Shark Strategy and a proper Crab way (both included in script). Again I apologize for creating a new strategy, but I needed to replace the Backup pets to match my Walkthrough suggestions and this way I have access to the script and creator info so I can include hyperlinks to next battle, etc. Start & Description << - - - - - - - - - - - - - - - - >> Next battle |
Tipo Script |
2 | 0.0 |
0 |
130
2:10
|
12+ | ||
| 15 | 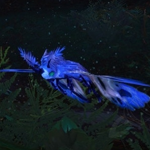
|
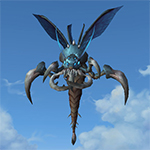
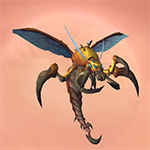
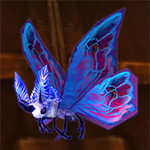
It doesn't really matter too much which moth and what abilities. The script just assumes you choose Assalto del Bozzolo in one of the slots and otherwise doesn't care if you choose Polvere di Falena, Richiamo del Fulmine or Feromoni di Falena and Assalto Alfa, Vampata or Vento Tagliente. It all kind of works out.
|
Script |
2 | 0.0 |
0 |
125
2:05
|
12-14 | ||
| 16 | 
|
Script |
2 | 0.0 |
0 |
120
2:00
|
11-12 |
Includi Passaggi:


Qualsiasi Livello 25+ Mascotte

Qualsiasi Livello 25+ Mascotte
Substitutes:
1 / 2

If the backline pets don't die before the active pet, you will face all the enemy pets.
| Prima | Dopo | Esperienza Guadagnata | |
|---|---|---|---|
| 1 | ➜ | 6 | 1196 |
| 2 | ➜ | 7 | 1271 |
| 3 | ➜ | 7 | 1337 |
| 4 | ➜ | 7 | 1394 |
| 5 | ➜ | 8 | 1444 |
| 6 | ➜ | 8 | 1485 |
| 7 | ➜ | 9 | 1518 |
| 8 | ➜ | 10 | 1543 |
| 9 | ➜ | 11 | 1559 |
| 10 | ➜ | 11 | 1568 |
| 11 | ➜ | 12 | 1568 |
| 12 | ➜ | 13 | 1559 |
| 13 | ➜ | 14 | 1543 |
| 14 | ➜ | 15 | 1518 |
| 15 | ➜ | 16 | 1485 |
| 16 | ➜ | 17 | 1444 |
| 17 | ➜ | 17 | 1394 |
| 18 | ➜ | 18 | 1337 |
| 19 | ➜ | 19 | 1271 |
| 20 | ➜ | 20 | 1196 |
| 21 | ➜ | 21 | 1114 |
| 22 | ➜ | 22 | 1023 |
| 23 | ➜ | 23 | 924 |
| 24 | ➜ | 24 | 817 |
|
Cappello da Safari |
|
|
Integratore Inferiore |
|
|
Integratore |
|
|
Cilindro di Lunacupa |
|
|
Evento bonus: scontri tra mascotte |
|
= |
Le mascotte livellano fino al 25 con minima XP persa |
|
|
= |
XP aggiuntiva oltre il livello 25 è persa. |
|
For the best display of your strategy, please follow these guidelines:


For the best display of your strategy, please follow these guidelines:
For the best display of your strategy, please follow these guidelines:
For the best display of your strategy, please follow these guidelines:
 Danza della Pioggia on CD
For the best display of your strategy, please follow these guidelines:
 Onda di Marea as filler
For the best display of your strategy, please follow these guidelines:
Danza della Pioggia &  Getto d'Acqua to kill enemy #1
For the best display of your strategy, please follow these guidelines:

What ambush? Looks like an all-you-can-eat-buffet to me!

1
Ghanksta#1998
scritto il 2022-02-02 17:53:22
3
Mysshe
scritto il 2021-12-08 07:34:58
2
Morticia24
scritto il 2021-10-18 00:28:45
2
Medusa#1484
scritto il 2021-03-16 18:34:56
3
huldu
scritto il 2020-11-16 13:53:45
0
TC scritto il 2020-07-12 22:08:27
0
Sinvanor
scritto il 2020-08-09 12:05:56
2
Springcaller scritto il 2020-11-13 20:27:19
7
Shade
scritto il 2020-10-15 13:24:08
1
kess scritto il 2020-08-22 10:34:23
-1
Gráinne
scritto il 2020-08-22 15:57:03
I think the Left Shark died on me once when I was farming Stratholme, but I had two more pets to finish it off. No problem.
4
Dende
scritto il 2020-09-15 14:27:27
0
Rakenessa scritto il 2020-04-24 12:08:30
Edit: I guess I was having some unlucky streaks there - Left Shark solo'd this week w/o Chuck's help. (edited)
1
Gráinne
scritto il 2020-04-24 16:21:21
1
Zeitlos#1455
scritto il 2020-08-05 14:40:51
1
Carcoza
scritto il 2020-06-13 06:53:31
4
Pla2pus#1287
scritto il 2019-07-14 00:21:21
Something odd happened today that I need to test again. My number 3 pet was level 23. On the enemy pet's last round (their undead round), my Left Shark got killed. When the fight ended my number 3 pet leveled up to 25 (gained 3900 XP).
I'll try again next week to see if that's a thing or not.
2
(OP) DragonsAfterDark
scritto il 2019-07-14 00:56:42
If your active pet dies and you have non-25 pets in the backline, it will distribute xp to all remaining pets that can use it. It's why there are certain fights that use self-killing (Explode, Corpse Explosion, and so on) abilities so that you never have to do the level pet swap.
2
Kessyra
scritto il 2020-05-23 14:50:57
If I knew how to write this into the TD Script I would. (edited)
1
Cognosis
scritto il 2020-05-14 20:11:36
0
Chalan#1245
scritto il 2020-02-12 11:49:35
2
BeardedGodzilla
scritto il 2020-02-08 15:47:57
ability(Rain Dance:1062) [ round>2 ]
ability(Water Jet:118) [enemy(#2).dead & enemy(#3).dead]
ability(Tidal Wave:419)
if [self(#2).active]
use(#1)
endif
if [self(#1).dead]
change(next)
endif
2
Anonymous scritto il 2019-08-10 19:01:45
2
Tiffany#1468
scritto il 2020-01-17 02:15:51
0
Soapy scritto il 2019-11-03 23:02:00
1
Rys scritto il 2019-10-10 20:05:00
1
(OP) DragonsAfterDark
scritto il 2019-10-10 21:32:26
0
Tarma scritto il 2019-07-19 23:18:57
1
(OP) DragonsAfterDark
scritto il 2019-07-19 23:30:11
0
Aelfraed scritto il 2019-07-23 01:05:35
0
Mord008 scritto il 2019-07-13 15:08:40
1
Joshua scritto il 2019-07-07 20:40:07
2
schlumpf#2707
scritto il 2019-07-07 16:34:10
1
Nyvenia scritto il 2019-07-04 14:33:35
-1
hockeytownrox scritto il 2019-06-29 16:25:22
1
Sawfty#11362
scritto il 2019-06-28 16:13:46
1
MightyAra
scritto il 2019-06-26 16:41:21
0
Setione
scritto il 2019-05-07 06:05:25
3
(OP) DragonsAfterDark
scritto il 2019-05-07 08:00:26
0
Setione
scritto il 2019-05-07 08:58:27
0
Roxander scritto il 2019-10-19 09:42:20
0
Booker scritto il 2019-07-25 09:19:49
1
Bierchen
scritto il 2019-06-28 15:12:52
1
Putin-XyuLo
scritto il 2022-08-04 20:37:48
1
Фрилансерка scritto il 2019-07-08 15:33:43
Nuovo Commento: