
4
4
|
Average rating: |
3.9 |
|
Ratings: |
8 |
|
Your vote: |
|
Creator |
||||||||||
|---|---|---|---|---|---|---|---|---|---|---|
|
Tags
Filter strategies:
|
|||||||||
| 1 |

4 rounds.
|
Script |
2 | 5.0 |
42 |
35
0:35
|
4 | |||
| 2 |

Qualsiasi Mascotte

Qualsiasi Mascotte
|

Requires BlizzConline 2021 pet. Strategy identified by SheepyMax on Wowhead. The Moon-Touched Netherwhelp will solo Yu'la without taking damage.
|
Script Non più ottenibile |
2 | 4.7 |
41 |
106
1:46
|
19 | ||
| 3 |

Qualsiasi Livello 1+ Mascotte
|
Livello 1+ Script |
2 | 4.7 |
11 |
52
0:52
|
8 | |||
| 4 |

Qualsiasi Livello 25+ Mascotte

Qualsiasi Livello 25+ Mascotte
|
|

Bring at least one level 25 pet along that can hit a bit harder. Do not use critters for this one, anything that has a single attack with more than 250 damage. The higher, the better.
Script thanks to ZoeyStarwind |
Negozio Script |
2 | 4.6 |
54 |
110
1:50
|
16+ | |
| 5 |

Qualsiasi Livello 25+ Umanoide

Qualsiasi Mascotte
|

There are already other strats with pets that work, but I was surprised to see this pet not represented in any of them. Very easy, done in 16 rounds.
Updated with TD Script, since I learnt how to do it since publishing this strategy. |
Script |
2 | 4.5 |
161 |
90
1:30
|
18+ | ||
| 6 |

Qualsiasi Livello 25+ Non Morta
|

Both breeds for the Val'kyr Impura work fine but I'd still recommend the H/H breed to ensure the strategy works without deviations.
|
Tipo Script |
2 | 3.6 |
48 |
60
1:00
|
7 | ||
| 7 |

Qualsiasi Livello 25+ Mascotte
|
|

DragonsAfterDark: This one pet strategy was broken by Shadowlands' changes, and Mr. Bigglesworth now needs a little backup to get the job done! With the inclusion of the Void-Scarred Anubisath, this is a zero damage strategy as long as the rotation is followed.
New script added & ratings have been reset. Happy battling! |
Script |
2 | 3.9 |
4 |
225
3:45
|
40 | |
| 8 |
Oceanne
|
RNG |
2 | 3.8 |
7 |
69
1:09
|
9 | |||
| 9 |

Qualsiasi Mascotte
|
Script Non più ottenibile |
2 | 5.0 |
2 |
90
1:30
|
15+ | |||
| 10 |

Author has not logged in to site for over a year, and given the feedback below, adjustments to the strategy have been made and ratings reset by curators. Any pet with Esplosione is fine for slot #2, but in the spirit of keeping the strategy somewhat similar to the Author's original, a similar pet to Abyssius was chosen. Yu'la's speed is 287, so if your pet is slower, follow the same priority as for the Netherspace Abyssal. If you're faster than Yu'la, Explode as long as she isn't in the air. |
2 | 5.0 |
4 |
205
3:25
|
33 | ||||
| 11 | Tipo |
2 | 5.0 |
1 |
120
2:00
|
17+ | ||||
| 12 |

Qualsiasi Livello 25+ Mascotte
|

DragonsAfterDark: Due to the OP being gone for so long, and in response to comment feedback, this has been updated to correctly reflect Yu'la's rounds, and a script has been added. Thank you to ZadTheGlad for providing the rotation. ^^
|
Script |
2 | 5.0 |
7 |
190
3:10
|
38 | ||
| 13 |
|

DragonsAfterDark: The original strategy was broken by Shadowlands changes, so adjustments needed to be made. 2/3 original pets were kept, (Feline Familiar & Flayer Youngling), while the Kun-Lai Runt was replaced by the Creeping Tentacle. A breed restriction was also placed on the Youngling & Familiar to make sure they're faster than Yu'la.
You can leave out the Feline Familiar if you want, and just use the first two pets, but in the spirit of keeping it as close (pet-wise) to the original, I included the Familiar to help end the fight a little quicker once Yu'la's health gets low. This is a zero damage strategy as long as the rotation is followed. Ratings have been reset. Happy battling! |
Tipo Script |
2 | 5.0 |
0 |
155
2:35
|
29 | ||
| 14 | 2 | 5.0 |
1 |
115
1:55
|
20 | |||||
| 15 |

after failing every strategy i tried i patched together my own.
alt pets for the 2nd and 3rd pets, anything with call of darkness and 287+ speed, pet family undead to just get an extra attack but other pet families work |
Tipo |
2 | 5.0 |
3 |
100
1:40
|
16+ | |||
| 16 | 2 | 5.0 |
0 |
120
2:00
|
12 | |||||
| 17 | Script |
2 | 0.0 |
1 |
87
1:27
|
15-16 | ||||
| 18 |

This strat takes a LOT of turns with Mr. Bigglesworth, but has worked consistently in DF, and rarely had to use Bonkers (could probably substitute another humanoid for cleanup).
|
Script |
2 | 5.0 |
3 |
242
4:02
|
42+ | |||
| 19 |
|

Script thanks to alquimistab
|
Script |
2 | 3.9 |
2 |
290
4:50
|
49+ | ||
| 20 |

Qualsiasi Livello 25+ Umanoide

Qualsiasi Mascotte
|
|

Instead of Clock'em you can also use Bonkers. Just make sure he is faster than Yu'la!
Script thanks to Zybop |
RNG Script |
2 | 3.0 |
5 |
125
2:05
|
18+ | |
| 21 |

Yu'la lifts off on round 2, 8, & 14
|
RNG |
2 | 2.7 |
3 |
100
1:40
|
13 | |||
| 22 |

After the unborn Valkyr+zandalari pet tactic failed for me I needed to search for some other tactics with my last fitting pets. I just searched through my pet collection for any speedy pets with strong attacks preferebly humanoid attacks or a dodge. If you got a S/? sunborn valkyr I highly recommend to use her as a third pet because in a previous fail try I used her and eventhough I didn't made it she was extremly useful with the strong attacks and the stun + I don't know the value of the welpling, it just worked out in my mind and in my try Yula died after she missed me once or twice to the darkness debuff.
|
Tipo RNG |
2 | 2.0 |
1 |
130
2:10
|
19 | |||
| 23 |

This is a variation of the stategy made by Shenk. During the Celestial Tournament, I didn't have my Unborn Val'kyr anymore, so I improvised. I hope that this'll be useful to others :)
|
Tipo RNG |
2 | 2.6 |
0 |
68
1:08
|
7 | |||
| 24 |

The second River Calf is there in case the Dragonkin-Buffed Yu'la crits your first River Calf on turn 14
As long as it meets the speed requirement, the alternatives should work fine if you don't have a second River Calf. I just didn't have any of the alternatives in the correct breed, and the River Calf was the easiest to get. Video for Fight |
Script |
2 | 0.0 |
0 |
85
1:25
|
16 | |||
| 25 | 2 | 0.0 |
0 |
125
2:05
|
18 | |||||
| 26 |

|
Script |
2 | 0.0 |
0 |
39
0:39
|
4 | |||
| 27 | 2 | 0.0 |
0 |
71
1:11
|
12+ |
Includi Passaggi:


Qualsiasi Livello 25+ Mascotte
Substitutes:
1 / 2

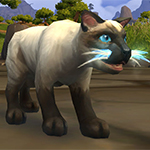
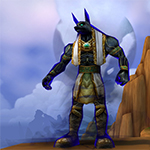
DragonsAfterDark: This one pet strategy was broken by Shadowlands' changes, and Mr. Bigglesworth now needs a little backup to get the job done! With the inclusion of the Void-Scarred Anubisath, this is a zero damage strategy as long as the rotation is followed.
New script added & ratings have been reset.
Happy battling!
| Prima | Dopo | Esperienza Guadagnata | |
|---|---|---|---|
| 1 | ➜ | 5 | 479 |
| 2 | ➜ | 5 | 508 |
| 3 | ➜ | 5 | 535 |
| 4 | ➜ | 6 | 558 |
| 5 | ➜ | 6 | 578 |
| 6 | ➜ | 7 | 594 |
| 7 | ➜ | 8 | 607 |
| 8 | ➜ | 9 | 617 |
| 9 | ➜ | 9 | 624 |
| 10 | ➜ | 10 | 627 |
| 11 | ➜ | 11 | 627 |
| 12 | ➜ | 12 | 624 |
| 13 | ➜ | 13 | 617 |
| 14 | ➜ | 14 | 607 |
| 15 | ➜ | 15 | 594 |
| 16 | ➜ | 16 | 578 |
| 17 | ➜ | 17 | 558 |
| 18 | ➜ | 18 | 535 |
| 19 | ➜ | 19 | 508 |
| 20 | ➜ | 20 | 479 |
| 21 | ➜ | 21 | 446 |
| 22 | ➜ | 22 | 409 |
| 23 | ➜ | 23 | 370 |
| 24 | ➜ | 24 | 327 |
|
Cappello da Safari |
|
|
Integratore Inferiore |
|
|
Integratore |
|
|
Cilindro di Lunacupa |
|
|
Evento bonus: scontri tra mascotte |
|
= |
Le mascotte livellano fino al 25 con minima XP persa |
|
|
= |
XP aggiuntiva oltre il livello 25 è persa. |
|
For the best display of your strategy, please follow these guidelines:




For the best display of your strategy, please follow these guidelines:


For the best display of your strategy, please follow these guidelines:


For the best display of your strategy, please follow these guidelines:


For the best display of your strategy, please follow these guidelines:


For the best display of your strategy, please follow these guidelines:


For the best display of your strategy, please follow these guidelines:


For the best display of your strategy, please follow these guidelines:


For the best display of your strategy, please follow these guidelines:


An emerald statue that came to life.
 Sfregio
 Tomba di Ghiaccio
 Barriera di Ghiaccio
 Abbattimento
 Deviazione
1
Gráinne
scritto il 2020-11-05 07:21:05
I find Yu'la is most often left with 366 HP. Ideally you want an Undead (strong against main attack) who can avoid the Lift-Off, and/or something that can do a lot of damage. You have two spare pets, and Yu'la does not heal, so you have lots of choice.
Anubisath Idol will mostly work fine. Cast Deflection when Yu'la flies up; otherwise Crush to death.
Bonkers with speed > 287, so S/S, P/S or H/S is ideal. Cast Dodge when Yu'la flies up; otherwise Tornado Punch when available, or Jab otherwise.
Widget the Departed can two-shot Yu'la with Call Darkness and Spectral Strike. Just be sure that you do not cast either while Yu'la is actually in the air during Lift-off.
Barnaby would look great for this, but is slower than Yu'la, so you have to watch Yu'la's cooldowns to be sure.
Macabre Marionette will work, with Dead Man's Party followed by Macabre Maracas.
Also Puddle Terror as in this other almost-one-pet strat
https://wow-petguide.com/index.php?Strategy=4924
And of course, since Yu'la doesn't need much to kill, a Mechanical with one of the big combinations like Shock and Awe and Ion Cannon will also do the job, again provided you don't waste your attack on Lift-off. (edited)
5
Sizzle#1759
scritto il 2020-10-14 13:51:53
1
Gráinne
scritto il 2020-10-14 15:37:08
2
JonSnow#12463
scritto il 2020-10-14 16:19:13
Mr. Bigglesworth on second slot in case something goes awry, because I really like him! ;)
1
Gráinne
scritto il 2020-10-14 18:27:14
I got in and confirmed. Yu'la got something buffed. Could well have been the shield.
My team saved since way back in Mists already had an S/S Bonkers as backup, so I finished Yu'la off with him easily enough.
Still, it's sad.
I suggest the strat be updated with a suitable second pet, rather than unpublished. (edited)
1
Janerlea
scritto il 2020-10-14 19:34:43
1
HashberryOTG
scritto il 2020-11-04 18:33:46
1
Keandra#2667
scritto il 2020-10-25 10:31:34
-10
BrokenNail scritto il 2020-05-08 07:58:32
6
Shenk
scritto il 2020-05-08 08:34:14
9
Gráinne
scritto il 2020-05-08 08:59:01
4
Shenk
scritto il 2020-05-08 09:51:22
1
Anna scritto il 2020-04-30 17:03:28
2
Hammerforge
scritto il 2020-02-07 02:44:29
If you are looking for a strat that still works every time in 2020... Look no further.
1
Pankracy#2378
scritto il 2020-02-11 06:41:22
4
DavidG
scritto il 2020-03-22 06:33:14
OK, so I do concede that strats against Squirt during a pet battle week are a special case, when speed does make a difference. ;)
1
Ibarrai
scritto il 2020-02-22 23:41:57
1
Pankracy#2378
scritto il 2020-02-11 06:40:52
1
Sazandora
scritto il 2019-06-01 06:45:47
0
Cake_Farts
scritto il 2019-03-02 07:54:59
5
Cake_Farts
scritto il 2019-03-02 08:14:23
2
Ebbiemay
scritto il 2019-03-06 23:38:52
1
ragath
scritto il 2019-05-24 20:30:37
1
Nemesis7734#1196
scritto il 2019-02-24 18:52:26
4
Amber1019
scritto il 2018-09-30 14:38:27
0
Darkmunk scritto il 2018-08-04 16:56:16
1
Sanayrin
scritto il 2018-05-15 22:42:52
-3
Szmatters scritto il 2018-01-31 18:55:19
1
andara scritto il 2018-04-28 14:35:58
0
Dragonsoleil scritto il 2017-05-06 17:12:06
0
Terrybull scritto il 2017-05-07 18:01:39
0
Dragonsoleil scritto il 2017-05-11 18:25:10
0
Aelfraed scritto il 2017-06-06 19:25:26
1
Somaloria scritto il 2017-06-09 01:40:26
0
Breezie scritto il 2017-12-09 19:15:10
-1
Chefzac scritto il 2017-06-26 21:29:29
ability(Claw) [enemy.round=1]
ability(Ice Tomb) [enemy.round=2]
ability(Ice Barrier) [enemy.round=3]
standby [enemy.round=4]
ability(Claw) [enemy.round=5]
ability(Claw) [enemy.round=6]
ability(Claw) [enemy.round=7]
ability(Ice Tomb) [enemy.round=8]
ability(Ice Barrier) [enemy.round=9]
standby [enemy.round=10]
ability(Claw) [enemy.round=11]
ability(Claw) [enemy.round=12]
ability(Claw) [enemy.round=13]
ability(Ice Tomb) [enemy.round=14]
ability(Ice Barrier) [enemy.round=15]
standby [enemy.round=16]
ability(Claw) [enemy.round=17]
ability(Claw) [enemy.round=18]
ability(Claw) [enemy.round=19]
ability(Ice Tomb) [enemy.round=20]
ability(Ice Barrier) [enemy.round=21]
standby [enemy.round=22]
ability(Claw) [enemy.round=23]
ability(Claw) [enemy.round=24]
-1
Josh scritto il 2017-08-09 02:45:39
ability(Claw:429) [round = 1]
ability(Ice Tomb:624)
ability(Ice Barrier:479)
standby [self.aura(Ice Barrier:480).exists]
ability(Claw:429)
2
Flashk scritto il 2017-10-01 17:06:58
ability(624) [ self.round > 1]
ability(479) [ self.round > 2]
standby [self.aura(480).exists]
ability(429)
0
Tangaria scritto il 2017-10-14 20:33:47
3
WraithChild scritto il 2017-10-05 18:41:46
1
Agu scritto il 2017-07-13 10:18:19
0
Atarin scritto il 2017-04-25 01:28:27
Ice Barrier is now blocking Ice Tomb from hitting Yu'la, so she doesn't get stunned and only Lift Off is blocked. Result is Biggles does hardly any damage and goes down fast :<
0
Cerim Jenkins scritto il 2017-04-27 09:53:48
0
Nana scritto il 2016-11-15 08:09:32
0
Duskbunny scritto il 2016-10-22 15:32:49
0
Zaymaa scritto il 2016-09-13 03:50:05
0
Ntina scritto il 2016-05-28 05:11:08
that had Scratch, Cocoon Strike, and Glowing Toxin. Apply the toxin and don't let it drop. Use the Cocoon Strike to mitigate the Lift Off, and swap flies after a Cocoon Strike to mitigate some of the Jade Breaths with the other flies' Cocoon Strikes. Use Scratch for filler when needed. The flies were also levels 22 and 23, and two were green quality with the third being rare. All of them had some speed in their stats, but none were really ideal - H/S, P/S, B/B. Being able to take some of the incoming damage off the table led to the toxin doing its work (6% of total health done per tick).
0
zaymaa scritto il 2016-08-17 06:08:56
0
Remte
scritto il 2015-10-06 11:35:25
0
Aranesh
scritto il 2015-10-07 05:49:29
2
xerxii
scritto il 2019-06-16 08:30:24
0
Ятсан scritto il 2018-11-14 19:26:25
Nuovo Commento: