^
vs. Notte dello Scontro: Amalia

32

32

Strategy 1 of 5
Browse all alternatives

Includi Passaggi:

Clicca il bottone per copiare lo script nei tuoi appunti:

use(BONESTORM:649) [!enemy(Stumpers:1904).dead & !enemy(Lil' Sizzle:1906).dead]
use(Ancient Blessing:611)
standby [!enemy(Stumpers:1904).dead & !enemy(Lil' Sizzle:1906).dead]
use(Claw:429)
Notte dello Scontro: Amalia 107489
Special or not:0Special or not:1112266453402660

Abilità: 1 1 2
Tipo: Qualsiasi

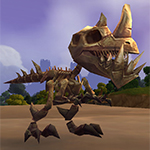
Cucciolo di Raptor Fossilizzato
This pet can have the following breeds:

Tipo Health Power Speed
PS 1481 305 257


1 ZR4 14

Qualsiasi Livello 25+ Non Morta

Abilità: Qualsiasi
Tipo: Qualsiasi

1 ZR4 14

Qualsiasi Livello 25+ Non Morta

Abilità: Qualsiasi
Tipo: Qualsiasi

tdScript thanks to Goldberggdn

XP Alta
Almeno una delle mascotte in questa strategia richiede delle statistiche specifiche.
Non tutte le strategie sono sempre al 100% sicure. Questa è una di quelle. Potresti dover ricominciare, poichè ci sono eventi casuali che ne aumentano il fallimento. Per favore non prendertela con le mascotte!
Questa strategia usa mascotte ottenute dal gioco di carte di WoW (TCG); qualche volta puoi trovarli anche alla casa d'aste, ma i prezzi sono potenzialmente alti.
Questa strategia usa mascotte ottenibili solo dal Negozio Blizzard, comprabili con saldo Battle.net o soldi reali.
Puoi usare questa strategia per far prendere esperienza a una mascotte aiutandola a salire di livello più velocemente.
Alcune istruzioni sono più difficili di altre da seguire. E' esattamente quello che troverai in questa strategia!
Script
La strategia offre un script che può essere usato con l'addon Pet Battle Script. Puoi copiare lo script cliccando il bottone a sinistra delle mascotte.
Almeno una mascotte in questa strategia non è più ottenibile. Se ce l'hai, congratulazioni!
Lo staff ha deciso che questa strategia sia particolarmente utile e l'ha evidenziata con questa tag per offrire più visibilittà.
In Dragonflight Patch 10.2, the ability Time Bomb has been changed. This tag is marking strategies using Time Bomb so they can be reviewed.
Time: 3:42
This time was entered by a strategy curator. It is quite reliable especially when using TDScript, however times can always vary slightly.
Rounds: 33
The number of rounds for this fight were added by a strategy curator. This number is usually very reliable.
Questa tabella illustra l'aumento di livello se si completa il combattimento con mascotte di livello 25 e una a traino.
Es

Prima Dopo Esperienza Guadagnata
1135981
2136353
3146683
4146971
5147219
6157425
7157590
8167714
9167796
10177838
11177838
12187796
13197714
14197590
15207425
16207219
17216971
18226683
19226353
20235981
21235569
22245115
23253900
24251980

Cappello da Safari

Integratore Inferiore

Integratore

Cilindro di Lunacupa

Evento bonus: scontri tra mascotte


=

Le mascotte livellano fino al 25 con minima XP persa

=

XP aggiuntiva oltre il livello 25 è persa.

Strategy Details
3 Min 42 Sec
This time was entered by a strategy curator. It is quite reliable especially when using TDScript, however times can always vary slightly.
33
The number of rounds for this fight were added by a strategy curator. This number is usually very reliable.
2022-08-01 21:02:33
The strategy was last updated on this date.
2017-03-11 21:01:35
The strategy was created on this date.
96,826
Visualizzazioni. Questo numero indica quante volte questa strategia è stata visualizzata dai visitatori.
Tamer Details
Dalaran:Broken Isles 28.3 23.4 (TomTom / Map Pin)
XP Alta
Turno 1

For the best display of your strategy, please follow these guidelines:

  • Use QuickFill elements where possible
  • Enter custom instructions in English
  • Check the Strategy Creation Guide for more info
Cucciolo di Raptor Fossilizzato
Sfregio
Benedizione Antica
Tempesta d'Ossa
Qualsiasi Livello 25+ Non Morta
Pass
Bring in your Cucciolo di Raptor Fossilizzato
Bring in your Undead pet
Swap to your Cucciolo di Raptor Fossilizzato
Swap to your Undead pet
Fuuf comes in
Stompers comes in
Piccolo Sfrigol comes in
An enemy pet comes in
Any standard attack will finish the fight
 
Cucciolo di Raptor Fossilizzato
Qualsiasi Non Morta
Qualsiasi Non Morta
Sfregio
Benedizione Antica
Tempesta d'Ossa
Piccolo Sfrigol
Stompers
Fuuf
Important: Please enter your instructions in English or a large parts of the community will not be able to read them.
Some typical sentences are translated automatically. Move your mouse over this part for more details.
The following strings are auto-translated if you enter them in the defined format. It is recommended to use them where possible:
[ability=123:Spellname] - [pet=123:Petname] dies
[ability=123:Name] - [enemy=123:Enemyname] dies
[ability=123:Name] until [pet=123:Petname] dies
[ability=123:Name] until [enemy=123:Enemyname] dies
Swap back to [pet=123:Petname]
[ability=123:Name] until the fight is won
Turno 2

For the best display of your strategy, please follow these guidelines:

  • Use QuickFill elements where possible
  • Enter custom instructions in English
  • Check the Strategy Creation Guide for more info
Cucciolo di Raptor Fossilizzato
Sfregio
Benedizione Antica
Tempesta d'Ossa
Qualsiasi Livello 25+ Non Morta
Pass
Bring in your Cucciolo di Raptor Fossilizzato
Bring in your Undead pet
Swap to your Cucciolo di Raptor Fossilizzato
Swap to your Undead pet
Fuuf comes in
Stompers comes in
Piccolo Sfrigol comes in
An enemy pet comes in
Any standard attack will finish the fight
 
Cucciolo di Raptor Fossilizzato
Qualsiasi Non Morta
Qualsiasi Non Morta
Sfregio
Benedizione Antica
Tempesta d'Ossa
Piccolo Sfrigol
Stompers
Fuuf
Important: Please enter your instructions in English or a large parts of the community will not be able to read them.
Some typical sentences are translated automatically. Move your mouse over this part for more details.
The following strings are auto-translated if you enter them in the defined format. It is recommended to use them where possible:
[ability=123:Spellname] - [pet=123:Petname] dies
[ability=123:Name] - [enemy=123:Enemyname] dies
[ability=123:Name] until [pet=123:Petname] dies
[ability=123:Name] until [enemy=123:Enemyname] dies
Swap back to [pet=123:Petname]
[ability=123:Name] until the fight is won
Turno 3
Passa

For the best display of your strategy, please follow these guidelines:

  • Use QuickFill elements where possible
  • Enter custom instructions in English
  • Check the Strategy Creation Guide for more info
Cucciolo di Raptor Fossilizzato
Sfregio
Benedizione Antica
Tempesta d'Ossa
Qualsiasi Livello 25+ Non Morta
Pass
Bring in your Cucciolo di Raptor Fossilizzato
Bring in your Undead pet
Swap to your Cucciolo di Raptor Fossilizzato
Swap to your Undead pet
Fuuf comes in
Stompers comes in
Piccolo Sfrigol comes in
An enemy pet comes in
Any standard attack will finish the fight
 
Cucciolo di Raptor Fossilizzato
Qualsiasi Non Morta
Qualsiasi Non Morta
Sfregio
Benedizione Antica
Tempesta d'Ossa
Piccolo Sfrigol
Stompers
Fuuf
Important: Please enter your instructions in English or a large parts of the community will not be able to read them.
Some typical sentences are translated automatically. Move your mouse over this part for more details.
The following strings are auto-translated if you enter them in the defined format. It is recommended to use them where possible:
[ability=123:Spellname] - [pet=123:Petname] dies
[ability=123:Name] - [enemy=123:Enemyname] dies
[ability=123:Name] until [pet=123:Petname] dies
[ability=123:Name] until [enemy=123:Enemyname] dies
Swap back to [pet=123:Petname]
[ability=123:Name] until the fight is won
Turno 4
Passa

For the best display of your strategy, please follow these guidelines:

  • Use QuickFill elements where possible
  • Enter custom instructions in English
  • Check the Strategy Creation Guide for more info
Cucciolo di Raptor Fossilizzato
Sfregio
Benedizione Antica
Tempesta d'Ossa
Qualsiasi Livello 25+ Non Morta
Pass
Bring in your Cucciolo di Raptor Fossilizzato
Bring in your Undead pet
Swap to your Cucciolo di Raptor Fossilizzato
Swap to your Undead pet
Fuuf comes in
Stompers comes in
Piccolo Sfrigol comes in
An enemy pet comes in
Any standard attack will finish the fight
 
Cucciolo di Raptor Fossilizzato
Qualsiasi Non Morta
Qualsiasi Non Morta
Sfregio
Benedizione Antica
Tempesta d'Ossa
Piccolo Sfrigol
Stompers
Fuuf
Important: Please enter your instructions in English or a large parts of the community will not be able to read them.
Some typical sentences are translated automatically. Move your mouse over this part for more details.
The following strings are auto-translated if you enter them in the defined format. It is recommended to use them where possible:
[ability=123:Spellname] - [pet=123:Petname] dies
[ability=123:Name] - [enemy=123:Enemyname] dies
[ability=123:Name] until [pet=123:Petname] dies
[ability=123:Name] until [enemy=123:Enemyname] dies
Swap back to [pet=123:Petname]
[ability=123:Name] until the fight is won

For the best display of your strategy, please follow these guidelines:

  • Use QuickFill elements where possible
  • Enter custom instructions in English
  • Check the Strategy Creation Guide for more info
Cucciolo di Raptor Fossilizzato
Sfregio
Benedizione Antica
Tempesta d'Ossa
Qualsiasi Livello 25+ Non Morta
Pass
Bring in your Cucciolo di Raptor Fossilizzato
Bring in your Undead pet
Swap to your Cucciolo di Raptor Fossilizzato
Swap to your Undead pet
Fuuf comes in
Stompers comes in
Piccolo Sfrigol comes in
An enemy pet comes in
Any standard attack will finish the fight
 
Cucciolo di Raptor Fossilizzato
Qualsiasi Non Morta
Qualsiasi Non Morta
Sfregio
Benedizione Antica
Tempesta d'Ossa
Piccolo Sfrigol
Stompers
Fuuf
Important: Please enter your instructions in English or a large parts of the community will not be able to read them.
Some typical sentences are translated automatically. Move your mouse over this part for more details.
The following strings are auto-translated if you enter them in the defined format. It is recommended to use them where possible:
[ability=123:Spellname] - [pet=123:Petname] dies
[ability=123:Name] - [enemy=123:Enemyname] dies
[ability=123:Name] until [pet=123:Petname] dies
[ability=123:Name] until [enemy=123:Enemyname] dies
Swap back to [pet=123:Petname]
[ability=123:Name] until the fight is won
Now:
Start from the top and repeat this rotation until Lil’Sizzle and Stompers in the back row are dead.

For the best display of your strategy, please follow these guidelines:

  • Use QuickFill elements where possible
  • Enter custom instructions in English
  • Check the Strategy Creation Guide for more info
Cucciolo di Raptor Fossilizzato
Sfregio
Benedizione Antica
Tempesta d'Ossa
Qualsiasi Livello 25+ Non Morta
Pass
Bring in your Cucciolo di Raptor Fossilizzato
Bring in your Undead pet
Swap to your Cucciolo di Raptor Fossilizzato
Swap to your Undead pet
Fuuf comes in
Stompers comes in
Piccolo Sfrigol comes in
An enemy pet comes in
Any standard attack will finish the fight
 
Cucciolo di Raptor Fossilizzato
Qualsiasi Non Morta
Qualsiasi Non Morta
Sfregio
Benedizione Antica
Tempesta d'Ossa
Piccolo Sfrigol
Stompers
Fuuf
Important: Please enter your instructions in English or a large parts of the community will not be able to read them.
Some typical sentences are translated automatically. Move your mouse over this part for more details.
The following strings are auto-translated if you enter them in the defined format. It is recommended to use them where possible:
[ability=123:Spellname] - [pet=123:Petname] dies
[ability=123:Name] - [enemy=123:Enemyname] dies
[ability=123:Name] until [pet=123:Petname] dies
[ability=123:Name] until [enemy=123:Enemyname] dies
Swap back to [pet=123:Petname]
[ability=123:Name] until the fight is won

For the best display of your strategy, please follow these guidelines:

  • Use QuickFill elements where possible
  • Enter custom instructions in English
  • Check the Strategy Creation Guide for more info
Cucciolo di Raptor Fossilizzato
Sfregio
Benedizione Antica
Tempesta d'Ossa
Qualsiasi Livello 25+ Non Morta
Pass
Bring in your Cucciolo di Raptor Fossilizzato
Bring in your Undead pet
Swap to your Cucciolo di Raptor Fossilizzato
Swap to your Undead pet
Fuuf comes in
Stompers comes in
Piccolo Sfrigol comes in
An enemy pet comes in
Any standard attack will finish the fight
 
Cucciolo di Raptor Fossilizzato
Qualsiasi Non Morta
Qualsiasi Non Morta
Sfregio
Benedizione Antica
Tempesta d'Ossa
Piccolo Sfrigol
Stompers
Fuuf
Important: Please enter your instructions in English or a large parts of the community will not be able to read them.
Some typical sentences are translated automatically. Move your mouse over this part for more details.
The following strings are auto-translated if you enter them in the defined format. It is recommended to use them where possible:
[ability=123:Spellname] - [pet=123:Petname] dies
[ability=123:Name] - [enemy=123:Enemyname] dies
[ability=123:Name] until [pet=123:Petname] dies
[ability=123:Name] until [enemy=123:Enemyname] dies
Swap back to [pet=123:Petname]
[ability=123:Name] until the fight is won
Once they are, keep Benedizione Antica on cooldown and use Sfregio to kill Fuuf.

For the best display of your strategy, please follow these guidelines:

  • Use QuickFill elements where possible
  • Enter custom instructions in English
  • Check the Strategy Creation Guide for more info
Cucciolo di Raptor Fossilizzato
Sfregio
Benedizione Antica
Tempesta d'Ossa
Qualsiasi Livello 25+ Non Morta
Pass
Bring in your Cucciolo di Raptor Fossilizzato
Bring in your Undead pet
Swap to your Cucciolo di Raptor Fossilizzato
Swap to your Undead pet
Fuuf comes in
Stompers comes in
Piccolo Sfrigol comes in
An enemy pet comes in
Any standard attack will finish the fight
 
Cucciolo di Raptor Fossilizzato
Qualsiasi Non Morta
Qualsiasi Non Morta
Sfregio
Benedizione Antica
Tempesta d'Ossa
Piccolo Sfrigol
Stompers
Fuuf
Important: Please enter your instructions in English or a large parts of the community will not be able to read them.
Some typical sentences are translated automatically. Move your mouse over this part for more details.
The following strings are auto-translated if you enter them in the defined format. It is recommended to use them where possible:
[ability=123:Spellname] - [pet=123:Petname] dies
[ability=123:Name] - [enemy=123:Enemyname] dies
[ability=123:Name] until [pet=123:Petname] dies
[ability=123:Name] until [enemy=123:Enemyname] dies
Swap back to [pet=123:Petname]
[ability=123:Name] until the fight is won

Ma quanto sono belli i Corgi?


Minime

scritto il 2024-01-19 07:38:04

10.2 still works, thanks

Eekwibble scritto il 2017-08-19 19:14:29

There are a few mentions of Blightbreath here but none that say an H/P breed can solo the fight... in 14 turns...
I'm a little annoyed, tbh, because I like looking for ways to level pets on fights like these that give decent xp, but, Blightbreath (1-2-1) was so effective, I didn't get a chance to rotate a levelling pet in.
Anyway, here's the rotation;

Turn 1. Acid Rain
2. Toxic Smoke
3-5. Dreadful Breath
6. Acid Rain
7. Toxic Smoke
8-10. Dreadful Breath
11. Toxic Smoke
12-14. Dreadful Breath

I received no crits and dealt only 2, they were on Stumpers on turn 3 and on Lil' Sizzle on turn 9. I did the calculations and without those Dreadful Breath crits, Stumpers would still have died (receiving 1403 damage to his 1400hp) and Lil' Sizzle would have been alive with 38hp. Blightbreath was still alive with its Undead racial unused, so it's clearly soloable by an H/P breed Blightbreath alone, even without crits.
I'll try and remember to check out a levelling pet strat the next time she's up.

Tink scritto il 2017-10-22 14:09:29

yes!, this was better than strat posted. I brought in 2 undead level 24's in 1st and 2nd slot(both stayed alive for xp). This should be posted as the main strat :)

Bomigab

scritto il 2023-06-14 07:03:56

I took a couple of rounds longer but my H/S Blightbreath was also able to solo this fight.

Goldberggdn#2803

scritto il 2019-10-19 07:28:16

Script fpr this strategy:

use(BONESTORM:649) [!enemy(Stumpers:1904).dead & !enemy(Lil' Sizzle:1906).dead]
use(Ancient Blessing:611)
standby [!enemy(Stumpers:1904).dead & !enemy(Lil' Sizzle:1906).dead]
use(Claw:429)

Lenaea#1490

scritto il 2022-01-28 21:04:14

this script worked great. thanks so much for making it easier on me <3

Deadcandance

scritto il 2022-01-28 16:24:43

Once the backline is 2 rotations away from being dead, you can start using bite instead of passing, makes the fight goes faster. Nice strategy tho.

crolzinha#1877

scritto il 2021-07-12 15:17:23

this one was as close as it can get. Both my back pets were dead and the Hatchling was already in the undead round. But it worked :D thanks!

Metalkeik

scritto il 2020-11-22 12:14:35

So i didnt have max level fossilized raptor so i made another team to test, used Boneshard B/B and used 3 bonestorms (dont matter which order), swapped to Graves (1/2/2)(H/P) and spammed 2 and 1, floof and stumpers died without me using 3rd pet, when Lil'sizzle was up my 2 was up again, used consume corpse to get HP back and just finished the fight with Graves.

Lil'sizzle force swapped in my Weebomination i had in 3rd slot cause i wanted huge HP pool pet, i just used diseased bite once with that.

Worked first try, don't think it has much rng involved though, so there's that. Hope it works out if you dont have fossilized raptor (edited)

Wolfbrother

scritto il 2020-10-31 07:33:11

Felt like it would fail, but it actually worked. :) SL prepatch fight still rocks. Just takes a while.

Bruman#1853

scritto il 2020-10-16 20:41:51

Cut it close, but worked first try :)

akesi#1338

scritto il 2020-03-08 23:29:18

Slow but steady! Great strat!

daedelusikaerius scritto il 2017-04-11 05:46:12

I used Blightbreath, Ghastly Kid, and Scourged Whelpling. Acid Rain and Dreadful Breath two cycles will knock out the fire puppy. and lower the others. when Blight dies come in with very low health Whelpling finish off the other dog Foof . and then finally end up with ghastly kid evading Stumpers attack and then killing Stumpers with Diseased Bite. for FFH

shiholude

scritto il 2018-09-24 22:35:18

Worked, but SUPER close. Last Pet (Kid) died on last round, so I got credit, but DAMN! :)

Arnithall scritto il 2016-12-12 14:32:35

Completely soloed with Lost of Lordaeron. (2 2 2)
Basically you Absorb right after you get the Howl debuff and spam Arcane Blast otherwise. Takes a little bit of time but a lot less than Fossilzed Raptor for me.

Joahkin

scritto il 2018-08-11 23:27:36

Such common pet and it worked just great, thank you!

Thordros#1784

scritto il 2017-12-28 14:41:29

If you start using Claw on Foof in Round 19 instead of passing in between cooldowns, you can end the fight several rounds earlier—your BONESTORM in Round 25 should kill all three dogs at the same time.

TD Script for that altered strategy:

ability(BONESTORM) [!enemy(#2).dead & !enemy(#3).dead]
ability(Ancient Blessing)
ability(#1) [round>=19]
standby
change(next)

(Note: if you crit Claw more than once on Foof, there's a chance he may die early. This is fine. The Round 25 BONESTORM will still kill Lil' Sizzler on the backline even if Stumpers dodges it, and you're still at full health—you'd have to miss more than 10 times in a row for it to be an issue.)

TimboAZ

scritto il 2018-01-21 11:39:28

Good tip. Starting Claw on turn 19 worked out perfectly for me.

Maelchon

scritto il 2018-03-14 19:06:44

Absolutely agree, I started Claw on round 19 and Foof died right after the back row corgis. Great modification to a solid strat.

Sverch#2149

scritto il 2018-08-11 06:58:22

Minor note for all who got non-english client:

ability(#3) [!enemy(#2).dead & !enemy(#3).dead]
ability(#2)
ability(#1) [round>=19]
standby
change(next)

That should do it.

Feliciti#2964

scritto il 2018-06-29 21:27:57

Ingenious!

Kathleene scritto il 2017-09-30 13:21:23

This strategy is slow, but it did the job for me. Like Eekwibble, I try to level at least one pet at least a little bit in every battle that I can. There may be a way to do that against this team of (almost) indomitable Corgis, but I don't see it at this point. Certainly not with an entire team of Undead. Both of my back-line pets expired and my Hatchling was just a couple of HP away from his rez round. Tough, tough puppies. Thanks for the strategy.

Rifkin scritto il 2017-09-07 21:15:04

Just could not get this strat to work, Fossilized Hatchling would always enter undead stage before getting the 2nd Ancient Blessing off.
Went with Scourged Whelpling (211), Stitched Pup (122) and Restless Shadeling (211)
Call Darkness to get rid of Sunlight
Plague Blood (keep it up)
Tail Sweep (til Whelpling Dies)
Howl
Diseased Bight
Repeat til pup dies
Finish off Beaky with Arcane Blast

hairyscary scritto il 2017-08-14 04:18:02

used blightbreath 111,son of sethe 112 and scourged whelpling 221 worked well

MolsonofAle scritto il 2017-08-13 23:17:29

If you are like me and don't have the hatchling.
What Evil suggested, Mr Bigglesworth 1,1,1 Fragment of Desire 1,1,1 and Blighthawk 1,1,1.
Worked well for me.
Ice tomb, claw as needed. Ice tomb in undead round.
Spiritfire to finish 2nd pet or could use soulrush might make it faster.
Reflective shield on Little Sizzle. Then spritfire bolt. Don't waste your soulrush here like I did.
Infected claw and liftoff with Blighthawk after switch finished him off.
Thanks Evil for the strat :-)

Havequick scritto il 2017-07-02 22:12:32

It might be worth mentioning that floof's dreadful breath spreads it's damage across your team so if your backline pets die quickly your fossilized hatchling will take a lot more damage. After I realized this I chose my two highest hp pets for my backline and had no problems. The strat didn't work for me on multiple attempts before I made this change.

ryan scritto il 2017-05-03 12:22:58

This worked so well. I used Boneshard in the beginning with all 3 BONESTORMS to speed up the process, plus how often do you get to do that?

aelf scritto il 2017-06-02 05:46:53

funny-i died first try so i also put Boneshard in at turn 3, bonestorm times 3. He died and FH came back to continue his rotation. Then when back corgis almost dead i started claw so Foof was only 2 hits away from dead. I had high health scourge whelpling on standby but I didn't need.

Karen scritto il 2016-12-17 11:27:24

As written, I lost with Foof still at half health. I tried Chrovan's strat and failed miserably, presumably due to RNG. I tried the Fossilized Hatchling strat again but with two backline pets with 1800+ health (Infested Bear Cub and Grotesque) and with a Claw replacing one Pass each time through the rotation. I only stopped Clawing when the next Bonestorm would have killed Foof, at which point his backline was about to go down anyway. I won with my Fossil at half health and my backline both with a sliver of health.

Source scritto il 2016-12-17 13:36:07

Start to chisel Foof with Claw instead of passing, the round before the back row dies.

Anonymous scritto il 2017-05-03 13:30:01

Yes, thank you for this! A minimum health requirement for the backline should be included in the strat and tossing in Claw instead of 2 passes every few rounds works like a charm.

Anonymous scritto il 2016-12-12 12:52:04

Worked for me with modifications ı started with unborn valkyr put a doom on 1st pet and increased damage debuff on the enemy team then fozilized hachling took care of all without amalia getting a chance to swap pets.

Anonymous scritto il 2017-05-01 20:09:21

I did this,. it worked faster than the original strat

Zed scritto il 2017-02-06 16:57:16

This strat worked perfectly for me. My backline pets were two H/H scourged whelplings who did eventually die near the end, but my hatchling won with near full health. The key is high hp backline pets.

Anonymous scritto il 2016-12-18 00:16:51

Both of my backline pets died, and on turn 35 the hatchling and Foof killed each other, didn't get credit. Complete waste of time as written. Choose two high HP backline pets, I picked Unborn Val'kyr and Grotesque. Every other turn replace one of the passes for claw so long as Foof isn't under 300 health.

QuietCannon scritto il 2017-02-06 13:05:02

I did Claw in place of Pass and it worked fine. My hatchling died, but he killed the first two pets on his own, leaving one hit for my Frag of Desire to pull off to win it.

Anonymous scritto il 2016-11-29 10:22:43

I use claw on foof and passed when foof got low on health I passed until foof healed back up some. that way when it was time to kill hoof it only took a couple of hits

Anonymous scritto il 2017-01-10 08:24:17

i came here just to post this just keep foof at low health and you wont ever need your backup pets

Anon scritto il 2016-11-29 07:19:36

For this strategy to work, you need backline pets with a lot of HP or being able to swap in and heal themselves. Because when your backline is dead, the Corgi will attack your Hatchling with strong single target attacks! 1806 HP pets are recommended. Grotesque or a high HP Valkyr.

Aeryl scritto il 2016-12-17 11:18:41

Uh, if you use this strategy "the Corgi" you fight never has strong single target attacks. The reason you pass when not healing or using BONESTORM is to keep Foof alive because he only does an AE for about 88 damage.

Gil scritto il 2016-12-17 17:14:47

The AoE damage is split amongst your living pets. This is why the damage is noticably higher once your backline pets are dead. Same ability but with only one pet alive, it's more focused.

Jen scritto il 2016-12-17 18:58:42

My backline pets didn't have heaps of health, but they died about the same time as Amalias back 2 pets.

Evil scritto il 2016-12-17 17:05:11

Mr. Bigglesworth 1/1/1 and Fragment of Desire 1/1/1

Easily killed with this setup. You can pick so many other pets as your 2nd... Very easy fight!

also tried S/S Wicked Soul 1/1/2 it has 337 speed, also very good for this fight.

Other pets i would recommend:

Fragment of Suffering 2/2/2
Fragment of Anger 1/2/1 or 1/2/2
Bone Serpent 1/2/1
Blighthawk 1/1/1 or 1/2/1 for selfheal
Zomstrock 1/1/1

Chrovan scritto il 2016-11-29 05:33:38

This fight is very RNG especially when Stumpers come in. Anyway I used the following strat and it worked at first time:

SCOURGED WHELPLING (1,1,1)
STITCHED PUP (2,1,2)
MR. BIGGLESWORTH (1,1,1)

Turn 1: Plagued Blood
Turn 2: Call Darkness
Turn 3: Shadowflame
Turn 4: Shadowflame
Turn 5: Shadowflame
Turn 6: Shadowflame [FOOF dead]

Sometimes FOOF die at turn 5, it depends on crit dealt by your pet

STUMPERS enter the fight. The problem now is that this crazy pet is able to dodge a lot of attacks. If he dodges more than 2 attacks, leave the fight and restart. In my case he didn't dodge any attack, but a friend of mine had his pet constantly dodged.

Turn 7: Plagued Blood
Turn 8: Call Darkness [SCOURGED WHELPLING should die and rez]
Turn 9: Shadowflame
Turn 10: Shadowflame [SCOURGED WHELPLING should die]

STITCHED PUP enter the fight.

Turn 11: Flurry [STUMPERS dead]

Remember the dodge thing I said before, and keep on flurry until STUMPERS is very dead.

LIL' SIZZLE enter the fight. This pet will dodge most probably during the first 2 rounds.

Turn 12: Plagued Blood
Turn 13: Flurry
Turn 14: Flurry

STITCHED PUP get out and MR. BIGGLESWORTH enter the fight

Turn 15: Ice Tomb
Turn 16: Claw
Turn 17: Claw
Turn 18: Ice Barrier

At this point there's a new switch and STITCHED PUP gets in again. Just before the
switch, LIL' SIZZLE is hit by Ice Tomb and is stunned.

Turn 19: Rabid Strike
Turn 20: Flurry [LIL'SIZZLE dead]

It's a very straightforward fight; the most annoying thing is STUMPERS and its dodge, that is very RNG.


Aeryl scritto il 2016-12-17 11:21:39

But if you use the strat here, it's not RNG ...

Neutron scritto il 2016-11-12 06:10:14

Used 2 x Weebomination and one bone serpent as a finisher. Just cleave and when one of weebominations dies, consume with the other one his corpse and keep cleaving.

Electrica scritto il 2016-11-06 14:22:01

I found this strat never worked for me. I switched it up and used Boneshard (2-1-1), Bone Serpent (2-2-1) and fossilized hatchling (1-1-2). Used blistering cold and then ice spike until Gusteau dies. Then bonestorm when Remy comes in. I got one more hit of blistering cold on Remy before my boneshard died. Then I brought in my fossilized hatchling. I did ancient blessing and the bonestorm. Then clawed until it died. Then I brought in bone serpent. Used consume, then call darkness. Remy died and dinner came in. I can't remember if I used consume first or nocturnal strike. Either way, judge your use of it on your bone serpents health. Then you should win.

Isiliel scritto il 2016-10-26 15:10:50

It is to mention that you can start with the Claw earlier than waiting for the background to die. I even started about two bonestorms before the background died - Foof will not have a lot of time to do any more damage to you once your background is gone.

momof4rugratz scritto il 2016-10-14 03:25:35

This is not working and am doing as posted all 5x failed. Once the back pets die your screwed

Aranesh

scritto il 2016-10-15 02:54:20

I changed it so it is clearer that you should bring level 25 pets in your own back row. Otherwise Foof will indeed kill you very quickly.

Anonymous scritto il 2016-10-14 23:31:43

Weebomincation works pretty well too with his cleave

NL scritto il 2016-10-13 23:22:21

It should be noted that Foof will start using his strong single target attack once your backline pets are dead, so don't just stick any low level pets in there.
You will also want to start Clawing when your next BONESTORM will kill off her backline pets.

Brachydios-Silvermoon scritto il 2016-09-28 01:36:47

Wow, this is such a silly strategy. I find it weird Blizzard didn't account for it...

Kiolna scritto il 2016-09-27 21:19:33

Also doable with graves - similar strategy, Mostly bonestorm on cooldown, consume, pass. When you start to lose your backline pets, and your health drops, then use consume corpse. I didn't find at any point that I was going to kill the frontline corgi with my consume - but i assume if you crit a bit too much you will. If you think he's gonna die (less than 190 health) then pass so you kill the backline corgis before the frontline one.

Weedwalker scritto il 2016-09-05 05:07:53

Rotation worked better with 1 less Pass. (I did Bonestorm, Pass, Pass, Ancient Blessing)

Alcippe scritto il 2016-09-05 03:43:54

I can also confirm that this rotation worked a lot better.

Aranesh

scritto il 2016-09-11 03:17:28

Thanks! I adjusted it :-)

Rosterus scritto il 2016-09-05 06:52:43

Hi,
Love your site.
But I couldn't find any Felspider where you have located them.
I found some by 39.75 54.92, southeast in Azsuna.

- Rosterus

Nuovo Commento:


Name:

Collegamento: