
| Humanoides Mal-humorados | Destruição Dracônica |  Voadores Violentos Voadores Violentos | Mortos-vivos Mortíferos | Bichos Bestiais |
| Massacre Mágico | Escalação Elemental | Fúria das Feras | Ataque Aquático | Matança Mecânica |
Estratégia adicionada por Aranesh
2
2
|
Média de Avaliação: |
5 |
|
Avaliações: |
6 |
|
Seu voto: |
|
Creator |
||||||||||
|---|---|---|---|---|---|---|---|---|---|---|
|
Etiquetas
Filter strategies:
|
|||||||||
| 1 | 

|
Script |
2 | 5.0 |
22 |
68
1:08
|
9 | |||
| 2 | 
|

Direbeak hatchling must have life > than the second pet
Script thanks to Aesetha |
Script |
2 | 4.8 |
38 |
70
1:10
|
9 | ||
| 3 |
|
Raça (breed) |
2 | 5.0 |
2 |
73
1:13
|
10 | |||
| 4 | 
|
One team for all 18 legendary pets on argus! (only one Td Script)
motivation: I don't know if strategies with Ikky will still work after the changes in shadowlands. I created a flying team which works for all 18 legendary pets on argus. Only the strategy steps are different from fight to fight. If you don't use TD Script, note the strategy steps. TD Script is for all 18 pets. So rematch string and TD Script only needs to be copied once. Tested 10/15/2020 |
Script |
2 | 5.0 |
2 |
43
0:43
|
7 | ||
| 5 |


Qualquer Voador
|
Be sure your 3rd pet's health is lower than 1380.
|
Script |
2 | 5.0 |
1 |
28
0:28
|
3 | ||
| 6 | 

|
Health of the 2nd pet depends on power of the 1st
|
Script |
2 | 5.0 |
1 |
27
0:27
|
3 | ||
| 7 |

|
A variation of Aranesh's strategy. If Chicken or turkey, in this battle it don't matter. Another variant: replace hen or turkey by Shore butterfly with less health than Sunscale hatchling which is then second pet. Butterfly with Sandstorm and Peck has no problem killing Bucky.
|
2 | 0.0 |
0 |
78
1:18
|
10 | |||
| 8 |
Qualquer Nível 25+ Voador
|
One of my favorite combos, now in Flying! ^^
|
Script |
2 | 0.0 |
0 |
38
0:38
|
4 |
Incl. passos:


Substitutos:
1 / 3
1 / 8
| Antes | Depois | Ganho de Experiência | |
|---|---|---|---|
| 1 | ➜ | 5 | 479 |
| 2 | ➜ | 5 | 508 |
| 3 | ➜ | 5 | 535 |
| 4 | ➜ | 6 | 558 |
| 5 | ➜ | 6 | 578 |
| 6 | ➜ | 7 | 594 |
| 7 | ➜ | 8 | 607 |
| 8 | ➜ | 9 | 617 |
| 9 | ➜ | 9 | 624 |
| 10 | ➜ | 10 | 627 |
| 11 | ➜ | 11 | 627 |
| 12 | ➜ | 12 | 624 |
| 13 | ➜ | 13 | 617 |
| 14 | ➜ | 14 | 607 |
| 15 | ➜ | 15 | 594 |
| 16 | ➜ | 16 | 578 |
| 17 | ➜ | 17 | 558 |
| 18 | ➜ | 18 | 535 |
| 19 | ➜ | 19 | 508 |
| 20 | ➜ | 20 | 479 |
| 21 | ➜ | 21 | 446 |
| 22 | ➜ | 22 | 409 |
| 23 | ➜ | 23 | 370 |
| 24 | ➜ | 24 | 327 |
|
Chapéu de Safari |
|
|
Petisco Menor |
|
|
Petisco |
|
|
Chapéu Darkmoon |
|
|
Pet Battle Week |
|
= |
Níveis de animal de estimação para 25 com perda mínima de XP |
|
|
= |
XP adicional acima do nível 25 é perdido |
|
Para melhor exibição da sua estratégia, por favor siga estas orientações:


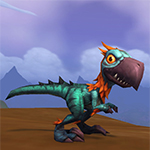
 Golpe Alfa até Terogarrinha morrer.
Para melhor exibição da sua estratégia, por favor siga estas orientações:
Para melhor exibição da sua estratégia, por favor siga estas orientações:
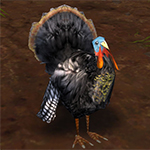
 Revoada - seuPeru Gorducho morrer
Para melhor exibição da sua estratégia, por favor siga estas orientações:
Para melhor exibição da sua estratégia, por favor siga estas orientações:
Para melhor exibição da sua estratégia, por favor siga estas orientações:

Eu não matei seu pai. Espera, franquia errada.


 Esquivar
 Enlouquecer
0
Evyn escreveu em 2020-11-08 17:20:51
1
Rikwe#2917
escreveu em 2020-10-20 15:42:46
1
tranquilsea
escreveu em 2020-06-07 15:27:06
0
Qurow escreveu em 2019-09-14 18:36:13
1
Andrusza#2184
escreveu em 2019-04-28 10:04:57
4
Evil escreveu em 2018-07-10 00:48:27
Ikky- Black Claw
Ji-Kun Hatchling- Acid Goo -> Flock
Dead!
The easiest and fastest kill for me so far!
4 Rounds :)
1
Eggs
escreveu em 2018-12-23 08:36:21
1
Eggs
escreveu em 2018-12-23 08:36:29
3
Carolina escreveu em 2018-05-24 23:02:46
1
Falathiel escreveu em 2018-07-23 13:25:52
1
kalisynth
escreveu em 2018-08-11 03:57:39
1
Ravynsur
escreveu em 2018-08-16 12:07:20
0
Paladinva
escreveu em 2018-07-18 18:56:33
3
Remte
escreveu em 2018-07-19 03:11:13
1
Kathleene
escreveu em 2018-04-10 19:56:05
1
Eekwibble
escreveu em 2018-05-23 06:11:54
By far the best I've found to use with an H/P Mech Axe though is Direbeak Hatchling. Predatory Strike then Falcosaur Swarm leaves Bucky with so little hp that Haywire only needs to hit once.
And for those with a P/P or S/S Mech Axe (1400hp), you can do the same with a Sharptalon Hatchling.
1
Blisse escreveu em 2018-07-09 21:01:06
1
Olania
escreveu em 2018-07-09 19:39:04
1
Lisma escreveu em 2017-11-11 11:17:14
Cerulean Moth (H/S) - 1, 1, 2
Zangar Spore (B/B) - x, x, 2
Mechanical Axebeak (H/P) - 1, 2, 1
Cerulean Moth:
1 - Cocoon Strike
2 - Call Lightning
3 - swap to Zangar Spore
Zangar Spore:
1- Explode
Mechanical Axebeak:
1 - Decoy
2-3 - Haywire
4 - Alpha Strike, Mechanical Axebeak dies
Cerulean Moth:
1 - Call Lightning
Bucky should die here.
1
handsomhaani#1708
escreveu em 2017-11-21 15:09:36
0
Hyacai escreveu em 2018-05-29 14:42:56
1
Stefan#26151
escreveu em 2017-12-08 16:56:34
0
Nalli escreveu em 2017-12-12 14:41:11
1
Zmiester#1293
escreveu em 2018-03-06 21:50:45
1
Khes
escreveu em 2018-04-07 05:14:58
0
PureArmour escreveu em 2017-11-02 21:20:51
0
Anonymous escreveu em 2017-11-15 18:51:58
1
Carrotboy
escreveu em 2018-01-28 03:47:52
4
EyeSage escreveu em 2017-09-10 21:04:27
Swarn predatory strike as long as there is a double damage used the predatory strike. If you have a chance to use another attack with the double damage up do it. I got it twice in a row using different order and even made a mistake on the first time. Don't use the protection on the direbeak just use attackes.
0
Claire escreveu em 2017-09-14 16:04:51
5
Shunai escreveu em 2017-09-15 15:04:21
Snowfeather Hatchling (1-X-1)
Bloodgrazer Hatchling (X-1-1)
Sharptalon Hatchling (1-X-1)
1-Falcosaur Swarm!
Bloodgrazer Hatchling is swapped in
2-3 Falcosaur Swarm!
4-Predatory Strike
5-Pass. Bloodgrazer Hatchling dies. Sharptalon Hatchling swapped in
6-7 Falcosaur Swarm!
8-Pass. Sharptalon Hatchling dies, Snowfeather Hatchling brought in
9-Predatory Strike
0
Gaffa escreveu em 2017-09-23 07:23:30
0
Schahmaar escreveu em 2017-09-24 04:28:50
0
Ramael escreveu em 2017-09-24 08:32:48
0
Aeliel escreveu em 2017-09-24 13:00:33
0
Nalwena escreveu em 2017-09-24 16:20:23
0
strumpett escreveu em 2017-09-27 09:27:31
0
Synchronis escreveu em 2017-09-28 18:18:21
0
Mel Lafferty escreveu em 2017-10-19 15:10:21
0
Infin escreveu em 2017-10-26 03:15:01
0
Anonymous escreveu em 2017-10-28 00:32:12
0
kess escreveu em 2017-11-05 09:09:27
1
Novaz
escreveu em 2017-12-08 14:41:50
7
Cernunnas
escreveu em 2017-11-07 04:45:45
1
Anonymous escreveu em 2017-10-22 06:23:55
2
Prudentius escreveu em 2017-10-15 18:33:26
ability(Dodge:312)
ability(Flock:581)
ability(Haywire:916)
ability(#1)
0
cat escreveu em 2017-09-24 14:03:05
0
TK escreveu em 2017-09-09 00:40:38
Great strat!
0
Diokeeg escreveu em 2017-09-10 14:41:55
0
Lenoria escreveu em 2017-09-18 16:11:13
0
Hermy escreveu em 2017-09-22 12:59:51
0
Quintette escreveu em 2017-09-19 04:45:19
0
Mali escreveu em 2017-09-06 08:32:56
*edit* even better, use direbeak as first falc, with ironskin before swarm :)
0
Shamy escreveu em 2017-09-06 12:12:19
0
Therabbit86ed escreveu em 2017-09-06 17:20:46
0
Shaelai escreveu em 2017-09-07 23:18:03
0
Soli escreveu em 2017-09-08 13:23:30
0
Enemy escreveu em 2017-09-08 17:33:40
0
Thesassiest escreveu em 2017-09-08 23:11:49
0
Ysa escreveu em 2017-09-09 04:54:28
0
Dakini escreveu em 2017-09-09 14:20:22
0
Argent escreveu em 2017-09-10 13:12:25
0
dragonheals12 escreveu em 2017-09-14 02:01:00
0
hairyscary escreveu em 2017-09-14 09:36:14
0
Dal escreveu em 2017-09-10 19:25:49
0
Kessyra escreveu em 2017-09-05 15:40:08
Same as above except Falcosaur Swarm then Predatory Strike
0
Anonymous escreveu em 2017-09-05 15:44:44
0
Anony escreveu em 2017-09-07 10:38:24
0
Elemjay escreveu em 2017-09-08 04:56:39
0
Anonymous escreveu em 2017-09-06 03:24:16
0
Illestra escreveu em 2017-09-06 12:33:36
0
Stefania escreveu em 2017-09-06 08:08:15
0
Jackieleggss escreveu em 2017-09-06 04:46:08
Round 1: Dodge
Round 2:Puncture Wound
Round 3+5: Alpha strike until it dies.
Round 6+7: Falcosaur swarm
Round 8: Savage Talon until it dies
Round 9: Soulrush
0
Sturmbotin escreveu em 2017-09-23 09:32:31
Ich hatte: Flammender Feuerfalke (2/1/2), Düsterschnabeljunges (1/2/1) und Ikky (1/1/1)
-Schriller Schrei (Düsterschnabel kommt rein)
-Eisenhaut
-Falkosaurierschwarm (Ikky kommt rein)
-Schwarze Klaue
-Schar (Feuerfalke kommt rein)
-Raubtierschlag
GG EZ
0
Jedra escreveu em 2017-10-25 06:12:44
0
viedock escreveu em 2018-01-22 13:22:56
1
trollo974
escreveu em 2018-01-21 14:17:18
Faire essaim de falcausore puis frappe du prédateur. ;)
0
Anonymous escreveu em 2017-10-02 09:43:19
0
Anonymous escreveu em 2017-10-15 11:18:19
0
Светтьмы escreveu em 2017-10-10 16:01:43
0
Элементар escreveu em 2017-09-22 12:32:47
Novo Comentário: