
攻略提供者是 solidstate77#1969
36
36
|
平均評分: |
3.9 |
|
評分: |
64 |
|
你的投票: |
|
Creator |
|||||||||
|---|---|---|---|---|---|---|---|---|---|
|
Tags
Filter strategies:
|
|||||||||

Strat found in comment by Devsham, very straightforward, little/no RNG.
|
屬性 Script |
2 | 4.8 |
N/A | 24 |
62
1:02
|
9 | ||

任何等級 25+ 人形生物
|
Leviticusmax
|

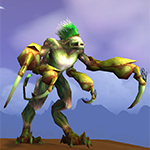
Flayer Youngling and Kun-Lai Runt breeds used: P/P
Strategy tested and passed January 12th 2019 |
Script |
2 | 4.5 |
N/A | 22 |
68
1:08
|
11-12 |
Script |
2 | 5.0 |
N/A | 9 |
69
1:09
|
11 | |||

You need to track the enemy pets cooldowns for this to work
|
Script |
2 | 3.9 |
N/A | 36 |
86
1:26
|
13-14 | ||

|
屬性 Script |
2 | 5.0 |
N/A | 2 |
50
0:50
|
6 | ||

Thank you to DragonsAfterDark for the script!
Adapted from other strategies listed, since I did not have the third pet from the other strats. Hypothetically other versions of Lil' Bad Wolf, as well as any Human pets with some sort of dodge, bubble or avoid ability (to avoid the upcoming Anteon Cannon) combined with Beast abilities will work however you may need to use one round sooner if they are slower than the boss. This factor also adds much more RNG because sometimes your 3rd pet comes out on the 8th round but much more often comes the 9th, where slower pets do not get their dodge ability in |
屬性 Script |
2 | 0.0 |
N/A | 0 |
69
1:09
|
10-11 |
包括步驟


Substitutes:
1 / 2
1 / 5
You need to track the enemy pets cooldowns for this to work
| 之前 | 之後 | 獲得經驗值 | |
|---|---|---|---|
| 1 | ➜ | 5 | 479 |
| 2 | ➜ | 5 | 508 |
| 3 | ➜ | 5 | 535 |
| 4 | ➜ | 6 | 558 |
| 5 | ➜ | 6 | 578 |
| 6 | ➜ | 7 | 594 |
| 7 | ➜ | 8 | 607 |
| 8 | ➜ | 9 | 617 |
| 9 | ➜ | 9 | 624 |
| 10 | ➜ | 10 | 627 |
| 11 | ➜ | 11 | 627 |
| 12 | ➜ | 12 | 624 |
| 13 | ➜ | 13 | 617 |
| 14 | ➜ | 14 | 607 |
| 15 | ➜ | 15 | 594 |
| 16 | ➜ | 16 | 578 |
| 17 | ➜ | 17 | 558 |
| 18 | ➜ | 18 | 535 |
| 19 | ➜ | 19 | 508 |
| 20 | ➜ | 20 | 479 |
| 21 | ➜ | 21 | 446 |
| 22 | ➜ | 22 | 409 |
| 23 | ➜ | 23 | 370 |
| 24 | ➜ | 24 | 327 |
|
狩旅團之帽 |
|
|
小寵物點心 |
|
|
寵物點心 |
|
|
暗月禮帽 |
|
|
寵物對戰獎勵事件 |
|
= |
將寵物等級提升至25級並最小化經驗損失的方法 |
|
|
= |
獲得 |
|
For the best display of your strategy, please follow these guidelines:




For the best display of your strategy, please follow these guidelines:


For the best display of your strategy, please follow these guidelines:


For the best display of your strategy, please follow these guidelines:


For the best display of your strategy, please follow these guidelines:


For the best display of your strategy, please follow these guidelines:


For the best display of your strategy, please follow these guidelines:


For the best display of your strategy, please follow these guidelines:


For the best display of your strategy, please follow these guidelines:


For the best display of your strategy, please follow these guidelines:


For the best display of your strategy, please follow these guidelines:


For the best display of your strategy, please follow these guidelines:


For the best display of your strategy, please follow these guidelines:


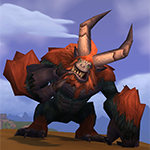
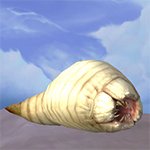
If there was a naming competition, I would vote for Bloaty McBloatface
1
kaysuella
發表在 2024-03-06 19:44:20
15
Devsham 發表在 2018-06-22 01:32:27
Squirky (1,2,2)
Corefire Imp (2,1,2)
Fiendish Imp (1,1,1)
Bubble
Swap to Corefire Imp
Rush
Rush
Wild Magic - If Corefire Imp dies after casting WM, bring in Squirky. Otherwise, pass and Corefire imp dies and then bring in Squirky.
Stampede until Squirky dies - bring in Fiendish Imp
Rush - Bloat dies
Potential to use different pets in the last slot as long as they are faster than Bloat since Bloat has Shattered Defenses debuff when last pet comes in
1
Goldie2000
發表在 2019-04-29 14:05:19
1
Bella123
發表在 2019-09-09 07:21:34
1
Mysshe
發表在 2022-01-06 05:59:08
1
Skolir#21837
發表在 2022-09-19 21:11:33
1
foamy
發表在 2023-03-15 20:54:03
2
iphegenia#1809
發表在 2022-02-27 08:46:45
1
Gladly#11647
發表在 2021-10-06 14:50:24
1
Mayzen
發表在 2021-09-27 15:51:24
3
Gabryella#1883
發表在 2021-06-23 18:51:33
3
VanyaMia
發表在 2021-08-15 07:03:05
3
Zhenton 發表在 2021-04-17 23:15:08
2
Lumaris1989
發表在 2021-01-24 03:36:24
0
Essere 發表在 2021-01-10 10:39:58
1
Bruman#1853
發表在 2020-10-31 00:26:13
5
Kiolna 發表在 2017-09-15 10:32:53
Round 1: bubble
Round 2: stampede
Round 3: stampede continues
Round 4: stampede continues
Round 5: fish slap
Round 6: fish slap
Squirky dies
Round 7: dodge
Round 8: haymaker
Round 9: bonkers dies to canon
Round 10: any attack should kill him (I used thrash)
0
Lenoria 發表在 2017-09-16 17:54:51
0
Fawnix 發表在 2017-09-17 17:53:28
0
Evie 發表在 2017-10-29 06:58:44
0
Mags 發表在 2017-10-30 00:14:50
0
Siilynna 發表在 2017-11-26 13:51:55
0
Lysmachia 發表在 2017-12-23 15:06:27
0
Lockturnal 發表在 2017-12-27 02:35:11
0
Lobombre 發表在 2019-09-23 11:41:16
1
tarokis
發表在 2020-10-30 19:04:13
1
Wolfbrother
發表在 2020-10-22 12:56:04
1
Jaye 發表在 2017-09-04 21:07:32
0
Shatu 發表在 2017-09-08 00:41:12
0
Tie 發表在 2017-10-29 15:12:49
1
Ttazi
發表在 2020-05-16 16:11:05
1
Aeliel 發表在 2017-09-16 05:46:09
0
Anonymous 發表在 2017-09-16 14:50:00
1
Xezia
發表在 2020-03-28 21:58:01
5
Toenail
發表在 2019-11-03 20:53:02
1
AlisonC 發表在 2018-10-07 17:37:56
Lil Bad Wolf - Deflection, then Pounce until dead
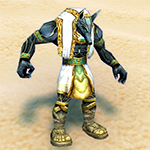
Anubisath Idol - Repeat Crush but make sure you Deflect a Diseased Bite so that he dies to Antean Cannon
Kun Lai Runt - Rampage
1
Verges 發表在 2017-10-13 16:04:59
1
caustickreature
發表在 2017-10-29 14:56:05
1
Paww
發表在 2018-04-11 15:37:56
0
Grischnak 發表在 2017-11-22 12:32:57
Those tiny ticks helped. I was missing killing him by no more than 10hp each time before teying this.
6
Prudentius 發表在 2017-09-16 19:02:35
ability(Deflection:490) [ enemy.ability(Antaen Cannon:1968).usable ]
ability(Rampage:124)
ability(Deflection:490) [ ! self(#2).dead ]
ability(#1) [ self(#2).played ]
change(#1)
change(next)
0
Ogier 發表在 2017-10-02 23:24:04
1
Zalid
發表在 2017-10-29 16:38:40
0
Ghenghiz 發表在 2017-09-01 07:52:38
Flayer Youngling as described and Bonkers (222)
Turn 1-5: Flayer as in guide
Turn 6: Swap to Bonkers
Turn 7: Dodge
Turn 8: Tornado Punch
Turn 9: Bite (Bonkers Died) - Swap to Flayer
Turn 10: Rampage. Bloat Died.
0
Anonymous 發表在 2017-09-01 18:56:38
0
Tarelgeth 發表在 2017-09-01 23:09:56
0
Eighty 發表在 2017-09-02 10:58:01
0
WiredTexan 發表在 2017-09-02 17:12:58
0
Anonymous 發表在 2017-09-03 17:09:44
0
Anonymous 發表在 2017-09-04 12:17:46
0
Emerson 發表在 2017-09-04 16:27:33
0
txgaffer 發表在 2017-09-05 00:04:29
0
Rakenessa 發表在 2017-09-08 00:03:19
0
Eekwibble 發表在 2017-09-15 06:40:40
I have an S/S, though, so, thanks, Ghenghiz.
0
Wiwer 發表在 2017-10-07 17:58:39
0
Leviticusmax 發表在 2017-09-01 02:40:19
Replace Anubaseth Idol With Squirky 1, 2, 2.
1. Deflect
2 - 4. Rampage
5. Triple Snap
Bring in Squirky
6. Bubble
7 - 9. Stampede
10. Rampage
0
Nelaphim 發表在 2017-09-02 02:29:39
0
Snowy6 發表在 2017-09-02 23:07:20
0
Emerson 發表在 2017-09-04 16:31:25
0
Jaye 發表在 2017-09-04 21:09:50
0
Stefania 發表在 2017-09-05 12:16:16
0
Anonymous 發表在 2017-09-06 21:14:36
0
Jagûar
發表在 2017-09-07 15:07:37
0
Draculja 發表在 2017-09-08 06:55:24
0
XNedra 發表在 2017-09-10 14:07:51
0
Aralexi 發表在 2017-09-14 15:01:05
0
Jagûar
發表在 2017-09-07 14:51:07
0
Anony 發表在 2017-08-31 00:44:13
I used a BB Squirky, SS Hopling, PP Grumpling
Opened with Squirky and used Bubble. Then used Punch, then Stampede (lasts 3 rounds). Squirky blocks Bloats attack. Swap to Hopling and use Crush. Hopling then dies. Swap Grumpling in and use Gift of Winter's Veil. Swap Squirky back in to eat Bloat's Antaen Cannon, Squirky dies. In comes Grumpling and use Punish twice while Bloat is recovering. This is RNG heavy on the fact that if you get crit/one shot by a crit you have to start the fight over. I won with this 3 times of 5 attempts.
0
Anonymous 發表在 2017-08-31 18:30:19
0
LirameiRav 發表在 2017-08-31 08:08:20
0
Terry 發表在 2017-08-31 13:43:36
0
Tomras 發表在 2017-08-31 05:04:47
1
Ilucie
發表在 2021-05-24 04:44:31
1
Flatty 發表在 2017-10-12 14:01:55
Round 6-> switch to Squirky
use bubble than stampede until Squirky dies
-> Kun-Lai Runt use rampage
0
Anonymous 發表在 2017-08-31 09:21:31
1
Stephan 發表在 2019-09-03 05:47:34
3
erokon
發表在 2018-04-06 16:42:02
Только вот анубисат ни разу не использует сокрушение, ибо умирает.
1
Madjestik85 發表在 2018-03-31 12:52:15
新留言