
攻略提供者是 WhatAChamp
|
平均評分: |
1 |
|
評分: |
1 |
|
你的投票: |
|
Creator |
|||||||||
|---|---|---|---|---|---|---|---|---|---|
|
Tags
Filter strategies:
|
|||||||||
RNG 商店 Script |
2 | 4.9 |
83% | 12 |
142
2:22
|
18 | |||

Unfortunately this strategy is not crit-proof. If you get unlucky and Bloog kills Scabby, restart the fight. Assuming that doesn't happen, it's smooth sailing.
|
RNG Script |
2 | 4.8 |
74% | 40 |
100
1:40
|
13+ | ||

EDITS:
From the comments below: 1) "This can work with H/H Scabby, but your diseased bites need to be on the higher end of the damage range. Also, the second pet can one-shot your nether pup with a crit, which adds a little RNG to the fight" 2) "if the diseased bite doesn't kill on turn 4 then you need to reset." 3) "the Lost Netherpup is supposed to take the hit from Flight" Thank you, commenters! Always glad to see when a strat works, even if there's a little RNG to it/works with a different breed. I needed to find a way around 雪怒的幼虎,雪福, as I didn't want to go level my monk in the middle of the achievement progress, I figured with as many pets as I have, there MUST be another way. I initially tried the Xu-Fu in the third slot strats, by trying a couple of other pets in those fights with similar-ish abilities as Xu-Fu, but the ability BITE isn't strong enough if they're going to take out a flying pet. So I decided to give the Scabby/Xu-Fu/Feline Familiar strat a shot, and tried once again to find other pets to stand in for Xu-Fu. In comes the 走失的虛空幼狼, who also lives long enough to take the Lift-Off, giving you all the breathing room you need for that last pet :D Have fun, y'all non-Xu-Fu owners! Hopefully you've got the Netherpup! |
RNG |
2 | 4.6 |
N/A | 30 |
103
1:43
|
14+ | ||

Beast pets do +25% increased damage when they are below half health. This tactic takes advantage of that by using dmg modifiers first and then the heavy nukes. That heavily reduces the chance of failing and doesn't require a specific breed.
It worked for me 9 out of 10 times. You might have to restart if Bile Larva fails to kill first pet, you need it to survive so that it can apply acidic goo on the second pet. You can replace Moon-Moon with Feline Familiar (1/X/2). In that case, just use Prowl once he comes in and one or two Onyx Bite. One should be enough if you have a good roll on the damage :) |
RNG |
2 | 4.4 |
N/A | 14 |
103
1:43
|
14+ | ||

Script thanks to Logic
|
屬性 RNG Script |
2 | 4.4 |
57% | 54 |
91
1:31
|
13 | ||
屬性 RNG |
2 | 4.9 |
N/A | 10 |
98
1:38
|
13+ | |||

Winrate ~97%
|
Script |
2 | 4.1 |
99% | 2 |
140
2:20
|
17+ | ||

It's very Fun, because I use this play when I cleared daily quest ' Natural Defenders' in Ardenweald
It very good work. when my xu-fu don't stun |
RNG |
2 | 3.4 |
N/A | 7 |
110
1:50
|
16+ | ||

Alternate strat based on available pets.
Blind is to stop heal from Devour, not to avoid headbutt. My Rose Taipan was P/P but others can work. (P/B may work if you crit.) **See comments for slight variations based on breed alterations for Rose Taipan |
屬性 RNG |
2 | 3.4 |
N/A | 6 |
142
2:22
|
18+ | ||

Crit RNG still exists. Your Feline Familiar has just enough hp to eat a non-crit Mudslide and a non-crit highest roll from Burrow. After that, it should go pretty smooth, even if Snowfang gets Stunned.
Even though it might seem like a waste to Ice Tomb, it's there just in case you *do* get stunned and Bone Crusher comes back in because they healed from killing Snowfang with Devour. Updated 6 July for script error |
RNG Script |
2 | 4.5 |
65% | 1 |
145
2:25
|
19-20 | ||

A bit of RNG involved, mostly with Bone Crusher. If Zandalari dies without Bone Crusher being in one-shot range from Xu-Fus Moonfire you need to restart.
Breed Info is conservative, might work with others. |
屬性 RNG |
2 | 3.6 |
N/A | 4 |
105
1:45
|
14+ | ||

This one can fail a lot, but will eventually get through, Hope you get crits, and they don't ehhe =) Good luck Hopefully this will be a skeleton frame for some more reliable strats at least =0)
|
RNG Script |
2 | 3.4 |
13% | 3 |
147
2:27
|
20+ | ||
RNG |
2 | 3.2 |
N/A | 7 |
145
2:25
|
18+ | |||
RNG Script |
2 | 2.5 |
14% | 16 |
100
1:40
|
13+ | |||

噬怪's Health could matter during the battle, I didn't have another breed to test it with.
The RNG in 靈魂衝擊 and 頭錘 should make the difference here: Should you land a stun consider restarting the battle or try manuveuring from there by either swapping to 貓科魔寵 as soon as the 土石流 Root disappears or finishing Chipper with your 噬怪. |
屬性 RNG |
2 | 1.0 |
N/A | 1 |
145
2:25
|
18+ | ||

4/4 wins (including mistakes) makes this one seem friendly for RNG
I used a P/P calf |
RNG |
2 | 3.0 |
N/A | 0 |
93
1:33
|
12-14 | ||

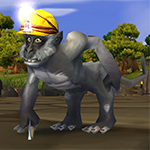
This fight is RNG heavy in that your mining monkey most likely needs to hit the second Demolish or he won't kill his target. C'Thuffer will also sometimes be a bit short on damage if he doesn't roll high on Shadow Shock. Be prepared to restart this a few times. I made this strategy work twice in six runs as crits can either win the day or ruin your day.
|
RNG Script |
2 | 1.0 |
7% | 0 |
105
1:45
|
14-15 |
包括步驟


This fight is RNG heavy in that your mining monkey most likely needs to hit the second Demolish or he won't kill his target. C'Thuffer will also sometimes be a bit short on damage if he doesn't roll high on Shadow Shock. Be prepared to restart this a few times. I made this strategy work twice in six runs as crits can either win the day or ruin your day.
| 之前 | 之後 | 獲得經驗值 | |
|---|---|---|---|
| 1 | ➜ | 3 | 239 |
| 2 | ➜ | 4 | 254 |
| 3 | ➜ | 4 | 267 |
| 4 | ➜ | 5 | 279 |
| 5 | ➜ | 6 | 289 |
| 6 | ➜ | 6 | 297 |
| 7 | ➜ | 7 | 304 |
| 8 | ➜ | 8 | 309 |
| 9 | ➜ | 9 | 312 |
| 10 | ➜ | 10 | 314 |
| 11 | ➜ | 11 | 314 |
| 12 | ➜ | 12 | 312 |
| 13 | ➜ | 13 | 309 |
| 14 | ➜ | 14 | 304 |
| 15 | ➜ | 15 | 297 |
| 16 | ➜ | 16 | 289 |
| 17 | ➜ | 17 | 279 |
| 18 | ➜ | 18 | 267 |
| 19 | ➜ | 19 | 254 |
| 20 | ➜ | 20 | 239 |
| 21 | ➜ | 21 | 223 |
| 22 | ➜ | 22 | 205 |
| 23 | ➜ | 23 | 185 |
| 24 | ➜ | 24 | 163 |
|
狩旅團之帽 |
|
|
小寵物點心 |
|
|
寵物點心 |
|
|
暗月禮帽 |
|
|
寵物對戰獎勵事件 |
|
= |
將寵物等級提升至25級並最小化經驗損失的方法 |
|
|
= |
獲得 |
|
For the best display of your strategy, please follow these guidelines:




For the best display of your strategy, please follow these guidelines:


For the best display of your strategy, please follow these guidelines:


For the best display of your strategy, please follow these guidelines:


For the best display of your strategy, please follow these guidelines:


For the best display of your strategy, please follow these guidelines:


For the best display of your strategy, please follow these guidelines:


For the best display of your strategy, please follow these guidelines:


For the best display of your strategy, please follow these guidelines:


For the best display of your strategy, please follow these guidelines:


For the best display of your strategy, please follow these guidelines:


For the best display of your strategy, please follow these guidelines:


For the best display of your strategy, please follow these guidelines:


For the best display of your strategy, please follow these guidelines:


Must mend my mauled mittens
1
lesnicus
發表在 2024-05-12 01:56:31
2
DragonsAfterDark
發表在 2024-05-12 05:31:39
2
Aranesh
發表在 2024-06-29 11:16:52
新留言