
Estrategia añadida por Rolfson#1694
3
3
|
Puntuación media: |
1.7 |
|
Puntuaciones: |
30 |
|
Tu voto: |
|
Creator |
|||||||||
|---|---|---|---|---|---|---|---|---|---|
|
Etiquetas
Filtrar estrategias:
|
|||||||||
Script |
2 | 4.8 |
N/A | 21 |
107
1:47
|
12 | |||

Cualquier mascota
|

This is a reliable two pet strategy for Taran Zhu.
For Aparecido restaurado there are 3 possible rotations based on which enemy pet is active. This is because sometimes the order in which you fight the pets changes. Please follow the steps exactly to prevent any chances of failure because this strategy is quite intricate. |
Script |
2 | 4.7 |
N/A | 49 |
103
1:43
|
12+ | |
|
|

Script by Tessriel
|
Script |
2 | 4.6 |
N/A | 35 |
160
2:40
|
23+ | |

Cualquier mascota
|

Reliable 2 pet strategy. Rooting Yen stops him swapping when he uses Feign Death, and Resilience stops you losing a turn from Li's Spin Kick.
Requires an S/B Infernal Pyreclaw. |
Raza Script |
2 | 4.6 |
N/A | 93 |
96
1:36
|
15 | |
|
|

Script by Shenk
|
Script |
2 | 4.8 |
N/A | 11 |
155
2:35
|
24+ | |
| 2 | 3.9 |
N/A | 11 |
138
2:18
|
17 | ||||

14 rounds.
|
Raza Script |
2 | 4.4 |
N/A | 8 |
120
2:00
|
14+ | ||
|
|

Script by Shadowball
|
Script |
2 | 3.9 |
N/A | 5 |
137
2:17
|
20+ | |
|
|
Raza |
2 | 5.0 |
N/A | 3 |
150
2:30
|
18+ | ||

Cualquier mascota
|

I couldn't find a reliable tactic, which survives some RNG,
therefor i came up with this one, covering it with a 3rd pet with a punch strong to humanoids like: Mordedura enfermiza, Choque de Sombras etc... (pet type doesn't matter) Cachorro vil (211) is just one good choice It could be used aswell for the Elekk de peluche Achievement, but it's not completely RNG-free with only 2 pets! (only on the last part, if either pet crits, Li might be forced to heal or you run out of juice) This tactic is tailored around being faster than Yen and Bolo and therefor striking first and eliminating most of the RNG. Let me hear, if you faced some and succeeded with my tactic ! ;-) |
Script |
2 | 5.0 |
N/A | 2 |
125
2:05
|
18+ | |

This is what happens when you're doing the Celestial Tournament for the first time ever, you have two Val'kyr nonata to play with, and you get desperate.
I've listed the breeds based on what I have/play with, but I'm not sure how critical they actually are to this fight. |
Raza Tienda Script |
2 | 0.0 |
N/A | 3 |
127
2:07
|
16+ | ||

|
Raza Script |
2 | 5.0 |
N/A | 0 |
115
1:55
|
18 | ||

Cualquier nivel 1+ Mascota
|
Raza Nivel 1+ Script |
2 | 5.0 |
N/A | 4 |
94
1:34
|
14 | ||

This one is more consistent in the rounds, so you're not having to worry about priorities.
|
Script |
2 | 5.0 |
N/A | 0 |
100
1:40
|
15 | ||
|
|

Script by Chefzac
|
Script |
2 | 3.1 |
N/A | 4 |
150
2:30
|
19+ | |

Credit to Aaron6383 on wowhead
Link |
2 | 3.2 |
N/A | 5 |
136
2:16
|
17 | |||
|
|
2 | 3.3 |
N/A | 4 |
195
3:15
|
27+ | |||

Checked the other tactics which included those pets but combined with more rare pets so I decided to combine just the ones I got (and which aren't that rare) and it worked out fine eventhough I missed the curse and my maggot didn't got enough power/speed to kill yen before he does his feign death. Just go along with your maggot if it's also the case for you and simply play pet 1-3.
|
2 | 0.0 |
N/A | 0 |
160
2:40
|
25+ | |||
| 2 | 0.0 |
N/A | 0 |
122
2:02
|
17-18 | ||||
|
|
RNG |
2 | 1.9 |
N/A | 2 |
180
3:00
|
26+ | ||
RNG |
2 | 1.4 |
N/A | 1 |
169
2:49
|
18 | |||

Second pet can be pretty much anything that has consistently high undead damage, as you'll need to do around 1k damage to the last pet after the runt dies.
I've found this strat to be fairly RNG-proof even if you get unlucky on thrash, and considerably more consistent than the moth strategies out there right now. |
RNG Script |
2 | 1.7 |
N/A | 3 |
165
2:45
|
25+ | ||
|
|

This strategy has a very, very slight risk to fail in the very beginning. I would therefore recommend to fight Taran Zhu first if you use this strategy.
|
Raza RNG |
2 | 1.0 |
N/A | 0 |
205
3:25
|
29+ |
Incl. pasos:


Habilidades: 2 * *
Raza: Cualquier
| Raza | Salud | Poder | Velocidad |
|---|---|---|---|
| BB | 1562 | 292 | 244 |
| HH | 1806 | 276 | 227 |
Habilidades: 1 * *
Raza: Cualquier
| Raza | Salud | Poder | Velocidad |
|---|---|---|---|
| HH | 1806 | 260 | 244 |
| HS | 1627 | 260 | 273 |
Habilidades: 1 * *
Raza: Cualquier
| Raza | Salud | Poder | Velocidad |
|---|---|---|---|
| SS | 1339 | 260 | 337 |
| PS | 1339 | 289 | 301 |
| SB | 1404 | 273 | 301 |
Habilidades: 1 * *
Raza: Cualquier
| Raza | Salud | Poder | Velocidad |
|---|---|---|---|
| PP | 1359 | 353 | 240 |
| PS | 1359 | 318 | 269 |
| HS | 1506 | 288 | 269 |


Habilidades: * * 2
Raza: Cualquier
| Raza | Salud | Poder | Velocidad |
|---|---|---|---|
| HH | 2537 | 260 | 179 |
Sustitutos:
1 / 6
Second pet can be pretty much anything that has consistently high undead damage, as you'll need to do around 1k damage to the last pet after the runt dies.
I've found this strat to be fairly RNG-proof even if you get unlucky on thrash, and considerably more consistent than the moth strategies out there right now.
| Antes | Después | Ganancia de Experiencia | |
|---|---|---|---|
| 1 | ➜ | 9 | 2393 |
| 2 | ➜ | 9 | 2541 |
| 3 | ➜ | 9 | 2673 |
| 4 | ➜ | 9 | 2789 |
| 5 | ➜ | 10 | 2888 |
| 6 | ➜ | 10 | 2970 |
| 7 | ➜ | 11 | 3036 |
| 8 | ➜ | 12 | 3086 |
| 9 | ➜ | 12 | 3119 |
| 10 | ➜ | 13 | 3135 |
| 11 | ➜ | 14 | 3135 |
| 12 | ➜ | 15 | 3119 |
| 13 | ➜ | 15 | 3086 |
| 14 | ➜ | 16 | 3036 |
| 15 | ➜ | 17 | 2970 |
| 16 | ➜ | 18 | 2888 |
| 17 | ➜ | 18 | 2789 |
| 18 | ➜ | 19 | 2673 |
| 19 | ➜ | 20 | 2541 |
| 20 | ➜ | 21 | 2393 |
| 21 | ➜ | 22 | 2228 |
| 22 | ➜ | 23 | 2046 |
| 23 | ➜ | 23 | 1848 |
| 24 | ➜ | 24 | 1634 |
|
Sombrero de safari |
|
|
Chuchería inferior para mascotas |
|
|
Chuchería para mascotas |
|
|
Chistera de la Luna Negra |
|
|
Semana de Duelos de Mascotas |
|
= |
La mascota sube a nivel 25 con pérdida mínima de EXP |
|
|
= |
Se pierde la EXP adicional por encima del nivel 25 |
|
For the best display of your strategy, please follow these guidelines:






For the best display of your strategy, please follow these guidelines:


For the best display of your strategy, please follow these guidelines:


For the best display of your strategy, please follow these guidelines:


For the best display of your strategy, please follow these guidelines:


For the best display of your strategy, please follow these guidelines:


For the best display of your strategy, please follow these guidelines:


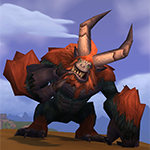
Líder del Shadopan y maestro en obligar a pandaren diminutos a pelear para él.
1
Dévine
escrito el 2025-06-27 23:40:07
1
Tackleberry#11654
escrito el 2025-04-10 07:07:08
1
Inteati
escrito el 2025-03-24 18:11:22
1
devilkept
escrito el 2025-01-15 05:31:57
1
Elfyr
escrito el 2023-05-17 19:52:50
0
pando escrito el 2023-04-19 16:42:49
2
Sabra
escrito el 2021-05-14 16:36:42
0
Cynfire
escrito el 2021-04-22 19:34:33
2
Meemo
escrito el 2021-04-18 12:20:03
2
BlofeldsCat
escrito el 2021-04-14 15:56:52
1
Putin-XyuLo
escrito el 2022-07-23 12:11:14
Nuevo comentario: