^
vs. Leeching

Stratégie proposée par Shenk

Strategy 3 of 4
Browse all alternatives

Ajout étape:

Leeching 0
Special or not:0Special or not:1111213512838821350

Talents : 1 1 1
Breed: PP

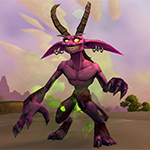
Diablotin rebelle
Cette mascotte peut avoir les breeds suivants:

Breed Vie Puissance Vitesse
PP 1319 341 260
PS 1319 305 289
PB 1384 305 273

Les breeds surlignés en rouge ne fonctionnent pas pour cette stratégie.

Special or not:0Special or not:1112263815444526380

Talents : 1 1 2
Breed: Tous

Minimancien
Cette mascotte peut avoir les breeds suivants:

Breed Vie Puissance Vitesse
HH 1908 203 280


Special or not:0Special or not:1212241314319324130

Talents : 2 1 2
Breed: Tous

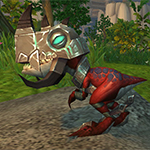
Croque-mollets zandalari
Cette mascotte peut avoir les breeds suivants:

Breed Vie Puissance Vitesse
PB 1384 314 265


All of those pets can enable a lot of ticks from Aura de Gonk, making your active pet extremely hard to kill.

Breed
Au moins une mascotte de cette stratégie doit être d'un breed spécifique
Toutes les stratégies ne sont pas infaillibles. Celle-ci est l'une d'entre elles. Vous aurez peut-être besoin de recommencer le combat, si l'aléatoire n'est pas en votre faveur !
Cette stratégie utilise des mascottes provenant du jeu de cartes à collectionner WoW (TCG) ou du marché noir pour des sommes conséquentes de PO.
Cette stratégie utilise des mascottes provenant de la boutique en jeu WoW, achetables via de l'argent réél.
Vous pouvez utiliser cette stratégie pour XP une mascotte de bas niveau.
Certaines instructions sont plus difficiles à suivre que d'autres. C'est ce que vous pourrez trouver dans cette stratégie !
Cette stratégie propose un TD script pouvant être utilisé avec l'addon du même nom. Vous pouvez copier le script dans votre presse-papier en cliquant sur le bouton à gauche des mascottes.
Au moins une des mascottes ne peut plus être obtenue aujourd'hui. Si vous l'avez, félicitations !
Un membre de l'équipe a trouvé cette stratégie particulièrement efficace et l'a mise en avant avec ce tag.
In Dragonflight Patch 10.2, the ability Time Bomb has been changed. This tag is marking strategies using Time Bomb so they can be reviewed.
Détails de la stratégie
2020-02-06 17:10:25
Date de dernière mise à jour de la stratégie.
2019-10-27 05:57:33
Date de création de la stratégie.
4,227
Nombre de vues. Indique combien de fois cette stratégie a été vue par les visiteurs du site.
RI
Immolation is the number #1 priority. After that you can use Portail. Staying in is also an option if you are in a good match-up and you want to make use of the backline healing. Also watch out for the health of your other pets considering Portail will swap in the healthiest.

For the best display of your strategy, please follow these guidelines:

  • Use QuickFill elements where possible
  • Enter custom instructions in English
  • Check the Strategy Creation Guide for more info
Diablotin rebelle
Brûlure
Immolation
Portail
Minimancien
Horion de l’ombre
Réanimation d’un allié
Barrage d’os
Croque-mollets zandalari
Déchirure
Griffe noire
Aura de Gonk
Pass
Bring in your Diablotin rebelle
Bring in your Minimancien
Bring in your Croque-mollets zandalari
Swap to your Diablotin rebelle
Swap to your Minimancien
Swap to your Croque-mollets zandalari
An enemy pet comes in
Any standard attack will finish the fight
 
Diablotin rebelle
Minimancien
Croque-mollets zandalari
Brûlure
Immolation
Portail
Horion de l’ombre
Réanimation d’un allié
Barrage d’os
Déchirure
Griffe noire
Aura de Gonk
Important: Please enter your instructions in English or a large parts of the community will not be able to read them.
Some typical sentences are translated automatically. Move your mouse over this part for more details.
The following strings are auto-translated if you enter them in the defined format. It is recommended to use them where possible:
[ability=123:Spellname] - [pet=123:Petname] dies
[ability=123:Name] - [enemy=123:Enemyname] dies
[ability=123:Name] until [pet=123:Petname] dies
[ability=123:Name] until [enemy=123:Enemyname] dies
Swap back to [pet=123:Petname]
[ability=123:Name] until the fight is won
Minim.
Apply Réanimation d’un allié and Barrage d’os, they add damage that stays even when you swap and their damage synergizes really well with Aura de Gonk. You can keep the Minimancien for quite a while because of the high health. Most of the time you should keep the dots up during your undead round.

For the best display of your strategy, please follow these guidelines:

  • Use QuickFill elements where possible
  • Enter custom instructions in English
  • Check the Strategy Creation Guide for more info
Diablotin rebelle
Brûlure
Immolation
Portail
Minimancien
Horion de l’ombre
Réanimation d’un allié
Barrage d’os
Croque-mollets zandalari
Déchirure
Griffe noire
Aura de Gonk
Pass
Bring in your Diablotin rebelle
Bring in your Minimancien
Bring in your Croque-mollets zandalari
Swap to your Diablotin rebelle
Swap to your Minimancien
Swap to your Croque-mollets zandalari
An enemy pet comes in
Any standard attack will finish the fight
 
Diablotin rebelle
Minimancien
Croque-mollets zandalari
Brûlure
Immolation
Portail
Horion de l’ombre
Réanimation d’un allié
Barrage d’os
Déchirure
Griffe noire
Aura de Gonk
Important: Please enter your instructions in English or a large parts of the community will not be able to read them.
Some typical sentences are translated automatically. Move your mouse over this part for more details.
The following strings are auto-translated if you enter them in the defined format. It is recommended to use them where possible:
[ability=123:Spellname] - [pet=123:Petname] dies
[ability=123:Name] - [enemy=123:Enemyname] dies
[ability=123:Name] until [pet=123:Petname] dies
[ability=123:Name] until [enemy=123:Enemyname] dies
Swap back to [pet=123:Petname]
[ability=123:Name] until the fight is won
ZS
Be aware that Aura de Gonk starts being on cooldown at the start of the match. The more passive damage you have active (Immolation,Réanimation d’un allié,Barrage d’os,Déchirure) the more healing ticks your active pet gets. So you could use Aura de Gonk and then swap to one of the other pets to heal them. However I rarely do that because most of the time it is better to stay in and apply Griffe noire. This will grant you a ton of potential damage and it works well with Déchirure.

For the best display of your strategy, please follow these guidelines:

  • Use QuickFill elements where possible
  • Enter custom instructions in English
  • Check the Strategy Creation Guide for more info
Diablotin rebelle
Brûlure
Immolation
Portail
Minimancien
Horion de l’ombre
Réanimation d’un allié
Barrage d’os
Croque-mollets zandalari
Déchirure
Griffe noire
Aura de Gonk
Pass
Bring in your Diablotin rebelle
Bring in your Minimancien
Bring in your Croque-mollets zandalari
Swap to your Diablotin rebelle
Swap to your Minimancien
Swap to your Croque-mollets zandalari
An enemy pet comes in
Any standard attack will finish the fight
 
Diablotin rebelle
Minimancien
Croque-mollets zandalari
Brûlure
Immolation
Portail
Horion de l’ombre
Réanimation d’un allié
Barrage d’os
Déchirure
Griffe noire
Aura de Gonk
Important: Please enter your instructions in English or a large parts of the community will not be able to read them.
Some typical sentences are translated automatically. Move your mouse over this part for more details.
The following strings are auto-translated if you enter them in the defined format. It is recommended to use them where possible:
[ability=123:Spellname] - [pet=123:Petname] dies
[ability=123:Name] - [enemy=123:Enemyname] dies
[ability=123:Name] until [pet=123:Petname] dies
[ability=123:Name] until [enemy=123:Enemyname] dies
Swap back to [pet=123:Petname]
[ability=123:Name] until the fight is won


Nouveau Commentaire :


Name:

Lien: