
Estrategia añadida por DragonsAfterDark
12
12
|
Puntuación media: |
5 |
|
Puntuaciones: |
8 |
|
Tu voto: |
|
Creator |
|||||||||
|---|---|---|---|---|---|---|---|---|---|
|
Etiquetas
Filtrar estrategias:
|
|||||||||

|

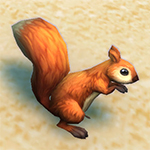
Depending on RNG you may not even need the squirrel.
Script thanks to Begija |
Script |
2 | 5.0 |
100% | 50 |
105
1:45
|
15+ | |
|
Script |
2 | 5.0 |
100% | 12 |
103
1:43
|
16 | ||

|
|
Script |
2 | 5.0 |
100% | 3 |
100
1:40
|
14-16 | |

|
I did not have a H/S breed Eskarrata húmeda to test with and
I suspect that the H/S breed will not be able to consistently finish the fight in 9-10 turns. |
Script |
2 | 5.0 |
95% | 1 |
74
1:14
|
9+ | |

Cualquier Alimaña de nivel 25+
|
i based this strat on the strat by Jagûar ,,, i want to give credit where credit is due. i changed couple of things, and for me the strat ran a little smoother.
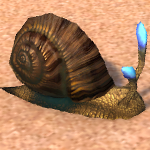
Big thanks for Jagûar for the original strat. as Jagûar said, The first snail must have 1969 (or more) HP, otherwise it will die prematurely. I chose a Mudshell Conch (H/P breed) which has 1790 health. My second pet is Zoom (H/H breed) and the third pet can be any critter pet. i chose Scooter the snail (H/H breed) but didn't even have to use the third pet. i cannot tell you if other breeds will work here as i did not test any other breeds, however, this strat for me was working flawless |
Raza |
2 | 4.3 |
N/A | 3 |
131
2:11
|
20+ | |

|
I chose a pet with good abilities against critters as third one but didn't even need it.
Script thank to Eekwibble |
Script |
2 | 3.5 |
98% | 1 |
105
1:45
|
15+ | |
|
|
The first snail must have 1969 HP, otherwise it won't be able to survive at the right time well into half health of Tikka, before it dies. If you chose to use Snail 1 with lower than 1969 HP, there's a high chance that your snail will fail.
Strategy tested and passed January 27th 2019 |
Raza |
2 | 0.0 |
N/A | 0 |
112
1:52
|
18 |
Incl. pasos:


Sustitutos:
1 / 11
1 / 6
| Antes | Después | Ganancia de Experiencia | |
|---|---|---|---|
| 1 | ➜ | 3 | 239 |
| 2 | ➜ | 4 | 254 |
| 3 | ➜ | 4 | 267 |
| 4 | ➜ | 5 | 279 |
| 5 | ➜ | 6 | 289 |
| 6 | ➜ | 6 | 297 |
| 7 | ➜ | 7 | 304 |
| 8 | ➜ | 8 | 309 |
| 9 | ➜ | 9 | 312 |
| 10 | ➜ | 10 | 314 |
| 11 | ➜ | 11 | 314 |
| 12 | ➜ | 12 | 312 |
| 13 | ➜ | 13 | 309 |
| 14 | ➜ | 14 | 304 |
| 15 | ➜ | 15 | 297 |
| 16 | ➜ | 16 | 289 |
| 17 | ➜ | 17 | 279 |
| 18 | ➜ | 18 | 267 |
| 19 | ➜ | 19 | 254 |
| 20 | ➜ | 20 | 239 |
| 21 | ➜ | 21 | 223 |
| 22 | ➜ | 22 | 205 |
| 23 | ➜ | 23 | 185 |
| 24 | ➜ | 24 | 163 |
|
Sombrero de safari |
|
|
Chuchería inferior para mascotas |
|
|
Chuchería para mascotas |
|
|
Chistera de la Luna Negra |
|
|
Semana de Duelos de Mascotas |
|
= |
La mascota sube a nivel 25 con pérdida mínima de EXP |
|
|
= |
Se pierde la EXP adicional por encima del nivel 25 |
|
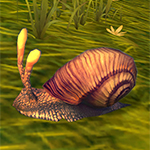
| Caracol Brilloconcha | BB |
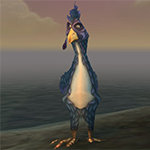
| Pollo de matorral | PB |
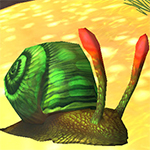
| Caracola Valvalodo | BB |
For the best display of your strategy, please follow these guidelines:


For the best display of your strategy, please follow these guidelines:
For the best display of your strategy, please follow these guidelines:
For the best display of your strategy, please follow these guidelines:
For the best display of your strategy, please follow these guidelines:
For the best display of your strategy, please follow these guidelines:
For the best display of your strategy, please follow these guidelines:
For the best display of your strategy, please follow these guidelines:
For the best display of your strategy, please follow these guidelines:
For the best display of your strategy, please follow these guidelines:
For the best display of your strategy, please follow these guidelines:
For the best display of your strategy, please follow these guidelines:
For the best display of your strategy, please follow these guidelines:
For the best display of your strategy, please follow these guidelines:
For the best display of your strategy, please follow these guidelines:
For the best display of your strategy, please follow these guidelines:
For the best display of your strategy, please follow these guidelines:
For the best display of your strategy, please follow these guidelines:

Champions of Vol'dun? Let's see how you fare against the Champions of the Celestial Tournament!


1
Antilles
escrito el 2024-01-14 06:49:03
3
Sargonnax escrito el 2019-09-21 06:39:38
1
Bunnee
escrito el 2022-04-22 07:03:42
1
Medusa#1484
escrito el 2021-03-13 00:47:43
0
Sara escrito el 2020-02-17 10:48:02
2
Daedrynn
escrito el 2018-12-30 18:55:45
Turn 1+2 Dive
Turn 3 Acidic Goo
Turn 4+5 Ooze Touch
Tikka comes in
Turn 1 Acidic Goo
Turn 2 Pass
Turn 3+4 Dive (your Dive will hit after Dust Cloud fades)
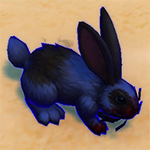
Milo comes in, bring in your Bush Chicken
Turn 1 Headbutt
Turn 2 Rake
Turn 3-5 Flock
Turn 6 (if needed) Headbutt
3
Maceye1#1882
escrito el 2019-05-15 19:17:04
3
(OP) DragonsAfterDark
escrito el 2019-05-15 22:20:13
-2
yeahno escrito el 2019-02-15 21:58:33
Turn 3 Acidic Goo
Turn 4+5 Ooze Touch
Tikka comes in
.... This is not happening, not even close, Buzzbeak is nowhere near dead
1
(OP) DragonsAfterDark
escrito el 2019-04-22 13:57:50
3
karibean
escrito el 2018-12-17 13:28:45
1
Kimberleigh escrito el 2018-12-17 19:00:10
1
Evanya escrito el 2019-01-12 17:19:15
1
Greeneggs
escrito el 2018-12-17 13:33:31
0
abyrvalg escrito el 2019-01-12 13:47:16
1
Melandroso
escrito el 2019-01-12 05:13:42
1
Prudentius
escrito el 2019-01-02 13:30:20
ability(#3)
ability(#2) [enemy.aura(Acidic Goo:368).duration < 1]
ability(#1)
change(next)
I noticed that it is better to use Dive on Tikka's Dust Cloud rounds even if it doesn't connect. It is ultimately an Ooze Touch and the Acidic Goo dot that brings Tikka to a kill strike from the Bush Chicken's Headbutt.
1
Kirandji
escrito el 2018-12-29 19:59:54
1
RockerChick#1288
escrito el 2018-12-13 00:00:47
1
Rellyk
escrito el 2018-12-17 18:21:17
1
Servv
escrito el 2018-12-13 11:58:49
1
Blackmu
escrito el 2019-06-25 09:05:43
Nuevo comentario: