
攻略提供者是 Applejack#1269
5
5
|
平均評分: |
3.1 |
|
評分: |
7 |
|
你的投票: |
|
Creator |
|||||||||
|---|---|---|---|---|---|---|---|---|---|
|
Tags
Filter strategies:
|
|||||||||


任何寵物
|

Time: ~1:20 (~9 rounds)
|
屬性 Script |
2 | 4.6 |
99% | 22 |
85
1:25
|
9+ | |


|
Updated 15 June 24 with specific pet in slot 2 and new script
|
Script |
2 | 4.1 |
98% | 29 |
110
1:50
|
15+ | |


任何等級 1+ 寵物
|
excellent strategy found on wowhead by user roeevv.
Script thanks to Draagz |
等級 1+ Script |
2 | 3.9 |
N/A | 33 |
139
2:19
|
17 | |


|
Esta estrategia me ha funcionado de maravilla, espero que les guste. Mucha suerte
|
RNG Script |
2 | 4.1 |
97% | 10 |
150
2:30
|
18 | |
|
任何等級 14+ 寵物

|
This is a fork of Lazey and Applejack's strats. Due credits to them.
Any snail works. I've made this strat as consistent and as reliable as possible to play around and minimize the RNG. Please be sure to read the steps carefully. Level Pet takes a maximum of 847 damage in the unlikely event that all 5 Void Cyclone stacks manage to hit it at FULL DAMAGE. You can definitely bring a lower hp level pet if you're not feeling unlucky. See comments for some commentary. |
RNG 等級 14+ Script |
2 | 3.7 |
89% | 12 |
158
2:38
|
19 | |


|
8~10
|
屬性 Script |
2 | 4.5 |
85% | 6 |
80
1:20
|
9-10 | |

|
9
|
屬性 Script |
2 | 4.2 |
91% | 6 |
75
1:15
|
9+ | |

任何等級 1+ 寵物
|
I've been trying for awhile to 2-pet this fight with a low level third, and I think this is the one. Depending on the damage rolls of your Slither, there's a possibility of Void Cyclone being active for 1 turn total in the fight. Because of this, your carry pet should have 129+ HP (more if it's a Flying type).
|
RNG 等級 1+ |
2 | 3.7 |
N/A | 6 |
152
2:32
|
20 | |
|
Based on the alpoxwolf#1723 strategie with little modification.
I add TD Script and third battle pet (Direbeak Hatchling) because sometime the Glutted Bleeder (mine in P/P) die before end. This PNJ isn't good for levelling pet (give really little XP) i prefer end the battle at 100%. |
Script |
2 | 5.0 |
100% | 2 |
135
2:15
|
17+ | |


|
屬性 Script |
2 | 5.0 |
80% | 3 |
97
1:37
|
13 | ||


|
RNG |
2 | 4.8 |
N/A | 3 |
115
1:55
|
15 | ||
|
任何等級 14+ 寵物
|
This is a variation of Lazey's setup except with a Dragonling for the last 2 pets. Dragonling is strong vs magic and tough vs magic which should make it more reliable.
|
RNG 等級 14+ Script |
2 | 3.1 |
92% | 5 |
155
2:35
|
20 | |


任何等級 1+ 寵物
|
Strat by roeevv on wowhead.
Level pets are not particularly useful since the XP nerf. So if you put any half decent pet into the leveling slot, it's a guaranteed win. |
RNG 等級 1+ |
2 | 4.0 |
N/A | 5 |
148
2:28
|
20-21 | |


|
If the enemy is one step ahead, you have to be two steps ahead.
Created this strategy to get this fight over quickly, tell me how it went for you! |
Script |
2 | 4.0 |
75% | 0 |
96
1:36
|
13+ | |
|
|
Did this WQ today and since I am in full 8.2 PTR strategy creation mode right now I thought it would be nice to spend some time and put something here that fits the post-XP-nerf requirements better than my old team.
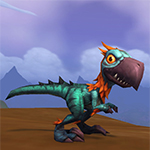
RNG heavy team, sometimes Ikky kills two pets, sometimes he doesn't live long enough to fully debuff the second enemy, but with this superfast Dragonhawk Hatchling breed and MPD as a backup, you shouldn't have problems to win. (9-12 rounds) |
屬性 Script |
2 | 2.0 |
99% | 1 |
95
1:35
|
11+ | |

|
RNG 商店 |
2 | 2.0 |
N/A | 2 |
130
2:10
|
16 | ||


|
屬性 Script |
2 | 0.0 |
100% | 0 |
110
1:50
|
16 | ||


|
屬性 Script |
2 | 0.0 |
100% | 0 |
94
1:34
|
13+ | ||


|
The fastest and most reliable strat I've been able to come up with from my current Pet Journal roster.
There are variations in the strat that the TDScript takes into account. You should be able to just mash the 'A' button |
屬性 RNG Script |
2 | 0.0 |
65% | 0 |
107
1:47
|
15 | |

任何等級 14+ 寵物
|
Lava Beetle can be replaced by Fire Beetle and maybe even by other Critters.
It makes a difference after which enemy spells you heal the beetle (hard to predict). |
屬性 RNG 等級 14+ |
2 | 0.0 |
N/A | 0 |
130
2:10
|
18 | |

任何寵物
|
*** REUSED ENTRY – the correct date is 2020-09-15 ***
A testament to how incredibly stupid the Shadowlands damage is. Maybe if I post more like these they will be happy to enforce a change… (LS's breeds owned: H/P and H/H) |
屬性 Script |
2 | 0.0 |
0% | 0 |
115
1:55
|
16-17 | |


|
屬性 |
2 | 0.0 |
N/A | 0 |
112
1:52
|
16 | ||

|
If you think you can or think you can't, you are probably right.
|
屬性 Script |
2 | 2.0 |
100% | 0 |
92
1:32
|
13+ |
包括步驟


任何等級 14+ 寵物
>900 |
This is a variation of Lazey's setup except with a Dragonling for the last 2 pets. Dragonling is strong vs magic and tough vs magic which should make it more reliable.
| 之前 | 之後 | 獲得經驗值 | |
|---|---|---|---|
| 1 | ➜ | 3 | 239 |
| 2 | ➜ | 4 | 254 |
| 3 | ➜ | 4 | 267 |
| 4 | ➜ | 5 | 279 |
| 5 | ➜ | 6 | 289 |
| 6 | ➜ | 6 | 297 |
| 7 | ➜ | 7 | 304 |
| 8 | ➜ | 8 | 309 |
| 9 | ➜ | 9 | 312 |
| 10 | ➜ | 10 | 314 |
| 11 | ➜ | 11 | 314 |
| 12 | ➜ | 12 | 312 |
| 13 | ➜ | 13 | 309 |
| 14 | ➜ | 14 | 304 |
| 15 | ➜ | 15 | 297 |
| 16 | ➜ | 16 | 289 |
| 17 | ➜ | 17 | 279 |
| 18 | ➜ | 18 | 267 |
| 19 | ➜ | 19 | 254 |
| 20 | ➜ | 20 | 239 |
| 21 | ➜ | 21 | 223 |
| 22 | ➜ | 22 | 205 |
| 23 | ➜ | 23 | 185 |
| 24 | ➜ | 24 | 163 |
|
狩旅團之帽 |
|
|
小寵物點心 |
|
|
寵物點心 |
|
|
暗月禮帽 |
|
|
寵物對戰獎勵事件 |
|
= |
將寵物等級提升至25級並最小化經驗損失的方法 |
|
|
= |
獲得 |
|
For the best display of your strategy, please follow these guidelines:


For the best display of your strategy, please follow these guidelines:
For the best display of your strategy, please follow these guidelines:
For the best display of your strategy, please follow these guidelines:
For the best display of your strategy, please follow these guidelines:
For the best display of your strategy, please follow these guidelines:
For the best display of your strategy, please follow these guidelines:
For the best display of your strategy, please follow these guidelines:
For the best display of your strategy, please follow these guidelines:

Capturing void creatures is fun they said. Nothing can go wrong they said.


1
DragonsAfterDark
發表在 2022-12-11 20:44:30
1
MERMEL#1857
發表在 2021-10-30 23:02:39
ability(Ravage:802) [ enemy.hp<617 ]
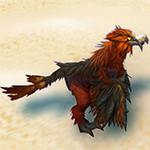
ability(Nature's Ward:574) [ !self(Teroclaw Hatchling:1416).aura(Nature's Ward:820).exists ]
ability(Alpha Strike:504)
ability(Decoy:334)
ability(Breath:115)
change(#2) [ self(Teroclaw Hatchling:1416).dead ]
change(Mechanical Pandaren Dragonling:844) [ self(#2).active ] (已編輯)
3
Mordenkainen
發表在 2019-05-23 19:38:46
0
Snowtracker 發表在 2018-12-01 21:51:03
1
Iamgladious
發表在 2018-09-26 14:56:28
2
Prudentius
發表在 2018-08-23 17:07:50
That said I found the script offered to be overly complex at points. If your Teroclaw Hatchling gets its beak ripped off by the first enemy pet its best just to restart the fight. nature's ward should only ever be cast once because Water Jet will destroy the hatchling is Nature's Ward is still applied after the second enemy pet is in play for two rounds.
This is the TD Script I wrote:
change(next) [ self(#1).dead & ! self(#3).played ]
ability(Ravage:802) [ enemy.hp < 617 ]
ability(Ravage:802) [ self.speed.slow ]
ability(Nature's Ward:574) [ enemy(#1).hp.full ]
ability(Decoy:334) [ enemy.ability(Darkflame:792).duration < 2 ]
ability(#1)
Feel free to use the first line for pet swapping, but be mindful of enemy pet abilities that pull in your highest health backline pet.
1
Tuma
發表在 2018-08-23 19:13:50
1
Prudentius
發表在 2018-08-24 11:37:40
That line should read
ability(Nature's Ward:574) [ enemy(#1).hp.full & self.aura(Nature's Ward:820).duration < 1 ]
1
(OP) Applejack#1269
發表在 2018-09-03 02:48:28
2
MuffinManKen
發表在 2018-08-29 23:57:22
1
MichelleLisa#1708
發表在 2018-08-29 23:19:05
0
crunchlab
發表在 2018-08-23 19:22:22
1
anon 發表在 2018-08-23 16:38:09
1
Ravynsur
發表在 2018-08-23 13:09:16
4
simrock
發表在 2018-08-23 07:34:07
ability(Nature's Ward:574) [ !self.aura(Nature's Ward:820).exists & enemy.hp>309 & !enemy(#2).active ]
on line 3, otherwise Nature's Ward is casted too often causing your Teroclaw Hatchling to die to the 2nd enemy
3
Palorii
發表在 2018-08-23 12:10:17
2
Aarmo#21132
發表在 2018-08-23 09:54:33
1
Moo 發表在 2018-08-23 08:51:30
0
Ruta 發表在 2018-08-23 06:47:19
Should just read Decoy. Works well otherwise if you discount your levelling pet dying regularly.
2
Churros 發表在 2018-08-23 04:04:52
1
Ibiza 發表在 2018-08-20 14:21:18
-1
Ducktok 發表在 2018-08-20 13:20:57
1
Wondercave
發表在 2018-08-20 13:14:21
0
Vagamagus 發表在 2018-08-23 10:39:13
新留言