
Estrategia añadida por DragonsAfterDark
18
18
|
Puntuación media: |
4.9 |
|
Puntuaciones: |
23 |
|
Tu voto: |
|
Creator |
|||||||||
|---|---|---|---|---|---|---|---|---|---|
|
Etiquetas
Filtrar estrategias:
|
|||||||||

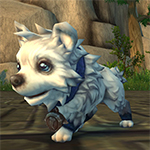
As per the suggestion from Carpo and Rascallycat on the other strategy, I made one with Snowfang.
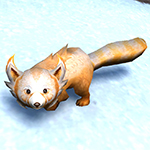
Updated 9 February 24: 1. With the buff to elemental damage when Blizzard is up, Snowy Panda can finish Slasher without needing the Ice Barrier. 2. switched the beaver for a second Snowy Panda just in case of crits, otherwise might only need it for Blizzard. If Pounder misses Snowfang on one of their rounds you won't need the second Snowy Panda at all. |
RNG Script |
2 | 4.9 |
99% | 18 |
108
1:48
|
13 | ||

Cualquier Bestia de nivel 25+
|
Script |
2 | 4.9 |
97% | 73 |
135
2:15
|
19 | ||

Cualquier Bestia de nivel 25+

Cualquier Bestia de nivel 25+
|

Script thanks to SirSuoh
|
RNG Script |
2 | 4.7 |
100% | 70 |
310
5:10
|
48+ | |

I tested this strategy multiple times. Eventhough the enemy team crits or Battery swaps with Slasher before he dies, keep continuing the steps. Eventually you will kill them all.
In one cash it went really weird and I had to use some common sense with my Lost Netherpup vs Pounder. In another case Pounder missed on my Snowy Panda and I didn't even need my Lost Netherpup. BE AWARE; the third step is named differently. The ability of the Cinder Pup is called Blazing Yip and not Bark. I couldn't change this unfortunately |
RNG |
2 | 4.1 |
N/A | 6 |
140
2:20
|
17+ | ||
RNG Tienda |
2 | 3.4 |
N/A | 7 |
143
2:23
|
17+ | |||

Strategy goals:
- Prevent Slasher from doing damage. - Cinder Pup provides a constant dot giving the extra damage needed to push the controlling mechanisms of the strategy to fruition. |
Script |
2 | 5.0 |
97% | 1 |
120
2:00
|
14-15 | ||

Strategy Inspired by others, using pets that I had available
Technically Ragepeep can solo the fight, but it is a little RNG and slow. You can replace the first 2 pets with literally any 2 pets that can kill Battery. |
Script |
2 | 5.0 |
96% | 1 |
280
4:40
|
36-38 | ||

The intent of this strat is to try to quicken things up. In the end, all you really need to succeed is the Piofurioso, as seen by a different strategy. However, as good as it is, it takes up to 50 turns or more. In the four times I've tried this, twice I've had to do two pets with Ragepeep; however, once I only had to do Pounder, and the last time, my Ragepeep came in just in time to soak Pounder's explosion. So maybe 20 turns at best, 35-38 at worst? You haven't really lost anything to give it a try!
|
2 | 5.0 |
N/A | 1 |
125
2:05
|
14+ | |||

start copied from Berendain but follow up is different.
Not completly crit proof. Battery should die on the first or second akunda's wrath turn. Not sooner. If slasher crits with prowl metal fist on thunder lizard then restart |
2 | 5.0 |
N/A | 2 |
139
2:19
|
18-19 | |||

Cualquier Bestia de nivel 25+
|
RNG |
2 | 4.0 |
N/A | 2 |
134
2:14
|
16+ | ||

There is some RNG in the first and third pets dying at the right time. I had around 75% success rate with the strategy, however.
|
RNG No Obtenible |
2 | 3.3 |
N/A | 2 |
156
2:36
|
22+ | ||

All wild caught pets, for those who have bad drop RNG.
Notes: * Haven't tested all breeds myself, used PB/HP/HP. * The third pet can be any beast with a dodge/burrow/survival move, as long as it can avoid the Explode. Best to have a 1 round hit ability selected as well. * Slasher can be RNG and once every ten battles or so can polish off your second pet, if this happens restart the fight. This is my first strategy, my apologies if I missed anything. I have tried to do a TD Script but failed miserably so if a kind person comments with one I will edit it in. |
Raza RNG |
2 | 3.2 |
N/A | 1 |
200
3:20
|
30 | ||

Low RNG. The idea is that most of the damage comes from Immolate in the backline, while Hibernate with the main pet. Also Stun to avoid Prowl.
|
RNG No Obtenible |
2 | 2.6 |
N/A | 2 |
195
3:15
|
25+ | ||

Included a TD that attempts to navigate the RNG for you a bit. Doesn't failsafe on a stun, but will for early Bebé cuernoviejo death.
Very RNG heavy, if your Bebé cuernoviejo gets crit you must restart. If you get a stun with Volcán, you might be able to recover it if you swap immediately to your Broodling and play it out from there, but its uncharted territory. I would always restart if it happened to try and have a "smooth" run for this strategy. In the finale, you must either not get hit or not get crit at least once for my chosen Broodling to survive. Each species and breed has its own requirements and you will have to adjust accordingly to what you have. Its very possible though, I ran this team 5 times after developing the strat and it only failed on consecutive crits from Pounder. The biggest thing you need in your third slot is >249 Speed and Burrow. It isn't heavy RNG, but it is far from consistent. Use at your own discretion. |
RNG Complicada Script |
2 | 2.4 |
67% | 2 |
171
2:51
|
23 | ||
Script |
2 | 0.0 |
98% | 0 |
154
2:34
|
25 | |||
Tienda |
2 | 0.0 |
N/A | 0 |
167
2:47
|
20 |
Incl. pasos:


As per the suggestion from Carpo and Rascallycat on the other strategy, I made one with Snowfang.
Updated 9 February 24:
1. With the buff to elemental damage when Blizzard is up, Snowy Panda can finish Slasher without needing the Ice Barrier.
2. switched the beaver for a second Snowy Panda just in case of crits, otherwise might only need it for Blizzard. If Pounder misses Snowfang on one of their rounds you won't need the second Snowy Panda at all.
| Antes | Después | Ganancia de Experiencia | |
|---|---|---|---|
| 1 | ➜ | 3 | 239 |
| 2 | ➜ | 4 | 254 |
| 3 | ➜ | 4 | 267 |
| 4 | ➜ | 5 | 279 |
| 5 | ➜ | 6 | 289 |
| 6 | ➜ | 6 | 297 |
| 7 | ➜ | 7 | 304 |
| 8 | ➜ | 8 | 309 |
| 9 | ➜ | 9 | 312 |
| 10 | ➜ | 10 | 314 |
| 11 | ➜ | 11 | 314 |
| 12 | ➜ | 12 | 312 |
| 13 | ➜ | 13 | 309 |
| 14 | ➜ | 14 | 304 |
| 15 | ➜ | 15 | 297 |
| 16 | ➜ | 16 | 289 |
| 17 | ➜ | 17 | 279 |
| 18 | ➜ | 18 | 267 |
| 19 | ➜ | 19 | 254 |
| 20 | ➜ | 20 | 239 |
| 21 | ➜ | 21 | 223 |
| 22 | ➜ | 22 | 205 |
| 23 | ➜ | 23 | 185 |
| 24 | ➜ | 24 | 163 |
|
Sombrero de safari |
|
|
Chuchería inferior para mascotas |
|
|
Chuchería para mascotas |
|
|
Chistera de la Luna Negra |
|
|
Semana de Duelos de Mascotas |
|
= |
La mascota sube a nivel 25 con pérdida mínima de EXP |
|
|
= |
Se pierde la EXP adicional por encima del nivel 25 |
|
| Dientenieve | PP |
| Panda de las nieves | HP |
| Panda de las nieves | HP |
For the best display of your strategy, please follow these guidelines:




For the best display of your strategy, please follow these guidelines:


For the best display of your strategy, please follow these guidelines:


For the best display of your strategy, please follow these guidelines:


For the best display of your strategy, please follow these guidelines:


For the best display of your strategy, please follow these guidelines:


For the best display of your strategy, please follow these guidelines:


For the best display of your strategy, please follow these guidelines:


For the best display of your strategy, please follow these guidelines:


For the best display of your strategy, please follow these guidelines:


For the best display of your strategy, please follow these guidelines:


For the best display of your strategy, please follow these guidelines:


For the best display of your strategy, please follow these guidelines:


For the best display of your strategy, please follow these guidelines:


For the best display of your strategy, please follow these guidelines:


For the best display of your strategy, please follow these guidelines:


For the best display of your strategy, please follow these guidelines:


For the best display of your strategy, please follow these guidelines:


For the best display of your strategy, please follow these guidelines:


For the best display of your strategy, please follow these guidelines:


Micro defence with macro shininess

3
Wynndra
escrito el 2021-01-03 16:41:42
1
Dogmeatman#2146
escrito el 2021-01-03 15:35:20
1
Clewara
escrito el 2020-12-03 02:12:13
Instructions could use the reminder to Pass once the beaver dam is up. Sure, it doesn't really matter because it's there to soak the Explode, but it's tidier, IMO.
1
(OP) DragonsAfterDark
escrito el 2020-12-03 21:22:14
2
schlumpf#2707
escrito el 2020-12-01 14:28:53
use(Eisgrab:624) [ round = 1 ]
use(Eisgrab:624) [ enemy(#3).active & enemy.round = 1 ]
change(#2)
standby [ self.aura(Eisbarriere:480).exists ]
use(Eisbarriere:479) [ enemy.aura(Mechanisch:244).exists ]
use(Schneesturm herbeirufen:206) [ enemy.aura(Betäubt:927).exists ]
use(Schneeball:477)
change(#1)
use(Frostschock:416) [ enemy(#3).active & !enemy.aura(Frostschock:415).exists ]
use(Eislanze:413)
change(#3)
use(Biberdamm:325) [ enemy.hp < 559 ]
use(Nagen:412)
0
Rexael escrito el 2020-12-01 12:31:50
2
Veph
escrito el 2020-11-30 00:06:37
Nuevo comentario: