
| Haunted Humanoids | Deathly Dragonkin | Flickering Fliers | Unholy Undead | Creepy Critters |
| Mummified Magics | Eerie Elementals |  Beast Busters Beast Busters | Aquatic Apparitions | Macabre Mechanicals |
Тактику предоставили haatic
70
70
|
Average rating: |
4.7 |
|
Ratings: |
91 |
|
Your vote: |
|
Creator |
|||||||||
|---|---|---|---|---|---|---|---|---|---|
|
Теги
Filter strategies:
|
|||||||||


|

As per the suggestion from Carpo and Rascallycat on the other strategy, I made one with Snowfang.
Updated 9 February 24: 1. With the buff to elemental damage when Blizzard is up, Snowy Panda can finish Slasher without needing the Ice Barrier. 2. switched the beaver for a second Snowy Panda just in case of crits, otherwise might only need it for Blizzard. If Pounder misses Snowfang on one of their rounds you won't need the second Snowy Panda at all. |
Случайности скрипт |
2 | 4.9 |
99% | 18 |
108
1:48
|
13 | |


Любой уровень 25+ Животное
|
скрипт |
2 | 4.9 |
97% | 73 |
135
2:15
|
19 | ||
Любой уровень 25+ Животное
Любой уровень 25+ Животное
|
Script thanks to SirSuoh
|
Случайности скрипт |
2 | 4.7 |
100% | 70 |
310
5:10
|
48+ | |

|
I tested this strategy multiple times. Eventhough the enemy team crits or Battery swaps with Slasher before he dies, keep continuing the steps. Eventually you will kill them all.
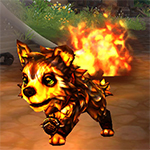
In one cash it went really weird and I had to use some common sense with my Lost Netherpup vs Pounder. In another case Pounder missed on my Snowy Panda and I didn't even need my Lost Netherpup. BE AWARE; the third step is named differently. The ability of the Cinder Pup is called Blazing Yip and not Bark. I couldn't change this unfortunately |
Случайности |
2 | 4.1 |
N/A | 6 |
140
2:20
|
17+ | |


|
Случайности Магазин |
2 | 3.4 |
N/A | 7 |
143
2:23
|
17+ | ||
|
|
Strategy goals:
- Prevent Slasher from doing damage. - Cinder Pup provides a constant dot giving the extra damage needed to push the controlling mechanisms of the strategy to fruition. |
скрипт |
2 | 5.0 |
97% | 1 |
120
2:00
|
14-15 | |
|
|
Strategy Inspired by others, using pets that I had available
Technically Ragepeep can solo the fight, but it is a little RNG and slow. You can replace the first 2 pets with literally any 2 pets that can kill Battery. |
скрипт |
2 | 5.0 |
96% | 1 |
280
4:40
|
36-38 | |
|
|
The intent of this strat is to try to quicken things up. In the end, all you really need to succeed is the Злозырк, as seen by a different strategy. However, as good as it is, it takes up to 50 turns or more. In the four times I've tried this, twice I've had to do two pets with Ragepeep; however, once I only had to do Pounder, and the last time, my Ragepeep came in just in time to soak Pounder's explosion. So maybe 20 turns at best, 35-38 at worst? You haven't really lost anything to give it a try!
|
2 | 5.0 |
N/A | 1 |
125
2:05
|
14+ | ||


|
start copied from Berendain but follow up is different.
Not completly crit proof. Battery should die on the first or second akunda's wrath turn. Not sooner. If slasher crits with prowl metal fist on thunder lizard then restart |
2 | 5.0 |
N/A | 2 |
139
2:19
|
18-19 | ||
Любой уровень 25+ Животное
|
Случайности |
2 | 4.0 |
N/A | 2 |
134
2:14
|
16+ | ||


|
There is some RNG in the first and third pets dying at the right time. I had around 75% success rate with the strategy, however.
|
Случайности Больше не получить |
2 | 3.3 |
N/A | 2 |
156
2:36
|
22+ | |


|
All wild caught pets, for those who have bad drop RNG.
Notes: * Haven't tested all breeds myself, used PB/HP/HP. * The third pet can be any beast with a dodge/burrow/survival move, as long as it can avoid the Explode. Best to have a 1 round hit ability selected as well. * Slasher can be RNG and once every ten battles or so can polish off your second pet, if this happens restart the fight. This is my first strategy, my apologies if I missed anything. I have tried to do a TD Script but failed miserably so if a kind person comments with one I will edit it in. |
Порода Случайности |
2 | 3.2 |
N/A | 1 |
200
3:20
|
30 | |

|
Low RNG. The idea is that most of the damage comes from Immolate in the backline, while Hibernate with the main pet. Also Stun to avoid Prowl.
|
Случайности Больше не получить |
2 | 2.6 |
N/A | 2 |
195
3:15
|
25+ | |
|
Included a TD that attempts to navigate the RNG for you a bit. Doesn't failsafe on a stun, but will for early Маленький старорог death.
Very RNG heavy, if your Маленький старорог gets crit you must restart. If you get a stun with Вулкан, you might be able to recover it if you swap immediately to your Broodling and play it out from there, but its uncharted territory. I would always restart if it happened to try and have a "smooth" run for this strategy. In the finale, you must either not get hit or not get crit at least once for my chosen Broodling to survive. Each species and breed has its own requirements and you will have to adjust accordingly to what you have. Its very possible though, I ran this team 5 times after developing the strat and it only failed on consecutive crits from Pounder. The biggest thing you need in your third slot is >249 Speed and Burrow. It isn't heavy RNG, but it is far from consistent. Use at your own discretion. |
Случайности Сложная скрипт |
2 | 2.4 |
67% | 2 |
171
2:51
|
23 | |

|
скрипт |
2 | 0.0 |
98% | 0 |
154
2:34
|
25 | ||

|
Магазин |
2 | 0.0 |
N/A | 0 |
167
2:47
|
20 |
Вкл. шаги:


Любой уровень 25+ Животное
Способности: Любой
Порода: Любой

Любой уровень 25+ Животное
Способности: Любой
Порода: Любой

Script thanks to SirSuoh
| До | После | Количество опыта | |
|---|---|---|---|
| 1 | ➜ | 3 | 239 |
| 2 | ➜ | 4 | 254 |
| 3 | ➜ | 4 | 267 |
| 4 | ➜ | 5 | 279 |
| 5 | ➜ | 6 | 289 |
| 6 | ➜ | 6 | 297 |
| 7 | ➜ | 7 | 304 |
| 8 | ➜ | 8 | 309 |
| 9 | ➜ | 9 | 312 |
| 10 | ➜ | 10 | 314 |
| 11 | ➜ | 11 | 314 |
| 12 | ➜ | 12 | 312 |
| 13 | ➜ | 13 | 309 |
| 14 | ➜ | 14 | 304 |
| 15 | ➜ | 15 | 297 |
| 16 | ➜ | 16 | 289 |
| 17 | ➜ | 17 | 279 |
| 18 | ➜ | 18 | 267 |
| 19 | ➜ | 19 | 254 |
| 20 | ➜ | 20 | 239 |
| 21 | ➜ | 21 | 223 |
| 22 | ➜ | 22 | 205 |
| 23 | ➜ | 23 | 185 |
| 24 | ➜ | 24 | 163 |
|
Шляпа для сафари |
|
|
Малое лакомство для питомца |
|
|
Лакомство для питомца |
|
|
Цилиндр Новолуния |
|
|
Бонус за неделю битв питомцев |
|
= |
Питомец прокачан до 25 с минимальными потерями опыта |
|
|
= |
Излишний опыт при прокачке до 25 |
|
| Злозырк | BB |
For the best display of your strategy, please follow these guidelines:


For the best display of your strategy, please follow these guidelines:
For the best display of your strategy, please follow these guidelines:

Микровойска, макроблеск


11
Tavariel
написал на 2021-03-15 21:08:14
3
Kailaa#1765
написал на 2021-09-03 20:23:37
3
Darkke
написал на 2021-09-18 14:11:37
1
Missyb написал на 2023-08-27 19:45:47
1
thebl4ckd0g
написал на 2023-09-22 00:59:18
2
Hakara#1527
написал на 2024-04-14 20:04:12
1
Zhic#2301
написал на 2024-11-11 17:21:02
1
Agrogas#2257
написал на 2023-10-02 17:18:56
3
Johnnies#2839
написал на 2023-01-07 02:03:13
3
Ankehl
написал на 2020-12-30 17:37:59
0
Izzy написал на 2021-01-01 10:08:16
1
Ankehl
написал на 2021-01-24 07:20:10
6
Shenk
написал на 2021-01-26 07:50:45
2
lissu
написал на 2021-02-15 11:01:49
1
Oploveknight
написал на 2022-10-31 04:21:55
4
DragonsAfterDark
написал на 2022-11-02 19:15:30
2
DarthGabry
написал на 2022-09-01 12:29:43
4
WhyDaRumGone
написал на 2022-04-29 17:56:54
7
SirSuoh
написал на 2022-01-19 04:01:10
use(Nature's Ward:574) [round=1]
use(Preen:1545) [self.ability(Rampage:124).usable]
use(Preen:1545) [self.ability(Rampage:124).duration <= 1]
use(Rampage:124)
use(#1)
8
cellardwellar
написал на 2021-04-18 02:12:00
use(Nature's Ward:574) [round=1]
use(Preen:1545)
use(Rampage:124)
use(#1)
2
Maritan
написал на 2021-06-01 22:43:35
2
Mysshe
написал на 2021-12-15 13:19:49
7
Detamble
написал на 2021-03-14 23:07:08
This Strat: But you have heard of me.
1
cellardwellar
написал на 2021-04-18 01:59:59
1
Xandry#1521
написал на 2021-02-13 19:02:56
0
Gamby написал на 2021-02-15 12:56:47
2
Tarasios#1195
написал на 2021-02-16 02:43:39
2
Gráinne
написал на 2021-03-15 02:40:25
I remember hearing about this bug somewhere else. I don't know whether it still exists, but seems possible. You could arrange not to use Nature's Ward for the last few rounds when the last opponent pet is just about dead, and swap in one of your other beasts if necessary, to make sure that Nature's Ward is not up when the battle ends.
I don't know if that would work around the bug, but worth a try.
1
Weasei
написал на 2021-02-05 11:37:52
1
tranquilsea
написал на 2021-01-15 00:32:08
1
Momoko#11808
написал на 2021-01-14 15:43:43
4
PureArmour#1184
написал на 2021-01-11 02:41:29
4
Geo#22440
написал на 2021-01-09 04:49:01
10
MagusZeus#1565
написал на 2020-12-10 12:49:13
ability(Nature's Ward:574) [!self.aura(Nature's Ward:820).exists]
ability(Preen:1545) [self.ability(Rampage:124).duration <= 1]
ability(Rampage:124)
ability(Nature's Ward:574)
2
Murmacil
написал на 2020-12-23 08:29:08
5
Aliciarose#1426
написал на 2020-12-22 14:34:29
4
Kurasu#2861
написал на 2020-12-14 11:12:20
1
Kessyra
написал на 2020-12-14 13:23:53
3
Kurasu#2861
написал на 2020-12-18 08:49:39
2
Raoke
написал на 2020-12-19 13:21:40
3
Coro
написал на 2020-12-10 14:26:26
1
Creymoren написал на 2020-12-10 13:26:00
3
zefyre#2820
написал на 2020-12-10 11:27:39
2
Ahdra
написал на 2020-12-10 03:41:19
2
Petbattlebuddy
написал на 2020-12-07 16:47:26
2
DenisRusOS#2511
написал на 2022-08-28 12:23:46
use(Preen:1545) [self.ability(Rampage:124).usable]
use(Preen:1545) [self.ability(Rampage:124).duration <= 1]
use(Rampage:124)
use(#1)
1
gengen001
написал на 2020-12-24 10:21:49
Новый комментарий: