
Estratégia adicionada por Kurasu#2861
6
6
|
Média de Avaliação: |
5 |
|
Avaliações: |
1 |
|
Seu voto: |
|
Creator |
|||||||||
|---|---|---|---|---|---|---|---|---|---|
|
Etiquetas
Filtro de estratégias:
|
|||||||||

Qualquer Mascote
Qualquer Mascote
|

Script thanks to fr0z3night
|
Script |
2 | 5.0 |
N / D | 21 |
77
1:17
|
13+ | |
Qualquer Mascote
Qualquer Mascote
|
You can only use the first part in this strategy without swapping, but RNG can bring your Teroclaw Hatchling down then.
If you decide to go without swapping: delete the first Paragraph of the TD Script The Swapping Strategy should work even against 3 Flying Pets you can use this strategy for any generic Teroclaw fight don't put important pets in the backline |
Script |
2 | 4.9 |
N / D | 92 |
85
1:25
|
11 | |

Qualquer Mascote
Qualquer Mascote
|
Script |
2 | 4.7 |
N / D | 47 |
85
1:25
|
13 | ||
Qualquer Mascote
Qualquer Mascote
|
Script |
2 | 4.4 |
N / D | 20 |
55
0:55
|
10 | ||

|
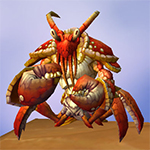
Wailing Critters - Moth team
You can use second and third moth that was used against Deviate Smallclaw. Next: Moth team vs. Deviate Flapper |
Script |
2 | 5.0 |
N / D | 13 |
90
1:30
|
12+ | |

Qualquer Mascote
|
Script |
2 | 5.0 |
N / D | 9 |
41
0:41
|
5 | ||

Qualquer Mascote
Qualquer Mascote
|
Script |
2 | 5.0 |
N / D | 7 |
55
0:55
|
8+ | ||


|
Lower powered pets in slot 1/2 preferred
|
Script |
2 | 5.0 |
N / D | 4 |
40
0:40
|
5 | |

Qualquer Nível 1+ Mascote
|
This team can take on all three of the teams quickly and efficiently, with only a short 'stopoff' for the healing.
I recommend keeping the pets in this order if you have a leveling pet as any Deviate Smallclaw roars that are blocked by the decoy will block the first two hits, saving a hit on the lowest HP pet. EDITED February 04, 2019, to officially bring in Crawdad for healing. Script thanks to GetRekt |
Nível 1+ Script |
2 | 5.0 |
N / D | 6 |
110
1:50
|
15+ | |


|
Script |
2 | 5.0 |
N / D | 3 |
65
1:05
|
9+ | ||

Qualquer Nível 25+ Voador
Qualquer Mascote
|
Script |
2 | 5.0 |
N / D | 4 |
81
1:21
|
10 | ||
Qualquer Mascote
Qualquer Mascote
|
Use Uncanny Luck buff, prowl on CD, Wind Burst Filler
|
Script |
2 | 5.0 |
N / D | 2 |
60
1:00
|
9+ | |

|
Few alternative #3 pets listed below
|
Script |
2 | 5.0 |
N / D | 5 |
38
0:38
|
3-4 |
Incl. passos:


Qualquer Nível 1+ Mascote


Substitutos:
1 / 2
This team can take on all three of the teams quickly and efficiently, with only a short 'stopoff' for the healing.
I recommend keeping the pets in this order if you have a leveling pet as any Deviate Smallclaw roars that are blocked by the decoy will block the first two hits, saving a hit on the lowest HP pet.
EDITED February 04, 2019, to officially bring in Crawdad for healing.
Script thanks to GetRekt
| Antes | Depois | Ganho de Experiência | |
|---|---|---|---|
| 1 | ➜ | 6 | 1196 |
| 2 | ➜ | 7 | 1271 |
| 3 | ➜ | 7 | 1337 |
| 4 | ➜ | 7 | 1394 |
| 5 | ➜ | 8 | 1444 |
| 6 | ➜ | 8 | 1485 |
| 7 | ➜ | 9 | 1518 |
| 8 | ➜ | 10 | 1543 |
| 9 | ➜ | 11 | 1559 |
| 10 | ➜ | 11 | 1568 |
| 11 | ➜ | 12 | 1568 |
| 12 | ➜ | 13 | 1559 |
| 13 | ➜ | 14 | 1543 |
| 14 | ➜ | 15 | 1518 |
| 15 | ➜ | 16 | 1485 |
| 16 | ➜ | 17 | 1444 |
| 17 | ➜ | 17 | 1394 |
| 18 | ➜ | 18 | 1337 |
| 19 | ➜ | 19 | 1271 |
| 20 | ➜ | 20 | 1196 |
| 21 | ➜ | 21 | 1114 |
| 22 | ➜ | 22 | 1023 |
| 23 | ➜ | 23 | 924 |
| 24 | ➜ | 24 | 817 |
|
Chapéu de Safari |
|
|
Petisco Menor |
|
|
Petisco |
|
|
Chapéu Darkmoon |
|
|
Pet Battle Week |
|
= |
Níveis de animal de estimação para 25 com perda mínima de XP |
|
|
= |
XP adicional acima do nível 25 é perdido |
|
Para melhor exibição da sua estratégia, por favor siga estas orientações:


Para melhor exibição da sua estratégia, por favor siga estas orientações:
Para melhor exibição da sua estratégia, por favor siga estas orientações:
Para melhor exibição da sua estratégia, por favor siga estas orientações:
Para melhor exibição da sua estratégia, por favor siga estas orientações:
Para melhor exibição da sua estratégia, por favor siga estas orientações:
Para melhor exibição da sua estratégia, por favor siga estas orientações:
Para melhor exibição da sua estratégia, por favor siga estas orientações:
Para melhor exibição da sua estratégia, por favor siga estas orientações:
Para melhor exibição da sua estratégia, por favor siga estas orientações:
Para melhor exibição da sua estratégia, por favor siga estas orientações:
Para melhor exibição da sua estratégia, por favor siga estas orientações:
Para melhor exibição da sua estratégia, por favor siga estas orientações:
Para melhor exibição da sua estratégia, por favor siga estas orientações:
Para melhor exibição da sua estratégia, por favor siga estas orientações:

Nham nham nham...


1
cellardwellar
escreveu em 2020-05-07 00:56:32
1
(OP) Kurasu#2861
escreveu em 2019-01-17 05:54:01
After second pet (or if Axebeak is at low health), swap in Crawdad. Renewing Mists, Wish, swap Axebeak back in for heal.
So far seems very effective and still very fast, but have only tested on one week so far. Was able to allow Axebeak to 'solo' all three first teams, with leveling pet getting XP each time.
1
(OP) Kurasu#2861
escreveu em 2019-02-04 12:21:58
Novo Comentário: