^
vs. Gloamwing

Strategy added by Yepah

100

1

Strategy 3 of 8
Browse all alternatives

Incl. steps:

Gloamwing 128015
Special or not:0Special or not:2002175261191750

Skills: * * 2
Breed: Any

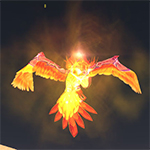
Phoenix Hatchling
This pet can have the following breeds:

Breed Health Power Speed
SS 1319 276 325


>300

Special or not:0Special or not:1012246514381124650

Skills: * 1 2
Breed: Any

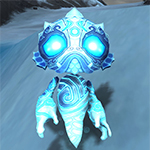
Playful Frostkin
This pet can have the following breeds:

Breed Health Power Speed
HP 1526 297 256


Special or not:0Special or not:1011335519225833550

Skills: * 1 1
Breed: Any

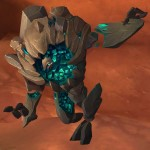
Echo of the Cave
This pet can have the following breeds:

Breed Health Power Speed
PS 1441 273 297


Substitutes:

Note: You have selected a substitute pet.
The strategy might fail if you use it with this pet instead of the one the strategy creator intended.

The substitute finder looks for these criteria in relation to the original pet:
  • Same family
  • Has the required skills
  • Has the required stats (if specified)
  • Ignores specific breed requirements for the main pet, as breeds can be very different for substitutes

1 / 2

1
1

Strategy has been updated 12 August 23 with new pets, but keeping the spirit of the strat by using Geyser to stun Gloamwing, and instead of Howl to buff Burrow we're using Rabid Strike to buff everything.

Low XP
At least one of the pets for this strategy require the use of a specific breed.
RNG
Not every strategy can be bullet proof. This is one of them. You might have to restart it, since there are some random elements that increase the risk of your pets failing. Don't blame them, please!
This strategy is using pets obtainable from the Wow Trading Card Game (TCG) or the auction house for potentially high sums of gold.
This strategy is using pets obtainable only from the WoW In-Game Shop for Battle.net Balance or real money.
You can use this strategy to carry a low level pet to give it experience.
Some instructions are more difficult to follow than others. That's exactly what you might find in this strategy!
The strategy offers a Script that can be used with the Pet Battle Script addon. You can copy the script by clicking on the button to the left of the pets.
At least one pet in the strategy cannot be obtained anymore. If you have it, congrats!
A Strategy Curator found this strategy to be especially helpful and higlighted it with this tag to give it more exposure.
In Dragonflight Patch 10.2, the ability Time Bomb has been changed. This tag is marking strategies using Time Bomb so they can be reviewed.
Time: 0:54
This time was entered by a strategy curator. It is quite reliable especially when using TDScript, however times can always vary slightly.
Rounds: 8
The number of rounds for this fight were added by a strategy curator. This number is usually very reliable.
This table shows the level increase for completing the fight with level 25 pets and one carry pet.
Partial level experience is not included in the calculation.

Before After Experience Gain
15479
25508
35535
46558
56578
67594
78607
89617
99624
1010627
1111627
1212624
1313617
1414607
1515594
1616578
1717558
1818535
1919508
2020479
2121446
2222409
2323370
2424327

Safari Hat

Lesser Pet Treat

Pet Treat

Darkmoon Hat

Pet Battle Week


Strategy Details
54 Sec
This time was entered by a strategy curator. It is quite reliable especially when using TDScript, however times can always vary slightly.
8
The number of rounds for this fight were added by a strategy curator. This number is usually very reliable.
2023-08-12 01:21:18
The strategy was last updated on this date.
2018-02-05 10:19:09
The strategy was created on this date.
21,382
Pageviews. This number indicates how often this strategy has been accessed by visitors.
Tamer Details
Mac'Aree 60.02 71.11 (TomTom / Map Pin)
Low XP
This fight provides very low experience. It is usually not worth bringing a low level pet in. You can see detailed values by hovering over the XP tag.
Turn 1
Pass - your Playful Frostkin is forced in

For the best display of your strategy, please follow these guidelines:

  • Use QuickFill elements where possible
  • Enter custom instructions in English
  • Check the Strategy Creation Guide for more info
Phoenix Hatchling
Conflagrate
Playful Frostkin
Flash Freeze
Geyser
Echo of the Cave
Sandstorm
Rabid Strike
Pass
Bring in your Phoenix Hatchling
Bring in your Playful Frostkin
Bring in your Echo of the Cave
Swap to your Phoenix Hatchling
Swap to your Playful Frostkin
Swap to your Echo of the Cave
Gloamwing comes in
An enemy pet comes in
Any standard attack will finish the fight
 
Phoenix Hatchling
Playful Frostkin
Echo of the Cave
Conflagrate
Flash Freeze
Geyser
Sandstorm
Rabid Strike
Gloamwing
Turn 2

For the best display of your strategy, please follow these guidelines:

  • Use QuickFill elements where possible
  • Enter custom instructions in English
  • Check the Strategy Creation Guide for more info
Phoenix Hatchling
Conflagrate
Playful Frostkin
Flash Freeze
Geyser
Echo of the Cave
Sandstorm
Rabid Strike
Pass
Bring in your Phoenix Hatchling
Bring in your Playful Frostkin
Bring in your Echo of the Cave
Swap to your Phoenix Hatchling
Swap to your Playful Frostkin
Swap to your Echo of the Cave
Gloamwing comes in
An enemy pet comes in
Any standard attack will finish the fight
 
Phoenix Hatchling
Playful Frostkin
Echo of the Cave
Conflagrate
Flash Freeze
Geyser
Sandstorm
Rabid Strike
Gloamwing
Turn 3
Flash Freeze -- RNG is here. Playful Frostkin must live to use Flash Freeze

For the best display of your strategy, please follow these guidelines:

  • Use QuickFill elements where possible
  • Enter custom instructions in English
  • Check the Strategy Creation Guide for more info
Phoenix Hatchling
Conflagrate
Playful Frostkin
Flash Freeze
Geyser
Echo of the Cave
Sandstorm
Rabid Strike
Pass
Bring in your Phoenix Hatchling
Bring in your Playful Frostkin
Bring in your Echo of the Cave
Swap to your Phoenix Hatchling
Swap to your Playful Frostkin
Swap to your Echo of the Cave
Gloamwing comes in
An enemy pet comes in
Any standard attack will finish the fight
 
Phoenix Hatchling
Playful Frostkin
Echo of the Cave
Conflagrate
Flash Freeze
Geyser
Sandstorm
Rabid Strike
Gloamwing
Turn 4
Pass - your Echo of the Cave is brought in

For the best display of your strategy, please follow these guidelines:

  • Use QuickFill elements where possible
  • Enter custom instructions in English
  • Check the Strategy Creation Guide for more info
Phoenix Hatchling
Conflagrate
Playful Frostkin
Flash Freeze
Geyser
Echo of the Cave
Sandstorm
Rabid Strike
Pass
Bring in your Phoenix Hatchling
Bring in your Playful Frostkin
Bring in your Echo of the Cave
Swap to your Phoenix Hatchling
Swap to your Playful Frostkin
Swap to your Echo of the Cave
Gloamwing comes in
An enemy pet comes in
Any standard attack will finish the fight
 
Phoenix Hatchling
Playful Frostkin
Echo of the Cave
Conflagrate
Flash Freeze
Geyser
Sandstorm
Rabid Strike
Gloamwing
Turn 5

For the best display of your strategy, please follow these guidelines:

  • Use QuickFill elements where possible
  • Enter custom instructions in English
  • Check the Strategy Creation Guide for more info
Phoenix Hatchling
Conflagrate
Playful Frostkin
Flash Freeze
Geyser
Echo of the Cave
Sandstorm
Rabid Strike
Pass
Bring in your Phoenix Hatchling
Bring in your Playful Frostkin
Bring in your Echo of the Cave
Swap to your Phoenix Hatchling
Swap to your Playful Frostkin
Swap to your Echo of the Cave
Gloamwing comes in
An enemy pet comes in
Any standard attack will finish the fight
 
Phoenix Hatchling
Playful Frostkin
Echo of the Cave
Conflagrate
Flash Freeze
Geyser
Sandstorm
Rabid Strike
Gloamwing
Turn 6

For the best display of your strategy, please follow these guidelines:

  • Use QuickFill elements where possible
  • Enter custom instructions in English
  • Check the Strategy Creation Guide for more info
Phoenix Hatchling
Conflagrate
Playful Frostkin
Flash Freeze
Geyser
Echo of the Cave
Sandstorm
Rabid Strike
Pass
Bring in your Phoenix Hatchling
Bring in your Playful Frostkin
Bring in your Echo of the Cave
Swap to your Phoenix Hatchling
Swap to your Playful Frostkin
Swap to your Echo of the Cave
Gloamwing comes in
An enemy pet comes in
Any standard attack will finish the fight
 
Phoenix Hatchling
Playful Frostkin
Echo of the Cave
Conflagrate
Flash Freeze
Geyser
Sandstorm
Rabid Strike
Gloamwing
Turn 7
Sandstorm - your Phoenix Hatchling is forced in

For the best display of your strategy, please follow these guidelines:

  • Use QuickFill elements where possible
  • Enter custom instructions in English
  • Check the Strategy Creation Guide for more info
Phoenix Hatchling
Conflagrate
Playful Frostkin
Flash Freeze
Geyser
Echo of the Cave
Sandstorm
Rabid Strike
Pass
Bring in your Phoenix Hatchling
Bring in your Playful Frostkin
Bring in your Echo of the Cave
Swap to your Phoenix Hatchling
Swap to your Playful Frostkin
Swap to your Echo of the Cave
Gloamwing comes in
An enemy pet comes in
Any standard attack will finish the fight
 
Phoenix Hatchling
Playful Frostkin
Echo of the Cave
Conflagrate
Flash Freeze
Geyser
Sandstorm
Rabid Strike
Gloamwing
Turn 8

For the best display of your strategy, please follow these guidelines:

  • Use QuickFill elements where possible
  • Enter custom instructions in English
  • Check the Strategy Creation Guide for more info
Phoenix Hatchling
Conflagrate
Playful Frostkin
Flash Freeze
Geyser
Echo of the Cave
Sandstorm
Rabid Strike
Pass
Bring in your Phoenix Hatchling
Bring in your Playful Frostkin
Bring in your Echo of the Cave
Swap to your Phoenix Hatchling
Swap to your Playful Frostkin
Swap to your Echo of the Cave
Gloamwing comes in
An enemy pet comes in
Any standard attack will finish the fight
 
Phoenix Hatchling
Playful Frostkin
Echo of the Cave
Conflagrate
Flash Freeze
Geyser
Sandstorm
Rabid Strike
Gloamwing

Still a better love story than twilight.


SophieRach#2398

wrote on 2023-08-27 18:41:42

Worked with a fel flame in the first spot as also has conflagrate!

Ashers wrote on 2017-09-07 01:27:31

I tried the strat listed on this page at least 30+ bandages. Tried this, worked on the 3rd try (and I messed up the 1st try). Posted by user 3ceph0los on Gloamwing's wowhead page.

Tiny Snowman 2 1 2
Ominous Flame 2 2 2
Crazy Carrot 2 1 1

1. Pass - Tiny Snowman switched with Crazy Carrot
2. Ironbark
3. Blistering Cold
4. Pass - switched with Ominous Flame
5. Scorched Earth
6. Forboding Curse
7. Pass - switched with Tiny Snowman
8. Deep Freeze
9. Call Blizzard
10. Magic Hat

Shashos wrote on 2017-09-07 03:24:07

Yes! Thank you so much. Worked first try.

Navet wrote on 2017-09-07 08:04:43

First try. Thanks

AusChameleon wrote on 2017-09-07 09:49:49

RNG meant took a couple, but best strat I've tried yet. Ominous flame had 75hp left lol Usually he dies, lucky he didn't cos my snowman died at the end.. the bleeds killed him as he died.

Cambridge wrote on 2017-09-07 12:17:52

Double Magic Hat in the end is much more reliable

Drizz wrote on 2017-09-07 12:59:50

Worked perfectly the 1st time

strumpett wrote on 2017-09-07 15:09:22

used this strat with the double magic hat. worked perfect first time

Snowy6 wrote on 2017-09-07 23:18:48

Took a couple of goes but it worked, thank you!

Lasaider-Nazgrel wrote on 2017-09-08 21:26:28

ONE SHOT! TY!

Raventoo wrote on 2017-09-09 18:35:58

First try!

Dakini wrote on 2017-09-11 21:11:39

Perfect!!!

WiredTexan wrote on 2017-09-12 01:54:05

FIrst try! Thanks!

Yewfire wrote on 2017-09-15 05:43:31

Worked first time. Thanks!

Swyftlyght wrote on 2017-09-15 20:06:50

This worked much better than the listed strategy, thanks.

Lillyboo wrote on 2017-09-15 21:23:15

worked very well, ty

Tovia wrote on 2017-09-15 23:56:26

Fun and clever strat, worked for me the first time, thank you!

Ryuuken wrote on 2017-09-16 00:24:27

First try I followed exactly and Gloamwing wound up with 15 health left.
Second time I used Magic Hat after Deep Freeze, and then Blizzard so Scorched could get an extra hit. I think Gloam had about 170 something health, but Blizzard crit. Not sure if it would have succeeded.

Kerrchak wrote on 2017-09-19 02:15:49

I actually ended up using Blizzard BEFORE Deep Freeze to guarantee the Stun to go off and it worked out even better than all my other previous attempts. Even the ones where I tried to use double Magic Hat.

Call Blizzard ended up pushing Gloamwing below 50% which allowed my Deep Freeze to go first. This means you get an extra turn of all your dots ticking damage which is much, much better than just one extra turn of Scorched Earth ticking damage.

Eno wrote on 2017-09-21 02:46:26

Worked 1st try

Quintette wrote on 2017-09-21 07:39:41

Look no further. This was it! Top strat on first try.

MouseD wrote on 2017-09-23 21:11:51

Thank you Ashers...took two turns but finally beat that royal pita Gloamwing

Tazan wrote on 2017-09-24 01:42:17

Very solid strat!

Coton wrote on 2017-09-26 13:26:01

I couldn't get this to work. After several tries, I switched turns 8 & 9, I called Blizzard first then Deep Freeze. It worked for me and completed the fight!

Chrisski wrote on 2017-10-04 03:09:58

This worked 1st try w/ the double hat variation

Emerson wrote on 2017-10-09 03:20:40

well well well - really nice one :)

XinaElise wrote on 2017-10-14 23:18:42

NICE! TY!

Bullshit wrote on 2017-10-17 10:29:56

Now there is a 100% working strategy! thank you!

Mel Lafferty wrote on 2017-10-19 12:00:45

1st attempt. Thank you :D

Tantricks wrote on 2017-10-23 12:34:38

Beautiful!! 1st try. <3

Annony wrote on 2017-10-23 18:55:09

Perfect! Worked first try.

Kwantum

wrote on 2017-11-11 23:13:36

As above (Cambridge) "Double Magic Hat in the end is much more reliable"

Slipdance

wrote on 2021-04-29 23:06:28

My sole complaint is that I can only upvote you once. (edited)

n4cr

wrote on 2021-02-22 14:06:54

Really heavy RNG, but got it with core hound pup at around 20 hp.

ssfiit

wrote on 2021-01-24 12:39:09

Perfect. Got it 1st try. Thanks :D

Walocial

wrote on 2019-05-11 21:34:15

First try, went exactly as described. Thanks!

Berendain

wrote on 2018-12-08 03:52:05

This worked for me. I would change the wording of the instructions on turn 5. Your Stout Alemental isn't forced in. You pass on the Water Spirit and it dies, then you select your Alemental, who uses Dive on turn 6 while Gloamwing is stunned.

Sully

wrote on 2018-09-23 03:40:46

Works. Took a few goes due to rng but it does work

Hawaha wrote on 2017-09-14 21:39:20

rounds are wrong. dive will dodge the exchange to stout.

Anonymous wrote on 2017-09-26 07:41:43

I noticed that too

Cruccolo wrote on 2017-11-10 22:05:14

Yeah, they say "don't use wowhead use wow-petguide", but then here the wrong strategies cannot be fixed.

Ruta wrote on 2018-02-01 08:57:49

This strategy does work. It is very RNG dependent, but no way as bad as Aquatics (or even Critters). Possible within ten repetitions YMMV.

Anonymous wrote on 2017-09-07 13:37:37

another strat: (since i didn't have Ominous Flame, Water Spirit or Alemental). I used Fetid Waveling with Ooze Touch, Corrosion and Healing Wave, Crazy Carrot with Jab and Blistering Cold, and Magma Rageling with Flamethrower, Flame Jet and Magma Trap.
Strat with Fetid Waveling > Pass, get swapped to Crazy Carrot. Throw up Blistering Cold, then Jab, then Crazy Carrot needs to die to Gloamwing's swap ability. Magma Rageling comes in, use Magma Trap, then Flame Jet, and if you're lucky, Flame Thrower. Magma Rage needs to die to swap ability, then Fetid Waveling comes in. The order here depends on when the Stun from Magma Trap goes off. For me, it ALWAYS went off during 1st or 2nd turn of Fetid Waveling being in. This is just obnoxious rng and we do what we have to. At any rate, I put Corrosion on him, then if he gets stunned, I heal then Ooze touch twice. If he didnt get stunned after I applied Corrosion then I Ooze Touch him, and hope for the stun, then heal and Ooze Touch again for win. It's a super RNG fight no matter what you do, this is just an alt strat for those that don't have the pets listed above.

Matt wrote on 2017-09-09 18:18:21

A few of these fights really are RNG monsters. This strat worked for me after about 6 tries or so. Thanks!

Rdord wrote on 2017-10-29 10:16:50

Ended up getting Snowman 2/1/2, B/B Tainted Waveling 1/2/x and Magma Rageling 1/1/2 to work with RNG. You need to chain stun in the final stages to double up with Magic Hats.


Corrosion>Ooze Touch>Waveling dies
Magma Trap>Flame Jet>Rageling dies
Call Blizzard>Magic Hat>Deep Freeze>Magic Hat

Arylachor wrote on 2017-12-03 21:38:14

Thank you for this, took many tries but it worked. Glad I found a strategy that used pets I actually had.

Tatahe wrote on 2017-09-06 18:25:15

Small clarification. Just ignore the breeds, this pets only have one breed each. Idk why people put breeds xD

Yepah wrote on 2017-09-07 16:08:30

I had never suggested a strat before, so I wanted to make sure I included any information that might be relevant. I'll know for next time that it's not always necessary :)

Cruccolo wrote on 2017-11-10 22:01:05

The strat doesn't work, the dive will make it miss the swap. If it's your first strat, please write it correctly :-)

Anonymous wrote on 2017-09-06 04:32:14

Works but bring lots of bandages, you will need them

Anonymous wrote on 2017-09-06 07:32:20

ya. pray that u can dive in around 3...

Ziv wrote on 2017-09-06 12:04:52

Corehound pup survived but barely with 37 hp. I nearly started the fight over before that round. So glad I didn't!

Yepah wrote on 2017-09-06 16:08:12

@Ziv, yeah, it seemed sketchy at first, but I had the same outcome 3 out of 4 times (exactly 37 hp), so I figured it was worth suggesting. Occasionally Gloamwing will get that lucky third Slicing Wind off and you'll have to start over :-(

Castratia wrote on 2017-09-06 16:27:53

How does this work? Even when my Water Spirit gets that dive in, my Corehound is killed before he can dive. Every. Single. Time. Is there a substitute for the Corehound that can survive long enough to finish this b*st*rd off?

Castratia wrote on 2017-09-06 16:53:24

Okay. After wiping multiple times on this rotation (as above), I tried Scratch instead of Burrow. Killed him. Not sure if it was due to RNG, but thought it might be worth mentioning.

Tatahe wrote on 2017-09-06 18:30:50

This is really RNG. First you need to avoid getting 3x hit by Slicing Wind at all. Second you need to avoid all crits and last, you need to roll above average on last turn... I failed this with a Gloamwing 1 HP on last turn. Was really painful FeelsBadMan

Rifkin wrote on 2017-09-07 08:17:29

haha thanks for the idea Castratia, but I thought I might as well push my luck further and try burn since it has the possibility of doing more damage - core hound came in at the end howled and burn hit for 632 :D

Verges wrote on 2017-10-13 09:26:23

Very true, any crit or triple hit will end this fight. Given strat does works but be prepared to make multiple attempts (5 for me)

Shashos wrote on 2017-09-06 22:25:45

I give up on this one. Even if my Alemental only gets hit by one Slice, the Corehound does not do enough damage to finish him off. The amount of RNG on Gloomwing is awful.

Chur wrote on 2017-09-06 10:30:47

I do not have core hound pup. is there an alternative ?

purpleblob wrote on 2017-09-06 15:13:28

All you have to do is put authenticator on though.
Edit: it also deactivates if you unlink the authenticator.

Anon wrote on 2017-09-06 21:18:23

With perfect RNG, i subbed the core hound pup out for Droplet of Y'Shaarj, with Corrosion then Expunge. But bring your bandages it took me like 30 tries.

New Comment:


Name:

Link: